Advertisement
Advertisement
Table of Contents

Summary of Contents for Diblasi R7-E
- Page 1 OPERATION MAINTENANCE FOLDING MOTORBIKE Mod. R7-E...
- Page 2 INDEX Notice Pictures and drawings of this manual have the sole Brakes (adjustments) aim to illustrate the operations described herein: Cable (throttle) however, they may not correspond exactely to your Diagnosis vehicle. Expanding pulley (disassembling) Folding Fuel Handlebar hinge (adjustement) Handlebar hook (adjustment) Headlamp (adjustment) Horn...
-
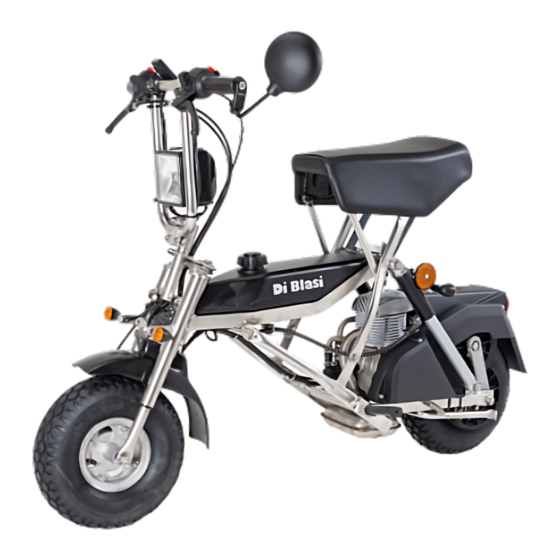
Page 3: Specifications
SPECIFICATIONS Engine Dimensions - manufacturer & model DI BLASI M1 - Open: - single cylinder, two stroke Overall length 128 cm (50“) - bore 39 mm - stroke 41,8 mm Wheel base 93 cm (37“) - cylinder capacity 49.9 cc Width 58 cm (23“) - compression ratio... - Page 4 TO UNFOLD THE VEHICLE Fig. 1 Fig. 2 When the vehicle is folded, it stands up alone. Rotate the handlebar on the stem hinge until it is locked by the hook. Important Caution: make sure that both springs which pull the hook are functionning properly and that the hook itself is properly positioned (sec.5.1).
- Page 5 Fig. 3 Fig. 4 Holding the handlebar with the left hand, with the ... the frame is locked automatically by the hook right hand pull and then backwards the rear edge of located on its right side under the saddle. the saddle until...
- Page 6 TO FOLD THE VEHICLE Fig. 5 Fig. 6 Close the fuel tap (A-fig.9) by turning the lever to Fold the rearview mirror. OFF (pointing backword) . Closing of the tank air Push the vehicle off its stand. vent hole is automatic. If you need to store the Turn the steering fully to the right.
- Page 7 Fig. 7 Fig. 8 ..push the rear edge of the saddle forward until it Fold the foot rest. is almost at the same level with the filler cap. The vehicle stands up alone. Unhook the handlebar and lower it.
-
Page 8: Operating Instructions
4 OPERATING INSTRUCTIONS 4.1 Running-in During the first 500 km (300 mls), use a mixture of regular gasoline with 4% two stroke oil and do not operate at more than 3/4 throttle. At about 500 km (300 mls) check all bolts and nuts for proper tightness and tighten the cylinder head nuts at 10 Nm torque. -
Page 9: Turn Signal Lamps
To slow down, close the throttle and, if necessary, apply the brakes. The vehicle is equipped with two brakes. The front wheel brake is controlled by the lever on the right side of the handlebar (C-fig 12). The rear wheel brake is controlled by the lever on the left side of the handlebar (D-fig.12). -
Page 10: Checks And Adjustments
5 CHECKS AND ADJUSTMENTS 5.1 Handlebar hook 5.4 Throttle cable The locking hook is secured by two springs (A- To take up slacks in the throttle cable, adjust device B fig.14). Before riding, be sure that both springs are - fig. 10 or G - fig. 12 .Tighten the lock nut after working properly. -
Page 11: Wiring Harness
Fig. 13 Fig. 14 Fig. 15 5.9 Nuts and bolts All nuts and bolts are equipped with locking devices (lock nuts, self locking nuts, lock washers). Nevertheless, check the tightening periodically. 5.10 Wiring harness See electric diagram: In the European mopeds: fig. 22 EU In the USA mopeds: fig. - Page 12 6 DISASSEMBLIES 6.2 Expanding pulley / clutch (fig.18) For disassembling: 6.1 Rear wheel - reduction unit (fig. 18-19) Unscrew the three bolts (B1 - B2 - B3) Unscrew the lock nut of the screw (A) and holding the belt guard. then the screw (A) at the bottom of the left shock absorber.
-
Page 13: Once A Year
7. SERVICING 7.1 Every 1000 km (600 miles) Lubricate with grease the speedometer drive (B-fig.18) through the lubricating nipple. Clean the air filter and the carburetor; 7.2 Once a year Lubricate the cables (brakes,throttle, speedometer) and the frame articulations with a drop of light oil. - Page 14 N B P Orange White Blue Yellow Gray C A R Brown Black Pink Green Ye l l o w - Green Violet Fig. 22US Fig. 22EU Horn Switch Light Switch Front Right Blinker Blinking Device Blinker Light Switch Horn Stabilizer Rear Light Blinker Engine Stop Switch...
- Page 15 8 DIAGNOSIS 8.1 The engine does not start 8.2 The engine does not run normally Check if the fuel is not reaching the carburetor The reason can be: because: One of the reasons listed in sec. 8.1 The tank is low on fuel: place fuel tap in Carbon deposit at the piston and cylinder reserve position (lever pointing up) and head, at the cylinder exhaust port, in the...
- Page 16 Cod. 699 - R7 - Inglese - Ed 11.97...
Need help?
Do you have a question about the R7-E and is the answer not in the manual?
Questions and answers