Table of Contents
Advertisement
Advertisement
Table of Contents
Troubleshooting

Subscribe to Our Youtube Channel
Related Manuals for Radius p200

Summary of Contents for Radius p200
- Page 1 Radius p200 Portable Radio Operating Instructions 68P81059C05-C...
-
Page 2: Table Of Contents
? @ @ @ @ @ @ @ @ L h ? @ @ @ @ @ @ @ @ L h , Motorola, Radius, P200, Private-Line, Digital Private-Line, ? @ ? @ @ @ @ @ @ 1 h... - Page 3 ? @ @ @ @ @ @ @ @ @ @ @ @ @ @ @ @ @ @ @ @ @ @ @ @ @ @ @ 6 K ? @ @ @ @ @ @ @ @ @ @ @ @ @ @ @ @ @ @ @ @ @ @ @ @ @ @ @ @ @ @ 6 K ? ? @ @ @ @ @ @ @ @ @ @ @ @ @ @ @ @ @ @ @ @ @ @ @ @ @ @ @ 6 K ? @ @ @ @ @ @ @ @ @ @ @ @ @ @ @ @ @ @ @ @ @ @ @ @ @ @ @ @ @ @ 6 K ? ? @ @ @ @ @ @ @ @ @ @ @ @ @ @ @ @ @ @ @ @ @ @ @ @ @ @ @ @ @ @ @ @ @ 6 X...
-
Page 4: Introduction
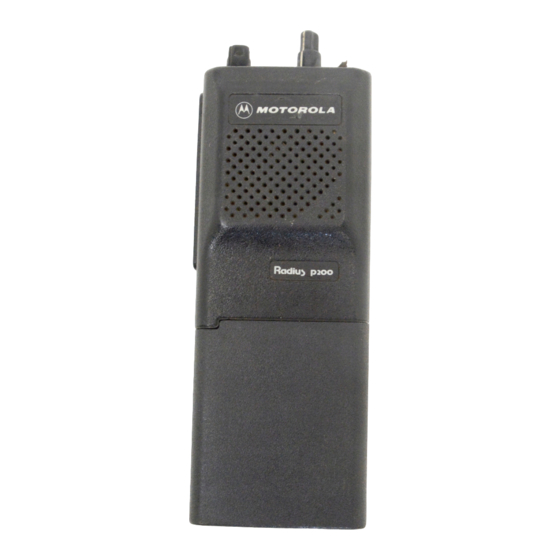
WELCOME TO THE MOTOROLA RADIUS P200 RADIO The Radius P200 Portable Radio is a sophisticated state-of-the- art unit. It incorporates the latest technology available in two-way radio communications. The use of microcomputer technology makes changing radio characteristics such as operating frequencies and squelch codes both economical and fast. - Page 5 Introduction...
-
Page 6: Inspection
When you receive your packaged P200 Radio, inspect the shipping carton for any signs of damage. Next, remove and check the contents of the packing case to be certain that all items ordered have been included. Contents of the packing case may be different from those listed if optional accessories were ordered. - Page 7 Inspection • • • • • • • Note:...
-
Page 8: Controls, Switches, Indicators, And Connectors
O 2 @ @ @ @ @ @ @ 6 K ? h g ? O 2 @ @ @ @ @ @ @ 6 K ? h g ? O 2 @ @ 0 M f I 4 @ @ @ 6 K ? h e ? O 2 @ @ 0 M f I 4 @ @ @ 6 X ? h e ? O 2 @ @ @ ? h e @ @ @ 6 X ? h ? O 2 @ @ @ ? h e ? @ ) K h e ? - Page 9 Controls, Switches, Indicators, and Connectors O 2 @ @ @ @ @ @ @ 6 K ? h g ? O 2 @ @ @ @ @ @ @ 6 K ? h g ? O 2 @ @ 0 M f I 4 @ @ @ 6 K ? h e ? O 2 @ @ 0 M f I 4 @ @ @ 6 X ? h e ? O 2 @ @ @ ? h e @ @ @ 6 X ? h ? O 2 @ @ @ ? h e ? @ ) K h e ?
- Page 10 LED Indicator A bi-color light-emitting diode (LED) O 2 @ @ @ 6 K ? f ? O 2 @ @ @ 6 K ? f ? ? @ @ 0 M ? I 4 @ @ f ? ? @ @ 0 M ? I 4 @ @ f ? J @ g ? @ L ? e ? J @ g ? @ L ? e ? 7 5 g ? 3 1 ? e ?
-
Page 11: Alert Tone Indicators
Power-Up Each time the radio is turned on, a microcomputer self-test occurs. An alert tone is generated for approximately 1 / 2 s e c o n d t o i n d i c a t e t h a t t h e microcomputer is functioning properly. - Page 12 Alert Tone Indicators ? O 2 @ @ @ @ @ 6 K ? O 2 @ @ @ @ @ 6 K O 2 @ @ @ @ @ @ 0 M e ? I 4 @ @ @ @ @ @ 6 K ? O 2 @ @ @ @ @ @ 0 M e ? I 4 @ @ @ @ @ @ 6 K ? ? O 2 @ @ 0 M ? ? O 2 @ @ 0 M ?
-
Page 13: Led Display Indicators
LED Display Indicators Transmit Mode (PTT Switch Depressed) Continuous red light – Normal transmission. Flashing red light – Low battery. No light – Indicates no PTT closure; no rf power being sent to the antenna. Receive Mode (PTT Switch Not Depressed) Flashing green –... - Page 14 • • • • @ @ 6 X @ @ @ ) X ? @ @ 6 X @ @ @ ) X ? W - X ? @ @ @ @ ) X * @ ) X @ @ @ @ @ ) X ? W - X ? @ @ @ @ ) X * @ ) X @ @ @ @ @ ) X ? V ' @ @ @ @ V ' @ @ 1 ?
-
Page 15: Radio Model Information
Figure 2. All P200 radio models are synthesized, two- or six-channel universal units that come standard with tone Private-Line (PL) or Digital Private-Line (DPL) coded squelch, which may be enabled/disabled on a per channel basis at time of order. - Page 16 Radio Model Information ? @ @ @ @ @ @ @ @ @ @ @ @ @ @ @ @ @ @ @ @ @ @ @ @ @ @ @ @ @ @ @ @ @ @ @ @ @ @ @ @ @ @ @ @ @ @ @ @ @ @ @ @ @ @ @ @ @ @ @ @ @ @ @ @ @ @ @ @ @ @ @ @ @ @ @ @ @ @ @ @ @ @ @ @ @ @ @ @ @ @ @ @ @ @ @ @ @ @ @ @ @ @ @ @ @ @ @ @ @ @ @ @ @ @ @ @ @ @ @ @ @ @ @ @ @ @ @ @ @ @ @ @ @ @ @ @ @ @ @ @ @ @ @ @ @ @ @ @ @ @ @ @ @ @ @ @ @ @ @ @ @ @ @ @ @ @ @ @ @ @ @ @ @ @ @ @ @ @ @ @ @ @ @ @ @ @ @ @ @ @ @ @ @ @ @ @ @ @ @ @ @ @ @ @ @ @ @ @ @ @ @ @ @ @ @ @ @ @ @ @ @ @ @ @ @ @ @ @ @ @ @ @ @ @ @ @ @ @ @ @ @ @ @ @ @ @ @ @ @ @ @ @ @ @ @ @ @ @ @ @ @ @ @ @ @ @ @ @ @ @ @ h e ? @ @ @ @ @ @ @ @ @ @ @ @ @ @ @ @ @ @ @ @ @ @ @ @ @ @ @ @ @ @ @ @ @ @ @ @ @ @ @ @ @ @ @ @ @ @ @ @ @ @ @ @ @ @ @ @ @ @ @ @ @ @ @ @ @ @ @ @ @ @ @ @ @ @ @ @ @ @ @ @ @ @ @ @ @ @ @ @ @ @ @ @ @ @ @ @ @ @ @ @ @ @ @ @ @ @ @ @ @ @ @ @ @ @ @ @ @ @ @ @ @ @ @ @ @ @ @ @ @ @ @ @ @ @ @ @ @ @ @ @ @ @ @ @ @ @ @ @ @ @ @ @ @ @ @ @ @ @ @ @ @ @ @ @ @ @ @ @ @ @ @ @ @ @ @ @ @ @ @ @ @ @ @ @ @ @ @ @ @ @ @ @ @ @ @ @ @ @ @ @ @ @ @ @ @ @ @ @ @ @ @ @ @ @ @ @ @ @ @ @ @ @ @ @ @ @ @ @ @ @ @ @ @ @ @ @ @ @ @ @ @ @ @ @ @ @ @ @ @ @ @ @ @ @ @ @ @ @ @ @ @ @ @ @ @ @ @ @ @ @ @ h e ? @ h e ? @ h e...
-
Page 17: Field Programmable Functions
Per Radio Functions Default All Alert Tones Enabled Power Up Alert Tone Enabled Channel Busy Light Enabled Transmit Light Enabled Battery Saver Disabled Per Channel Functions Default RX Freq. Test TX Freq. Test PL Decode Test PL Encode Test Time-Out-Timer Disabled RX Only Channel Disabled... - Page 18 Field Programmable Functions...
-
Page 19: Getting Started
Antenna Installation W 2 @ @ @ @ @ @ @ @ @ 1 O 2 @ @ @ @ @ @ 6 X ? W & @ @ @ @ @ @ @ @ @ @ @ L ? ? 7 @ @ @ @ @ @ @ @ @ @ @ @ ) X J @ @ @ @ @ @ @ @ @ @ @ @ @ @ 1 7 @ @ @ @ @ @ @ @ @ @ @ @ @ @ @ L ? - Page 20 Getting Started W 2 @ @ @ @ @ @ @ @ @ 1 O 2 @ @ @ @ @ @ 6 X ? W & @ @ @ @ @ @ @ @ @ @ @ L ? ? 7 @ @ @ @ @ @ @ @ @ @ @ @ ) X J @ @ @ @ @ @ @ @ @ @ @ @ @ @ 1 7 @ @ @ @ @ @ @ @ @ @ @ @ @ @ @ L ?
-
Page 21: Operation
All P200 radio models have an internal squelch setting which is adjusted at the factory. The squelch level setting is not a user-operated control;... - Page 22 Operation O 2 @ @ @ @ @ @ @ 6 K ? h g ? O 2 @ @ @ @ @ @ @ 6 K ? h g ? O 2 @ @ 0 M f I 4 @ @ @ 6 K ? h e ? O 2 @ @ 0 M f I 4 @ @ @ 6 X ? h e ? O 2 @ @ @ ? h e @ @ @ 6 X ? h ? O 2 @ @ @ ? h e ? @ ) K h e ?
- Page 23 To Transmit Set the frequency switch to the desired channel position (1-6). Do not interrupt another user. Listen for activity on your channel. If the channel on which your are transmitting is programmed to receive PL and the squelch switch is in the @ @ 6 X @ @ @ ) X ? @ @ 6 X...
- Page 24 @ @ 6 X @ @ @ ) X ? @ @ 6 X @ @ @ ) X ? W - X ? @ @ @ @ ) X * @ ) X @ @ @ @ @ ) X ? W - X ? @ @ @ @ ) X * @ ) X @ @ @ @ @ ) X ? V ' @ @ @ @ V ' @ @ 1 ?
-
Page 25: Operation With Standard Features
To fit your particular needs, a number of features are available to enhance the operation of your P200 radio. These capability features are described for you in this section. Quik-Call II The Quik-Call II provides the user with the talk-back pager feature. - Page 26 Operation with Standard Features @ @ 6 X @ @ 6 X W - X ? @ @ @ @ ) X W - X ? @ @ @ @ ) X @ @ @ ) X ? @ @ @ ) X ? * @ ) X @ @ @ @ @ ) X ? * @ ) X @ @ @ @ @ ) X ? V ' @ @ @ @ V ' @ @ 1 ?
- Page 27 Note that even in the carrier squelch mode the Quik-Call II decoder is active and will respond to a valid Quik-Call II code. The radio will emit an interrupted alert tone on receiving a valid code. Time-Out-Timer (60 second) The Time-Out-Timer (T.O.T.) feature aler ts the user if the transmitter is keyed for a long period.
- Page 29 Channel Scan (Lowband Models Only) This option allows you to monitor a number of channels; the receiver checks each channel in a continuous cycle for activity. The channels to be scanned are user programmable. Channel scan is offered in two modes of operation, non-priority and priority scan.
- Page 30 ? W 2 @ @ @ h g ? ? 7 @ @ @ @ h g ? ? @ @ @ @ @ h g ? ? @ @ @ @ @ @ @ @ @ @ @ @ @ @ @ @ @ @ @ @ @ @ @ @ @ h g ? ? @ @ @ @ @ @ @ @ @ @ @ @ @ @ @ @ @ @ @ @ ? ? @ @ @ @ @ @ @ @ @ @ @ @ @ @ @ @ @ @ @ @ @ @ @ @ @ h g ? ? @ @ @ @ @ @ @ @ @ @ @ @ @ @ @ @ @ @ @ @ ?
- Page 31 Talk-Back Scan This is a standard feature of the channel scan options listed above. When transmit or receive activity ceases on a scan channel, a “dwell time” of approximately three seconds occurs prior to the radio resuming scan for other channel activity. This “dwell time”...
- Page 32 • • • ? W 2 @ @ @ ? 7 @ @ @ @ ? @ @ @ @ @ ? @ @ @ @ @ @ @ @ @ @ @ @ @ @ @ @ @ @ @ @ @ @ @ @ @ ? @ @ @ @ @ @ @ @ @ @ @ @ @ @ @ @ @ @ @ @ ? ? @ @ @ @ @ @ @ @ @ @ @ @ @ @ @ @ @ @ @ @ @ @ @ @ @ ? @ @ @ @ @ @ @ @ @ @ @ @ @ @ @ @ @ @ @ @ ?
- Page 33 A maximum of six channel scan positions are available. P200 Lowband radios with the scan option are not shipped programmed with scan channels. The scan list is programmed by the user. The user programming feature may be disabled and programming allowed through the radio service software.
- Page 34 Note: ? @ ? @ ? @ ? @ ? O 2 @ 6 K ? O 2 @ 6 K @ ( g O 2 @ @ @ @ 0 ? 4 @ @ @ @ 6 K ? g W - X ? g ? @ ( g O 2 @ @ @ @ 0 ? 4 @ @ @ @ 6 K ? g W - X ? g ? ( Y f W 2 @ 0 M ? h I 4 @ 6 X ? f * ? , ? g ? ( Y f W 2 @ 0 M ? h I 4 @ 6 X ? f * ? , ? g ?
-
Page 35: Operation With Options
In addition to the standard features, a number of options are also available to enhance the operation of your P200 radio. These options are described for you in this section. ? @ @ @ @ @ @ @ @ @ @ @ @ @ @ @... - Page 36 Operation with Options ? @ @ @ @ @ @ @ @ @ @ @ @ @ @ @ ? @ @ @ @ @ @ @ @ @ @ @ @ @ @ @ ? @ @ @ @ @ @ @ @ @ @ @ @ @ @ @ ? @ @ @ @ @ @ @ @ @ @ @ @ @ @ @ ? @ @ @ @ @ @ @ @ @ @ @ @ @ @ @ ? @ @ @ @ @ @ @ @ @ @ @ @ @ @ @...
- Page 37 Last Number Redial P200 automatically stores the numbers last entered in the scratchpad memory. To automatically dial this number, depress and hold the PTT switch down and press “*”, then 0. Release the PTT switch after the last tone is heard.
- Page 38 Note: Note:...
- Page 39 immediately by simply entering the numbers from the keypad. When the phone number is entered, it is automatically stored in the last number redial memory (location 0). To store the number in another location, press the program button and press “*”...
- Page 40 IMPORTANT...
- Page 41 To dial this sequence, depress and hold the PTT switch down, press “*”, then press the proper memory location (1-9). The access code will be transmitted followed by a pause. The pause gives the system time to check the access code and send out a dial tone.
- Page 42 Caution:...
-
Page 43: Battery Information
? @ ? @ f ? I ' @ h e ? @ ? @ f ? @ ? @ ? @ g N @ h e ? @ ? @ f ? @ The P200 radio gets its power (10Vdc) ? @ ? @ g ? @ h e ? @ ? @ f ? @... - Page 44 ? @ h f @ @ ? @ h f @ @ ? @ h f @ @ ? @ h f @ @ ? @ h f @ @ ? @ h f @ @ ? @ h f @ @ ? @ h f @ @ ? @ h f @ @ ? @ h f @ @...
- Page 45 For additional information on batteries and battery charging, refer to the battery charger information in the maintenance manual. Short Circuit Care should be taken to avoid external short-circuiting of the battery. A sustained high rate discharge (e.g., a paper clip placed accidentally across the battery contacts) may permanently damage the battery, void the battery warranty, and create a burn or fire hazard.
- Page 46 Caution:...
- Page 47 TRANSMIT WHILE THE RADIO IS IN THE CHARGER. For Single-Unit and Multi-Unit Rapid-Char ge Battery Chargers Only: When charging a P200 battery, the green light will turn on when charging is complete. If both lights flash when the battery is inserted in the charger, there is an open or short circuit in the battery.
- Page 48 ? W 2 6 X ? ? W 2 6 X ? ? W & @ @ @ @ ) X ? ? W & @ @ @ @ ) X ? W & @ @ ) X W & @ @ ) X W &...
- Page 49 NAB6063A Heliflex (42 - 50MHz), color coded red Each Radius P200 lowband radio is shipped from the factory with an antenna kit. The antenna kit includes an uncut antenna, an antenna cap, and a cut chart, which supplies information that describes what length to cut the antenna for a specific customer frequency.
- Page 50 Accessories Note:...
- Page 51 Nickel-Cadmium Battery Chargers: NTN5538 Single-Unit Desk-Top (Rapid Rate 117V) NTN5539 Single-Unit Desk-Top (Rapid Rate 220V) with European Plug NTN5540 Compact (110V) NTN5541 Compact (220V) with European Plug NTN5536 Six Unit Rapid Rate Charger (117V) NTN5537 Six Unit Rapid Rate Charger (220V/240V) Carrying Accessories: NTN5546 Velcro Patch Pin Attachment...
-
Page 52: Belt Clip Installation Instructions
Reinstall the battery by sliding it on to the bottom of the radio far enough so that the battery release fully engages the battery pack. This completes the installation. P200 PORTABLE RADIO BELT CLIP/FRONT COVER RUBBER... - Page 53 Belt Clip Installation Instructions...
-
Page 54: For Use In Hazardous Atmospheres
Radios must ship from the Motorola factory equipped with the hazardous atmosphere options; they cannot be modified in the field. Failure to use the radio with the approved battery will negate the FM approval. P200 Factory Mutual approved radios can be used For Use in Hazardous Atmospheres... - Page 55 For Use in Hazardous Atmospheres • • @ @ @ @ @ @ @ @ @ @ @ @ @ @ @ @ @ @ @ @ @ @ @ @ @ @ @ @ @ @ @ @ @ @ @ @ @ @ @ @ @ @ @ @ @ @ @ @ @ @ @ @ @ @ @ @ @ @ @ @ @ @ @ @ @ @ @ @ @ @ @ @ @ @ @ @ @ @ @ @ @ @ @ @ @ @ @ @ @ @ @ @ @ @ @ @ @ @ @ @ @ @ @ @ @ ? @ @ @ @ @ @ @ @ @ @ @ @ @ @ @ @ @ @ @ @ @ @ @ @ @ @ @ @ @ @ @ @ @ @ @ @ @ @ @ @ @ @ @ @ @ @ @ @ @ @ @ @ @ @ @ @ @ @ @ @ @ @ @ @ @ @ @ @ @ @ @ @ @ @ @ @ @ @ @ @ @ @ @ @ @ @ @ @ @ @ @ @ @ @ @ @ @ @ @ @ @ @ @ @ @ ? @ @ @ @ @ @ @ @ @ @ @ @ @ @ @ @ @ @ @ @ @ @ @ @ @ @ @ @ @ @ @ @ @ @ @ @ @ @ @ @ @ @ @ @ @ @ @ @ @ @ @ @ @ @ @ @ @ @ @ @ @ @ @ @ @ @ @ @ @ @ @ @ @ @ @ @ @ @ @ @ @ @ @ @ @ @ @ @ @ @ @ @ @ @ @ @ @ @ @ @ @ @ @ @ @ ? @ @ @ @ @ @ @ @ @ @ @ @ @ @ @ @ @ @ @ @ @ @ @ @ @ @ @ @ @ @ @ @ @ @ @ @ @ @ @ @ @ @ @ @ @ @ @ @ @ @ @ @ @ @ @ @ @ @ @ @ @ @ @ @ @ @ @ @ @ @ @ @ @ @ @ @ @ @ @ @ @ @ @ @ @ @ @ @ @ @ @ @ @ @ @ @ @ @ @ @ @ @ @ @ @ ?
- Page 56 The following radios and accessories are approved as Intrinsically Safe by Factory Mutual. Refer to the radio label for intrinsic safety ratings and required batteries. Only the accessories and antennas listed below may be used on approved radios. Lowband P200 VHF P200 UHF P200 H41RFU7160AN...
- Page 57 Models ACCESSORIES (P200/HT600) KIT NUMBERS DESCRIPTION P200 HT600 NMN6153A NMN6156A Remote Speaker Microphone NMN6168A NMN6145A Remote Speaker Microphone with 2.5mm Earphone Jack NTN5559A NTN5050A Remote Speaker Microphone with Antenna (PSR) NSN6056A NSN6008A Lapel Speaker NTN5558A NTN5043A Earpiece w/Volume Control NSN6057A...
- Page 59 NAE6521A NAE6231A 400-440 MHz Heliflex NAE6522A NAE6232A 438-470 MHz Heliflex NAE6523A NAE6233A 470-520 MHz Heliflex NAE6500A NAE6350A 400-520 MHz Flexible Whip NAE6511A NAE6131A 400-433 MHz PSR Whip (Used w/NTN5559A) NAE6512A NAE6132A 440-470 MHz PSR Whip (Used w/NTN5559A) NAE6513A NAE6133A 470-520 MHz PSR Whip (Used w/NTN5559A) BATTERIES NTN5531A...
-
Page 60: Troubleshooting
If you experience difficulty, check the following items before requesting service. Review steps under OPERATION. Be sure the frequency select switch is set to the correct channel. Replace or recharge the battery. If reception is poor, check the antenna. It must be undamaged and operated in the vertical position for best reception. - Page 61 Troubleshooting...
- Page 62 If any operational difficulties should arise, report them to your Radius dealer. Proper repair and maintenance procedures will assure efficient operation and long life for this radio.
- Page 63 Service...
-
Page 64: General Radio Care
Avoid physical abuse of your radio such as carrying it by the antenna or remote microphone. Wipe the battery contacts with a lint-free cloth to remove dirt, grease, or other material which may prevent good electrical connections. The antenna jack is fitted with a protective cap which should be left in place when the jack is not being used. - Page 65 General Radio Care Caution:...
-
Page 66: Safety Information
The Federal Communications Commission (FCC) with its action in General Docket 79-144, March 13, 1985 has adopted a safety standard for the human exposure to radio frequency (rf) electromagnetic energy emitted by FCC-regulated equipment. Proper operation of this radio will result in user exposure substantially below the FCC recommended limits. - Page 67 Safety Information O 2 @ @ @ @ @ @ @ @ 6 K O 2 @ @ @ @ @ @ @ @ 6 K ? O 2 @ @ @ @ @ @ 0 M ? f ? I 4 @ @ @ @ @ @ @ @ @ 6 K ? O 2 @ @ @ @ @ @ 0 M ? f ? I 4 @ @ @ @ @ @ @ @ @ 6 K O 2 @ @ @ @ @ @ @ @ @ @ @ @ @ @ @ @ @ 6 K ? O 2 @ @ @ @ @ @ @ @ @ @ @ @ @ @ @ @ @ 6 K ?
-
Page 68: Computer Software Copyrights
The Motorola products described in this manual may include c o p y r i g h t e d M o t o ro l a c o m p u t e r p ro g r a m s s t o re d i n semiconductor memories or other media. - Page 69 Computer Software Copyrights...
-
Page 70: Battery Chargers Kit Information
Kit Information Kit Number Battery Charge Charger Type 110 Volts 220 Volts Type Time Single-Unit Compact NTN5540 NTN5541 16 hours Single-Unit Rapid NTN5538 NTN5539 1 hour Multi-Unit Rapid NTN5536 NTN5537 1 hour Batteries Kit Number Capacity Charge Type NTN5531, NTN5561 Medium Rapid NTN5521, NTN5545... - Page 71 Battery Chargers...
-
Page 72: Battery Chargers Operating Instructions
(red light remains on). If both lights flash when the battery is inserted in the charger, there is an open or short circuit in the battery. Be sure both the charger and battery contacts are clean. Battery Chargers Operating Instructions (P200) - Page 73 Battery Chargers Operating Instructions (P200) Note:...
- Page 74 There are no user serviceable parts in the charger. If the charger fails to operate, contact Motorola Inc., Radius Products Division Customer Service at 1-800-356-1520. Battery Chargers Operating Instructions (P200) cont.
-
Page 75: Fcc Licensing Information
A DIVISION OF MOTOROLA INC. FCC Licensing Information Your Radius radio operates on FM radio communication frequencies an is subject to the Rules and Regulations of the Federal Communications Commission (FCC). The FCC requires that all operators using Private Land Mobile or General Mobile Radio frequencies obtain a radio license before operating their equipment. - Page 76 O 2 @ @ @ 6 K ? O 2 @ @ @ 6 K ? W 2 @ @ @ 0 M ? I 4 @ @ @ 6 K ? W 2 @ @ @ 0 M ? I 4 @ @ @ 6 K ? ? W 2 @ 0 Y ? ) X ? f ? @ @ <...
- Page 77 If your eligibility is within the Business The Business Radio Service, itinerant Radio Service, contact the National frequencies are 27.49 MHz, Assocaition of Business and Educational 4 6 4 . 5 0 0 , 4 6 9 . 5 0 0 M H z p a i r a n d R a d i o ( N A B E R ) f o r t h e N A B E R f e e 464.550, 469.550 MHz pair.
- Page 78 Notes...
- Page 79 Notes...
- Page 80 Notes...
- Page 81 Notes...
- Page 82 Notes...
- Page 83 Notes...
Need help?
Do you have a question about the p200 and is the answer not in the manual?
Questions and answers