Table of Contents
Advertisement
Quick Links
Advertisement
Table of Contents

Summary of Contents for C-Pen 200
-
Page 1: User Manual
USER MANUAL English... - Page 2 symbol on our products signifies that they have been certified in accordance with the EMC directive 89/ 336/EEC and the Low Voltage directive 73/23/EEC when applicable. The products fulfill the requirements of the following standards: EN 50 081-1:1992 Electromagnetic compatibility, Generic Emission Standard.
-
Page 3: Table Of Contents
Parts of the pen ............10 Display objects .............. 11 GETTING STARTED ........14 Installing the batteries ..........14 Turning C-Pen On and Off ..........15 Navigating and selecting ..........15 READING AND SAVING TEXT ....... 18 Reading text ..............18 Saving text .............. - Page 4 CONNECTING TO A PC ........48 Installing software ............48 Connecting C-Pen to a PC ..........49 Getting help ..............50 C-Pen Viewer ..............50 Installing and removing applications ......51 Transferring files ............51 C Address ............... 52 C Direct ................53 C-Pen Edit ..............
-
Page 5: Introduction To C-Pen
You don’t have to tear out pages any more. Your saved text files can later be transferred to your PC. It is also possible to use C-Pen to read text directly into a Windows application in your PC. Powerful features C Read is the basic function of C-Pen. -
Page 6: Optimum Reading Conditions
C-Pen into your PC. The text will be placed at the cursor position in for instance a Word or Excel document. C Address is an application in C-Pen for storing and looking up contact information such as addresses, phone numbers and e-mail addresses. - Page 7 C-Pen does not recognize handwritten text. • Position and movement of C-Pen It is important how you hold and move C-Pen over the printed text. Please read the Quick Start folder to learn how to use C-Pen correctly. It is crucial that you follow these instructions in order to get the best results.
-
Page 8: User Documentation And Support
• Certain colors C-Pen cannot read red or yellow text on a white or red background, or white text on a red background. • Small or large character sizes The size of the characters should be 7–20 points. User documentation and support There are different sources to support your use of C-Pen: •... -
Page 9: Care & Safety
• Make sure that the camera opening is free from dust or any other objects. • Clean C-Pen with a dry cloth. Do not use detergents or other chemicals when cleaning C-Pen. • Use only 1.5 V AAA batteries of type LR03 (alkaline) •... -
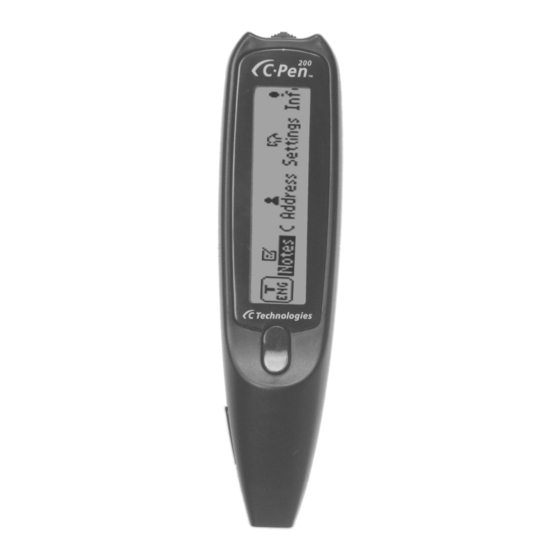
Page 10: Presentation Of The Pen
Navigation control (Nav) and On/Off button IR port On/Off Turns C-Pen on or off, when pressed for one second. This button is also used as a control for moving around in menus and texts (turn control left or right) and to select an item or an option (press briefly). -
Page 11: Display Objects
See System Settings, p. 45. IR port The infrared (IR) port is used for wireless data transfer between C-Pen and a PC that also is equipped with an IR port. Trigg To be pressed and held down while reading text. - Page 12 Status field The area on the left side of the display is called the status field. This field displays the text settings (Text Quality and Text Language). See Settings, p. 42. Text Quality (see Settings) Text Language (see Settings) Application icon The applications are represented by application icons in the Main screen.
- Page 13 Checked box Unchecked box Dialog box A dialog box appears when you need to enter information or give commands to C-Pen. A dialog box contains one or more objects such as edit fields or dialog buttons. A dialog box Edit field...
-
Page 14: Getting Started
GETTING STARTED Installing the batteries 1. Remove the battery cover from the rear panel of C-Pen. Lift the cover here to open 2. Insert two alkaline AAA batteries (1.5 V type LR03) as shown below. It is imperative to observe the polarity of the batteries. -
Page 15: Turning C-Pen On And Off
Turning C-Pen On and Off To turn C-Pen on and off, press the On/Off button until the display is activated/deactivated. C-Pen turns off automatically after 4 minutes of non-use. To change the automatic power-off time, see System Settings, p. 45. - Page 16 , you can press ESC. CANCEL Dialog buttons In a dialog box you instruct C-Pen how to continue by selecting a dialog button: You accept a suggestion in a dialog box. Your answer is “Yes” to a question in a dialog box.
- Page 17 Edit fields Edit field To be able to edit text in an edit field you have to select it. A cursor will appear in the edit field and the status field shows the edit mode symbol. See Editing text, p. 21. Cursor Edit mode symbol Check boxes...
-
Page 18: Reading And Saving Text
C-Pen correctly. (See also Optimum reading conditions, p. 6) Reading text To read a line, follow the steps below. 1. Turn C-Pen on. Make sure that the text settings are set to the appropriate values. The text settings are TEXT . There is... - Page 19 33. You can also create a new, empty text file by selecting ... and then in Notes, before you start FILE reading. NOTE: You can move C-Pen either left-to-right or right- to-left over the text. You can read up to 15 cm/second.
-
Page 20: Saving Text
Reading another line Read the second line the same way you read the first. A space or a line break is inserted between the lines (see Read Mode, p. 43). You can also insert a line break by clicking Trigg once. The last line is highlighted (inverted), i.e. -
Page 21: Editing Text
EDITING TEXT To be able to edit text in a text file or in an edit field you have to enter edit mode. Entering edit mode You enter edit mode in different ways depending on your starting-point. You can enter edit mode in the Text screen or in edit field. - Page 22 In edit mode you move the cursor one character at a time by turning Nav. Move the cursor to a position where you want to edit the text. Press Nav to open the Edit menu. The items in the Edit menu are: Leaves the edit mode in the Text screen.
- Page 23 Some of the menu items are explained more in detail below: Change Place the cursor to the left of the character you want to change and select from the menu. CHANGE Turn Nav to select the new character from the character set and then press Nav.
- Page 24 : Select Continuous or Separate lines. READ MODE • : Select Normal or Inverted. TEXT QUALITY • : Select if your CALIBRATION DEFAULT SETTING C-Pen is calibrated and you want to revert to the factory setting. Quit Editing Quit edit mode by selecting QUIT EDITING...
-
Page 25: C Write
C Write C Write is a feature that allows you to draw characters by using C-Pen as an ordinary pen. C-Pen can track its own movement over a surface and recognize the move- ment as a letter, digit or a symbol. Using C Write is an alternative to using the character frame when inserting characters in a text. - Page 26 Basic rules when using C Write • In order to obtain maximum accuracy when writing with C-Pen, your characters should resemble the pro- totypes on the following pages as much as possible. Start here • A character must be drawn in one single stroke.
- Page 27 If you write two shift signs, C Write will enter Caps Lock mode. All letters will be capitals until you write a shift sign again. C Write Caps Lock mode icon Symbols Press Trigg briefly to enter symbol mode. The status field displays the Symbol mode icon.
- Page 28 C Write Prototypes Letters, digits and shift Shift Space Backspace New line...
- Page 30 Special characters Çç Ææ Øø Accents and umlauts Write the letter first and then the accent or umlaut. Example: ä = a + ¨ º ´ Symbols Enter symbol mode by pressing Trigg briefly.
- Page 31 “ ¿ < > ¡ £ § ß...
-
Page 32: Applications
APPLICATIONS C-Pen’s application icons are shown in the Main screen. You can move between the icons by using Nav. Press Nav to start an application. Main screen Move between the icons with Nav Notes contains text files. See p. 33. -
Page 33: Notes
You do not have to do this command to create a file. A new file will automatically be created whenever you start to read with C-Pen (except when you already are in the Text screen). New text files will be placed in Notes. - Page 34 Use your C-Pen to read a name or press Nav to enter edit mode. To save the folder, select . The folder is placed in Notes. If you want to save a file within a specific folder, you must create the file by opening the folder, selecting ...
- Page 35 In the Text screen you move the cursor line by line with Nav. You can insert a new line at the cursor position (the flashing triangle) by reading a new line with C-Pen. Press Nav if you want to edit the text, change text settings or stop working with the text.
-
Page 36: C Address
C Address C Address is an application in C-Pen for storing and looking up contact information such as addresses, phone numbers and e-mail addresses to people and organiza- tions you communicate with. Start C Address by selecting the C Address icon in the Main Screen. - Page 37 You can always move to any field you want by turning Nav. If you want to redo a reading with C-Pen, just go to the field that you want to change and read again. Enter edit mode if you want to edit the content of the field (see p.
- Page 38 “Last name, First Name”. You can edit the file name or you can read a file name with your C-Pen. A file name must not be longer than 64 characters. Invalid characters like ‘\’ or ‘.’ will be replaced with a blank space.
- Page 39 Deletes the contact file. DELETE Brings you to the top of the C Address main screen ( EXIT Closes the Contact menu. CANCEL View a contact Select to view a contact. The contact information is VIEW presented in the Contact view screen. At opening the scroll bar rectangle is blinking, which indicates that the scroll bar is active, and you are able to scroll through all contact information.
- Page 40 Nav. If you want to change the content in a field, you can read a new field text with C-Pen or edit the text in the usual way. Find a contact To find a contact, navigate to the C Address main screen and select .
- Page 41 Search result Select to close the screen and return to the DONE C Address main screen. If no matching text is found, a dialog box appears telling you “Nothing found”. Select to go back to the Find Contact screen. Delete a contact Select a contact in the contact list and select DELETE dialog box asks you to confirm that you are sure.
-
Page 42: Settings
Settings Settings contains the parameters controlling C-Pen. Enter Settings from the Main screen by selecting the Settings icon. You can also enter text settings from the Text menu (p. 35) and the Edit menu (p. 21). A list of the available settings appears. - Page 43 C-Pen’s reading ability can be adjusted to the contrast between the text and its background in the following way: 1. Hold C-Pen with the pen tip flat against the surface. 2. Press Trigg for two seconds without moving C Pen. 3. A progress indicator appears on C-Pen’s screen.
- Page 44 When your C-Pen is calibrated the Text Quality icon in the status field changes appearance: The calibration overrides the factory setting. The calibra- tion is not saved when C-Pen is turned off. If you want to revert to the factory setting without turning C-Pen off, choose...
- Page 45 DEFAULT SETTING press the scan button (Trigg), a calibration will start. You can do a calibration whenever you use C-Pen. This method increases C-Pen’s reading ability if the text is not black and/or the background is not white. Inverted text must still be set in Text Quality.
- Page 46 If PIN-code is enabled, you must enter the PIN each time C-Pen is turned on. After three unsuccessful attempts, C-Pen will turn off. You get three attempts each time you start C-Pen. Warning! If you start C-Pen by select- in the start up...
-
Page 47: Info
Info Info contains a list of help and information topics. Exits Info. EXIT Gives instructions on performing a GETTING STARTED successful reading. Press Nav or ESC to close the topic. Gives solutions to common TROUBLESHOOTING problems. Press Nav or ESC to close the topic. -
Page 48: Connecting To A Pc
CONNECTING TO A PC C-Pen can be connected to a PC by Infrared (IR) commu- nication. A working IR connection with a PC is required to install and remove applications in C-Pen. To enable this communication certain hardware and software must be installed and configured properly on your PC. -
Page 49: Connecting C-Pen To A Pc
C Pen for best results. To play the demo, click on Demo. To open the ReadMe file, click on ReadMe. Connecting C-Pen to a PC To connect C-Pen to your PC, position C-Pen so that it is aligned with the PC’s IR port as shown in the figure. -
Page 50: Getting Help
C-Pen) and from the Help menu select C-Pen Help Topics. You can also press F1 on your keyboard to enter C-Pen Windows Software Help. C-Pen Viewer Open C-Pen Viewer by double-clicking on My C-Pen. C-Pen Viewer enables you to browse the contents of your C-Pen Viewer... -
Page 51: Installing And Removing Applications
C-Pen. The user interface looks like Windows Explorer and you will recognize the applications from the Main screen in C-Pen. Use C-Pen Viewer to open and browse files in your C-Pen , to create new folders and to remove applications from your C-Pen. Installing and removing applications The applications in your C-Pen can be removed and new ones installed. -
Page 52: C Address
C Address with those in Microsoft Outlook (but not Microsoft Outlook Express). Simply click your right mouse button on the My C-Pen icon on the PC desktop and the option C Address Sync will appear. Selecting it will start an easy-to-use application allowing you to specify the extent of synchronization. -
Page 53: C Direct
C Direct gives you the opportunity to enter text from your C-Pen at the cursor position in Windows programs. To activate C Direct place C-Pen in front of the IR port on your PC, click the right mouse button on the C-Pen icon (My C-Pen) and select C Direct from the context menu. -
Page 54: C-Pen Edit
C-Pen Edit C-Pen Edit is a simple text editor that lets you edit files stored in C-Pen directly, without having to first move them to your PC. C-Pen Edit can communicate directly with your C-Pen to open and save files. If you are using C-Pen Edit and open a file from C-Pen, it can be saved either to your hard drive or directly back into C-Pen. -
Page 55: Troubleshooting
See Read mode in Settings, p. 43. Make sure that you hold C-Pen so that the pen tip is flat against the surface of the text you are reading. If you have an angle between the nose and the surface, C-Pen will take incorrect pictures of the text. - Page 56 Enter System Settings (p. 45) and increase Power-off time. Problem: I am left-handed and the text on the display is upside-down. Solution: in Settings, p. 45. RIGHT LEFT HANDED Please refer to the C-Pen Windows Software Help for a more extensive troubleshooting section.
-
Page 57: Technical Specifications
TECHNICAL SPECIFICATIONS Size: 140x35x24 mm Weight: 80 g (including batteries) Display: 2 rows © ™ Processor: Intel StrongARM 100 MHz Memory: 512 kB RAM 2 MB flash memory, Battery lifetime: 3–4 weeks normal use Reading speed: 15 cm/s Character sizes: 7–20 points... -
Page 58: Index
INDEX C-Pen Viewer 50 Application 32 Calibration 43 Default setting 45 Application icon 12 Camera opening 10 Character set 23 Battery 14 Check box 12, 17 Battery compartment 10 Command menu 34 Connecting to a PC 48 C Address 6, 32, 36, 52... - Page 59 Editing text 21 C Write 25 Main screen 12, 32 Edit field 21 Menu 12, 16 Edit menu 21 Menu items 12 Edit mode symbol 21 Menu language 46 Entering edit mode 21 Text screen 21 Escape button (ESC) 10, 11 Navigating 15 Exchange Trigg/ESC 46 Navigation control (Nav)
- Page 60 Saving text 20 Technical specifications 57 Scroll bar 12 Text, inverted 43 Selecting 15 Text Language 43 Settings 32, 42 Text Language icon 12 C Write Feedback 45 Text menu 35 Calibration 43 Text Quality 43 Read Mode 43 Text Quality icon 12, 44 System Settings 45 Text Language 43 Text screen 19, 21...
-
Page 61: Warranty
C Technologies. If your C-Pen product requires warranty service you should return the product to the dealer/retailer from whom it was purchased. The product must be packed in original packaging or with sufficient care so as to avoid shipping damage. -
Page 62: Warranty Information
Warranty Information Serial number: CT number: Date: Customer: Address: Dealer: Address:...
Need help?
Do you have a question about the 200 and is the answer not in the manual?
Questions and answers