Table of Contents
Advertisement
CHALLENGER 9000M SERIES
Residential Vehicular Garage Door Operator
MODEL NUMBERS 9300M, 9500M, and J9500M
I N S T A L L A T I O N A N D O W N E R ' S M A N U A L
INSTALLER: Place this manual in the plastic envelope provided and
110060
R E A D T H I S M A N U A L C A R E F U L L Y B E F O R E I N S T A L L A T I O N O R U S E
TABLE OF CONTENTS
Product Features ......................................................2
Tools Required..........................................................2
Component Identification ........................................3
Assembly Instructions ....................................3
Identify Your Door Type ...........................................4
B: Important Installation Instructions.....................5
C: Installing the Operator ........................................6
Mounting the Front Bracket...............................6
Mounting the Power Head .................................7
Door Bracket Installation ...................................7
Door Arm Installation.........................................8
Connecting Electrical Power .............................9
The Convenience Lamp .....................................9
D: Control & Auxiliary Equipment..........................10
Standard Wall Button Installation ...................10
Programming the Radio Transmitter ..............11
Programming the Radio Receiver ...................13
Safe Finish™ Photosystem Installation..........13
READ THESE STATEMENTS CAREFULLY AND FOLLOW THE INSTRUCTIONS CLOSELY
The Warning and Caution boxes throughout this manual are there to protect you and your equipment.
WARNING
Indicates a
MECHANICAL
hazard of INJURY
OR DEATH. Gives
instructions to avoid
the hazard.
BY
permanently attach to the wall near the pushbutton.
SA VE T HES E I NST R U C T I ONS
Pay close attention to these boxes as you follow the manual.
CAUTION
Indicates a MECHANICAL
hazard of DAMAGE to the
door, door operator, or
equipment. Gives
instructions to avoid the
hazard.
As of date of
manufacture, meets all
ANSI/UL 325 Safety
Requirements for
Vehicular Garage
Door Operators
Pre-Power On Installation Checklist ...............14
Section E: Operation & Adjustments.....................15
Important Safety Instructions .........................15
Turning on the Power ......................................15
Basic Operating Parameters ...........................15
Manual Door Operation..................................... 9
Adjustments .....................................................16
Opening Travel Adjustments...........................16
Open & Closing Force Adjustment .................16
Setting The Close Limit ...................................16
Obstruction Sensing Adjustment....................16
Testing The Obstruction Sensing ...................17
Positive Mechanical Lock Adjust ....................18
Alignment of Safe Finish Photoelectric ..........18
Photoelectric Obstruction Test .......................18
Wiring Diagram .......................................................19
Troubleshooting Guide ..........................................19
Warranty Information .............................................20
WARNING
Indicates an
ELECTRICAL hazard
of INJURY OR
DEATH. Gives
instructions to avoid
the hazard.
CAUTION
Indicates an ELECTRICAL
hazard of DAMAGE to the
door, door operator, or
equipment. Gives
instructions to avoid the
hazard.
Advertisement
Table of Contents

Summary of Contents for Challenger 9300M
-
Page 1: Table Of Contents
CHALLENGER 9000M SERIES Residential Vehicular Garage Door Operator MODEL NUMBERS 9300M, 9500M, and J9500M I N S T A L L A T I O N A N D O W N E R ’ S M A N U A L INSTALLER: Place this manual in the plastic envelope provided and permanently attach to the wall near the pushbutton. -
Page 2: Product Features
PRODUCT FEATURES The purpose of this booklet is to provide assembly, Manual Release: A pull cord allows separation of the installation and operation information concerning the drive mechanism and manual operation of the door when herein described Residential Garage Door Opener and desired, as in the event of a power failure. -
Page 3: Component Identification
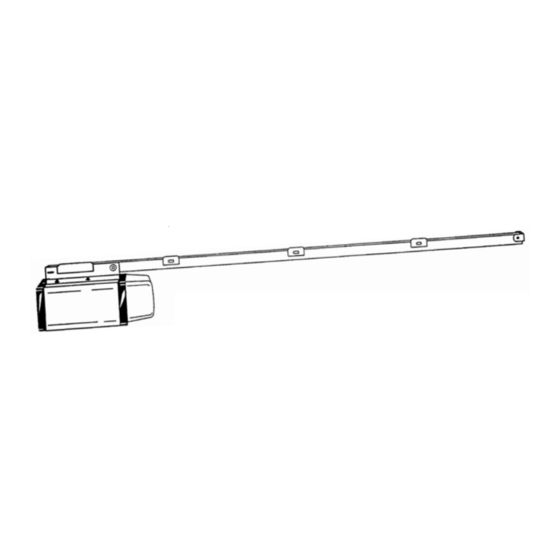
COMPONENT IDENTIFICATION TRANSMITTER WALL BRACKET DOOR ARM and ROD POWER HEAD/DRIVE RAIL ASSEMBLY MANUAL RELEASE SENSOR ‘L’ BRACKET DOOR BRACKET PUSHBUTTON SENSOR ‘U’ “WARNING” LABEL BRACKET BELL WIRE SAFE FINISH SPOOL PHOTOSYSTEM SENSORS 110046 SAFE FINISH HARDWARE OPENER RELEASE HARDWARE 110045 KNOB WALL... -
Page 4: Identify Your Door Type
104368 FOR THESE TYPES OF DOORS USE FOR THESE TYPES OF DOORS USE MODEL J9500M. MODEL 9300M OR MODEL 9500M. USE 7J RAIL USE 7 FT, 8 FT OR 10 FT RAIL (FOR DOOR HEIGHT UP TO 8 FT) (MATCH DOOR HEIGHT) -
Page 5: B: Important Installation Instructions
IMPORTANT INSTALLATION INSTRUCTIONS WARNING! TO REDUCE THE RISK OF SEVERE INJURY OR DEATH READ AND FOLLOW ALL INSTALLATION INSTRUCTIONS! AN UNBALANCED DOOR OR ONE THAT REINFORCE LIGHTWEIGHT FIBERGLASS, STICKS OR BINDS MAY PREVENT THE ALUMINUM AND STEEL DOOR TOP SENSING SYSTEM FROM WORKING SECTIONS TO AVOID DAMAGE AND TO PROPERLY, CAUSING INJURY OR DEATH. -
Page 6: C: Installing The Operator
C: INSTALLING THE OPERATOR STEP 1: VERTICAL Mounting the Front Bracket — CENTERLINE HORIZONTAL Sectional Doors and One-Piece Doors with Track (For LINE One-Piece Doors without track see Step 1A, next): Mark a vertical centerline on the header above the door. By manually raising the door, determine the high arc of the door’s travel (see illustrations on page 4) and using a level, transfer this measurement to the header (see illustration at... -
Page 7: Mounting The Power Head
C: INSTALLING THE OPERATOR position. Allow 2” of space between the tee rail and the door (at the high arc position) as shown in the illustration on page 9. The opener will be angled as shown. This is necessary for proper operation. NOTE: Since the opener will be secured permanently in this position, open and close the door a few times to be sure the door does not rub on the Tee Rail and that you have allowed the proper clearances before proceeding. -
Page 8: Door Arm Installation
C: INSTALLING THE OPERATOR Step 8: Connecting Door Arm to Trolley 110053-2 (THIS IS FOR SECTIONAL DOORS ONLY - FOR ONE PIECE DOORS PROCEED TO STEP 10) The door arm assembly consists of the door arm tube section and door Trolley arm rod which are packaged separately. -
Page 9: Connecting Electrical Power
C: INSTALLING THE OPERATOR Slide door arm and trolley toward door; connect Closed Limit 110055-1 the tube assembly to the door bracket with the Stop Location Open Limit 3/8” diameter bolt and locking nut, tightening Stop Location enough to allow for door arm pivot. Do not Fully Closed overtighten the locking nut. -
Page 10: D: Control & Auxiliary Equipment
D: CONTROL AND AUXILIARY EQUIPMENT INSTALLATION OF A STANDARD WALL WARNING PUSH BUTTON A standard wall push button is packaged with your opener. Do not use a door bell button with light. The A CHILD OPERATING THE DOOR operating parameters for the standard wall push button CONTROLS RISKS INJURY —... -
Page 11: Programming The Radio Transmitter
D: CONTROL AND AUXILIARY EQUIPMENT the LED starts to blink (approximately 5 seconds). Remote Control Radio System When the LED starts to blink IMMEDIATELY As your transmitter is pre-coded at the factory with release both the “+” and “-” buttons. The LED will three of over 19,000 unique codes. -
Page 12: Battery Replacement
D: CONTROL AND AUXILIARY EQUIPMENT TEACHING THE OPERATOR THE TRANSMITTER CODE Press Learn Enable button on the opener back panel Red LED and work light on the operator will turn ON Red LED Light (Note: Your radio system will learn 8 different transmitter Green LED codes. -
Page 13: Safe Finish™ Photosystem Installation
D: CONTROL AND AUXILIARY EQUIPMENT INSTALLATION OF THE SAFE FINISH "trace" wire for interconnect. PHOTOSYSTEM B. Run a wire pair (20 or 22 gage solid wire) from the receiver position (unit with "LED" light in the front, STEP 1: Mark the position of the SAFE may be either side of the door) back to the rear FINISH™... -
Page 14: Pre-Power On Installation Checklist
D: CONTROL AND AUXILIARY EQUIPMENT C. Connect the interconnect wire pair to the garage Tighten all mounting screws and bolts. Final alignment and the system test is covered on Page 18, door opener terminals marked "1" & "4". Although not required, it is suggested that the "trace" be “Operation and Adjustment Instructions”. -
Page 15: Section E: Operation & Adjustments
E: OPERATION AND ADJUSTMENT INSTRUCTIONS IMPORTANT SAFETY INSTRUCTIONS WARNING! TO REDUCE THE RISK OF SEVERE INJURY OR DEATH READ AND FOLLOW ALL INSTRUCTIONS! • OPENER PROPERLY MAY RESULT IN NEVER LET CHILDREN OPERATE OR SERIOUS INJURY OR DEATH. PLAY WITH DOOR CONTROLS. KEEP THE •... -
Page 16: Opening Travel Adjustments
E: OPERATION AND ADJUSTMENT INSTRUCTIONS Adjustment #1: Opening Travel Adjustment #2: Opening and Closing Force Your opener is assembled at the factory with the trolley in the forward position with the open limit stops Hex nuts for adjusting force are located on either side snapped in place on the chain, set for a standard door. -
Page 17: Adjustments
E: OPERATION AND ADJUSTMENT INSTRUCTIONS If the door reverses when it comes into contact with the Adjustment #4: Obstruction Sensing floor, move the close limit stop, located on the left side (Closing Direction) (inside looking out, see figure Adjustment #1), towards the power head unit. -
Page 18: Positive Mechanical Lock Adjust
E: OPERATION AND ADJUSTMENT INSTRUCTIONS the rail stop and move it behind the chain latch Adjustment #5: Positive Mechanical assembly with a gap of 1/2” between “stop” and Lock Adjustment “latch”. Rail “Stop” Stop Limits 1/2” “Latch” The garage door opener is designed with an automatic mechanical locking system. -
Page 19: Wiring Diagram
E: OPERATION AND ADJUSTMENT INSTRUCTIONS BLACK BLACK BLACK FIELD WIRING POWER TERMINAL FUNCTION WHITE WHITE WHITE PHOTOELECTRIC 24 VDC 112074 GREEN GROUND RADIO FIELD WIRING TERMINALS COMMON PUSH BUTTON SAFE FINISH - CLOSE - - OPEN - PHOTOELECTRIC WHITE LIMIT/SENSING SWITCH BLUE LIMIT/SENSING... -
Page 20: Warranty Information
Manufacturer’s Limited Warranty Allstar warrants its 9000M Series Challenger residential vehicular garage door openers as follows: The drive train to be free from defects in materials and workmanship for: Models 9300M/9500M/J9500M: for 10 years from the date of purchase by the original purchaser.
Need help?
Do you have a question about the 9300M and is the answer not in the manual?
Questions and answers
Part number for the radio transmitter
The part number for the radio transmitter for the Challenger 9300M is not provided in the context.
This answer is automatically generated
Challenger 9300 chain is slipping
The Challenger 9300 chain may be slipping because the limit stop is not correctly positioned. Each chain link provides 1/2" of trolley travel adjustment, so if the limit stop is not properly set, the chain may not maintain proper tension or movement. Adjusting the limit stop one link at a time may help resolve the issue.
This answer is automatically generated