Table of Contents
Advertisement
Advertisement
Table of Contents

Summary of Contents for DIGIWEB Fritz!Box 7360
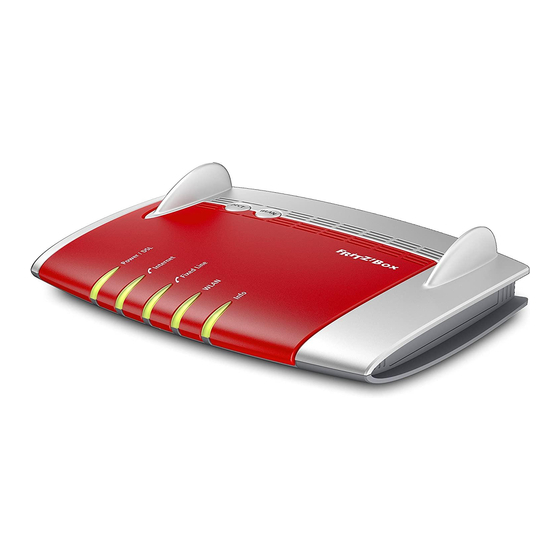
- Page 1 Quick Set Up Guide Fritz!Box 7360...
-
Page 2: Table Of Contents
Contents Step 1: Unpack Contents Page Step 2: Connect the 12V 2A DC Power Supply Unit (PSU) Page Step 3: Connect the DSL Phone Cable Page Step 4: Enable Network Connection Page Step 5: Activate Wireless Connection Page Step 6: Choose your Wireless Network Page Step 7: Network Security Key / WiFi Password Page... -
Page 3: Step 1: Unpack Contents
Fritz!Box 7360 Quick Start Guide Welcome to your Fritz!Box 7360 Quick Start Quide. Digiweb would like to thank you for choosing Fibre Broadband. We really appreciate your custom! Step 1: Unpack Contents You will find the following items included in your new Fibre Broadband Pack. -
Page 4: Step 2: Connect The 12V 2A Dc Power Supply Unit (Psu)
Step 2: Connect the 12V 2A DC Power Supply Unit (PSU) • Connect the PSU (C) to the Fritz!Box (B) as per above diagram. • Connect the PSU (C) to the nearest power socket. -
Page 5: Step 3: Connect The Dsl Phone Cable
Step 3: Connect the DSL Phone Cable • Connect the larger RJ45 connector on the DSL phone cable (D) to the DSL/ TEL port on the back of the Fritz!Box (B) • Connect the smaller RJ11 connector on the DSL phone cable (D) to the installed dedicated Fibre data socket as shown on left below. • Wait up to 5 mins for the Power/DSL light on your Fritz!Box to go steady green. The VoIP “Internet” light will only activate if you have opted for a Digiweb Broadband Talk VoIP package. -
Page 6: Step 4: Enable Network Connection
Step 4: Enable Network Connection • On your Windows computer desktop, click the windows button typically placed in the bottom left hand corner of your desktop. • Choose “Control Panel” • Choose “Network and Internet” • Choose “Network and Sharing” or “Network and Sharing Centre” • Choose “Change adapter settings” • Right click “ Wireless Network Connection” • Select “Enable”. DO NOT select “Disable” if adapter is already enabled. Note: Your computer setup and screen may differ from the above. -
Page 7: Step 5: Activate Wireless Connection
Step 5: Activate Wireless Connection • Ensure that the WLAN LED is ON steady green as per above. • If WLAN LED is off press WLAN button once - (do not hold down) to activate WLAN. • Right click on the “Wireless Network Connection” • Select “Connect / Disconnect”... -
Page 8: Step 6: Choose Your Wireless Network
Step 6: Choose your Wireless Network • On the base of your Fritz!Box modem you will find the network name “FRITZ!Box Fon WLAN 7360”. • Select “FRITZ!Box Fon WLAN 7360” from the list currently appearing on your screen from Step 5. • Select the “Connect automatically” option so that your computer remembers the Wifi network and automatically connects every time you turn on your computer. • Click “Connect”... -
Page 9: Step 7: Network Security Key / Wifi Password
Step 6. You can locate your unique WLAN Network Key on the sticker attached to the base of the Fritz!Box. Please note that the WLAN Network Key shown in the example above is for... -
Page 10: Step 8: Broadband Talk Setup
VoIP telephone service. The VoIP Internet light circled above will be steady green when Digiweb Broadband Talk VoIP is active. If you have opted for Digiweb’s fixed line telephone service, please connect your telephone to the telephone socket as installed by the telecoms engineer during the installation process. Do not connect your telephone to the Fritz!Box. -
Page 11: Step 9: Internet Connection Status
Step 9: Internet Connection Status • Open your Browser (Internet Explorer, Firefox, Chrome, etc) • Type 192.168.178.1 or http://fritz.box into the address bar of your selected browser • Enter 1234 as the Fritz!Box password. • By default you are now looking at the Overview screen. Under “Connections” you should see a green LED beside “Internet” followed by “connected since (date/time)” • If you are using Digiweb Broadband Talk VOIP service, under “Connections”, you should see a green LED beside “Telephony” followed by the “1 telephone number enabled ”... -
Page 12: Manual Configuration Settings
Flashing: Configuring / Configurable e.g. firmware update. DO NOT POWER OFF when this LED is flashing! Info Red: Configuration error – please power off and on the Fritz!Box. Contact Digiweb Technical Support if powering off and on does not fix this. - Page 13 Manual Configuration Settings...
-
Page 14: Factory Reset
• Enter 1234 as the Fritz!Box password. • Pre Factory Reset Checks: o Save your phonebook if you are using the Fritz!Box phone book option. Refer to user manual for full details on how to complete this. o Please note that any user specific configuration changes will be lost so you need to use the “Backup”... -
Page 15: User Manuals / Parental Controls
User Manuals Digiweb Fritz!Box 7360 User Manual To download a full user manual of the Fritz!Box 7360, please refer to the following website URL: www.digiweb.ie/downloads/Digiweb_FritzBox7360Manual.pdf Parental Controls Digiweb Parental Control Set Up Guide To download the Parental Controls Set Up Guide for the Fritz!Box 7360, please refer to the following website URL: www.digiweb.ie/downloads/Digiweb_ParentalControls.pdf Contact Details Broadband and Telephony Technical Support Telephone: 1918 or 1890 940 405 Email: support@digiweb.ie... - Page 16 www.digiweb.ie...
Need help?
Do you have a question about the Fritz!Box 7360 and is the answer not in the manual?
Questions and answers