Table of Contents
Advertisement
Advertisement
Table of Contents

Related Manuals for Snug Seat Hippo

Summary of Contents for Snug Seat Hippo
- Page 1 Hippo™ User Guide...
-
Page 3: Table Of Contents
Adjusting the Harness Height ................33 Securing Your Child ................34 Buckling and Tightening the Harness ..............34 Care and Maintenance ................36 Warranty ....................40 BRITAX , HUGS , Hippo , and Versa-Tether are trademarks owned by Britax Child Safety, Inc., and ® ™ ™ ®... - Page 4 WARNING! Failure to follow all warnings and instructions could result in SERIOUS INJURY or DEATH. FIT REQUIREMENTS • Based on crash statistics, the National Highway Traffic Safety Administration (NHTSA) recommends that parents select the back • All references to child’s weight include weight of cast. seat as the safest location for a properly installed child seat.
-
Page 5: Safety Information
• Store the child seat in a safe place when it is not being used. Avoid The Hippo is distributed by Snug Seat, Inc. For customer service call placing heavy objects on top of it. 1-800-336-7684 or write: Snug Seat, Inc., PO Box 1739 Matthews, NC •... -
Page 6: Child Fit Information
Safety Information Safety Information Child Fit Information Forward-Facing The American Academy of Pediatrics recommends that all infants Use forward-facing only with children: and toddlers should ride in a Rear-Facing Car Seat until they are 2 • who weigh between 20 – 65 lbs (9.1 – 29.4 kg) and years of age or until they reach the highest weight or height allowed •... -
Page 7: Child Seat Features
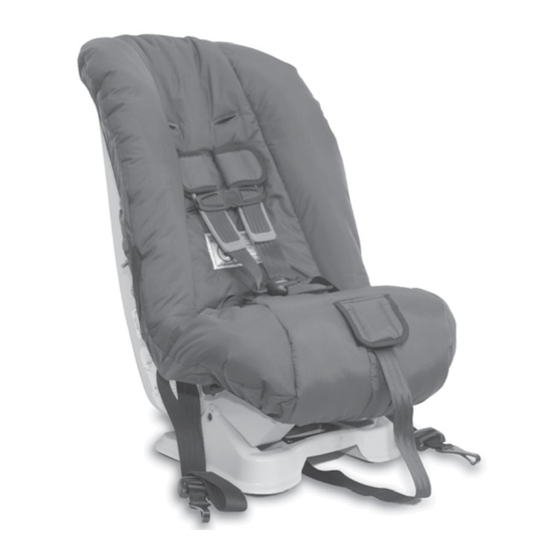
Child Seat Features Child Seat Features Harness Slots Harness Buckle 16 Cover 21 Elastic Harness Holder Comfort Pads Rear-Facing Lock-Off 17 Serial Number and 22 Pouch for LATCH Hook (under Manufactured Date Label cover) Chest Clip 10 Recline Handle (under cover) 23 LATCH Bar HUGS (Harness Ultra Guard 11 LATCH Adjuster... -
Page 8: Child Seat Configurations
Child Seat Configurations Wedge Positioning System Recline Criteria A wedge positioning system has been provided to assist in achieving a snug fit. Consult a medical professional for proper use. See illustration below for profile view of possible configurations. Restraint Position Child Weight Orientation Rear-Facing... -
Page 9: Vehicle Compatibility
SERIOUS INJURY can occur. See your vehicle owner's manual for child IMPORTANT: The Hippo car seat may not be compatible with seat installation instruc- certain inflatable lap-shoulder belts. See FAQS in the support section tions. The back seat is the of the BRITAX website (www.britaxusa.com/support) for additonal... -
Page 10: Installation: Rear-Facing
Installation: Rear-Facing Installation: Rear-Facing LATCH Installation 6 Align each LATCH strap on the LATCH bar with the “LATCH Strap Here Rear-Facing” • Figure A illustrates a rear-facing LATCH label (Fig. E) on each side of the child seat. installation. (Fig. F). •... -
Page 11: Lap-Shoulder Belt Installation
Installation: Rear-Facing Installation: Rear-Facing Lap-Shoulder Belt Installation • To prevent damage, never extend the lock- off arm beyond its normal open position and • Figure A illustrates a rear-facing, lap- always keep the lock-off closed when it is shoulder belt installation. not in use. -
Page 12: Lap-Belt Installation
Installation: Rear-Facing Installation: Rear-Facing Lap-Belt Installation • Pre-crash locking vehicle seat belts will lock in one of two places: the latch plate or the • Figure A illustrates a rear-facing, lap-belt retractor. If your vehicle seat belt system installation. includes a pre-crash locking feature, use •... -
Page 13: Installation: Forward-Facing
Installation: Forward-Facing Installation: Forward-Facing LATCH Installation 5 Attach one LATCH hook to its adjacent vehicle LATCH anchor (Fig. B). • The LATCH hook MUST be attached over WARNING! the LATCH anchor (Fig. C). • Do not use the lower anchors of the child restraint anchorage •... -
Page 14: Lap-Shoulder Belt Installation
Installation: Forward-Facing Installation: Forward-Facing Lap-Shoulder Belt Installation TIP:Turning the back of the child seat toward you can make routing the vehicle belt • Figure A illustrates a forward-facing lap- easier (Fig. C). shoulder belt installation. 5 Verify that the vehicle belt is not twisted and •... -
Page 15: Lap-Belt Installation
Installation: Forward-Facing Installation: Forward-Facing Lap-Belt Installation 4 Verify that the vehicle belt is not twisted, is routed under the LATCH bars, then buckle • Figure A illustrates a forward-facing, lap-belt (Fig. D). installation. 5 Push the child seat firmly into the vehicle •... -
Page 16: Installation: Aircraft
Installation: Aircraft Installation: Versa-Tether This child seat is certified for aircraft use. Most Safety Information airlines in the U.S. and Canada will allow the use of a child seat as long as it is labeled as an approved child seat for airline use and fits properly on the WARNING! aircraft seat. -
Page 17: Using The Versa-Tether
Installation: Versa-Tether Installation: Versa-Tether Using the Versa-Tether Tether Connector Strap 1 Consult your vehicle owner’s manual for NOTE: Britax child seats are shipped with the tether connector strap designated tether anchorage locations. attached to the Versa-Tether hook. When not in use with rear-facing 2 Locate the tether on the rear of the child installations that have designated tether anchors or forward-facing seat and remove the tether from the pouch. -
Page 18: Energy-Absorbing Tether
Installation: Versa-Tether Child Seat Functions Energy-Absorbing Tether Recline Adjustment Pull the recline handle (Fig. D) then slide the child seat shell into the desired position. The energy-absorbing Versa-Tether was designed to enhance Release the recline handle, then verify the child the performance of the child seat tether. -
Page 19: Chest Clip
Child Seat Functions Child Seat Functions Chest Clip Releasing the Harness Buckle Press the release button and slide both buckle Fastening the Chest Clip tongues from the buckle (Fig. E). Fasten the chest clip by pushing the two halves together until a positive click is heard (Fig. A). IMPORTANT: Periodically clean the harness buckle to ensure safe operation. -
Page 20: Securing Your Child
Securing Your Child Securing Your Child Buckling and Tightening the 8 Gently pull up on the harness straps to tighten lap section of the harness which Harness should fit across the child’s upper thighs. 1 Loosen the harness by lifting the harness adjuster release lever located on the front NOTE: The Wedge Positioning System can be of the child seat while pulling both shoulder... -
Page 21: Care And Maintenance
Care and Maintenance Care and Maintenance Cover Removal Refitting the Cover To refit the cover, reverse the directions on page 36. Make sure that the WARNING! Do not take apart the harness. Never remove shoulder straps are not twisted, and are properly threaded through the the buckle tongues from the harness. - Page 22 Care and Maintenance Care and Maintenance Cleaning the Harness Adjuster Cleaning the Harness Buckle Periodically check the adjuster area to be sure it is clean and free of If a child eats and drinks while in the child seat, food, drink or other debris. If debris is present, it must be removed to the harness buckle may need to be periodically prevent interference with the adjuster mechanism.
-
Page 23: Warranty
The warranty and remedies as set forth above are exclusive and in lieu of all others, oral or written, express or implied. In no event will Snug Seat, or the retailer selling this product, be liable to you for any damages, including incidental or consequential damages, arising out of the use or inability to use this product. - Page 25 IMPORTANT: DOUBLE CHECK EVERY TIME YOU USE THIS CAR SEAT. Double Check Car Seat-to-Vehicle Installation: Check that the LATCH or vehicle seat belts connections to the vehicle are tight and locked. Verify the car seat cannot be moved front-to-back or side-to-side more ...
Need help?
Do you have a question about the Hippo and is the answer not in the manual?
Questions and answers