Prodys ProntoNet User Manual
Hide thumbs
Also See for ProntoNet:
- User manual (50 pages) ,
- User manual (91 pages) ,
- Hardware and reference manual (76 pages)

Related Manuals for Prodys ProntoNet


Summary of Contents for Prodys ProntoNet
-
Page 1: User Manual
ProntoNet User Manual Ver 4.1.0 interstage Phistersvej 31, 2900 Hellerup, Danmark Telefon 3946 0000, fax 3946 0040 www.interstage.dk - pro audio with a smile... -
Page 2: Table Of Contents
III.2.1.1. Establishing a call when ProntoNet is configured as an IP codec..22 (NET = IP)................22 III.2.1.2. Establishing a call when ProntoNet is configured as an ISDN codec .24 (NET = ISDN)................24 III.2.1.3. Establishing a call when ProntoNet is configured as an X21 codec ..24 (NET = X21)................24... - Page 3 V.1.1.2. ISDN Terminal adaptor Configuration ........59 V.1.1.3. X21 Ports: ..............60 V.1.1.4. RS232 Ports: ..............61 V.1.1.5. SNMP Traps: ..............61 V.1.1.6. GPIO Port:..............62 V.1.2 Audio Input: ..............64 V.1.3 System Configuration ............65 V.1.3.1. Exporting / Importing the configuration .........69 V.1.4 Streaming:...............69 Prontonet User’s Manual v410...
- Page 4 .................89 V.6 ProntoNet working as a “DUAL CODEC” ........90 V.7 About how the Decoder works and automatic searching.....91 V.8 The ProntoNet operating as IP codec (NET = IP) ......93 V.8.1 UNICAST communications .............93 V.8.2 Using line 2 ..............93 V.8.2.1. Establishing a UNICAST connection from the ProntoNet ....93 V.8.2.2.
- Page 5 GPIO Port ................109 RS232 Port................109 X21 Port................109 VI.3 Power Supply..............109 Main ..................109 Secondary (Optional) ..............109 VI.4 Dimensions and Weight ............110 VI.5 Environment..............110 Disconnection Codes............111 Updating the firmware ............113 Prontonet User’s Manual v410...
-
Page 6: Ce Declaration Of Compliance
CE168X parking are in comliance with Electromagnetic Compatibility Directive (89/336/EEC), and the Low Voltage Directive (72/23/EEC) of the European Union. A “Declaration of conformity” for ProntoNet is available on file at Prodys offices in Spain. To obtain this information, contact with sales@prodys.net. CAUTION ProntoNet uses a Lithium battery. -
Page 7: Introduction
IP. ProntoNet is also a Multi-network audio codec that can be used in different industry standard types of communication networks: Standard ISDN 1-BRI universal terminal adapter (U or S/T). - Page 8 Chapter VI – How does the ProntoNet work?. This chapter is a practical guide to help in understanding just how the ProntoNet unit works under different configurations, especially the more unusual ones. Appendix A – Technical Specifications. Appendix B – Disconnection Codes.
-
Page 9: Installation Guide
II.2 Installation The ProntoNet is designed to be housed in a standard 19” rack. The unit is 44.45mm high (1U, or 1.75 inches). When choosing a suitable place for installation, please bear the following in mind: The position must allow for easy connection of cables to the back of the unit. -
Page 10: Ii.3.1 Power
On the back panel you will find the main power inlet. You will also find the main power switch and the fuse holder. The ProntoNet unit is designed to take AC universal power, from 100 to 240 VAC with frequency between 50Hz and 60Hz. -
Page 11: Ii.3.2.1. Ethernet Port - The Lan Connector
PC. In this case the PC must have a free Ethernet port to connect to and you must use a ‘cross- over’ Ethernet cable. Again, any good IT shop will stock these cables. This time the wiring is as follows: Prontonet User’s Manual v410... -
Page 12: Ii.3.2.2. Isdn Port
The U connector is only available if an NT1 interface is installed. The NT1 interface is optional and is not supplied as standard. When the ProntoNet is connected to a basic rate interface with bus configuration and the unit is the termination point, it must be loaded with 100 Ohm resistors. -
Page 13: Ii.3.2.3. X21 Port
NC (Internally used) To connect a V35 port one must bear in mind the following correlation between signals: X21 ProntoNet V35 Signal Transmit Data TxD- Transmit Data TxD+ Receive Data RxD- Receive Data RxD+ Clock - Clock+ Prontonet User’s Manual v410... -
Page 14: Ii.3.3 Rs 232 Ports
There are two RS232 ports for use as auxiliary data ports. These ports allow the transmission and reception of data along with encoded audio. Port A is always ready. Port B is only available if the ProntoNet is configured as a DUAL Codec, therefore able to operate two totally independent communication channels. Note that these sockets are RJ45 connections, as opposed to the typical 9-pin subD connections. -
Page 15: Ii.3.4 Gpio Port
GPIO Port WARNING GPIO has been modified in ProntoNet with serial number 8938/00250 or higher. Since this production, the GPIO is provided with 7 inputs and 7 outputs. A subD 25 pin socket provides a general purpose connection with 7 inputs and 7 outputs. -
Page 16: Ii.3.4.2. Outputs
40VDC / 40 mA and will require a pull-up resistor to function with other logic inputs. An appropriate value is 2.2 Kohms. ProntoNet with serial numbers before than 8938/00250 are provided with the following GPIO port The GPIO port contains 4 opto-isolated inputs and outputs: Pin 1 is connected to +5VDC via a polyswitch resetable fuse and can be used to provide power to an external circuit. -
Page 17: Ii.3.5 Audio Interfaces
There are 8 microswitches on the back panel which are reserved for special functions. Before turning on the unit the user must check that they are configured according to the following diagram, which is the standard start-up configuration: Prontonet User’s Manual v410... -
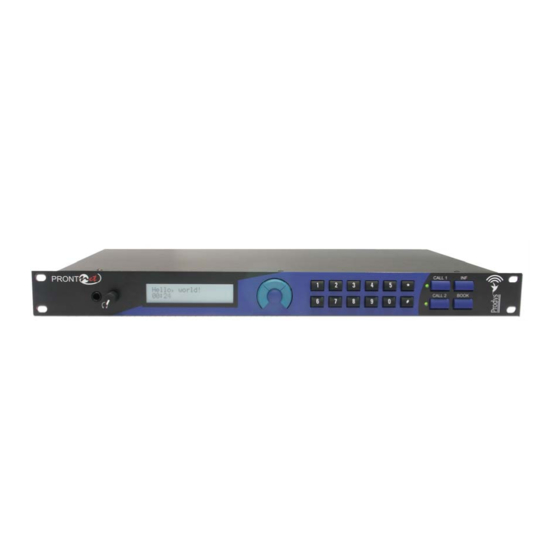
Page 18: The Front Panel
III.1.1 STATUS SCREEN: This is the default screen that you will see when the ProntoNet is ‘at rest’, that is, when you are not navigating or using the front panel keys. It reports the status of the communications and the Decoder. - Page 19 RING: Receiving a call on the line. The display shows an arrow indicating incoming calling and the ISDN number or IP address: L1: 1234567890 L2:DOWN Each Key has an associated LED that indicates the following situations: LED off: Line disconnected Prontonet User’s Manual v410...
- Page 20 L 2 : N O T A V A I L A B L E When the ProntoNet is operating as a DUAL codec, there will be two independent Decoders, one for each line. In all other cases information will only show on the first line of the display as there will be only one Decoder working (even if there are two communication lines connected).
- Page 21 TDWN: The main line is dropped and the display shows the countdown of the timer. L1:CONNECTED SEARCH L2:--- TDWN=20 BKUP ON: The ProntoNet is working in backup mode, that is, transmitting and receiving through the ISDN. L1:CONNECTED FRAMED L2:IDLE (10) BKUP ON TUP: The main line is working well again and the display is showing the countdown of the timer before of leaving the backup mode.
-
Page 22: Iii.2 Control Keys
A long press (over 1 second) will disconnect the associated line. It is posible to program a number of call retries from the ProntoNet web page. III.2.1.1. Establishing a call when ProntoNet is configured as an IP codec... - Page 23 To make the connection press OK. “Period” is selected with the # key. CALL2 key is available from version 3.3.1 in order to establish a second unicast TX communication, sending the same audio as in line 1. Prontonet User’s Manual v410...
-
Page 24: Iii.2.1.2. Establishing A Call When Prontonet Is Configured As An Isdn Codec
Establishing a call when ProntoNet is configured as an X21 codec (NET = X21) When ProntoNet is set up for dedicated lines (NET = X21) it is not necessary to talk about establishing connections in the same way as we have been doing with IP networks and ISDN. -
Page 25: Iii.2.2 The Inf Key
This key allows the user a simple and quick way to display detailed information on the status and configuration of the ProntoNet. Given that the screen is not able to display all the information at once, you can cycle through the different information screens by repeatedly pressing the INF button. -
Page 26: Iii.2.2.3. Screen 3: Decoding Algorithm
Screen 3: Decoding algorithm This window shows the algorithm that is selected and synchronised for Decoder 1 and 2 (number 2 is only relevant when ProntoNet is working as a DUAL codec). Here are some examples: D 1 : M P L 2 - 0 6 4 - M N - 4 8... -
Page 27: Iii.2.2.5. Screen 5: Lan Port Configuration Parameters
A U D I O I N : D I G - E X T III.2.2.7. Screen 7: GPIO This represents the GPIO status: G P I : 0 0 0 0 G P O : 1 0 1 0 Prontonet User’s Manual v410... -
Page 28: Iii.2.2.8. Screen 8: Ip Connections
L 1 : 1 2 3 4 5 6 7 8 9 0 L 2 : 1 2 3 4 5 6 7 8 9 0 Pressing OK again will process this information, that is, the ProntoNet will configure the Encoder according to the BOOK entry and make the connection over ISDN or IP. -
Page 29: The Menu
Using the on-screen menus the user can control all the functions of the ProntoNet. Using the ⇐, ⇑ and ⇒ keys it is possible to move around the system menus and with the OK key select the desired options. Here is some more detail on each of these keys: ⇒... -
Page 30: Iv.3 Net: Selecting A Communications Port
ENC: Encoder algorithm selection menu From this option we can choose the audio Encoder algorithms. Note that the ProntoNet can operate as a DUAL codec when ISDN is selected as the communications interface. In this case, it is possible to have two simultaneous communications that are totally independent and so it is possible to configure the second Encoder. - Page 31 < < S E T E N C O D E R 1 > > A A C 4 L C A A C 4 L D A P T X Next there follows the parameters and restrictions associated with each algorithm. Prontonet User’s Manual v410...
-
Page 32: Iv.4.2 Pcm
A U T P C M { G 7 1 1 } G 7 2 2 G 7 1 1 S E T L A W { A - L A W } μ - L A W IV.4.4 G722: Without parameters to configure. Prontonet User’s Manual v410... -
Page 33: Iv.4.5 Mpeg Layer Ii
If NET = ISDN Bit Rate > 128 Kbps is not possible. If the Bit rate > 128 Kbps a 24 Khz sample rate is not possible. If the Bit Rate > 192 Kbps MONO mode is not possible. Prontonet User’s Manual v410... -
Page 34: Iv.4.6 Mpeg Layer Iii
384 Kbps is not an option with MPEG Layer III. If NET = ISDN Bit Rate > 128 Kbps is not possible. If the Bit rate > 128 Kbps a 24 Khz sample rate is not possible. Prontonet User’s Manual v410... -
Page 35: Iv.4.7 Aac 2,4 Lc
If the Bit Rate > 192 Kbps the combination MONO - Fs= 32 KHz is not possible. If the Bit Rate >256 Kbps the combination MONO is not possible. If the Bit Rate >256 Kbps the combination STEREO – Fs = 24 KHz is not possible. Prontonet User’s Manual v410... -
Page 36: Iv.4.8 Aac Ld
O N { O F F } NOTICE - AAC LD RESTRICTIONS If NET = ISDN Bit Rate > 128 Kbps is not possible. If the Bit Rate >256 Kbps, a 24 KHz sample rate is not possible. Prontonet User’s Manual v410... -
Page 37: Iv.4.9 Aptx
These are the available options: a) 64 Kbps Mono 7.5 KHz. b) 128 Kbps Stereo 7.5 KHz o Mono 15 KHz. c) 192 Kbps Mono 20 KHz. d) 256 Kbps Stereo 15 KHz. e) 384 KHz Stereo 20 KHz. Prontonet User’s Manual v410... -
Page 38: Iv.4.9.2. Enh Aptx
128 kbps 160 Kbps 192 kbps 32 kHz 15 stereo 256 kbps 320 kbps 384 kbps 48 kHz 20 mono 192 kbps 240 Kbps 288 Kbps 48 kHz 20 stereo 384 kbps 480 Kbps 576 kbps Prontonet User’s Manual v410... - Page 39 48 kHz 20 stereo 384 kbps NET = ISDN: Mode apt-X Enhanced 16 bits 20 bits 24 bits 16 kHz 7.5 mono 64 kbps 16 kHz 7.5 stereo 128 Kbps 32 KHz 15 mono 128 Kbps Prontonet User’s Manual v410...
-
Page 40: Iv.5 Configuration Of Encoder 2
AAC4LC: AAC MPEG 4 Low Complexity. AAC4LD: AAC MPEG 4 Low Delay. AptX : Proprietary algorithm based on ADPCM, with very low delay. The display screens shown are the same as for Encoder 1 but with the restrictions outlined previously. Prontonet User’s Manual v410... - Page 41 MPEG LAYER III Fs = 24/16 KHz MODE MODE Stereo Joint Stereo Dual Mono Stereo Joint Stereo Dual Mono MPEG2,4 AACLC = 48/32/24 KHz MODE Stereo Joint Stereo Dual Mono Only 48 For AAC LD we have not restrictions. Prontonet User’s Manual v410...
-
Page 42: Iv.6 Conf: General Configuration Menu
– internal (with the digital audio input) or external (coming from another device connected to the AES/EBU connector). C O N F A E S / E B U S Y N C { A U D I O } E X T Prontonet User’s Manual v410... -
Page 43: Iv.6.1.2. Aes/Ebu Transparent (Available Only In 3.1.0 Version Or Later)
AES3 digital audio interface, for example Dolby E systems. This mode is only available when ProntoNet works as an IP codec (NET = IP). When this option is selected, the Encoder options are disabled. - Page 44 By setting DHCP, the unit will receive its IP parameters when starting. These IP settings might be different from time to time, that is why ProntoNet supports RIP2 protocol. This protocol allows to set an ‘internal’ IP address, in order that the unit can be identified regardless of the IP settings provided by the DHCP server.
-
Page 45: Iv.6.2.2. Isdn
CNUM: An abbreviation for ‘Calling Number’. This option allows you to program up to a maximum of three numbers that will work as incoming call filters. When the CNUM option is activated, the ProntoNet will respond automatically only to Prontonet User’s Manual v410... - Page 46 { N 1 } N 2 N 3 L I N E 1 C A L L I N G N U M 1 SPID: L I N E 1 S P I D N U M B E R Prontonet User’s Manual v410...
- Page 47 < < S E T R S 2 3 2 P O R T A 1 2 0 0 2 4 0 0 4 8 0 0 9 6 0 0 Port B is only available if the unit is working in dual mode, i.e. each line is working independently. Prontonet User’s Manual v410...
-
Page 48: Iv.6.3 Conf-Sys
B A C K U P M E N U { M O D E } E N A B L E T I M E R This option is only available if NET=IP or NET=X.21 Prontonet User’s Manual v410... - Page 49 The ENABLE option activate or not the backup functionality. Also, there is an option to force backup operation, as explained above. B A C K U P E N A B L E { O N } O F F F O R C E D Prontonet User’s Manual v410...
- Page 50 AUXDATA: This option allows to configure if the decoder will be able to receive ancillary data or not. A U X . D A T A M E N U { R S 2 3 2 } G P I O Prontonet User’s Manual v410...
-
Page 51: Iv.6.4 Conf-Book
It is possible to enable independently the RS232 port and the GPIO port. There are DEC1 and DEC 2 in case the ProntoNet works as dual codec. R S 2 3 2 D A T A M E N U... - Page 52 Book. By selecting, the algorithm currently configured the display will show the options available to change it (CHANGE). E 1 : M P L 3 - 1 2 8 - M N - 4 8 { C H A N G E } Prontonet User’s Manual v410...
-
Page 53: Iv.7 Inf
L 1 : M A N - C N : O F F - E I S D N L N : - > L 2 : M A N - C N : O F F - E I S D N L N : < - Prontonet User’s Manual v410... -
Page 54: Remote Control
To access the ProntoNet from the Internet Explorer, enter the IP address of the unit in the address bar. Keep in mind that the ProntoNet factory IP address is 192.168.100.100 and it could be necessary to modify the network configuration of the computer on which the web browser is running. - Page 55 To access the ProntoNet from the Internet Explorer enter the IP address of the unit in the address bar as shown here: User can choose whether to monitor or to control ProntoNet from the Web Page. Bear in mind that only one page at the same time can control the unit. However, It is possible to monitor the unit from several web browsers simultaneously.
- Page 56 ProdysControl and at the same time, web browsers monitoring the same unit, etc… Prior to version 3.6.0, it was not posible to access ProntoNet Web Page from several browsers at the same time, and the following window appeared: Once the password is entered correctly, the web browser will display the “Home...
-
Page 57: General Configuration
The ProntoNet Web page is arranged in three main areas: General Configuration area. Control area. Monitor area. By clicking on any button on the menu bar or any highlighted zone, individual configuration pages are displayed. General Configuration There are the following options: Ports: To configure the ProntoNet Ports. -
Page 58: Ports
The right window shows the window dialog to configure the selected port. For example, if we select the LAN port: V.1.1.1. LAN port: ProntoNet allows to assign the IP parameters both manually and automatically (DHCP). Manually User must enter the following IP parameters manually: 1. -
Page 59: Isdn Terminal Adaptor Configuration
By setting DHCP, the unit will receive its IP parameters when starting. These IP settings might be different from time to time, that is why ProntoNet supports RIP2 protocol. This protocol allows the user to set an ‘internal’ IP address, in order that the unit can be identified regardless of the IP settings provided by the DHCP server. -
Page 60: X21 Ports
The options Line 1 and Line 2 allows to configure in each line (B channel) the Local Number, Calling number filters and the answering mode: V.1.1.3. X21 Ports: From this option the speed of the X21 port is selected. Prontonet User’s Manual v410... -
Page 61: Rs232 Ports
SNMP trap will be sent when an alarm is activated or deactivated, with the time and type of alarm. For this to happen, alarms have to be enabled (see Alarms). ProntoNet can be fully monitored though SNMP protocol. This option is available from version 3.3.1. -
Page 62: Gpio Port
When this input is activated, the ProntoNet will proceed automatically to disconnect the line 2. It makes sense only when the ProntoNet is working in ISDN mode as a DUAL CODEC. Mute Left When this input is activated, the left audio output will be muted. - Page 63 OUTPUTS Transparent Under this configuration, the state of the output will be the same that its homologous input has in the ProntoNet connected in the other end. Line 1 Connected The output will be activated when the line 1 is connected.
-
Page 64: Audio Input
AES3 digital audio interface, for example Dolby E systems. Audio gain adjustment: Audio inputs and outputs can be adjusted, even when lines are connected, and each audio channel independently. This option is available from version 3.3.1. Prontonet User’s Manual v410... -
Page 65: System Configuration
For more information about the backup operation see chapter IV (CONF – SYS – BACKUP) and Chapter VI – How the backup Works? Redial:It is possible to configure a number of redials. The ProntoNet will try the connection in the following cases: 1.- The unit is trying the connection for the first time. - Page 66 TimeDate: This option allows to synchronize time and date by using the SNTP protocol (Simple Network Time Protocol). SNTP operates always in the client-server model and for this reason, ProntoNet can work as SNTP server or SNTP client. Prontonet User’s Manual v410...
- Page 67 RS232: There are two RS232 ports for use as auxiliary data ports. These ports allow the transmission and reception of data along with the encoded audio. Port A is always ready. Port B is only available when ProntoNet is configured as a DUAL Codec, therefore able...
- Page 68 GPO: Under ‘transparent’ configuration, the state of the input will be present in its homologous output in the ProntoNet connected at the other end. Since there is only one GPO connector, user must select whether to select GPO information coming from Decoder1 or from Decoder2, or none.
-
Page 69: Exporting / Importing The Configuration
This option is available from version 3.3.1, but it was moved to a different menu position from version 3.6.0 onwards. IP: This option allows the user to configure some IP header fields to carry out QoS. Prontonet User’s Manual v410... - Page 70 TBP value. When the packet size needs to be fragmented keep in mind that the overhead changes for that reason. When it happens It is indicated as follows: Prontonet User’s Manual v410...
- Page 71 Streaming Packets Quality of Service: This option allows the user to configure the value in the ToS field in the IP header. This field can be used to carry out QoS in the network. Streaming packets Time To Live: Configure the Time To Live parameter. Prontonet User’s Manual v410...
-
Page 72: Test
A decisive factor in real time audio streaming is the ‘jitter’, or delay variation. To deal with the jitter in the connection, ProntoNet provides a tool which allows the user to modify the size of the reception buffer, and so, to compensate the jitter. - Page 73 This option is available from version 3.6.0. How to run the test: 1.- First of all the user must enter the IP address of the remote ProntoNet. This dialog stores the last used IP addresses. 2.- To run the test just press the test button:...
- Page 74 "live" network then it is desirable to limit the test bandwidth to that which will actually be used. An accurate figure of total bandwidth used (audio data + overhead) can be obtained from the "Audio Configuaration" screen. Prontonet User’s Manual v410...
-
Page 75: Real Time Monitoring
If the indication goes to red for an instant, usually doesn't affect the streaming, but of course, if you have a constant red indication you are having problems with the streaming. This option is available from version 4.0.1. Prontonet User’s Manual v410... -
Page 76: Phone Book
It is possible to Export / Import the Book in XML format. It is also possible to create an html report allowing to preview and print. This option is available from version 3.4.1. Prontonet User’s Manual v410... -
Page 77: Call Log
A report of the calls in html can be created allowing preview and print. This option is available from version 3.4.1. Prontonet User’s Manual v410... - Page 78 Prontonet User’s Manual v410...
-
Page 79: Controlling The Prontonet
From the Control area it is possible to select the communications interface (NET option on the display menu), to configure the encoder or encoders, in case the ProntoNet it is working as Dual Codec, and establish a communication according to the NET selected. -
Page 80: Configuring The Encoder
The Audio Mode area shows the Encoder / Decoder current status and also, it allows to configure the encoder. By clicking on the Encoder area the encoder configuration dialog will be showed: The available encoder configuration parameters depending on which algorithm has been selected. Prontonet User’s Manual v410... -
Page 81: Making Calls
The user can enter the number directly or can select an index from the Phone Book. The encoder can be configured from this dialog as well. After the number has been entered, click Dial to call. If NET = IP, the following dialog will be shown: Prontonet User’s Manual v410... - Page 82 These options have been modified in previous versions. Please check the "Prontonet What's new" documentation for exact details for any particular version. The user can enter the IP address or can select an index from the Phone Book.
-
Page 83: Disconnecting The Line
“Connected”: The line is connected. An arrow will indicate if it is an incoming or outgoing call. The duration of the call also is indicated (Available since version 3.6.0). “Disconnected”: The line is detected physically but no connection is being made. Beside the text appear the disconnection codes. Prontonet User’s Manual v410... -
Page 84: Decoder Status
The Decoder status is shown on the right side of the Audio Mode area: The Decoder status: “Searching”: The decoder is not synchronized. “Framed” : The decoder is synchronized. Idle: The line is disconnected. Not available: Decoder not available. Prontonet User’s Manual v410... -
Page 85: Alarms
Fan Failure alarm will be activated if the fun doesn’t work when the temperature is over this threshold. LAN NOT Present: Not physical level detected in the LAN port. LAN Traffic: The LAN traffic is higher than the 90% of the capacity of the network. Prontonet User’s Manual v410... -
Page 86: Monitoring Alarms
V.3.3 Alarms History The alarms are saved on the non volatile memory of the ProntoNet. It means, that it is possible to know what happened on the past even if the unit was disconnected of the network. The alarms history can be showed by clicking over the lamp or over “History”... - Page 87 An historical report of alarms in html allowing preview and print has been added. This option is available from version 3.4.1. Prontonet User’s Manual v410...
-
Page 88: How Does The Prontonet Work
This can be a cause of confusion for the user, who may be expecting a certain behaviour or action from the unit but observes another. This chapter is therefore a practical guide to help in understanding just how the ProntoNet unit works under different configurations, especially the more unusual ones. -
Page 89: Configuration Parameters That Are Dependant On The Network Type Selected
The number of available channels: With ISDN communications it is possible to have two totally independent connections with a binary rate of 64 Kbps on each connection. When ISDN is selected as the network, the ProntoNet can work as DUAL CODEC. -
Page 90: Prontonet Working As A "Dual Codec
(Line 1 or Line 2 as seen by the ProntoNet) it is possible to send an audio signal encoded with any of the available codec algorithms. The menu offers the option to configure Encoder 1 and Encoder 2 separately. -
Page 91: About How The Decoder Works And Automatic Searching
The ProntoNet Decoder system doesn’t need to be configured as it is totally automatic. However, it is necessary to point out some aspects of how it works as it depends on the format of incoming data. The ProntoNet is able to synchronise automatically to the following algorithms under the following conditions:... - Page 92 3. If we want the Encoder to switch to the algorithm detected by the Decoder, the Encoder should simply be set to AUTO mode. AUTO does not work with aptX when NET is X21 or ISDN. Prontonet User’s Manual v410...
-
Page 93: The Prontonet Operating As Ip Codec (Net = Ip)
The ProntoNet operating as IP codec (NET = IP) The operation of the ProntoNet as an IP codec offers two operational modes: UNICAST and MULTICAST. V.8.1 UNICAST communications The term UNICAST is used in the networking world to refer to the connection to a single destination. -
Page 94: Establishing A Multicast Communication From The Prontonet
(automatic audio synchronisation in all modes) b. Prodys Real Time Protocol (P-RTP): This is a protocol based on UDP used for the transmission of audio. To guarantee a constant delay time the units must synchronise clocks. -
Page 95: Prontonet Operating As An Isdn Codec
ProntoNet operating as an ISDN codec The ProntoNet as ISDN codec is very similar to the Pronto 3, therefore those users that are familiar with the Pronto 3 will find it easy to operate the ProntoNet over ISDN. The most important points that a user must have in mind for this mode are as follows: 1. - Page 96 3. Communications in Dual mode, Joint Stereo or Stereo at 64 Kbps: When we configure Encoder 1 to Dual mode, Joint Stereo or Stereo at 64 Kbps, Encoder 2 is disabled since there are no free audio inputs or outputs to assign to it. Prontonet User’s Manual v410...
- Page 97 4. Communications at 128 Kbps – Inverse Multiplex: Certain algorithms permit the compression of the signal at bit-rates other than 64Kbps, for example at 128Kbps. With the ProntoNet it is possible to send or receive audio compressed at 128 Kbps using both the B channels of the basic rate ISDN connection.
- Page 98 Prontonet User’s Manual v410...
-
Page 99: Establishing Isdn Calls
The CALL 1 key is for calling on Line 1 and the CALL 2 key is for calling on Line 2. On pressing the CALL 1 key the display prompts you to enter a number. Once the number is entered and the ENTER key is pressed, the ProntoNet will go ahead and make the call. -
Page 100: Receiving Calls Via Isdn
V.9.3 Restrictions in ISDN communications: As we have already stated, the ProntoNet can work as a DUAL CODEC over ISDN, meaning it can operate with two independent lines. However, this is only possible when two MONO communications are used. The use of Dual, Joint Stereo or Stereo modes creates certain restrictions on the system that are in place to avoid conflicting situations. -
Page 101: Prontonet Operating As An X21 Codec
DUAL CODEC only allows two MONO communications. The display shows an error code to indicate the situation. b. ProntoNet receives a call in the line 2 and detects that the audio is encoded in DUAL, JOINT STEREO or STEREO mode at 64 Kbps. -
Page 102: How The Backup Mode Works
V.12 How the backup mode works ProntoNet when is configured as IP codec or X21 codec (NET = IP o NET = X21) can use the ISDN connection as backup line, that is, the ISDN will be an alternative communication line when the IP or X21 line is dropped. -
Page 103: Prontonet Master Operation
(64 o 128 Kbps) when the unit starts working in backup mode. The ProntoNet will try the connection as many times as it will be necessary until the connection will be established or until it decides that the main line has been recovered. -
Page 104: Prontonet Slave Operation
V.12.1.2. ProntoNet SLAVE operation If the ProntoNet works as SLAVE, the entry or exit to the backup mode will be guided by different criterions than the defined ones in the MASTER mode. First of all, it is necessary that the Backup option be enabled. - Page 105 ProntoNet SLAVE Backup Configuration 1.- Disable the backup operation: SYS - BACKUP – ENABLE - OFF 2.- Set the ProntoNet as MASTER: SYS – MODE – SLAVE 3.- Enable the Backp operation: BACKUP – ENABLE – ON It is possible to select between the left channel L or L+R as audio source of the encoder 1, and R or L+R as audio source for encoder 2, when mono mode is selected for the backup (ISDN) connection.
-
Page 106: Technical Specifications
AES/EBU format: EIAJ CP-340 tipo I/IEC-958 Pro Rate Converter: 1:3 to 3:1. Audio properties THD+N<0.0035% S/N > 94 dB typical. Crosstalk > 94 dB. Phase Difference < 0.3º. Quantification: 24 bits. With a tone of +22 dBu, Fs=48 Khz, 24 bits Prontonet User’s Manual v410... -
Page 107: Vi.2 Compression
15,8 15,8 15,4 15,4 15,4 11,3 11,3 11,3 15,8 15,8 15,8 15,4 15,4 15,4 11,3 11,3 11,3 15,8 15,8 15,8 15,4 15,4 15,4 11,3 11,3 15,8 15,8 15,8 15,4 15,4 11,3 11,3 15,8 15,8 15,4 15,4 Prontonet User’s Manual v410... - Page 108 11,3 11,3 11,3 12,6 15,7 15,7 15,1 15,1 15,1 11,3 11,3 11,3 12,6 15,7 15,7 15,1 15,1 15,1 aptX Fs=48KHz Fs = 32 KHz Fs=16 KHz Rate ST/Dual ST/Dual ST/Dual G722 Fs=16KHz Rate G711 Fs=8KHz Rate Prontonet User’s Manual v410...
-
Page 109: Communications Ports
Bit rates: 64, 128, 192, 256, 384 Kbps. VI.3 Power Supply Main Universal power Supply Operating Voltage: 94-250 V Operating Line frequency: 47-65 Hz. Out Power : 25W Secondary (Optional) Nominal input: 24 VDC. Input range: 18..36 VDC. Power: 25 W. Prontonet User’s Manual v410... -
Page 110: Vi.4 Dimensions And Weight
VI.4 Dimensions and Weight 1 U Rack Mount. Height: 43.4 mm. Width: 19” RACK (482.5 mm). Depth: 202.25 mm. Weight: 3 Kg. VI.5 Environment Temperature:0– 50ºC. Humidity: 10 to 90% non-condensing. Prontonet User’s Manual v410... -
Page 111: Disconnection Codes
Service or option not available, unspecified Invalid number format Invalid call reference value Facility rejected Identified channel does not exist A suspended call exists, but this identity Response to STATUS ENQUIRY does not Normal unspecified Call identity in use Prontonet User’s Manual v410... - Page 112 IP Diagnostic Codes Cause Code Meaning Start Status. No answer from the remote unit. Call rejected. The remote unit can be already busy. Normal Disconnect from the remote unit. Normal Disconnect from the local unit. Prontonet User’s Manual v410...
-
Page 113: Updating The Firmware
If the defined IP address is not detected correctly, you will see the following message: If the defined unit is correctly detected, you will see information on the device, the current version and the button that allows you to choose an update file to be enabled. Prontonet User’s Manual v410... - Page 114 The selection dialog box will only show files with the extension .hff, representing the permitted update files. 4. Select the update file. This will enable the update button, which will start the update process. Prontonet User’s Manual v410...
- Page 115 If everything has gone correctly, at the end of the recording, you will be shown the following message: Prontonet User’s Manual v410 interstage Phistersvej 31, 2900 Hellerup, Danmark Telefon 3946 0000, fax 3946 0040 www.interstage.dk...
- Page 116 ProntoNet What’s New ProntoNet Family– What’s new...
- Page 117 Date 06-07-07 Version V5.2.1 ProntoNet ProntoNet IP Decoder PortaNet Nereus Indpendent Tx & Rx control Call control and monitoring has been divided into Tx and Rx. From this version onwards, it is possible to establish a Tx Multicast call and, at the same time, to receive a RX Unicast call.
- Page 118 In addition, it is possible to make or hang up several connections at the same time by using the ‘Group Call’ and ‘Disconnect All’ buttons respectively. ProntoNet ProntoNet IP Decoder PortaNet Nereus Dithering control for the AES/EBU chip.
- Page 119 ProntoNet What’s New ProntoNet ProntoNet IP Decoder PortaNet Nereus New GPIO options GPI: Answer L1 and Answer L2. GPO: Line Disconnected: GPO set to ‘0’. Line Connected: GPO set to ‘1’. Trying/receiving a call: GPO blinking (1 second period). ProntoNet...
- Page 120 ProntoNet What’s New ProntoNet ProntoNet IP Decoder PortaNet Nereus New feature to synchronize digital audio output to an external sync. signal when the audio input is set to analog.
- Page 121 ProntoNet What’s New ProntoNet ProntoNet IP Decoder PortaNet Nereus Reset from menu screen It is possible to reset the unit from the front panel. This is very helpful for those installations where it is difficult to access to the rear panel.
- Page 122 ProntoNet What’s New ProntoNet ProntoNet IP Decoder PortaNet Nereus Scheduler A problem when modifying existing entries in the scheduler table has been fixed. ProntoNet ProntoNet IP Decoder PortaNet Nereus Connection recovery From this version onwards, if the unit is switched off when the line was ‘down’ but came from a ‘connected’...
- Page 123 ProntoNet What’s New All the information is displayed in different graphs, synchronized with each other, so that the user can move through all the data very easily. Data from each connection is stored independently so that it is possible to access data from connections other than the current one.
- Page 124 ProntoNet What’s New ProntoNet ProntoNet IP Decoder PortaNet Nereus New streaming protocols compatible with CCS NetStar and AudioStar ProntoNetLC support ProntoNet ProntoNet IP Decoder PortaNet Nereus A problem with ‘infinite’ redial and Rx unicast calls has been fixed. The unit kept trying the connection forever under these circumstances.
- Page 125 ProntoNet What’s New ProntoNet ProntoNet IP Decoder PortaNet Nereus Compression mode selection on the Scheduler The available compression modes for IP and ISDN calls within the scheduler were not filtered according to the selected network. ProntoNet ProntoNet IP Decoder PortaNet...
- Page 126 What’s New Date 13-04-07 Version V5.0.0 ProntoNet ProntoNet IP Decoder PortaNet Nereus Added support to the new PortaNet MK2 hardware revision The most important features are the following: New Line input for Internacional Sound. Microphone input level controlled remotely from the web page.
- Page 127 - this was expected. Prodys is working closely with the NACIP group to better define this aspect of the standard...
- Page 128 ProntoNet What’s New...
- Page 129 ProntoNet What’s New Date 12-1-07 Version v4.8.1 ProntoNet ProntoNet IP Decoder PortaNet Nereus User configurable TCP/UDP ports It is possible to configure which ports the unit will use for its TCP/UDP communications. ProntoNet ProntoNet IP Decoder PortaNet Nereus DNS support By specifying the IP address of a DNS Server, the user can make calls to ‘names’...
- Page 130 Micro interruption detection The decoder will detect very short audio interruptions regardless of the alarm pooling period. This alarm will be notified as “Decoder Framed lost”. ProntoNet ProntoNet IP Decoder PortaNet Nereus New BackUp criteria The new BackUp configuration window is as follows: There are two different zones called for the master side “Go to Backup”...
- Page 131 ProntoNet What’s New ProntoNet ProntoNet IP Decoder PortaNet Nereus The ICMP protocol has been removed The ICMP protocol was removed for checking line integrity due to the problems reported by some clients regarding security issues on their network configurations ProntoNet...
- Page 132 ProntoNet What’s New ProntoNet ProntoNet IP Decoder PortaNet Nereus LAN led on red to indicate link failure The LAN led will light on red when a link failure is detected, instead of switching it off. ProntoNet ProntoNet IP Decoder PortaNet Nereus When enabling/disabling any alarm, the “No Audio Level Detected”...
- Page 133 ProntoNet What’s New Now, it is done every minute. ProntoNet ProntoNet IP Decoder PortaNet Nereus Time zone configuration The time zone configuration did not work properly for the following zones: Australia/Adelaide • Australia/Brisbane • Australia/Broken_Hill • Australia/Darwin • Australia/Lindeman •...
- Page 134 There is a new option inside the streaming configuration menu where it is possible to select between Prodys (proprietary protocol) or SIP. This SIP implementation is NOT definitive and is for testing purpose only . It includes the following IP protocols: SIP (Session Initiation Protocol) according to RFC3261 for signalling, session and call control.
- Page 135 • Decoder Framed lost alarm modified. • New “Decoder Not Framed” Alarm. • See ProntoNet Family about v4.7.1 document for more information. ProntoNet ProntoNet IP Decoder PortaNet New option in Test tool to export test results. Once the test is finished, it is possible to export the results to an XML file.
- Page 136 Voltages: They allow the user to get some information about the voltages of the system: Main Voltage: Range: 11.50v - 12.50v Backup Voltage: PortaNet range with battery: 11.00v - 12.00v PortaNet range without battery: < 5v ProntoNet : 12, 24 or 48 DCV. Voltage_5v: Range: 4.70v - 5.30 Voltage_3.3v: Range: 3.10v - 3.50v ProntoNet...
- Page 137 ProntoNet What’s New the date and the time of the system. ProntoNet ProntoNet IP Decoder Portante GPIOS processing optimization The GPIO processing has been optimized so that this information is only sent when changing or every second, whichever comes first.
- Page 138 ProntoNet What’s New ProntoNet ProntoNet IP Decoder Portanet Next scheduled call indication A message is displayed on the web page informing about the next scheduled call: ProntoNet ProntoNet IP Decoder PortaNet Enabling/disabling G711 ISDN incoming calls A new check box has been added allowing the user to enable/disable voice calls (G711) over ISDN...
- Page 139 ProntoNet What’s New ProntoNet ProntoNet IP Decoder PortaNet Enabling/Disabling hidden-number ISDN calls A new check box has been added to allow the user to enable/reject this kind of calls via ISDN.
- Page 140 ProntoNet What’s New Date 14/07/2006 ProntoNet ProntoNet IP Decoder PortaNet Versiones v4.5.2 v2.2.2 v2.2.4 ProntoNet ProntoNet IP Decoder PortaNet The factory default configuration can be restored from the web page. A new option has been added to the user interface. This option allows the user to restore the factory default configuration, except those parameters related to the LAN configuration: IP address, netmask and gateway.
- Page 141 New command for the Status Protocol A new command has been defined in the Status Protocol: SendEventProntoNetLineStatusChanged. This command carries the following information: • Callee/called number. • Disconnection code. • IP call type. Further information can be obtained in “ProntoNet SDK User’s Manual v2.1.2”.
- Page 142 Remote control changes – ProntoNet will send status information automatically Another TCP port (50035) must be enabled. ProntoNet will send status information automatically when any of its status parameters change. IP communications in line 2 There are two different operation modes when NET=IP: SIMPLE and DOUBLE mode.
- Page 143 10/04/2006 Added the possibility to choose the format for the ancillary data Now it is possible to choose between: Prontonet format and Pronto2/3 format (in which the GPIOs information cannot be sent) A new button has been added in order to delete the contents of the selected record of the book The selected files can be deleted by pressing "Delete..."...
- Page 144 ProntoNet What’s New A confirmation dialog will be shown before deleting any record. Also added the possibility to select external protocol to enable: RS232 or IP...
- Page 145 Now, it is possible to select 32 KHz and 24 KHz in bonding audio modes. New product released: ProntoNet SDK This SDK allows controlling ProntoNet through RS232 or IP. For more information, please contact with sales@prodys.net. Added histogram functionality to the IP Test Now it is possible to see a histogram of each of the tests made allowing to know how each test behaves during the whole process.
- Page 146 Mayah uses this special J52 mode when working in AAC 64 LC. o At 128 kbps: J52 supported in MPEG layer II and AAC MPEG2,4 LC. For a detailed information about the compatibility between ProntoNet and Mayah Centauri 3001 see the document “ProntoNet Mayah ISDN Compatibility”.
- Page 147 ProntoNet What’s New 4.1.0 Version Date 26/10/2005 The possibility to make Test Streaming according to the Encoder configuration is added. A new option in Advance Configuration is available: “Enable Hangup Confirmation”. If the value is “1”, the application will ask confirmation before of...
- Page 148 ProntoNet What’s New New choices for L+R have been added: There are three choices: L+R, L+R – 3dB and L+R – 6 dB. Resizable calling dialog...
- Page 149 The GPIO operation port has been improved by reducing the reading/writing cycle to 100 ms. The sequence of starting in the front panel has changed When the unit starts the display shows PRODYS and a progress bar : P R O D Y S # # # #...
- Page 150 ProntoNet What’s New W A I T I N G # # # #...
- Page 151 ProntoNet What’s New Version 4.0.1 Date 23/09/2005 The Unicast unidirectional has been divided in two options: Unicast Unidireccional Tx or Unicast Unidireccional Rx. So, it is possible to select the direction of the communication independently if the unit makes the call or not.
- Page 152 ProntoNet What’s New There is a new option in the Backup configuration to force that the unit goes to the backup line. Once the force backup has been activated, the unit will go to backup after the timer down is over.
- Page 153 L or L+R as audio source of the encoder 1, and R or L+R as audio source of the encoder 2. This option is only available from the ProntoNet web page. Encoding L+R as a mono signal instead of L and R separately as stereo allows to transmit the audio signal with more bandwidth when the ISDN link is only 1 B channel, that is 64 Kbps.
- Page 154 It is possible to open the ProntoNets web pages with different versions. In previous version it was not possible to control ProntoNet units with different versions by using the web browser. The reason was that only one OCX file can be loaded in the PC. Beginning from this version it is possible to have more than one OCX file in the same PC.
- Page 155 ProntoNet What’s New 2. Clear button. 3. Limit the bandwith test. 4. Lost and disordered packets. DHCP option available from the frontal panel menu: L A N P O R T C O N F < I P > D H C P...
- Page 156 ProntoNet What’s New Monitor of the streaming operation: The outputs of the GPIO are deactivated during the power up of the unit. This version solves a problem with the AES/EBU interface. The problem was that occasionally the AES/EBU interface entered an invalid state and...
- Page 157 27/06/2005 Added duration indication of the present call: Added new Streaming tool to test the IP connection between two ProntoNet units. This tool allows to check in real-time the bandwidth, delay and jitter of the IP connection between two ProntoNets. This information can be used to adjust the streaming parameters and so, to obtain the best quality in the real-time audio transmission.
- Page 158 This new feature provides more flexibility when setting a multicast connection because from now on it will be possible to select them dynamically before calling. New monitoring facility from the website: A new control system in the ProntoNet has been implemented to allow the following: 1.- The unit can be controlled or only monitored from the website:...
- Page 159 ProntoNet What’s New 3.- If a unit is already being controlled by a web page and we try to get the control from another website, a message will appear. This message will indicate that the unit is already being controlled from another PC and the IP address of this computer.
- Page 160 ProntoNet What’s New Version 3.4.1 Date 27/04/2005 Prontonet integration in the ProdysControl. It needs ProdysControl v4.0.0 or higher.
- Page 161 ProntoNet What’s New Export / Import Agend in XML format. It is also possible to create an html report allowing to preview and print. Bonding apt-X (MUCAS) support added. A history report has been included to record the input and output calls according to the following information: telephone/IP, audio modes, date and start/end time, length of each call, etc…...
- Page 162 ProntoNet What’s New Historical report of alarms in html allowing preview and print. Text support has been added in the PhoneBook.
- Page 163 ProntoNet What’s New The text can only be entered from the web control but can also be viewed in the display. If a phone number/IP is stored in the PhoneBook with a name, the name is showed instead of the phone number/IP when making or receiving a call.
- Page 164 ProntoNet What’s New Version 3.3.1 Date 30/03/2005 Streaming TX configuration: It is possible to modify the transmission time between packets. This parameter is directly related with the packet size and therefore with the occupied bandwidth (overhead) and delay. When the packet size needs to be fragmented keep in mind that the overhead changes for that reason.
- Page 165 ProntoNet What’s New through the line 1. It is possible to select UNICAST bidirectional or unidireccional. Audio Gain control: The older versions modified the levels in G711, G722 y MPEG Layer II when ISDN had been selected (NET = ISDN) in order to have levels compatibility with Pronto 2 and Pronto 3.
- Page 166 ProntoNet What’s New The alarm traps can be retrieved by using get SNMP operations. SNMP: The Backup status can be retrieved by using get SNMP operations. GPO: When a GPO is programmed to be activated when an alarm has occurred, it is possible to choose which alarms will activate the output.
- Page 167 ProntoNet What’s New SNTP protocol implemented (Simple Network Time Protocol) SNTP operates always in the client-server model and for this reason, ProntoNet can work as SNTP server or SNTP client. ProntoNet working as SNTP server: It is required to set time and date.
- Page 168 ProntoNet What’s New The redial option can be modified with the lines are connected. Lock Keys : There is a new option to lock automatically the frontal panel keypad. Automatic means that the keypad is locked a short while (around 1 minute) after you just press a key.
- Page 169 WARNING! THIS VERSION OR LATER, THE APTX MODES ARE NOT COMPATIBLE WITH OLDER VERSIONS OF PRONTONETS It has been detected that ProntoNet with older version is not compatible with Aptx codecs of other manufacturers. All aptX modes has been modified to solve this problem.
- Page 170 ProntoNet What’s New Decoder ancillary data configuration is possible. RS232 and GPIO are configured separately, that is, it is possible to enable the ancillary data reception through RS232 or GPIO port. The display shows information about selected speed in each RS232 port.
- Page 171 ProntoNet What’s New About 3.2.1 Version Time and Date Configuration This window allows to set ProntoNet’s Time and Date. This information is required because of the alarm system. About 3.2.0 Version Alarms The alarm window allows to select the alarms that the unit will check. The unit will notify the...
- Page 172 ProntoNet What’s New Selecting Alarms The unit allows many different alarms. The selection menu is opened by clicking over the Alarm area. Voltage Out of Range 12 v Main: The voltage from the main power supply (AC/DC) is out of range.
- Page 173 By clicking over it, the information will be showed: Alarms History The alarms are saved on the non volatile memory of the ProntoNet. It means, that it is possible to know what happened on the past even if the unit was disconnected of the network. The alarms history can be showed by clicking over the lamp or over “History”...
- Page 174 ProntoNet What’s New Selecting Alarms The unit allows many different alarms. The selection menu is opened by clicking over the Alarm area. Voltage Out of Range 12 v Main: The voltage from the main power supply (AC/DC) is out of range.
- Page 175 By clicking over it, the information will be showed: Alarms History The alarms are saved on the non volatile memory of the ProntoNet. It means, that it is possible to know what happened on the past even if the unit was disconnected of the network. The alarms history can be showed by clicking over the lamp or over “History”...
- Page 176 ProntoNet What’s New Alarmas SNMP Traps From this option it is posible to select the IP address where the SNMP traps will be sent.
-
Page 177: Gpio Port
1. Connect Line 2 When this input is activated, the ProntoNet will proceed automatically to connect the line 2. It makes sense only when the ProntoNet is working in ISDN mode as a DUAL CODEC. Disconnect Line 2 When this input is activated, the ProntoNet will proceed automatically to disconnect the line 2. - Page 178 Decoder 2 NOT framed The output will be activated when the Decoder 2 is NOT Framed. It makes sense only when the ProntoNet is working in ISDN mode as a DUAL CODEC. Backup Active The output will be activated when the ISDN Backup is working.
- Page 179 An appropriate value is 2.2 Kohms. GPIO Port provided in ProntoNet with serial number previous to 8938/00250 ProntoNet with serial numbers before than 8938/00250 are provided with the following GPIO port...
- Page 180 ProntoNet What’s New The GPIO port contains 4 opto-isolated inputs and outputs: Pin 1 is connected to +5VDC via a polyswitch resetable fuse and can be used to provide power to an external circuit. The maximum current must not exceed 300 mA.
- Page 181 ProntoNet Family What’s new ProntoNet Family – What’s new in release 5.9.1 interstage Phistersvej 31, 2900 Hellerup, Danmark Telefon 3946 0000, fax 3946 0040 www.interstage.dk - pro audio with a smile...
- Page 182 Device BackUp Device BackUp An N+1 Prodys Redundancy Protocol allows one backup IP codec to provide resiliency for up to N active IP codecs. This protocol runs over IP, so that it is not necessary to place all IP devices/modules on the same location/chassis.
- Page 183 New in release 5.9.1 FEC port FEC port is user configurable This firmware version lets the user change the UDP port used for FEC.
- Page 184 New in release 5.9.1 Device Name Device Name A device name can be assigned to the unit from the LAN configuration window on the web page: This name appears on the title of the web page and on the tab of the windows task bar:...
- Page 185 New in release 5.9.1 Real time Network Analyzer data compression and rearrangement Real time Network Analyzer data compression and rearrangement Data from the Real time Analyzer is compressed and rearranged so that the newest connections are got first, for the user to be able to access data from those connections while data from older connections is still being downloaded.
Need help?
Do you have a question about the ProntoNet and is the answer not in the manual?
Questions and answers