Table of Contents
Advertisement
Available languages
Available languages
MINI-STATE
®
Model HDMS9100
with RF Remote and
Programmable, Direction Memory
IMPORTANT—
Your Antennacraft HDView360
perfect for receiving off-air reception. You can store chan-
nel positions with the radio frequency remote control, then
later recall one of the channel memories. Your antenna will
automatically go to the direction you programmed for your
best reception.
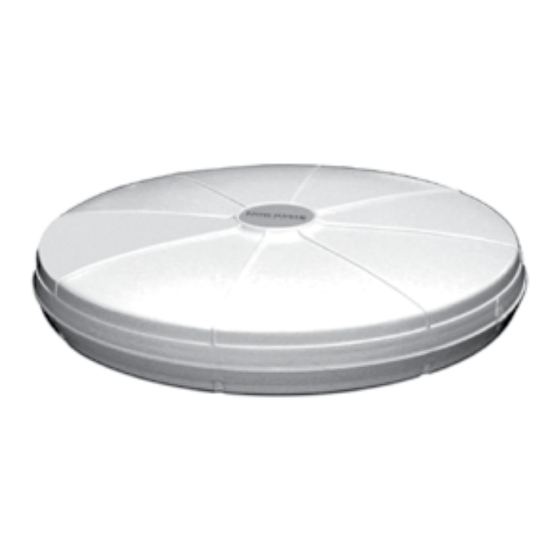
The directional, rotating antenna provides excellent reception
of HDTV/VHF/UHF TV channels in most viewing locations.
The UV protective housing is made of impact-resistant filled
co-polymer, making the exterior resistant to weathering. It
features both AC and DC operation and is excellent for use
on recreational vehicles, boats, or in the home.
Before Installation Note: to CATV SYSTEM INSTALLER—Article 820-40 of the NEC specified that the cable ground shall be connected to the grounding system of
the building "as close to the point of cable entry as practical".
Note: Do not plug your Mini-State power supply into an AC outlet or DC power source until all electrical and antenna connections have been made. Doing so may short
out the power supply/transformer and void your warranty.
WARNING:
To reduce the risk of fire or electric shock, do not expose this
appliance to rain or moisture.
RISK OF ELECTRIC SHOCK DO NOT OPEN
CAUTION: TO REDUCE THE RISK OF ELECTRIC SHOCK,
DO NOT REMOVE COVER (OR BACK).
NO USER-SERVICING. REFER ALL SERVICING TO
QUALIFIED SERVICE PERSONNEL.
®
Antenna System
This model is not compatible with Mini-State 5MS series motor drives.
Mini-State
antenna is
®
®
CAUTION
WARNING: INSTALLATION OF
THIS PRODUCT NEAR POWERLINES
IS DANGEROUS. FOR YOUR SAFETY,
FOLLOW THE INSTALLATION
► RV
► BOAT
► HOME
The VHF section is a circular shaped, slot tuned, broadband,
unidirectional traveling wave antenna. The UHF section is a
broadband, multi-element array. Both UHF and VHF signals
are amplified with a built-in split-band amplifier that provides
up to 20 dB gain.
The HDView360
Mini-State
®
for long life and requires no routine maintenance. Should
the unit ever quit working, refer to the troubleshooting tips to
help determine possible causes. Do not attempt to service
this product yourself, as opening or removing covers may
expose you to dangerous voltage or other hazards. Refer
all servicing to qualified service personnel.
CAUTION:
Use of controls or adjustments or performance of procedures other
than those specified may result in hazardous radiation exposure.
The lightning flash with arrowhead symbol, within an equilateral
triangle is intended to alert the user to the presence of uninsulated
"dangerous voltage" within the product's enclosure that may be of sig-
nificant magnitude to constitute a risk of electric shock to persons.
The exclamation point within an equilateral triangle is intended to alert
the user to the presence of important operating and maintenance (ser-
vicing) instructions in the literature accompanying the appliance.
DIRECTIONS.
Model HDMS9100RV includes two
RV/Boat mounting brackets.
Optional UAM9000
Offset J-Mount
Covered under one or more of the following U.S. Patents:
227,785; 3,721,990; 3,761,333; 3,909,691
© 2008 ANTENNACRAFT
Antenna System is designed
®
Advertisement
Table of Contents

Related Manuals for HDView360 Mini-State HDMS9100

Summary of Contents for HDView360 Mini-State HDMS9100
- Page 1 Covered under one or more of the following U.S. Patents: 227,785; 3,721,990; 3,761,333; 3,909,691 © 2008 ANTENNACRAFT IMPORTANT— This model is not compatible with Mini-State 5MS series motor drives. Your Antennacraft HDView360 Mini-State antenna is The VHF section is a circular shaped, slot tuned, broadband, ®...
-
Page 2: Important Safety Instructions
Important Safety Instructions READ INSTRUCTIONS—All the safety and operating instruc- 15. LIGHTNING—For added protection for this product during tions should be read before the appliance is operated. lightning storm or when it is left unattended and unused for long periods of time, unplug it from the wall outlet and disconnect RETAIN INSTRUCTIONS—The safety and operating instruc- the antenna or cable system. -
Page 3: Example Of Antenna Grounding
to be bonded with a No. 6 AWG (13.3 mm ) or larger conductor to the building or structure grounding electrode system in accordance with NEC 800.40(D), 810.21(J), 820.40(D) and 830.40(D). EXAMPLE OF ANTENNA GROUNDING ACCORDING TO NATIONAL ELECTRICAL CODE INSTRUCTIONS CONTAINED IN ARTICLE 810-”RADIO AND TELEVISION EQUIPMENT”... -
Page 4: Mounting The Antenna
2. Make cable connections to the Mini-State Antenna as Mounting the Antenna described in the Mini-State Antenna Installation Manual. 3. Mount both of the mounting brackets to the Mini-State Note: Mount the antenna before you make any receiver Antenna using the four #10-32 screws and lock washers connections or plug it into its power source. -
Page 5: Receiver Cable Connections
HDMS9100 Receiver Cable Connections Installing the Battery Your remote control is powered The coaxial cable provides feedback from your antenna. If it has not been connected, your receiver may be per- with a button-cell battery (in- Remote Control manently damaged! cluded). -
Page 6: Changing Transmitter/Receiver Id Code
4. Press ‘1’, ‘2’, ‘3’ to select code 1, 2 or 3 respectively within 7. Use the left or right arrows on the remote to select the 2½ seconds after the receiver LCD is emptied. optimized antenna direction. Finally, press “STORE” again to save the setting. -
Page 7: Available Parts
MINI-STATE HDView360 HDMS9100 ANTENNA LIMITED WARRANTY ® ® We warrant that if anything goes wrong with your ANTENNACRAFT® HDView360 Mini-State Antenna within 90 days of purchase, and it is a ® ® manufacturing defect, we will repair the unit or replace it at no cost. This warranty excludes all costs arising from installation, removal, reinstallation or setup, transportation to and from the dealer, and damage due to lightning, misuse or neglect. -
Page 8: Directives De Sécurité Importantes
Français Directives de Sécurité Importantes LIRE LES DIRECTIVES – Lisez les directives de sécurité et d’utilisation avant 15. CHARIOTS ET SUPPORTS – Si vous placez l’appareil sur un chariot ou un d’utiliser l’appareil. support, assurez-vous qu’il s’agisse d’un chariot ou support recommandé par le fabricant. -
Page 9: Installation Du Câble
être d’une intensité suffisante pour IMPORTANT—Ce modèle n’est pas compatible avec la série présenter un risque de choc électrique. Mini-State 5MS contrôlé par moteur. Votre système d’antenne HDView360 Mini-State est parfaite AFIN DE RÉDUIRE LE RISQUE DE CHOC ÉLECTRIQUE, NE ®... -
Page 10: Emplacement D'installation
1. Attacher le connecteur coaxial du câble de l’antenne au terminal Emplacement d’Installation coaxial enfilé sur l’unité d’alimentation, centrant le conducteur intérieur dans le trou avant de resserrer la noix. Note: Installez l’antenne avant tout branchement effectué 2. Glisser le câble à 3 fils de rotateur par le serre-joint de serre-câble. sur le récepteur ou branchement à... -
Page 11: Installation De La Pile
7. Utilisez la flèche droite ou gauche sur la télécommande Installation de la Pile pour sélectionner la direction optimale de l’antenne. Fi- nalement, appuyez sur ‘’STORE’’ encore pour conserver Votre télécommande est alimentée votre ajustement. Télécommande par une pile à bouton (incluse). 8. -
Page 12: Dépannage
Dépannage Les informations suivantes sont des solutions en cas ou le système d’antenne ne fonctionne pas. Le récepteur peut afficher des messages lors d’une opération interrompue. OBSERVATION PROBLÉME POSSIBLE ACTION Branché la corde d’alimentation, Le récepteur n’est pas branché. Le récepteur est en mode réinitialise le pouvoir du récepteur et Rien n’apparaît sur l’écran ACL d’identification et il n’y a pas de commandes appropriées...
Need help?
Do you have a question about the Mini-State HDMS9100 and is the answer not in the manual?
Questions and answers
Is this hd369 still available for RVs?
Yes, the HDView360 Mini-State HDMS9100 is available for RVs. The manual states that the model includes two RV/Boat mounting brackets, indicating compatibility with RV installations.
This answer is automatically generated
WHERE I CAN BUY CRAFT hd 360TV ANTENNA