
Related Manuals for DigiTech GE4056


Summary of Contents for DigiTech GE4056
- Page 1 TURNTABLE PLAYER GE4056 READ INSTRUCTIONS CAREFULLY BEFORE USE AND STORE IN A SAFE PLACE FOR FUTURE REFERENCE...
- Page 2 DESCRIPTION...
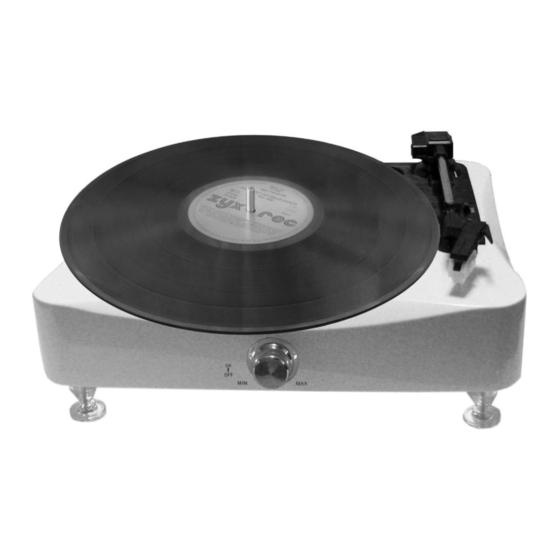
- Page 3 1. Turntable 2. Adapter Use this adapter when playing 45rpm records. 3. Tone arm 4. Cartridge 5. Speed selection Three speed for choice: 33.3, 45, 78 rpm. 6. Auto stop control 7. Tone arm park 8. USB jack 9. RCA output Connect this with the plugs to mixer or amplifier, red for R/H channel, white for L/H for channel.
- Page 4 INITIAL STARTING-UP MAINS CONNECTION Ensure that the mains voltage of your home corresponds to the operating voltage of the unit. Your unit is ready to be connected to a mains voltage of 230V/50Hz AMPLIFIER CONNECTION Connect audio plugs to Alert input on your mixer or amplifier: Red plug into R/H channel input.
- Page 5 MAINTENANCE REPLACING THE STYLUS -Refer to the figures 1-8 INSTALLING A NEW STYLUS CARTRIDGE -Refer to the figures 5 & 6 NOTES We advise you to clean your records with an anti-static cloth to gain maximum enjoyment from them and to make them last. We would also point out that for the same reason your stylus should be replaced periodically (approximately every 250 hours) Dust the stylus from time to time using a very soft brush dipped in alcohol...
-
Page 6: Audacity Quick Guide
Audacity Quick Guide For the complete manual please check the following website. http://audacity.sourceforge.net/help/documentation Before recording and editing music please install the supplied software first. To Install Software (PC) & Record 1. Insert the CD that came with your USB turntable. 2. - Page 7 If you are still having difficulty finding the USB Turntable, try to check your system settings or control panel to adjust audio input settings from the sound control panel. After you have completed the above settings, you are ready for recording. To record 1.
- Page 8 Toolbars Selection tool - for selecting the range of audio you want to edit or listen to. Envelope tool - for changing the volume over time. Draw tool - for modifying individual samples. Zoom tool - for zooming in and out. Timeshift tool - for sliding tracks left or right.
- Page 9 Edit Toolbar All of the button on this toolbar perform actions – and with a couple of exceptions, they’re all just shortcuts of existing menu items to save you time. Holding the mouse over a tool will show a “tooltip” in case you forget which one is which.
- Page 10 Track Pop-Down Menu Mono – makes this track a mono track, meaning it is played out of just one speaker, or played out of the left and The Track Pop-Down Menu appears when right speakers equally. Left Channel – makes this track come out of only the left speaker.
- Page 11 Set Rate – sets the number of and a folder called Composition_data. samples per second of the track, Audacity project files are not meant to 44100Hz is used by audio CDs. be shared with other programs – use Tracks can have different sample rates one of the Export commands (below) in Audacity;...
- Page 12 Export Selection As MP3… - same Print – Print out the main window view as above, but only exports the current from audacity showing the tracks and selection. waveforms. Export as Ogg Vorbis… - exports all Exit (Quit) – closes all windows and of the audio as an Ogg Vorbis file.
- Page 13 Delete – Removes the audio data that and right edge of the selection appear is currently selected without copying it on a positive-slope zero crossing. This to the clipboard. makes it easier to cut and paste audio without resulting in and audible clicking sound.
- Page 14 Snap-To…> Snap Off – Turns History… - Bring up the history Snap-To mode off letting you select window. It shows all the actions you arbitrary ranges of time. have performed during the current session, including importing. The right-hand column shows the amount Preferences…...
- Page 15 Float Mixer Toolbar – moves the options in the dialog to try some other Mixer Toolbar out of the window and possible encodings. into its own floating window as above. At the beginning of your imported track(s), you may notice a little bit of noise.
- Page 16 that track was at a non-default rate Align and move cursor… - same as then you may need to use Set Rate the functions above, except that the from the Track Pop-Down menu to set cursor or selection is moved along the correct sample rate.
- Page 17 Silence – inserts silence Amplify – changes the volume of the selected audio. If you click the “ Allow Tone… - you can create a Sine wave, clipping” checkbox, it will let you Square wave, or Sawtooth wave. amplify so much that the audio ends up beyond the range of the waveform, and is clipped (distorted).
- Page 18 Compressor – compresses the Noise Removal – This effect lets you dynamic range of the selection so that clean up noise from a recording. the loud parts are soft parts the same. First, select a small piece of audio that You can optionally normalise the is silent except for the noise, select recording afterwards, resulting in the...
- Page 19 The nearest peak frequency. This Repeat – repeats the selection a window can also display other certain number of times. This common functions that are calculated operation is quite fast and using the Fast Fourier Transform, space-efficient, so it is practical to use including three versions of the it to create nearly-infinite loops.
- Page 20 Distributed by: Electus Distribution Pty Ltd 320 Victoria Road Rydalmere NSW 2116 Australia Phone: 1300 738 555 Facsimile: 1300 738 500 www.electusdistribution.com.au Made in China...
Need help?
Do you have a question about the GE4056 and is the answer not in the manual?
Questions and answers