Table of Contents
Advertisement
30" AND 36" UNDER CABINET-MOUNT
Universal Installation Instructions and Use & Care Guide
Model:
1801(A)
1802
GV-SR01
IMPORTANT: READ AND SAVE THESE INSTRUCTIONS.
FOR RESIDENTIAL USE ONLY.
Revised September 2014
Disclaimer: Item purchased may be slightly different from the manual.
RANGE HOOD
For questions about features, operation/performance parts, accessories or service, call:
1-626-453-0550
1
Advertisement
Table of Contents

Related Manuals for Golden Vantage 1801(A)

Summary of Contents for Golden Vantage 1801(A)
-
Page 1: Range Hood
30" AND 36" UNDER CABINET-MOUNT RANGE HOOD Universal Installation Instructions and Use & Care Guide For questions about features, operation/performance parts, accessories or service, call: 1-626-453-0550 Model: 1801(A) 1802 GV-SR01 IMPORTANT: READ AND SAVE THESE INSTRUCTIONS. FOR RESIDENTIAL USE ONLY. Revised September 2014 Disclaimer: Item purchased may be slightly different from the manual. -
Page 2: Table Of Contents
TABLE OF CONTENTS RANGE HOOD SAFETY ..............3 INSTALLATION REQUIREMENTS ...........4 Tools and Parts Requirements ...........4 Location Requirements .............4 Installation Dimensions ............5 Ventilation Requirements ............6 Electrical Requirements ............7 INSTALLATION INSTRUCTIONS ..........8 Prepare ..................8 Install Range Hood ..............9 Complete Installation ..............11 RANGE HOOD USE .................12 Range Hood Controls ..............12 TROUBLE SHOOTING ..............13 RANGE HOOD CARE ..............14... -
Page 3: Range Hood Safety
RANGE HOOD SAFETY Your safety and the safety of others are very important. We have provided many important safety messages in this manual and on your appliance. Always read and obey all safety messages. This is the safety alert symbol. This symbol alerts you to potential hazards that can kill or hurt you and others. -
Page 4: Installation Requirements
INSTALLATION REQUIREMENT TOOLS AND PARTS REQUIREMENTS Electrical drill or ratchet driver 1/2” drill bit for drilling pilot holes 1 ¼” drill bit for drilling electrical wiring access hole. Screwdrivers: Philips & Straight blade M5 x 60 QTY:6 Washer QTY:4 Pliers Tape measure or ruler and pencil Electrical supplies for wiring Aluminum foils tape and/or duct tape... -
Page 5: Installation Dimensions
INSTALLATION DIMENSIONS A. Countertop height B. Hood height from ceiling to bottom of the range hood filter surface: D-A-C=B C. 27” min. from cooking surface, suggested 30” max. D. Ceiling height... -
Page 6: Ventilation Requirements
VENTILATION REQUIREMENTS Venting Method ■ Range hoods must be ventilated to the This canopy hood is factory set for through outdoors, except for non-vented (recirculating) installations. the roof or wall. ■ Do not ventilate the range hood into an A 6" (15.2 cm) round vent system is needed attic or other enclosed areas. -
Page 7: Electrical Requirements
Calculating Vent System ELECTRICAL Length REQIUREMENTS Observe all governing codes and ordinances. To calculate the length of the system you need, Ensure that the electrical installation is adequate add the equivalent feet (meters) for all vent and in conformance with the National Electrical pieces used in the system. -
Page 8: Installation Instructions
Preparation Advanced Preparations: Be Familiar with the controls of the range hood by reading through Range Hood Controls on Page, 12 Place the range hood on a flat, stable surface. Connect the range hood to a standard outlet and test out all of controls. -
Page 9: Install Range Hood
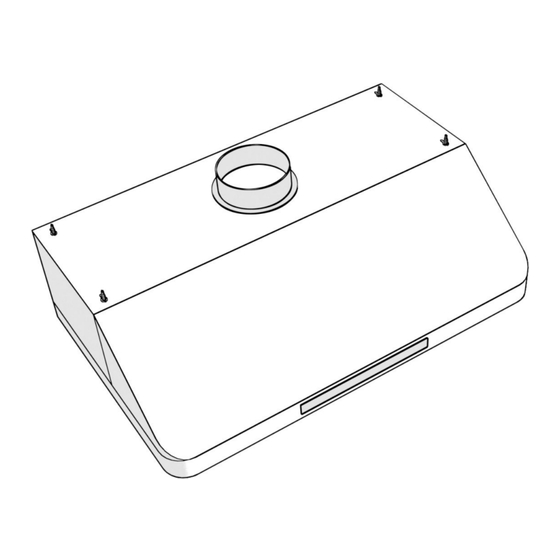
Installation Installations: Measure the distance between the stove top and the bottom of the range hood. A distance of 27” to 30” is recommended. 1. There are two ways (A or B) to mount this range hood. 1801A and 1802, Type B does not work. A. - Page 10 Connect the hooks, gaskets and screws to the unit by screwdriver. Figure 3 Screw the anchor screws to suitable location, then hook on, lock screws.
-
Page 11: Complete Installation
Installation Continued 4. Connect the range hood to a designated standard outlet or cut off the plug and connect three wires (black, white and green) to house wires and cap with wire connectors. Connect according to colors ( I.e. black to black, white to white, and green to green. (If applicable) 5. -
Page 12: Range Hood Use
Control Operation Control Panel Layout and Buttons configurations: A) Lamp: Press the lamp display one time to activate the light, press the lamp display again to deactivate it. B) Timer: When the range hood is on “Standby” Mode, press the timer button for 3 seconds. The range hood will then enter the time setting state;... -
Page 13: Troubleshooting
Troubleshooting 1. If the range hood or halogen light does not operate after installation: Check if the range hood has been plugged in, make sure that all power has been turned back ON, fused not blown and all electrical wiring are properly connected. ... -
Page 14: Range Hood Care
Use and care Information Operation: Read and understand all instructions and warnings in this manual before operating the appliance. Save these instructions for future reference. Always leave safety grills and filters in place. Without these components. Operating blowers could catch on to hair, fingers and loose clothing. ... -
Page 15: Maintenance
Maintenance Safety warning: Never put your hand into area housing the fan while the fan is operating! For optimal operation, clean range hood and all baffle/spacer/filter/grease tunnel/oil container regularly. Regular care will help preserve the appearance of the range hood. Cleaning Exterior surfaces: ... -
Page 16: Warrenty & Services
SHOPRANGEHOODS.COM MAJOR APPLIANCE WARRANTY LIMITED WARRANTY For three year from the date of purchase, when this major appliance is operated and maintained according to instructions attached to or furnished with the product, Www.shoprangehoods.com will pay for Factory Specified Parts. This limited warranty is valid only in the United States or Canada and applies only when the major appliance is used in the country in which it was purchased.
Need help?
Do you have a question about the 1801(A) and is the answer not in the manual?
Questions and answers