Levante TANGO 12 Owner's Manual

Levante TANGO 12 Owner's Manual

Portable air conditioner

Advertisement

PDF 文件使用 "pdfFactory Pro" 试用版本创建
Inside you will find many helpful hints on how to use and maintain your air conditioner properly. Just
a little preventative care on your part can save you a great deal of time and money over the life of
your air conditioner. Before operating this product, please read the instructions carefully and save this
manual for future use.
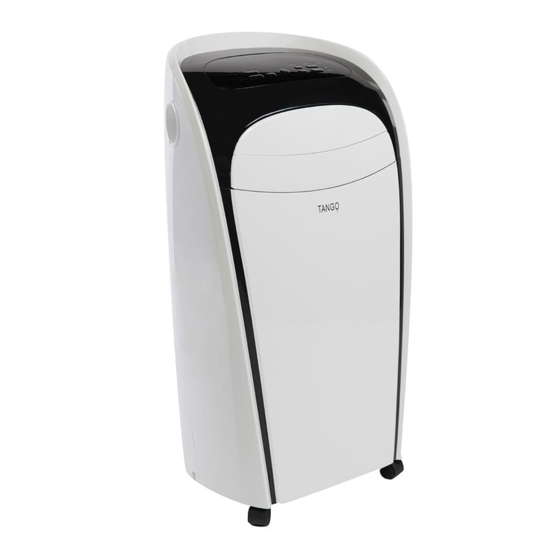
TANGO 12
TANGO 14
TANGO 16
www.fineprint.cn

Advertisement

Table of Contents
loading
Need help?

Need help?

Do you have a question about the TANGO 12 and is the answer not in the manual?

Questions and answers

Subscribe to Our Youtube Channel

Summary of Contents for Levante TANGO 12

  • Page 1 TANGO 12 TANGO 14 TANGO 16 Inside you will find many helpful hints on how to use and maintain your air conditioner properly. Just a little preventative care on your part can save you a great deal of time and money over the life of your air conditioner.
  • Page 2 Read This Manual Inside you will find many helpful hints on how to use and maintain your air conditioner properly. Just a little preventive care on your part can save you a great deal of time and money over the life of your air conditioner. You'll find many answers to common problems in the chart of troubleshooting tips.
  • Page 3: Table Of Contents

    CONTENTS SOCIABLE REMARK Sociable remark..........................2 SAFETY PRECAUTIONS Safety rules ............................3 Operating condition ...........................3 Electrical information .........................4 IDENTIFICATION OF PARTS Accessories ............................4 Names of parts...........................5 AIR CONDITIONER FEATURES Electronic control operating instructions ...................6 OPERATING INSTRUCTIONS Operating instructions ........................7 INSTALLATION INSTRUCTIONS Location ............................9 Window kit installation ........................9 Exhaust hose installation ........................12 Water drainage ..........................13...
  • Page 4: Sociable Remark

    SOCIABLE REMARK When using this air conditioner in the European countries, the following informa- tion must be followed: DISPOSAL: Do not dispose this product as unsorted municipal waste. Collection of such waste separately for special treatment is necessary. It is prohibited to dispose of this appliance in domestic household waste. For disposal, there are several possibilities: A) The municipality has established collection systems, where electronic waste can be disposed of at least free of charge to the user.
  • Page 5: Safety Precautions

    SAFETY PRECAUTIONS Safety r ules To prevent injury to the user or other people and property damage, the following instructions must be followed. Incorrect operation due to ignoring of instructions may cause harm or damage. Always do this Never do this Do not operate your air conditioner in a wet room such as a bathroom or laundry room.
  • Page 6: Electrical Information

    IDENTIFICATION OF PARTS For your s afety WARNING Do not store or use gasoline or other flammable vapors and liquids in the vicinity of this or any other appliance. Avoid fire hazard or electric shock. Do not use an extension cord or an adaptor plug. Do not remove any prong from the power cord.
  • Page 7: Names Of Parts

    IDENTIFICATION OF PARTS NAMES OF PARTS Front Operation Panel Horizontal Louver Blade (swing automatically) Carrying Handle (both sides) Remote signal receptor Panel Fig.1 Rear Upper Air Filter (Behind the grille) Air Outlet Wheel Air intake Drain Outlet Air intake Lower Air Filter (Behind the grille) Bottom tray drain outlet Fig.2...
  • Page 8: Air Conditioner Features

    AIR CONDITIONER FEATURES ELECTRONIC CONTROL O PERATING INSTRUCTIONS Before you begin, thoroughly familiarize yourself with the control panel and remote controller and all its functions, then follow the symbol for the functions you desire. The unit can be controlled by the unit control panel alone or with the remote controller . NOTE: This man ual does not include Remote Controller Operations, see the <<Remote Controller Instruction>>...
  • Page 9: Operating Instructions

    OPERATING INSTRUCTIONS Error codes and protection code: without), or fan only operation depen- E1- Room temperature sensor error- ding on what temperature you have Unplug the unit and plug it back in. selected and the room temperature. If error repeats, call for service. The air conditioner will control room Evaporator temperature sensor error- temperature automatically round the...
  • Page 10: Other Features

    OPERATING INSTRUCTIONS panel will ill umina te to indica te it re ceive d the signal.It wil l conti nue to send this s ignal until the fe ature is deactivat e d by pressing the Follow Me b utton again . If the unit d oes not receiv e the Follow Me s ignal during any 7 minut es inte rval, the un it will beep to indi cate the Fo llow Me mo de has ende d.
  • Page 11: Installation Instructions

    INSTALLATION INSTRUCTIONS (optional ) INSTALLATION INSTRUCTIONS L ocatio n The air conditioner should be placed on a firm foundation to minimize noise and virbration. For safe and secure positioning, place the unit on a smooth, level floor strong enough to support the unit. The unit has casters to aid placement, but it should only be rolled on smooth, flat surfaces.
  • Page 12 INSTALLATION INSTRUCTIONS (optional) Installation in a double-hung sash Foam seal A window (adhesive type) 1. Cut the foam seal(adhesive type) to the proper length and attach it to the window stool. Fig.8 F ig.8 2. Attach the window slider kit to the window stool. Adjust the length of the window slider kit according Window kit to the width of window, shorten the adjustable window...
  • Page 13 INSTALLATION INSTRUCTIONS (optional) Installation in a sliding sash window Foam seal A (adhesive type) 1. Cut the foam seal(adhesive type) to the proper length and attach it to the window frame,Fig.12. Fig.1 2 2. Attach the window slider kit to the window stool. Adjust the length of the window slider kit according Window to the width of window, shorten the adjustable window...
  • Page 14: Exhaust Hose Installation

    INSTALLATION INSTRUCTIONS Exhaust hose installation: The exhaust hose and adaptor must be installed or removed in accordance with the usage mode. Fig.16 Fig.17 COOL,HEAT(heat pump type) or AUTO mode Install FAN,DEHUMIDIIFY or HEAT(electrical heat type) mode Remove 1. Install the window Exhaust adaptor B onto the exhaust hose as shown in Fig.16 or Fig.17 Refer to the previous pages for window kit installation.
  • Page 15: Water Drainage

    INSTALLATION INSTRUCTIONS Water drainage: During dehumidifying modes, remove the drain Remove the plug from the back of the unit, install the drain drain plug connector(5/8 universal female mender) with 3 4 hose(locally purchased). For the models without drain connector, just attach the drain hose to the hole.
  • Page 16: Care And Maintenance

    CARE AND MAINTENANCE CARE AND MAINTENANCE IMPORTANT: Upper filter 1) Be sure to unplug the unit before cleaning or servicing. (take out) 2) Do not use gasoline, thinner or other chemicals to clean the unit. 3) Do not wash the unit directly under a tap or using a hose. It may cause electrical danger.
  • Page 17: Troubleshooting Tips

    TROUBLESHOOTING TIPS TROUBLE SHOOTING TROUBLES POSSIBLE CAUSES SUGGEST REMEDIES 1. Unit does not - P1 appears in the display window Dra in the water in the bottom tray. Start when Pressing on/off - Room temperature is lower than Reset the temperature. Button the set temperature.(Cooling mode) - The windows or doors in the room...
  • Page 18 The design and specifications are subject to chan ge witho ut prior notice for product improvement. Consult with the sales agency or manufactu rer for details. CP001IU-G(J)(G) 202000192543 PDF 文件使用 "pdfFactory Pro" 试用版本创建 www.fineprint.cn...

This manual is also suitable for:

Tango 14Tango 16

Table of Contents

Save PDF