Table of Contents
Advertisement
Advertisement
Table of Contents

Summary of Contents for SODAX X1
-
Page 2: Introduction
7. The use of accessory attachments not recommended by the appliance manufacturer may and tasty cold, warm, or hot water and of carbonated soda water (for X1) . result in fire, electric shock or injury to persons. -
Page 3: Table Of Contents
Overview ..........There are no parts inside the machine serviceable by the user. Installing your SODAX X1 – X10 Water – Soda Dispenser ............... Preparing the SODAX X1 – X10 for operation Repair should be done by authorized service personnel only. -
Page 4: Safety Instructions
• Do not make any modifications to the machine or its power cord. Only have repairs carried out by a service centre authorized by Sodax to avoid a hazard. • This machine is not intended for use by persons (including children) with reduced... -
Page 5: Safety Precautions
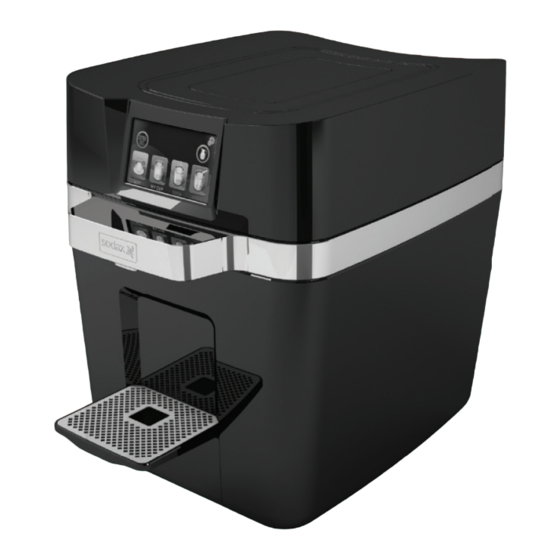
Water icon icon Place the SODAX X1-X10 dispenser on a firm, smooth, horizontal surface such as the kitchen counter – away from heat generating sources (Grills, Ovens etc.) DO NOT shake the dispenser when moving it around. DO NOT expose the dispenser to temperatures lower than 0C. The water in the dispenser system may freeze. - Page 6 (only for X1); as the water source. 3. Install the bottle-adaptor assembly by rotating it a quarter turn clockwise (only for X1). (When selecting the standalone mode, the dispenser may be connected to an external water supply source.) 4.
-
Page 7: Preparing The Sodax X1-X10 For Operation
Touch the Metric Units or the Imperial units If the SODAX X1-X10 is to be fed by the icon to select the desired system. household water system, touch the faucet Touch the NEXT screen button to confirm icon. - Page 8 Preparing the SODAX X1-X10 for the CAUTION sanitation procedure Place a container (at least 3 liter capacity) Make sure the shutoff valve connecting under the dispenser's spout. Touch the NEXT screen button. the dispenser to the water supply system is CLOSED.
-
Page 9: Water Dispensing Display
Touch and hold your finger on the "Cold" or "Soda (only X1)" icons to dispense water as long as your finger remains on the icon. Lift your finger to stop the dispensing. -
Page 10: The Settings Screen
Select this dispensing option, to open a new display enabling you to identify the pre-set drinking glass volume and temperatures. There are four options for the MY CUP feature. See MY CUP Tech Support Setting the Sodax X1-X10 features settings on page 25. - Page 11 Child Safety Setting the Times Touching this icon will enable you To set the time indicated on the In the SETTINGS display touch the icon. dispenser's display. The Child Protection display will appear. To set the Energy Saving feature. ...
- Page 12 Setting the Energy Saving Mode Setting the Sleep / Wake up Mode To access the Energy Savings mode display The SLEEP MODE is designed to saves electricity consumption during night time when dispenser is not in use. touch the icon in the SETTINGS = Clock Options screen.
- Page 13 The automatic water dispensing may be set in accordance with the glass volume and the desired temperature. You may also set the carbonation level ("strength") of the soda water (only for X1). You may set the exact water volume that will be dispensed into a glass by briefly touching the appropriate glass icon.
- Page 14 Setting the Hot Water Temperature Touch the baby bottle icon to access the Touch the temperature setting icon water volume and temperature setting menu. access the temperature setting menu. In the Temperature Settings display, touch Touch the temperature setting icon to access the right arrow to raise the temperature or the the temperature setting menu.
- Page 15 MY CUP display. Setting the Cold Water Volume Setting the Carbonation Level (only X1) Touch the cold water icon in the You may select one of the tree available water carbonation levels ("Soda strength"): SETTINGS = Cold display.
- Page 16 Touch the CONFIRM screen button to confirm Changing the Display Language and save this volume setting for next time or This feature is used to select/change the displays and menus language. repeat the steps for saving another volume. To access the language select/change menu, touch the icon in the settings display.
- Page 17 Changing the Dispenser's Water Supply Source If the dispenser's built in water reservoir was selected as the water supply source (the During the dispenser's initial installation, a water supply source was selected. If you wish to Standalone mode) please ensure the water change the present water supply source please contact the Service Department faucet is closed.
-
Page 18: Replacement Of Consumables
6 months. When the year is over, a warning will display indicating that the service life of the lamp has ended and that the purification level of the water delivered by the SODAX X1-X10 is below the specified level. - Page 19 Remove the used filter. renew the rinsing. Unwrap the new filter and insert it into the filter housing so that the SODAX icon embossed on The container may fill up a number of times. the filter will face upward and forward.
-
Page 20: Replacing The Co
Replacing The CO Bottle (X1) The Technical Settings Screen An empty CO bottle Indication is displayed To access the technical settings screen touch by a yellow circle on the Soda Water glass the Technical Screen icon .on the icon. The yellow circle will disappear only SETTINGS display. - Page 21 Periodic Rinsing and Sanitation The Serviceman's screen Once every few months (depending on the water scale content in your area) or if the dispenser In the Technical Settings Screen, the serviceman was not used during the preceding 72 hours, we recommend to rinse and sanitize the internal will touch the technician's icon tanks and piping of the dispenser.
-
Page 22: In Case Of A Problem
WARNING The manufacturer will not be liable for any damage or fault caused to the Sodax X1-X10 The shutoff faucet is closed Open the faucet dispenser as a result of any of the following incorrect use of the dispenser – not in... -
Page 23: Technical Specifications Sodax X1-X10 Dispenser
Weight 18 Kg. (*) Connect the Sodax X1-X10 dispenser to the electrical system only via a residual current circuit breaker (not higher than 30 milliamps) (**) Standard glass volume 200 ml. (***)Chlorine reduction and filtration level have been specified using a genuine Sodax filter cartridge consumables and thus represent a standard level.
Need help?
Do you have a question about the X1 and is the answer not in the manual?
Questions and answers