JVC KS-FX12 Service Manual
Cassette receiver
Hide thumbs
Also See for KS-FX12:
- Service manual (48 pages) ,
- Instructions manual (21 pages) ,
- Installation and connection manual (4 pages)
Table of Contents
Advertisement
Quick Links
SERVICE MANUAL
Area Suffix
[KS-F150]
J ...... Northern America
Contents
Safety precaution ------------------------------------- 1-2
Instructions --------------------------------------------- 1-3 - 12
Disassembly method --------------------------------- 2-1
Adjustment method ----------------------------------- 2-8
Description of major ICs ----------------------------- 2-12
CASSETTE RECEIVER
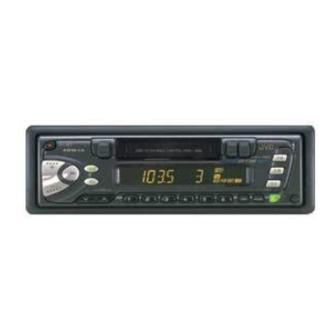
KS-FX12
KS-FX12WT
KS-F150
[KS-FX12WT]
J ...... Northern America
COPYRIGHT
1999 VICTOR COMPANY OF JAPAN, LTD.
Area Suffix
Block diagram ----------------------------------------- 2-18
Standard schematic diagrams --------------------- 2-19
Printed circuit boards -------------------------------- 2-22 - 24
Parts list ------------------------------------------------ 3-1 - 13
KS-FX12
SYSTEM CPU
LC72362N
HEAD AMP
UPC1228HA
PLAYBACK HEAD
1-0036-7016S
Area Suffix
[KS-FX12]
J ...... Northern America
E ... Continental Europe
No.49522
Nov. 1999
KS-F150
Advertisement
Table of Contents

Related Manuals for JVC KS-FX12


Summary of Contents for JVC KS-FX12
- Page 1 KS-F150 KS-FX12 SERVICE MANUAL CASSETTE RECEIVER KS-FX12 KS-FX12WT KS-F150 SYSTEM CPU LC72362N HEAD AMP UPC1228HA PLAYBACK HEAD 1-0036-7016S Area Suffix Area Suffix Area Suffix [KS-F150] [KS-FX12WT] [KS-FX12] J ..Northern America J ..Northern America J ..Northern America E ... Continental Europe...
-
Page 2: Safety Precaution
KS-F150 KS-FX12 Safety Precaution ! CAUTION Burrs formed during molding may be left over on some parts of the chassis. Therefore, pay attention to such burrs in the case of preforming repair of this system. Feature Check List Model KS-F150... -
Page 3: Table Of Contents
Serial No. FSUN3098-631 1099HISFLEJES EN, SP, FR Thank you for purchasing a JVC product. Please read all instructions carefully before operation, to ensure your complete understanding and to obtain the best possible performance from the unit. CONTENTS BASIC OPERATIONS ............ 3 RADIO OPERATIONS ........... -
Page 4: Radio Operations
KS-F150 KS-FX12 RADIO OPERATIONS Listening to the radio Storing stations in memory You can use one of the following two methods to store broadcasting stations in memory. • Automatic preset of FM stations: SSM (Strong-station Sequential Memory) • Manual preset of both FM and AM stations. -
Page 5: Other Convenient Tuner Functions
KS-F150 KS-FX12 TAPE OPERATIONS Other convenient tuner functions Listening to a tape MO/RND +/– RPT/SCAN Scanning broadcast stations Turn on the power. /I/ATT When you press RPT/SCAN while listening to the radio, station scanning starts. Each time a broadcast is tuned in, scanning stops for about 5 seconds (tuned frequency number flashes on the display), and you can check what program is now being broadcast. -
Page 6: Storing Your Own Sound Adjustments
We recommend that you use one of the CH-X series with your unit. Detaching the control panel If you have another CD automatic changer, consult your JVC car audio dealer for connections. • For example, if your CD automatic changer is one of the KD-MK series, you need a cord (KS- U15K) for connecting it to this unit. -
Page 7: Selecting Cd Playback Modes
KS-F150 KS-FX12 To fast forward or reverse the track Selecting CD playback m odes ¢, while playing a CD, to fast forward the track. Press and hold Press and hold 4 , while playing a CD, to reverse the track. -
Page 8: Specifications
KS-F150 KS-FX12 SPECIFICATIONS AUDIO AMPLIFIER SECTION CASSETTE DECK SECTION Maximum Power Output: Wow & Flutter: 0.15% (WRMS) Front: 40 watts per channel Fast-Wind Time: 190 sec. (C-60) Rear: 40 watts per channel Frequency Response: Continuous Power Output (RMS): 50 to 14,000 Hz (±3 dB) Front: 16 watts per channel into 4 Ω, 40... - Page 9 Si tiene alguna pregunta o necesita información votre voiture particulière. Si vous avez des questions ou avez installation kits, consult your JVC car audio dealer or a company acerca de las herramientas para instalación, consulte con su besoin d’information sur des kits d’installation, consulter votre...
- Page 10 KS-F150 KS-FX12 • When installing the unit without using the sleeve • When using the optional stay • Instalación de la unidad sin utilizar la cubierta • Cuando emplea un soporte opcional • Lors de l'installation de l’appareil sans utiliser de manchon •...
-
Page 11: Electrical Connections
JVC de equipos que vous pouvez acheter chez un revendeur d’autoradios JVC. -
Page 12: Localizacion De Averias
KS-F150 KS-FX12 PRECAUCIONES sobre las conexiones de la PRECAUTIONS sur l’alimentation et la PRECAUTIONS on power supply and speaker fuente de alimentación y de los altavoces: connexion des enceintes: connections: • NO c o ne c te lo s c o nduc to re s de altav o z de l c able de •... -
Page 13: Disassembly Method
KS-F150 KS-FX12 Disassembly Method Detaching the Front Panel Unit Front panel unit ( See Fig.1 ) Push the Release button in the direction of arrow to detach the front panel unit. Push the release button Fig. 1 Bottom cover Front chassis Removing the Front Chassis ( See Fig. - Page 14 KS-F150 KS-FX12 Removing the Heat Sink ( See Fig. 5 ) Heat sink 1. Removing the front chassis. 2. Removing the bottom cover. 3. Remove the three screws ( 1 and 1` ) retaining the heat sink. Fig. 5 Removing the Main Board Assembly ( See Fig.
- Page 15 KS-F150 KS-FX12 Cassette mechanism Removing the Cassette Mechanism assembly ( See Fig. 8 ) 1. Removing the front chassis. 2. Removing the bottom cover. 3. Removing the heat sink. 4. Removing the main board assembly. 5. Remove the four screws ( 4 ) retaining the cassette mechanism.
- Page 16 KS-F150 KS-FX12 Head amplifier board Removing the Head Amplifier Board ( See Fig. 12 ) 1. Removing the front chassis. CJ901 2. Removing the bottom cover. 3. Removing the heat sink. 4. Removing the main board assembly. 5. Removing the cassette mechanism.
- Page 17 KS-F150 KS-FX12 <Cassette Mechanism Sections> Reel base assembly Cassette hanger Center plate Motor assembly Sub-belt Direction switch board FF Lever Main belt Flywheel Flywheel Cassette holder assembly(F) assembly(B) REW Lever Fig. 1 Fig. 2 Removing the Main Parts of Cassette Mechanism 1.
- Page 18 KS-F150 KS-FX12 Note : The reel disk and capstan can now be replaced. C Washer 1-1 Remove the C washer at the top of the reel disk Reel disk to remove the reel disk. Capstan caution : Replace with a new C washer after E Washer repairing.
- Page 19 KS-F150 KS-FX12 Pinch-roller (R) Pinch-roller (F) E Washer E Washer assembly assembly S. support plate A.arm A.arm spring(B) spring(A) Pinch-roller shaft Pinch-roller shaft FF Roller P. arm spring(F) P. arm spring(R) Remove the P. arm spring (F) from the chassis.
-
Page 20: Adjustment Method
KS-F150 KS-FX12 Adjustment Method Test Instruments reqired for adjustment Standard volume position 1. Digital osclloscope(100MHz) Balance and Bass,Treble volume .Fader 2. Frequency Counter meter :Center(Indication"0") 3. Electric voltmeter Loudness,Dolby NR,Sound,Cruise:Off 4. Wow & flutter meter Volume position is about 2V at speaker output with 5. - Page 21 KS-F150 KS-FX12 Arrangement of Adjusting & Test points Cassette mechanism (Surface) Motor assembly Tape speed adjust Playback head Azimuth screw Head section view Fixed screw Head azimuth screw Playback head Height adjusting screw a Height adjusting screw c Height adjusting screw b...
- Page 22 KS-F150 KS-FX12 Information for using a Car Audio Service Jig 1. For 1995 and 1996 , we're advancing efforts to make our extension cords common for all car audio products. Please use this type of extension cord as follows. 2. As a U-shape type top cover is employed, this type of extension cord is needed to check operation of the mechanism assembly after disassembly.
- Page 23 KS-F150 KS-FX12 Mechanism Adjustment Section Item Adjusting & Confirmation Methods Adjust Std. Value 1.Head azimuth "Head Height Adjustment" Note Adjust the azimuth directly. When you adjust the height us- A Line ing a mirror tape, remove the cassette housing from the mechanism chassis.
-
Page 24: Description Of Major Ics
KS-F150 KS-FX12 Description of major ICs UPC1228HA (IC901) : Head Amplifier HA13158 (IC981) : BTL Amplifier ANP1 NFB1 OUT1 OUT2 NFB2 ANP2 UPC1228HA 2-12... - Page 25 KS-F150 KS-FX12 LC72362N-9595 (IC701) : System Controller 1.Terminal Layout 24 - 1 41 - 64 2.Description Symbol Function Function Symbol Crystal oscillator Non connect To GND Non connect J BUS SI Bus serial data input from CP751 Non connect J BUS SO...
-
Page 26: Block Diagram
KS-F150 KS-FX12 TEA6320T (IC931) : E.volume 1.Terminal Layout OUTRR OUTLR OUTRF OUTLF Vref MUTE CD-CH TAPE TUNER 2.Block Diagram MUTE VOLUME 2 FUNCTION 0 to 55 dB ZERO CROSS BALANCE DETECTOR FENDER REAR POWER SUPPLY VOLUME 1 BASS TREBLE +20 to -31 dB... - Page 27 KS-F150 KS-FX12 3.Pin Functions Symbol Functions Serial data input/output. Ground. OUTLR output left rear. OUTLF output left front. Treble control capacitor left channel or input from an external equalizer. Bass control capacitor leftchannel or output to an external equalizer. Bass control capacitor left channel.
- Page 28 KS-F150 KS-FX12 AN80T05 (IC781) : Regulator 1.Block Diagram NC TUNER FM/AM POWER 5V REMOTE MEMORY NC 2.Pin Functions Symbol Functions Not used Output selector of AM and ANT. TUNER Output selector for AM or FM or both outputs is off.
- Page 29 KS-F150 KS-FX12 LC75823W (IC651) : LCD Driver 1.Terminal Layout 2.Block Diagram 48 - 33 1 - 16 3.Pin Function Functions Symbol 1 - 9 NOT USED S10 - S52 10 - 52 Segment outputs that display data transferred from serial data.
- Page 30 KS-F150 KS-FX12 Block Diagram 2-18...
- Page 31 KS-F150 KS-FX12 Stndard Schematic Diagrams Head amplifier circuit section Tape PB/Main Signal 2-19...
- Page 32 KS-F150 KS-FX12 Receiver & Operation switch circuit section FM Radio Signal AM Radio Signal CD Signal Tape PB/Main Signal 2-20...
- Page 33 KS-F150 KS-FX12 LCD driver & Operation switch circuit section 2-21...
- Page 34 KS-F150 KS-FX12 Printed Circuit Boards Main boards : No. 0 2-22...
- Page 35 KS-F150 KS-FX12 LCD Driver & Operation switch board : No. (Solder side) (Parts side) 2-23...
- Page 36 KS-F150 KS-FX12 Cassette mchanism boards : No. Mute Board Direction swith Board 2-24...
-
Page 37: Parts List
KS-F150 KS-FX12 PARTS LIST [ KS-FX12 ] [ KS-FX12WT ] [ KS-F150 ] * All printed circuit boards and its assemblies are not available as service parts. Area Suffix Area Suffix [KS-FX12] [KS-F150] J ..Northern America J ..Northern America E .. - Page 38 KS-F150 KS-FX12 Exploded view of general assembly and parts list Block: No. M 1 M M...
- Page 39 KS-F150 KS-FX12 Parts list (General assembly)
- Page 40 KS-F150 KS-FX12...
- Page 41 KS-F150 KS-FX12 Cassette mechanism assembly and parts list VDL3650-201M Block: No. M 2 M M...
- Page 42 KS-F150 KS-FX12 Parts list (Cassette mechanism)
- Page 43 KS-F150 KS-FX12...
-
Page 44: Electrical Parts List
KS-F150 KS-FX12 Electrical parts list... - Page 45 KS-F150 KS-FX12...
- Page 46 KS-F150 KS-FX12 3-10...
- Page 47 KS-F150 KS-FX12 3-11...
- Page 48 KS-F150 KS-FX12 Packing materials and accessories parts list Block: No. M 3 M M A1 to A4 , A21 to A24 Block: No. M 4 M M Ver. J Only A5 to A9 KS-FX12 Ver.E Only 3-12...
- Page 49 KS-F150 KS-FX12 Packing parts list Accessories list 3-13...
- Page 50 KS-F150 KS-FX12 VICTOR COMPANY OF JAPAN, LIMITED MOBILE ELECTRONICS DIVISION,10-1,1chome,Ohwatari-machi,Maebashi-city371-8543,Japan Printed in Japan (No.49522) 9911(M)
Need help?
Do you have a question about the KS-FX12 and is the answer not in the manual?
Questions and answers