Table of Contents

Related Manuals for Gastroback 42909

Summary of Contents for Gastroback 42909
-
Page 1: Operating Instructions
Operating Instructions Smart Ice cream advanced automatIc Art.-Nr. 42909 Smart Ice Cream Advanced Automatic Read all provided instructions before first use! Model and attachments are subject to change! For domestic use only! -
Page 2: Table Of Contents
Carefully read all provided instructions before you start running the appliance and pay attention to the warnings mentioned in these instructions. table of contents Knowing your Smart Ice Cream Advanced Automatic ..........34 Important safeguards ..................36 General safety instructions ................36 Important safeguards for all electrical appliances ..........38 Technical Specifications ..................39 Properties of your new ice cream maker ..............39 Operation ......................40... - Page 3 Congratulations! A series of new possibilities comes with your new Gastroback Smart Ice Cream Advanced Automatic. The new ice cream maker »Smart Ice Cream Advanced Automatic« from GASTROBACK will delight both the ice cream gourmet and the whole family. With the integrated compressor coo- ling delicious ice creams can be prepared in just 20 minutes.
-
Page 4: Knowing Your Smart Ice Cream Advanced Automatic
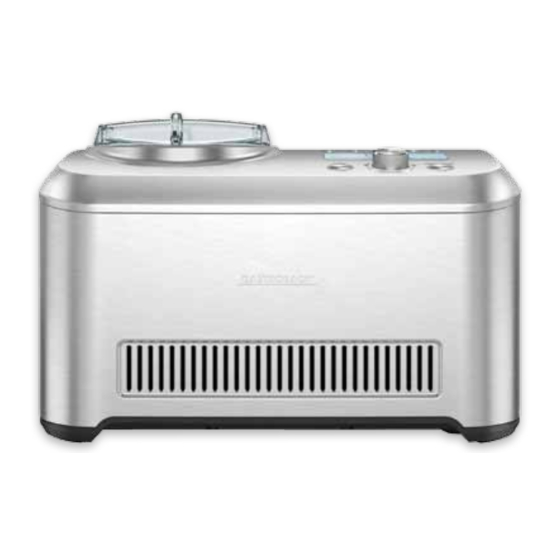
KnowIng Your Smart Ice cream advanced automatIc a. Anodised ice cream bowl with handle for easy removal. Not J. Auto timer | Hardness selection dial will scroll between the dishwasher safe and should not be stored in the freezer. following settings: sorbet, frozen yogurt, gelato, or ice cream. Rotate B. - Page 5 Lcd-dISPLaY o. LCD Control Display provides information on function setting t. PRE-COOLING indicates that the compressor is on and cooling and cooling progress. the machine. P. Hardness selection bar u. PRESS START flashes when in the PRECOOL mode to advise that Q.
-
Page 6: Important Safeguards
ImPortant SaFeguardS Carefully read all instructions before operating this appliance and save for further reference. Do not attempt to use this appliance for any other than the intended use, described in these instructions. Any other use, especially misuse, can cause severe injuries or damage by electric shock, moving parts or fire. - Page 7 sible for their safety. children must always be supervised to ensure that they do not play with the appliance or any parts of the appliance or the packaging. Always keep the appliance where it is dry, frost-free, and clean, and where young children cannot reach it.
-
Page 8: Important Safeguards For All Electrical Appliances
• Do not cover the air vents when the ice cream machine is in use. • Do not place any ingredients directly into the ice cream chamber. Place ingredients into the ice cream bowl only. • Do not store explosive substances such as aerosol cans with a flammable propellant in this appliance. • Ensure ice cream chamber is clean, dry, and free of debris before each use. • Do not place fingers or hands inside the ice cream machine during operation. Avoid contact with moving parts. • Do not leave the lid off the ice cream machine for extended periods of time. • Keep the inside and outside of the appliance clean. Follow the cleaning instructions pro- vided in this book. • Do not use any other accessories other than those provided with the Smart Ice Cream Advanced Automatic. -
Page 9: Technical Specifications
Thereafter, clean the appliance and, leaving the lid open, let it dry for at least 1 day. (See: ›Care and Cleaning‹) Do not clean the appliance in an automatic dishwasher. tecHnIcaL SPecIFIcatIonS Model: Art. No. 42909 Smart Ice Cream Advanced Automatic Power supply: 220 - 240 V AC / 50 Hz Maximum power consumption:... -
Page 10: Operation
child Lock The Smart Ice Cream Advanced Automatic features a child lock. Press and hold HOLD for 2 seconds to set the child lock mode. To exit this mode press and hold for 2 seconds again. add mix-Ins Mix-ins such as chocolate chips, fresh fruit and flavours can all be added easily through the flip back lid. - Page 11 1. To lock the lid into position, align the lid handle to the align- ment graphic, rotating clockwise into the LOCK position. (pic C) 2. Press the POWER button to turn the machine on. 3. Rotate the hardness selection dial to your chosen dessert. Press the START | PAUSE button to begin the churning process. The elapsed time will be displayed on the LCD. 4.
-
Page 12: Automatic Mode
automatic mode Start up Unwind the power cord completely and insert the power plug into a 220/240V outlet. Press the POWER button to turn the machine on. Progress indicator highlighted The POWER button will illuminate white. The LCD screen will display AUTO. The progress and hardness bar will also be illuminated. The arrow should be pointed at the AUTO on the LCD screen to indicate the mode you are in. -
Page 13: Manual Mode
churning to the desired setting. As the dessert starts to freeze the indicators on the hardness selection bar will move up the selection bar to the chosen dessert. It may take sometime before indicators illuminate. The display will toggle between elapsed time and the current temperature to which the machine is chilling. -
Page 14: Tips For Best Results
e) If the START | PAUSE button is pressed during the cycle this will pause the time. To resume the process press the button again. f) If you need to reset the timer press and hold the START | PAUSE button for 2 seconds and this will reset the timer. g) The timer can be adjusted at any time. Lcd-display The LCD screen will toggle between the count down timer and temperature. voLume FunctIon The Smart Ice Cream Advanced Automatic features a beeper to indicate that your frozen dessert is ready. -
Page 15: Tips For Making Crème Anglaise (Custad Base)
• When storing your frozen dessert in the freezer, ensure that the container is air tight and well sealed. This will prevent ice crystals forming. Putting a piece of baking or grease proof paper directly over the top of the frozen dessert will also help with this. note: Do not place the ice cream bowl in the freezer. • Frozen desserts are best eaten within 1 week of churning but can be kept for up to 2 weeks. -
Page 16: The Vital Ingeredients
the vital ingredients eggS All the recipes in this book were tested using standard min mass 59g eggs. The egg gives ice cream volume, stabilises and emulsifies the mixture. The yolk of the egg contains lecithin, which acts as an emulsifier to bond with the fat globules. note: Avoid using older eggs, especially if you are not cooking the mixture. -
Page 17: Storage
cleaning the stainless steel housing 1. Wipe the exterior of the stainless steel housing and the LCD screen with a soft damp cloth. Do not use a dry paper towel or cloth to clean the LCD screen, or use an abrasive cleanser or metal scouring pad to clean any part of the ice cream machine as these will scratch the surface. -
Page 18: Troubleshooting
5 minutes. • Check to see if center spindle is inserted correctly into plastic padd- le; if the center spindle is not moving then there mayb maybe an issue with the machine - Call Gastroback customer service. Lid will not lock • Paddle and bowl are not positioned properly – make sure the handle into position of the bowl sits within the grooves and paddle is inserted properly. - Page 19 Problem easy Solution My ice cream • The internal compressor is mounted on special rubber mounts to maker seems reduce the noise and vibration during operation. When cooling is to be vibrating not required the compressor will automatically turn off and a small briefly? amount of vibration for 1-2 seconds is normal. The controls • The child lock may be on. Press and hold the HOLD button for 2 don’t work?
-
Page 20: Notes For Disposal
InFormatIon and ServIce Please check www.gastroback.de for further information. For technical support, please contact Gastroback Customer Care Center by phone: +49 (0)4165/22 25-0 or e-mail info@gastro- back.de. warrantY We guarantee that all our products are free of defects at the time of purchase. -
Page 21: Recipes
RECiPE idEas Ice creamS Quick mix vanilla Ice cream Basic vanilla Ice cream Makes approximately 1 litre Makes approximately 1 litre Ingredients Ingredients cup heavy pouring cream 2 cups pouring cream 1¼ cups whole milk 1 cup milk ¾ cup sweetened condensed milk 1 vanilla bean, split and seeds scraped or 1 teaspoon vanilla extract teaspoon vanilla extract... - Page 22 2. Meanwhile beat egg yolks and sugar in the back of the spoon (see tips for better ice a bowl until pale and thick. Once chocolate cream making). mixture is hot, slowly whisk chocolate into 4. Pour mixture into a heatproof bowl, cover the egg mixture.
- Page 23 Salted caramel Ice cream and rub together with fingertips until butter is mixed through other ingredients. Spoon Makes approximately 1 litre mixture onto baking tray and bake in oven Ingredients for about 10 - 15 minutes or until golden. 1 ½ cups milk Allow crumble to cool on tray.
- Page 24 egg yolks 4. Pour mixture into a heatproof bowl, cover ½ cup good quality honey and refrigerate until well chilled. 5. Pour gelato base into ice cream bowl. method Set ice cream maker to desired setting and 1. Place cream and milk into a medium hea- churn.
-
Page 25: Lemon Sorbet
mint chocolate gelato method Makes approximately 1 litre 1. Place milk, cream and vanilla extract into a medium heavy-based saucepan. Heat until Ingredients mixture just starts to simmer. 1½ cups milk ½ cup pouring cream 2. Meanwhile beat egg yolks and sugar in a 120 g good quality dark chocolate, chop- bowl until pale and thick. - Page 26 tip: To make this recipe without using the method eggwhite we recommend using the manual 1. Combine sugar, water and vanilla bean setting and allow approximately 60 minutes and seeds in a saucepan over a low heat. for churning. Mixture will make approxi- Cook, stirring, until the sugar has dissolved.
- Page 27 Banana Frozen Yogurt Set ice cream maker to desired setting and churn. Makes approximately 1 litre 4. Once mixture is frozen transfer to a free- Ingredients zer safe container and freezer for up to 1 1 ½ cups mashed ripe bananas (about week.
- Page 28 Gewerbestraße 20 . 21279 Hollenstedt / Germany Telefon +49 (0)41 65/22 25-0 . Telefax +49 (0)41 65/22 25-29 info@gastroback.de . www.gastroback.de...
Need help?
Do you have a question about the 42909 and is the answer not in the manual?
Questions and answers