Table of Contents
Advertisement
Advertisement
Table of Contents

Summary of Contents for Yada BT54860
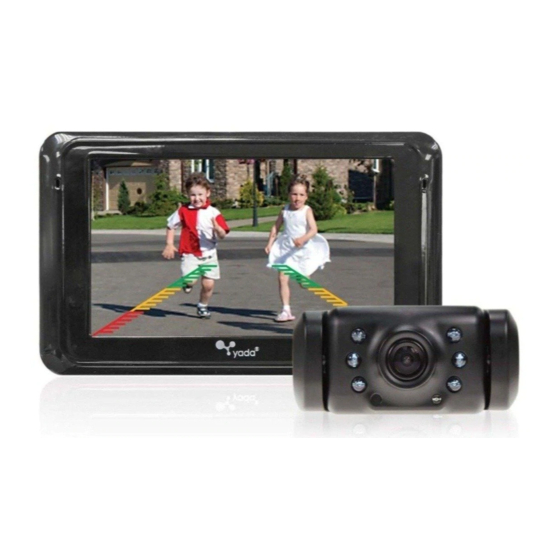
- Page 1 5” Dash Monitor BT54860/BT54998...
-
Page 2: Table Of Contents
TABLE OF CONTENTS 1. Introduction ....................................1 2. Package Contents ...................................2 3. Product Specifications ................................3 4. Installation Guide ..................................3 5. Settings and Operation ................................9 6. Safety Information ................................12 7. Maintenance & Warranty ..............................14 8. General Information ................................19... -
Page 3: Introduction
1. INTRODUCTION Please read all of the installation instructions carefully before installing the product. Improper installation will void manufacturer’s warranty. The installation instructions do not apply to all types of vehicles, and are written as guidelines to assist in installing the system. Consult an experienced technician if you are not comfortable installing the product. -
Page 4: Package Contents
2. PACKAGE CONTENTS 1. 5” Dash Monitor 2. 1 Backup Camera 3. 12V/24V Power Adapter for Monitor 4. Hardwire Cable for Monitor 5. Suction Cup Mount for Monitor 6. Install Kit 7. Optional 12V/24V Power Adapter for the Camera 8. User’s Manual 9. -
Page 5: Product Specifications
Monitor. Run cable to fuse box and connect to fused accessory power source. Refer to your vehicle owner manual for location of available accessory fuses. 5. At this time, the Yada Dash Monitor is ready to be automatically powered on when the vehicle engine starts. - Page 6 BACKUP CAMERA INSTALLATION - Hardwire Power Camera cable Hardwire cable for Camera Reverse Light Power Wires This installation is based on powering the Camera over the reverse tail lights. When installed as directed, the camera image will only appear when the vehicle is in reverse. Caution: This unit is designed to operate on a 12V/24V DC NEGATIVE GROUND electrical system.
- Page 7 5. At your taillight, remove the light bulb socket from the reverse light housing. 6. Determine the reverse light power wires for your car, designating the positive and negative wires. If you are not sure of which are the power wires, then please contact your vehicle manufacturer or reference a wiring diagram for your vehicle.
- Page 8 16. Once license plate and Camera are secure, you can adjust the vertical angle of the Camera to your specific need. 17. As a last check, note the position of the view from the Camera when you place the vehicle in reverse. Adjust the angle of the Camera as necessary to achieve the best rear view.
- Page 9 BACKUP CAMERA INSTALLATION – 12/24V Direct Power This installation allows the Camera to be powered via an adapter into any available 12/24V socket. When installed as directed, the camera image will always appear on the monitor screen as long as both are receiving power.* 1.
- Page 10 Camera cable Attach 12V/24V Power Adapter for Camera 6. Locate the closest available 12/24V socket and plug in the adapter. 7. Standing with the license plate in one hand and the Camera in the other hand, slide the Camera along the top of the license plate in order to determine the placement. Best placement is in the center of the license plate.
-
Page 11: Settings And Operation
recommended that you glance at the image only when in reverse, and use as an aid. Do not rely solely on the camera view to back up. *By using the power button on the Monitor, the image can be shut off while driving. Please remember to turn back on once the vehicle is stopped and ready to reverse. - Page 12 BRIGHTNESS AND CONTRAST You can adjust the contrast and brightness of the Monitor according to your desired level. Note: Contrast and Brightness setting ONLY works while the camera image is on the screen. TO ADJUST BRIGHTNESS 1. Press “MENU” 2. Go to “Brightness” by pressing “– “ 3.
- Page 13 PAIRING The Yada Backup Camera included is already paired with the monitor. If you can not see the Camera image, pair the Camera with the following steps: 1. Turn on your vehicle and place in reverse gear. This will power the Monitor and the Camera.
-
Page 14: Safety Information
6. SAFETY INFORMATION WARNING: A failure to read and follow these warnings and instructions may result in a serious accident, including damaged property or a serious injury, including loss of life. • The Backup Camera is designed as an aid to the driver in detecting large stationary objects to help avoid damaging the vehicle. - Page 15 • Do not strike the Camera. It is a precision instrument. Otherwise, it may malfunction or cause damage resulting in a fire or an electric shock. • This product will only provide images of items that are within the field of view of the Camera. Thus, it is imperative that the Camera should be kept clean and unobstructed, and should be mounted so that its field of view includes the entire area behind your vehicle.
-
Page 16: Maintenance & Warranty
SAFETY AROUND AND BEHIND OTHER VEHICLES Using a Backup Camera is not enough to completely overcome a vehicle’s blind spot. Many preventable injuries and deaths occur in driveways or parking lots when drivers do not see children, pets, or others near their vehicles. Here are a few safety tips that will help you to avoid a back-over accident: •... - Page 17 defects in material and workmanship for 1 year from the date of original purchase. Where permitted by law, Winplus North America’s liability shall be limited to that set forth in this limited express warranty. This limited express warranty shall be the exclusive remedy of the purchaser and Winplus North America makes no other warranty of any kind aside from the limited express warranty stated above.
- Page 18 NOTE: Toll Free # is for North America Customers ONLY. See Customer service section for customer contact numbers for other regions/offices. For customer service and technical support, please call us at 1.866.294.9244 or email us at customercare@winplususa.com. If at that time it is determined that a replacement unit is needed, the support representative will issue a Return Authorization and instruct on how to get a new unit.
- Page 19 any liability for any losses (whether direct or indirect, in contract, tort or otherwise) incurred in connection with the Backup Camera, including but not limited to damaged property, personal injury and/or loss of life. Neither shall Winplus North America and/or its affiliates have any liability for any decision, action or inaction taken by any person in reliance on the Backup Camera, or for any delays, inaccuracies and /or errors in connection with the Backup Camera and its functioning.
- Page 20 WINPLUS AUSTRALIA/HONG KONG LIMITED WARRANTY This Yada product is warranted against faulty workmanship for a period of 2 years from date of purchase. Liability is limited to replacement of the product and claims for associated or consequential loss or damage will not be accepted. Warranty is void and does not apply if the product has been damaged or rendered faulty by accident, abuse, misuse, incorrect application or if the product has been modified or tampered with.
-
Page 21: General Information
8. GENERAL INFORMATION CUSTOMER SERVICE/CONTACT For questions or issues regarding the product, please visit www.letsyada.com or contact Winplus in your area/region to speak to our customer service representative: Winplus North America Tel.: 866-294-9244 Tel.: 909-752-3074 Winplus Europe Tel.: 44-1440-7138888 Winplus Australia Tel.: 61-3-8727-7600 Winplus New Zealand Tel.: 64-9-5254575... - Page 22 • Reorient or relocate the receiving antenna • Increase the separation between the equipment and receiver • Connect the equipment into an outlet on a circuit different from that to which the receiver is connected • Consult the dealer or an experienced radio/TV technician for help This device complies with Part 15 of the FCC Rules.
- Page 23 IMPORTANT NOTE: FCC Radiation Exposure Statement: This equipment complies with FCC radiation exposure limits set forth for an uncontrolled environment. End users must follow the specific operating instructions for satisfying RF exposure compliance. This transmitter must not be co-located or operating in conjunction with any other antenna or transmitter.
- Page 24 Suites 6-11, 7th Floor, Corporation Park, Tel: 852-2798-8932 11 On Lai Street, Shatin, N.T., Hong Kong Fax: 852-2795-0241 www.winplus.com www.letsyada.com © 2014 Winplus North America Inc. All Rights Reserved. Winplus, the logo design, and Yada® are trademarks or registered trademarks of Winplus North America Inc.
Need help?
Do you have a question about the BT54860 and is the answer not in the manual?
Questions and answers