
Subscribe to Our Youtube Channel
Related Manuals for Marley MD5016


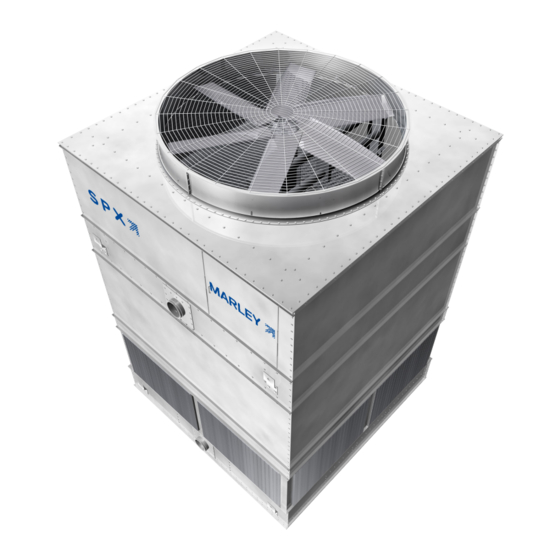
Summary of Contents for Marley MD5016
- Page 1 Marley MD5016 Cooling Tower Field Installation Manual 08-1612...
-
Page 2: Table Of Contents
Contents MD5016 Field Installation Getting Started (section-page) Note: Optional equipment not listed in the Table of About This Manua l..........1-1 Contents is installed using separate installation Safety..............1-1 drawings and bills of material. These documents Part Identification............1-1 are located within the literature package and should Tools &... -
Page 3: Getting Started (Section-Page)
Getting Started MD5016 Field Installation ABOUT THIS MANUAL To obtain maximum efficiency, it is strongly recommended that this entire manual be read before starting installation. This manual illustrates a typical field installation sequence of a basic tower. Some common options are also included. Refer to separate installation drawings for additional optional equipment Review all manuals, drawings and bills of material prior to assembly. -
Page 4: Tools & Supplies
Protractor level: For setting fan blade pitch Typical bolted attachment with threaded end of bolt up, or installed horizontally Dial Indicator kit: marley item No. 115311. For drive shaft alignment. Needed for motor outside airstream option only. GENERAL DECAL INSTRUCTIONS Decals are an important part of the tower assembly. -
Page 5: Joint Sealing Instructions
Getting Started MD5016 Field Installation JOINT SEAL INSTRUCTIONS The following information covering surface preparation applies to all sealed joints whether FASTENER sealer Z11 or strip sealer Z12 and/or Z13 is being used. The typical joint sealing details shown WATER SIDE... -
Page 6: Standard Field Details Module Connection
Standard Field Details MD5016 Field Installation Module Connection TYPICAL SIDEWALL ATTACHMENT TYPICAL ENDWALL ATTACHMENT MODULE CLEAN ANY DIRT & DEBRIS FROM THE BOTTOM FLANGES OF THE TOP MODULE BEFORE HOISTING TYPE 'D' Z12 TYPE 'D' FILL PANEL CORNER SEAMS SIDEWALL ENDWALL WITH 3/8"... -
Page 7: Drain Plug
Standard Field Details MD5016 Field Installation Drain Plug If the collection basin drain is not being plumbed, install drain plug as shown. 08-1612 SECTION-2 PAGE 2 OF 2... -
Page 8: Collection Basin Options Sump Outlet
Collection Basin Options MD5016 Field Installation Sump Outlet FIND NO. DESCRIPTION HEX CAP SCREW - M10X40 OVERSIZE WASHER - M10 FLAT WASHER - M10 SEALING WASHER - 3/8" [10mm] NUT - M10 TUBE SEALER FASTENERS MUST BE STAINLESS STEEL IN... - Page 9 Collection Basin Options MD5016 Field Installation Sump Outlet SUMP SCREEN On sumps with high flows a screen assembly with anti-vortex plate is used. PIPING, SUPPORTS, DESIGN See "Outlet Anti-Vortex Plate" detail. OF PIPING AND SUPPORTS, AND RESTRAINT OF LATERAL PIPING LOADS ARE THE RESPONSIBILITY OF OTHERS.
-
Page 10: Bottom Outlet / Equalizer / Inlet Bypass Piping
Collection Basin Options MD5016 Field Installation Bottom Outlet / Equalizer / Inlet Bypass Piping COLLECTION BASIN PIPING, SUPPORTS, DESIGN DEPRESSED FLOOR OF PIPING AND SUPPORTS, AND RESTRAINT OF LATERAL PIPING LOADS ARE THE RESPONSIBILITY OF OTHERS. DO NOT SUPPORT PIPING... -
Page 11: Bottom Outlet Screen
Collection Basin Options MD5016 Field Installation Bottom Outlet Screen BOTTOM OUTLET SCREEN On outlets with high flows a screen assembly with anti-vortex plate is used. See "Outlet Anti-Vortex Plate" detail. COLLECTION BASIN DEPRESSED FLOOR 08-1612 SECTION-3 PAGE 4 OF 10... -
Page 12: Outlet Anti-Vortex Plate With Screen
Collection Basin Options MD5016 Field Installation Outlet Anti-Vortex Plate with Screen COLLECTION BASIN ANTI-VORTEX PLATE & DEPRESSED FLOOR SCREEN ASSEMBLY Used On outlets with high flows. Center over Outlet BOTTOM OUTLET OR SUMP OUTLET 08-1612 SECTION-3 PAGE 5 OF 10... -
Page 13: Bottom Inlet Bypass Hood
Collection Basin Options MD5016 Field Installation Bottom Inlet Bypass Hood FIND NO. DESCRIPTION HEX CAP SCREW - M8X25 FLAT WASHER - M8 SEALING WASHER - 6/16" [8mm] NUT - M8 TUBE SEALER TYPE 'C' COLLECTION BASIN DEPRESSED FLOOR 08-1612 SECTION-3 PAGE 6 OF 10... -
Page 14: Flume
Collection Basin Options MD5016 Field Installation Flume Apply a 1/2" [13mm] diameter bead Apply a 1/2" [13mm] diameter If collection basins of multiple towers of sealer around and between holes bead of sealer around and are to be connected together, a flume is where joggle will overlap. -
Page 15: Flume Weir Gate
Collection Basin Options MD5016 Field Installation Flume Weir Gate FIND NO. DESCRIPTION LOCK WASHER - M8 NUT - M8 FASTENERS ARE STAINLESS STEEL 08-1612 SECTION-3 PAGE 8 OF 10... -
Page 16: Solenoid Valve
Collection Basin Options MD5016 Field Installation Solenoid Valve QUICK-FILL CONNECTION TEFLON TAPE OR JOINT COMPOUND (BY OTHERS) SOLENOID VALVE 08-1612 SECTION-3 PAGE 9 OF 10... -
Page 17: Belt Drive - Field Installed Motor
Belt Drive - Field Installed Motor MD5016 Field Installation Unfasten Motor Support REMOVE & SAVE LEVELLING BOLT REMOVE & SAVE RETENTION BOLTS MOTOR SUPPORT PLATE MOTOR SUPPORT PLATE VIEW FROM INSIDE TOWER PVC Drift Eliminators: VIEW FROM OPEN Lay a piece of plywood on top of the drift eliminators while ACCESS DOOR working inside the tower to avoid damage. -
Page 18: Install Motor
Belt Drive - Field Installed Motor MD5016 Field Installation Install Motor Rotate the motor plate out thru the access door opening. Install the motor with fasteners hand-tight to allow adjustment. MOTOR ATTACHMENT HARDWARE FIND NUMBERS MOTOR FRAME NEMA 182T thru 215T V11 W22 W02 X02... - Page 19 Belt Drive - Field Installed Motor MD5016 Field Installation Install Motor Sheave SHEAVE SPLIT-TAPER BUSHING TAPER-LOCK BUSHING SHEAVE SET SCREWS SUPPLIED FASTENERS SUPPLIED WITH BUSHING WITH BUSHING TAPER-LOCK BUSHING SPLIT-TAPER BUSHING Thoroughly clean all the surfaces of the bushing, sheave and motor shaft.
- Page 20 Belt Drive - Field Installed Motor MD5016 Field Installation Secure Motor Support JAM NUT FLAT WASHER ADJUSTMENT NUT BOLT & FLAT WASHER RETENTION BOLT, LOCK WASHER & NUT DETAIL A RETENTION BOLT, LOCK WASHER & NUT Rotate motor support back into the tower and reinstall support retention fasteners.
-
Page 21: Motor Sheave
Belt Drive - Field Installed Motor MD5016 Field Installation Belt Installation FASTENER TORQUE @ MOTOR ONLY FASTENER TORQUE FOOT-POUNDS (NEWTON-METERS) BOLT DIAMETER GALVANIZED STAINLESS STEEL (UNLUBRICATED) (UNLUBRICATED) 10mm 30-32 (42-43) 34-36 (46-48) 12mm 64-66 (87-90) 85-90 (115-122) 16mm 135-140 (183-190) - Page 22 Belt Drive - Field Installed Motor MD5016 Field Installation Belt Tension ADJUSTMENT ROD LOCKING BRACKET (MAY ALSO BE USED AS A WRENCH) KNOB Adjust belt tension by turning the threaded rod here. Apply anti-seize compound to the threads of the rod before turning General Rules For Belt Tensioning 1.
- Page 23 spxcooling.com 7401 WEST 129 STREET OVERLAND PARK, KANSAS 66213 UNITED STATES 913 664 7400 spxcooling@spx.com In the interest of technological progress, all products are subject to design and/or material change without notice. ©2008 SPX Cooling Technologies, Inc. | Printed in USA...
Need help?
Do you have a question about the MD5016 and is the answer not in the manual?
Questions and answers