
Summary of Contents for Safescan TA-900 series
- Page 1 Manual Safescan Time Attendance Systems TA-900 series English | nEdErlAnds | dEuTsch | FrAnçAis | EspAñol | iTAliAno | porTuguês...
-
Page 2: Table Of Contents
English | nEdErlAnds | dEuTsch | FrAnçAis | EspAñol | iTAliAno | porTuguês Contents considErATion Environmental considerations MounTing And connEcTing ThE TErMinAl connect the Tcp/ip network cable if you want to synchronize the terminal through the network Wi-Fi connection Function Keys and display Key functions FirsT usE idEnTiTy VEriFicATion... - Page 3 English | nEdErlAnds | dEuTsch | FrAnçAis | EspAñol | iTAliAno | porTuguês coMMunicATion sETTings network (Ethernet) rs232/485 setting security for rs 232 communications Wi-Fi configuration 6.4.1 Manual Wireless configuration sysTEM sETTing oVErViEW system setting 7.1.1 suggested Threshold settings 7.1.2 date format data management 7.2.1...
- Page 4 Matching 14.0 gETTing FAMiliAr WiTh ThE KEypAd 15.0 usEr AccEss To ATTEndAncE rEcords 16.0 Typing WiTh sAFEscAn TA-900 sEriEs KEypAd 16.1 how to create a “word” 17.0 synchronizE dATA WiTh ThE soFTWArE 17.1 By usB stick 17.2...
-
Page 5: Package Contents
TA-900 series or any other safescan products, or if you are looking for more resources to help you setup and/or operate your safescan product, then please don’t hesitate to visit our website at... -
Page 6: Environmental Considerations
The safescan TA-900 series operating temperature range is 0° to 40° c (32° to 105° F). do not operate the safescan TA-900 series in very hot environments. Keep the safescan TA-900 series away from direct heat sources and provide adequate ventilation to prevent the safescan TA-900 series from overheating. -
Page 7: Wi-Fi Connection
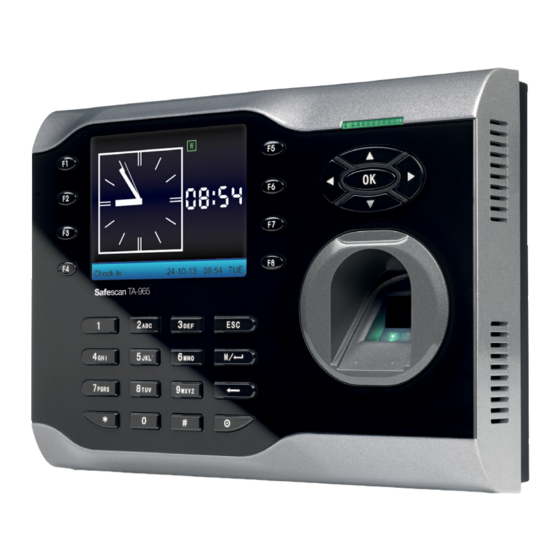
English | nEdErlAnds | dEuTsch | FrAnçAis | EspAñol | iTAliAno | porTuguês 2.2 Wi-Fi connection To connect the TA-920, 960 or 965 by Wi-Fi please follow the steps described in chapter 6.4. 2.3 Function key and display TA-910 / 920 1. -
Page 8: First Use
Always back up the fingerprint templates in de safescan Time Attendance software on your computer. having a “template backup” can potentially save you a lot of time. if the safescan TA-900 series fails or is vandalized, having a “backup” eliminates the need of having to re-enroll all your users. -
Page 9: Add New User Id. No
From within the new user Menu, scroll with the ▲/ ▼ keys until the cursor is in the id. no field. Note: The safescan TA-900 series automatically assigns the next available id number by default. press oK to accept and/or scroll keys ◄ / ► and the default id no. -
Page 10: How To Create A User Name
TA-900 series prompts with a beep to remove it. you will then be prompted to repeat the process 2 more times, each... -
Page 11: Enroll New User With Password (Pwd)
“backup” finger(s) registered ensures that the user will always be recognized by the safescan TA-900 series. if one finger is temporarily rendered “unreadable” by recent cuts or scratches, the user can use their backup finger. -
Page 12: Enroll New User With Rfid Card (Card)
This screen appears Flash your card 2 to 3 inches from the safescan TA-900 series internal card reader. The terminal will then read and register your card. press oK to confirm registration of your card. -
Page 13: Save/Exit New User Registration
5.2 Manage User(s) The Manage users menu allows the system Administrator(s) to view all users’ information stored in the safescan TA-900 series. This includes the users’ id. nos (numbers), names, how many fingerprints they have registered and if they have registered rFid cards or passwords. -
Page 14: User(S) Attendance Records
After searching successfully, the user’s record will be highlighted in blue. if the user is not registered on the safescan TA-900 series, the message “no Enroll!” will appear. 5.2.2 User(s) Attendance records Administrators can retrieve any registered user’s recent attendance record. -
Page 15: Edit User(S)
English | nEdErlAnds | dEuTsch | FrAnçAis | EspAñol | iTAliAno | porTuguês From within the user Menu, scroll with the ◄ / ►keys until Manage is highlighted. press oK to select. select the user whose attendance records you need to view by scrolling with the ▲/ ▼... -
Page 16: Delete User(S)
5.2.4 Delete User(s) Administrators can delete all or partial registered user information on the safescan TA-900 series. deleting may be necessary when: • A user’s fingerprint is no longer recognized (possibly caused by injury) or his/her password has been forgotten. -
Page 17: Add User(S)
▲/ ▼ keys to highlight your selection. press oK to delete your selection. The safescan TA-900 series will prompt you “oKdel”? press oK again to confirm deletion. 5.2.5 Add User(s) Administrators can add users from the user Manage Menu also. -
Page 18: Short Message Service (Sms)
Esc. 5.3 Short Message Service (SMS) The short message is similar to a “company bulletin board.” it allows safescan TA-900 series system Administrators to post messages to the employees. short messages can be created for the entire employee staff (“public”) or for an individual employee (“personal”). -
Page 19: How To Create A Short Message
English | nEdErlAnds | dEuTsch | FrAnçAis | EspAñol | iTAliAno | porTuguês 5.3.1 How to create a Short Message start at the check/clock-in screen. press the Menu key to open the Main Menu. From the Main Menu, highlight and select user Mng. From within the user Mng Menu, scroll with the◄... -
Page 20: How To Write A Text For Short Message
English | nEdErlAnds | dEuTsch | FrAnçAis | EspAñol | iTAliAno | porTuguês 5.3.2 How to write a text for Short Message The following example illustrates how to create the user name John. From within the new user menu, press the asterisk key until [English] appears at the bottom of the screen. -
Page 21: View Public Short Messages
For example, in a res-taurant the same employee may start his/her shift as a waiter and then switch to tending bar. since different positions receive different rates of pay, the safescan TA-900 series allows an employee to enter different work codes when “checking/clocking in.” Also useful to assign doctor’s visits e.g. -
Page 22: Adding Work Codes
Name: description of work code. scroll with the ▲/ ▼ keys and place the cursor in the name field. use the safescan TA-900 series keyboard to create a ”Work code name.” Each time you press the asterisk on the keypad you have the choice to enter either “letters” or “symbols.”... -
Page 23: Editing And Deleting Work Codes
Work code screen appears. The user may directly enter a work code by typing with the safescan TA-900 series keypad, or he/she may scroll with the ▲/ ▼ keys to select the desired Work code. highlight the desired work code and press oK to accept. -
Page 24: Communication Settings
(see chapter 5.4). 6.0 Communication Settings The safescan TA-900 series only records “time stamps.” it does noT perform calculations and will noT compute “actual hours worked.” As mentioned earlier in the manual, the safescan TA-900 series supports safescan Time Attendance software. -
Page 25: Rs232/485
English | nEdErlAnds | dEuTsch | FrAnçAis | EspAñol | iTAliAno | porTuguês • Terminal IP address: default ip is 192.168.1.201. This can be modified, but do noT use an ip address al-ready being used by device on the same network. •... -
Page 26: Setting Security For Rs 232 Communications
English | nEdErlAnds | dEuTsch | FrAnçAis | EspAñol | iTAliAno | porTuguês • Baud rate: use the / to change pre-set values. • RS232: if using rs232 communication, select “on”. • RS485: if using rs485 communication, select “on”. scroll with the ▲/ ▼keys to place the cursor in the desired field. scroll with the ◄... -
Page 27: Wi-Fi Configuration
▲/ ▼keys to place the cursor in the desired field. • deviceid/serial # prior to setting up rs232/rs485 communication, a 1 to 254 digit serial number of the safescan TA-900 series must be entered to secure the data communication between the pc and the safescan TA-900 series. -
Page 28: Manual Wireless Configuration
English | nEdErlAnds | dEuTsch | FrAnçAis | EspAñol | iTAliAno | porTuguês click to Refresh the screen, the available WlAns will then be listed on the interface with an indication of the signal strengthen select the required Wireless lAn and enter with scroll with ▼to the input field for the password (Pass.) and enter the password of the wireless router using the T9 input method editor (IME) - Page 29 English | nEdErlAnds | dEuTsch | FrAnçAis | EspAñol | iTAliAno | porTuguês select Wi-Fi Setup to enter the Wi-Fi Setup interface. Set Network SSID. set the network id (ssid) by imputing the network id with the T9 inputting method editor(IME) (more about T9 inputting see in chapter 16).
-
Page 30: System Setting Overview
• Keyboard/Keypad: Modify function keys and short-cut keys • Display: Allowed “user-access attempts,” clock display, picture slideshow settings • Power: power conservation options • Reset: shutdown and reset safescan TA-900 series • Bell: Bell scheduling • Misc Set.: Miscellaneous settings... -
Page 31: System Setting
English | nEdErlAnds | dEuTsch | FrAnçAis | EspAñol | iTAliAno | porTuguês 7.1 System Setting The system Menu allows you to configure Fingerprint matching threshold, date format, audio responses, volume and memory near-full alerts. From within the system Menu, scroll with the ◄ / ► and ▲/ ▼keys until system is highlighted. -
Page 32: Data Management
Recheck Minute: When full, the safescan TA-900 series prevents new records from over-writing previous records (virtual value is 66). Alarm attendance log (Log Alert): set the number of remaining log entries before the safescan TA-900 series will send an alarm (virtual value is 1-99). -
Page 33: Picture Formats
The safescan TA-900 series has functions keys on either side of the screen. The function keys act as “short-cuts” similar to computer keyboard function keys. The safescan TA-900 series has 6 pre-defined function keys, labeled F1 through F6, F7 and F8 are empty and for customization. - Page 34 “status Key,” this screen appears. • No.: Assigns a code to shortcut • Name: create a name for the shortcut (see chapter 16; Typing with safescan TA-900 series Keypad) • Automatic switch: set times when this short cut is active...
-
Page 35: Display Setting
| nEdErlAnds | dEuTsch | FrAnçAis | EspAñol | iTAliAno | porTuguês 7.4 Display Setting This allows you to program user-Access attempts before safescan TA-900 series “times out”, clock display and picture slideshow settings. From within the system Menu, scroll with the ◄ / ►keys and ▲/ ▼keys until display is highlighted. -
Page 36: Reset
Note: • reset does noT erase user information or attendance records. • reset only erases changes made to the safescan TA-900 series system configuration since leaving the factory. 7.6 Bell setting The safescan TA-900 series has an internal bell which can be scheduled to ring at certain intervals. -
Page 37: Miscellaneous Settings (Misc. Set)
• Fingerprint image • power Button • language 7.7.1 Sleep time (Idle) To help prolong the life of the safescan TA-900 series. From within the system Menu, scroll with the ◄ / ►keys and ▲/ ▼keys until Misc.set. is highlighted. press oK. -
Page 38: Fingerprint Image (Fp Image)
English | nEdErlAnds | dEuTsch | FrAnçAis | EspAñol | iTAliAno | porTuguês 7.7.2 Fingerprint Image (FP Image) To set how the fingerprint images are showed on the display. From within the system Menu, scroll with the ◄ / ►keys and ▲/ ▼keys until Misc.set. -
Page 39: Language
English | nEdErlAnds | dEuTsch | FrAnçAis | EspAñol | iTAliAno | porTuguês scroll with ▲/ ▼keys and enter the setting then select with ◄ / ► “on or oFF” After selecting oK, a message will display “change saved successfully! oK” To continue, press oK. -
Page 40: Usb Disk/Pendrive (Flash Drive)
The following files are copied to the usB disk/pendrive: • X_attlog.dat (attendance log) • X_oplog.dat (management log) • X_user (user info including templates) Note: The “X” represents the machine number of the safescan TA-900 series from which the data file(s) originated. -
Page 41: How To Download Attendance Records
Then press oK. The safescan TA-900 series will prompt “downloading user data, please wait..” When the user data finishes downloading, the safescan TA-900 series will prompt “download user data successful” press Esc to exit and return to the previous menu. -
Page 42: Downloading Sms (Short Message)
Then press oK. The safescan TA-900 series will prompt “uploading user data, please wait..” When the user data finishes uploading, the safescan TA-900 series will prompt “upload user data successful.” press Esc to exit and return to the previous menu. -
Page 43: Uploading Picture(S)
TA-900 series. After uploading the pictures the safescan TA-900 series will display the message “upload successful.” The picture file will automatically be added to the existing pictures stored on the safescan TA-900 series. -
Page 44: Auto Test
| nEdErlAnds | dEuTsch | FrAnçAis | EspAñol | iTAliAno | porTuguês 10.0 Auto Test The safescan TA-900 series has built-in Auto Test features which allow users to quickly check if major system functions are operating properly. start at the check/clock-in screen; press the Menu key to open the Main Menu. -
Page 45: Audio Test
TA-900 series keypad. As you touch each “keypad key,” its corresponding key on the screen display will highlight in red (__). -
Page 46: Real-Time Clock (Rtc) Test
Esc at any time to return to the Auto Test Menu. 11.0 Record (attendance/audit logs) The safescan TA-900 series stores user attendance/door-access records which can be viewed directly from the safescan TA-900 series screen display. -
Page 47: System Information
When finished reviewing attendance records, press Esc at any time to exit and return to the previous menu. 12.0 System information This menu provides information regarding the safescan TA-900 series storage utilization and firmware. start at the check/clock-in screen and press the Menu key to open the Main Menu. -
Page 48: Device Information
| nEdErlAnds | dEuTsch | FrAnçAis | EspAñol | iTAliAno | porTuguês • Total Attendance log storage capacity of 200,000 records. - 1,000 records have been stored. - safescan TA-900 series can store 199,000 more records. 12.2 Device information To view device information, scroll with the ◄ / ►keys. -
Page 49: Fingerprint Recognition Technology
60-digit password. This unique template is then encrypted and stored in the safescan TA-900 series database. Note: privacy issues should never be a concern when using the safescan TA-900 series because no rEAl iMAgE oF A usEr’s FingErprinT is sTorEd. only the minutiae-based templates are stored. -
Page 50: Getting Good Fingerprint Images
TA-955 has an integrated card reader if you do not intend to assign passwords. -
Page 51: Proper Finger Placement
| nEdErlAnds | dEuTsch | FrAnçAis | EspAñol | iTAliAno | porTuguês Be sure to maintain contact with the fingerprint sensor for 2 full seconds, until the safescan TA-900 series responds. The safescan TA-900 series has both audio and visual indicators which respond when the safescan TA-900 series senses a finger. -
Page 52: 1:1 Fingerprint Matching (Id. No +Fingerprint)
13.5.3 1:1 Fingerprint Matching (ID. NO +fingerprint) When too many users’ fingerprints are not easily recognized by the safescan TA-900 series, it can be set to perform 1:1 fingerprint matching. 1:1 matching requires an added step of entering the user’s id. number first. however, 1:1 matching is more consistent than 1:n matching. -
Page 53: Password Matching
English | nEdErlAnds | dEuTsch | FrAnçAis | EspAñol | iTAliAno | porTuguês if the safescan TA-900 series does not recognize the user’s finger it will respond by tweet twice and the light flashes red. When this occurs, the user again must place his/her finger on the sensor. -
Page 54: Getting Familiar With The Keypad
◄ scroll right ► scroll left ◙ shuts down safescan TA-900 series when held down for 3 seconds when in check/clock-in screen ← Backspace Key (erases 1 character at a time) Menu / <Enter> Key Escape key (cancels operation and returns to previous menu) Asterisk often used to page up ▲display... -
Page 55: User Access To Attendance Records
Appendix 4. 16.0 Typing with Safescan TA-900 Series keypad The safescan TA-900 series keypad allows you to type letters of the alphabet and symbols, similar to the way many cell phones have this feature for text-messaging. in several safescan TA-900 series input screens, pressing the asterisk key on the keypad allows the user to enter either “letters”... - Page 56 English | nEdErlAnds | dEuTsch | FrAnçAis | EspAñol | iTAliAno | porTuguês Each time you press the asterisk key on the keypad you have the choice to enter either “letters” or “symbols”. When in “letter mode,” [English] appears at the bottom of the screen. press the key again and you will notice how [symbol] replaces [English] at the bottom of the screen.
-
Page 57: Synchronize Data With The Software
17.0 Synchronize data with the software 17.1 By USB stick Before you can synchronize your safescan TA 900 terminal with the safescan Time Attend-ance software on your computer you must add your device to the software: please proceed as follows: •... -
Page 58: Connect Terminal With Safescan Time Attendance Software
| nEdErlAnds | dEuTsch | FrAnçAis | EspAñol | iTAliAno | porTuguês 17.2.1 Connect Terminal with Safescan Time Attendance Software during your first synchronization with the safescan Time Attendance software on your computer, you must add your device in the software: please proceed as follows: •... - Page 59 English | nEdErlAnds | dEuTsch | FrAnçAis | EspAñol | iTAliAno | porTuguês After you have made the right selections continue with the “commit. sync” button to execute the synchronisation. press oK, the system can not find any changes anymore. press oK. The synchronization is done.
- Page 60 www.safescan.com...
Need help?
Do you have a question about the TA-900 series and is the answer not in the manual?
Questions and answers