
Related Manuals for iBall iB-DHM4414P

Summary of Contents for iBall iB-DHM4414P
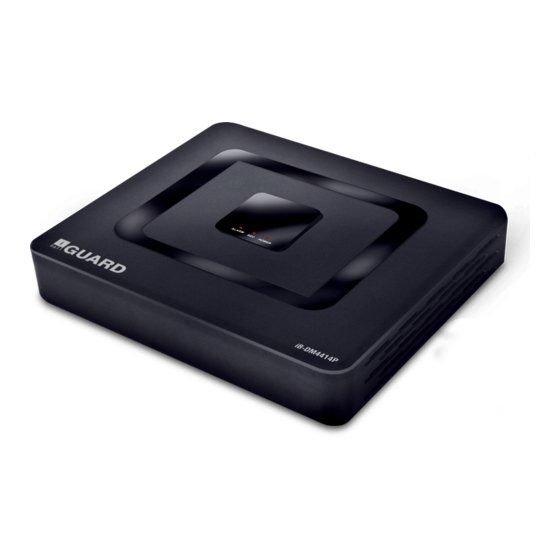
- Page 1 DVR User Manual 4-CH Full D1 Hybrid Mini DVR iB-DHM4414P 8-CH Full D1 Hybrid Mini DVR iB-DHM8841P Ver.: 1.0.0...
-
Page 2: Safety Warnings
Introduction Thank you for purchasing iBall Guard DVR. This manual applies for 2 different DVR models, Kindly check the product name/model no. of the DVR as you have purchased to refer the actual product specification. It will help to refer for installations & configuring your DVR. -
Page 3: Package Contents
Package Contents The following contents should be found in your package: 1- DVR 1- Power Adapter 1 - User Guide 1- Resource CD, which includes this Software utility Note: Make sure that the package contains the above items. If any of the listed items are damaged or missing, please contact the partner from whom you have purchased. -
Page 4: Product Features
NVR :- IP Camera Multiplex Operation: Live, Record, Playback, Backup& Remote Access iBall Cloud Technology - Easy management over Internet PTZ,Email, Video Blind, Motion Detection, Video Loss & Zoom Backup & Storage: USB Flash, Portable HDD & Network Backup... - Page 5 1-HDMI Port for HD display output Multiplex Operation: Live, Record, Playback, Backup, Remote Access iBall Cloud Technology - Easy management over Internet PTZ, Email, Video Blind, Motion Detection, Video Loss & Zoom Backup & Storage: USB Flash, Portable HDD & Network Backup...
-
Page 6: Hardware Installation Steps
Hardware Installation Steps: Hard Disk Installation: For the first use, please install the hard disk in the DVR before switch on the power. Note: DVR can run and monitor normally without hard disk, while it can’t record and playback. USB Connection: You can connect USB mouse, Flash disk, Portable HDD or DVR-RW on the USB port as available on Front or Back side of DVR. -
Page 7: Port Details
Port Details Name Description Video input Standard BNC port, Connected with the Camera. Video output Connected with the video input of the monitor. Video signal output port, connected to VGA port of a computer monitor. BNC video signal output connected to TV Video signal output port, connected to HDMI port of a HDMI TV, Computer monitor. - Page 8 Login When the DVR boots up, below is the screen as appearing confirming the OS is loading for startup Kindly wait till the Login Menu screen appears User must login as entering the Default User Name & Password. There are 2 login user settings >...
-
Page 9: Password Protection
Picture-1 Login Password protection If the password is continuous wrong 3 times, the beep will appear. If the password is continuous wrong 5 times, the account will be locked. Password unlock: Just reboot the DVR or wait for max. 30 mins, the account will be unlocked automatically). - Page 10 Desktop Shortcut Menu In preview menu you can right click to get desktop shortcut menu Main Menu As you click the Main menu icon from shortcut menu below image will appear Recording Setting...
- Page 11 Set the recording parameters in the surveillance channel. You can enter [Main Menu]> [Record]> [Record Config] to set. The system’s default set is 24 hours continuous recording. Note: There is at least 1 read-write hard disk if the DVR records normally.
- Page 12 will start only in the set range. 【Recording Type】Set recording type: regular, detection or alarm. Regular: Perform the regular recording in the set time section. The video file type is “R”. Detect:Trigger the “motion detect”, “camera mask” or “video loss” signal.
- Page 13 Snapshot Storage: (Selected models support the feature) Setup snapshot parameters for different channels. At first time its set 24hours snapshot continuously, Main Menu->Record->Snapshot Storage for appropriate settings. Note: If normal snapshot storage, pls setup Snap at Main Menu->Advanced->HDD Manage->Snapshot. Picture- 3 Snapshot Storage Video Playback There are 2 methods for you to play the video files in the hard disk.
- Page 14 Picture - 4 Video Playback 1. Playback control 2. Operating Tips 3. Record type 4. Time progress bar options...
- Page 15 5. Switching time or file mode 6. File Search 7.Channel option 8.Date option 9.Storage Device option 10.File information 11.File Option 12.Time 【File information】Start time, end time and size. 【File option】Choose the file to playback/backup. 【 layback control】Refer to the following sheet for more information.
- Page 16 Network Setup Picture-5 Network Setup Doing network setup through Main Menu > System > Network 【IP address】Set the IP address. Default: 192.168.1.200 【Subnet Mask】Set the subnet mask code: Default: 255.255.255.0 【Gateway】Set the default gateway. Default: 192.168.1.1 【TCP Port】Default media port : 9999 【HTTP Port】Default port : 80...
- Page 17 Motion Detection Picture-6 Motion Detection Motion detection setup: Set DVR equipment making it alarm, linkage record and make the PTZ turn to preset position when there is a moving object in designated areas during Monday to Friday. Step1. Choose【Main Menu】>【Alarm】>【Motion Detect】 ,then enter the setup interface Step2.
- Page 18 PTZ Control Follow the below steps for easy PTZ operations Step1. Set basic parameter such as channel and protocol. 【Main Menu】>【System】>【PTZ Config】 Step2. At the state of menu preview, enter the PTZ operation menu. Step3.One is "right click" mouse; choose the “PTZ control” and doing the PTZ general operation.
-
Page 19: Remote Monitoring
Remote Monitoring After connecting the network, 2 kinds of methods can be used for remote monitoring which are client software and common browser. Client software Client software (CMS) professional software used multi-equipments monitoring, which is safe, convenient and stable. CMS software is used in a computer, and manipulates several DVR at the same time. - Page 20 Web Based Login: Suggested to use Internet Explore for Login the DVR menu Step1. Install the browser plugin General_IE_V2.0.0.35_20111222.exe in case login page not able to access. Step2. Open web browser, then enter IP address on the browser address bar http://192.168.1.200 to login Note: when first login, below login image will appear...
- Page 21 Picture-9 GUI Operation Interface 1) Screen Split - Choose image preview mode; 2) Playback - Enter playback mode, which supports multi-channel playing back simultaneously. 3) Log - Display log information; 4) Local Config -Alarm and System setting 5) Channel operation - Open the videos. Left click and choose a window in the left, and choose the corresponding channel in the right, then double click the video.
- Page 22 Recording Config DVR achieves the functions such as high quality playback and remote monitoring by coding parameter config. Recording setup for each channel Note: Only part of DVR mode support resolution switch. Step1. Local operation through 【Main Menu】 > 【System】 > 【Encode】 remote setup click right mouse and choose “config”...
- Page 23 Extra Stream Setup Extra stream is used for remote client monitor and mobile monitor area. Step1. Enable extra stream Step2. Set frame rate and bit rates, operation way is the same as main stream. Multi-channel Playback Simultaneously DVR introduces the newest combination coding technique to achieve videos of all channels play simultaneously.
-
Page 24: Mobile Monitoring
Picture-12 CMS Interface Step1. Enable extra streams (Main Menu->System->Encode) Step2. Open CMS, and then login. Step3. After add devices, right click device name to select "Connect all video (Main stream)" Mobile Monitoring It introduces extra stream techniques when mobile monitoring, support channels switch (eg. - Page 25 4. After successfully installing the software, finding and running "eg.windows mobile-move eye" software through [start] -> [procedure] in the mobile, Picture13 mobile client software Interface Picture-13 Picture-14 Step5. Move Eye - Mobile setup. Click "setting" button at the right corner, and then go to below picture 14.
- Page 26 Mobile Client Software setting User name: login name of DVR Password: password of DVR Server: IP address or domain name of DVR Port: mobile monitor port 9090 Auto Connect: If select it, then it will auto connect to the DVR and auto display cameras.
-
Page 27: Video Blind
Flexible File Storage and Backup DVR feature several unique storage and backup techniques to achieve multiple modes storage and backup. Redundant storage: DVR introduces RAD 1 storage technique to achieve 2 hard disks storing simultaneously and mutual backup. USB HDD and Portable hard disk: DVR introduces the storage technique, supporting video files which are real-time written in storage devices. -
Page 28: General Setup
General setup [system time] Set the system data and time. [data format] Choose the data format: YMD, MDY, DMY. [list separator] Choose list separator of the data format. - Page 29 User management Can manage User & Group Add User Add Group There is no limit in the user and user team. You can add or delete the user team according to user definition. The factory setup include: user\admin & guest.
- Page 30 Logout Logout, Shut down the system or reboot up Upgrade: Select upgrade position from USB interface Upgrade file – select the file which needs upgraded...
-
Page 31: Mouse Operation
Mouse operation *Take right hand as an example Operation Function Double click one item in the file list to playback the video Double click the playback video to zoom in or out the screen Double left click Double click the channel to make it full screen display in preview double click... -
Page 32: Remote Control Operation
Remote Control Operation Sr no. Name Function Multi-window button Same function as Multi-window button in the front panel Numeric button Code input/number input/channel switch Same function as button in the front panel Direction button Same function as direction button in the front panel Record control Control the record Same function as “Record mode”... -
Page 33: Copyright And Trademarks
COPYRIGHT & TRADEMARKS Specifications are subject to change without notice. iBall is a registered trademark of Best IT World (India) Pvt. Ltd. Other brands and product names are trademarks or registered trademarks of their respective holders. No part of the specifications may be reproduced in any form or by...
Need help?
Do you have a question about the iB-DHM4414P and is the answer not in the manual?
Questions and answers