
Related Manuals for Scott E-Z Set


Summary of Contents for Scott E-Z Set
-
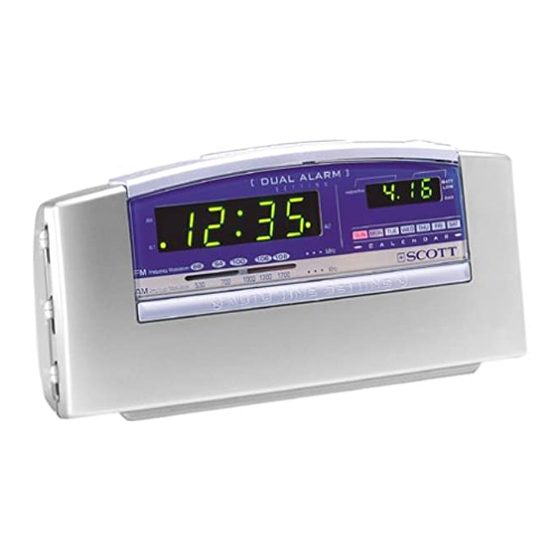
Page 1: Clock Radio
Clock Radio with Dual Alarm Auto Time Setting System (U.S. Patent No. 6,567,344) OWNER’S MANUAL SCR120 Visit our web site at www.emersonscott.com SCR120_080206.p65 2/8/2006, 15:56... -
Page 2: Important Safety Instructions
CAUT I ON TO PREVENT FIRE OR SHOCK HAZARD, DO NOT USE THIS PLUG WITH AN EXTENSION CORD, RECEPTACLE OR OTHER OUTLET UNLESS THE BLADES CAN BE FULLY INSERTED TO PREVENT BLADE EXPOSURE. TO PREVENT FIRE OR SHOCK HAZARD, DO NOT EXPOSE THIS APPLIANCE TO RAIN OR MOISTURE. C AU T I O N RISK OF ELECTRIC SHOCK DO NOT OPEN... - Page 3 ‘ Year’ , ‘ Month’ , ‘ Date’ , ‘ Day’ , and ‘ Time’ as soon as you plug it in. The only thing you have to do is tell the E-Z Set what time zone you are in, and the built in computer does everything else for you immediately.
-
Page 4: Important Notes
IMPORTANT NOTES • Avoid installing this unit in places • Operate controls and switches as exposed to direct sunlight or close described in the manual. to heat radiating appliances such as • Before turning on the power, make electric heaters, on top of other certain that the power cord is stereo equipment that radiates too properly installed. -
Page 5: Preparation For Use
PREPARATION FOR USE UNPACKING AND SET UP • Remove the radio from the carton and remove all packing material from the radio. We suggest that you save the packing material, if possible, in the unlikely event that your radio ever needs to be returned for service. The original carton and packing material is the only safe way to pack your radio to protect it from damage in transit. -
Page 6: Power Source
POWER SOURCE This radio is designed to operate on normal 120V 60Hz AC power only. Do not attempt to operate the radio on any other power source. You could cause damage to the radio that is not covered by your warranty. This radio should be connected to an AC outlet that is always ‘... -
Page 7: Location Of Controls And Indicators
LOCATION OF CONTROLS AND INDICATORS SCR120_080206.p65 2/8/2006, 15:56... - Page 8 Top Panel 1.) ALARM MODE Button. (Weekdays/Weekends/Everyday alarm) 2.) TIME Setting Button. 3.) DATE Setting Button. 4.) ALARM 1 Setting Button. 5.) ALARM 2 Setting Button. 6.) TIME ZONE Button. 7.) UP Button. 8.) DOWN Button. 9.) SLEEP Timer Button. 10.) RADIO ON/OFF Button.
- Page 9 If you do not live in the Eastern Time zone you must change the default zone display to your own zone. You only do this one time and the E-Z Set will remember the new default zone setting and will always return to that setting after a power interruption.
-
Page 10: Date Display
DAYLIGHT SAVING AND LEAP YEAR ADJUSTMENTS All Daylight Saving and Leap Year adjustments are made automatically by the E-Z Set internal computer as follows: • Start of Daylight Saving Time: At “2:00 AM” on the first Sunday in April, the clock will automatically advance to “3:00 AM”. - Page 11 As a result of the new Energy Bill that was passed by Congress in August of 2005, Daylight Saving Time is scheduled to be extended starting in 2007. This E-Z Set Clock Radio has been programmed to adjust itself automatically for Daylight Saving Time through 2006.
-
Page 12: Manual Time Adjustments
Some people like to set their clocks 5 to 10 minutes fast to make sure that they will always be on time. Even though the E-Z Set sets the time by itself, you still have the option of adjusting the time manually if you wish. - Page 13 SELECTING THE ALARM MODE Your E-Z Set clock radio allows you to select from among three different alarm operation modes for either alarm. The alarm modes are: • Weekdays only - the alarm will only turn on Monday through Friday;...
-
Page 14: Listening To The Radio
LISTENING TO THE RADIO 1.) Set the Band selector to the desired band, AM or FM. 2.) Set the VOL (Volume) control to a low setting. 3.) Press the RADIO ON/OFF button to turn the radio ‘ On’ . 4.) Select your desired station with the TUN (Tuning) control. 5.) Adjust the VOL control to the desired setting. -
Page 15: Wake To Radio
WAKE TO RADIO 1.) Turn the radio ‘ On’ and select the band, station, and volume level that you wish to hear when the alarm comes on, then turn the radio ‘ Off’ again. 2.) Reconfirm the wake up time and alarm mode settings for the alarm you are using, Alarm 1, Alarm 2, or both alarms. -
Page 16: Wake To Buzzer
WAKE TO BUZZER Note: Alarm 1 and Alarm 2 have different buzzer sounds. • Alarm 1 is a “Single beep” sound. • Alarm 2 is a “Double beep” sound. You will be able to tell which alarm is going off by the sound that it makes. 1.) Reconfirm the wake up time and alarm mode settings for the alarm you are using, Alarm 1, Alarm 2, or both alarms. -
Page 17: Dimmer Control
SLEEP TO MUSIC TIMER You can program the sleep timer to play the radio for up to 90 minutes and then shut off automatically. 1.) Press the SLEEP button. The small display will show “10” and the radio will begin to play. After 10 minutes the radio will shut off automatically. -
Page 18: Changing The Lithium Battery
A fresh lithium battery can supply power to the E-Z Set computer for at least 3 years even if it is never connected to an AC power supply. If your radio was connected to... -
Page 19: Resetting The Clock After A Total Memory Loss
Set internal computer. If the unit is disconnected from the AC outlet after the battery is exhausted, or if a power interruption occurs, the E-Z Set memory will be lost and the clock will need to be reset when the power is restored. Be sure to install a fresh lithium battery before you reset the clock, otherwise the clock will need to be reset each time the power is interrupted. - Page 20 5.) After you set the time, reconfirm that the Day and Month/Date displays are still correct. Make final adjustments if necessary. The E-Z Set clock memory is now reset and the new lithium battery will maintain it for the next 5 to 8 years, depending on the number and duration of the power outages you experience.
-
Page 21: Care And Maintenance
FOR ADDITIONAL SET-UP OR OPERATING ASSISTANCE PLEASE CALL: 1-888-837-8370 FOR CUSTOMER SERVICE, PLEASE WRITE TO: H.H. SCOTT, INC. Consumer Affairs Dept., 5101 Statesman Drive, Irving, TX 75063. The Serial Number can be found on the bottom cabinet. We suggest that you record the Serial Number of your unit in the space below for future reference. - Page 22 H.H. SCOTT, INC. CLOCK RADIO LIMITED WARRANTY What does this warranty cover? Any manufacturing defects in original material, including original parts and workmanship, under normal use and conditions. For how long? For a period of one (1) year from the date of original purchase in the U.S.
- Page 23 H.H. SCOTT, INC. H.H. SCOTT, INC. Part No. 100-5093 Printed in China 607-06 SCR120_080206.p65 2/8/2006, 15:56...
Need help?
Do you have a question about the E-Z Set and is the answer not in the manual?
Questions and answers
how to set daylight savings on old SCR120 clock radio
The Scott E-Z Set SCR120 clock radio automatically adjusts for Daylight Saving Time through 2006. However, due to changes in the Energy Bill in 2005, users need to manually update the Daylight Saving Time settings for 2007 and beyond. Instructions for this adjustment are provided on a separate addendum sheet included with the instruction manual. Once updated, the clock will automatically adjust for Daylight Saving Time through the year 2099.
This answer is automatically generated