Advertisement
Quick Links
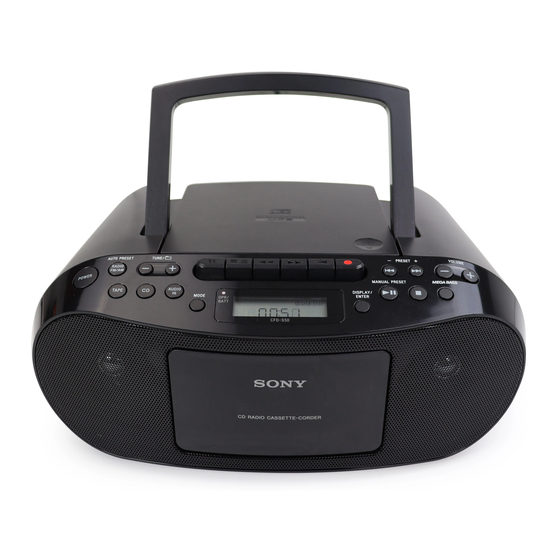
Personal Audio System
Operating Instructions
©2013 Sony Corporation
CFD-S50
The recycling of materials will help to conserve
natural resources. For more detailed information
about recycling of this product, please contact
WARNING
your local Civic Office, your household waste
disposal service or the shop where you
purchased the product.
To reduce the risk of fire or electric shock, do
Europe Only
not expose this apparatus to rain or moisture.
To reduce the risk of fire or electric shock, do not
expose this apparatus to dripping or splashing,
and do not place objects filled with liquids, such
as vases, on the apparatus.
As the main plug is used to disconnect the unit
This symbol on the battery or on the packaging
from the mains, connect the unit to an easily
indicates that the battery provided with this
accessible AC outlet. Should you notice an
product shall not be treated as household waste.
abnormality in the unit, disconnect the main plug
On certain batteries this symbol might be used in
from the AC outlet immediately.
combination with a chemical symbol. The
The unit is not disconnected from the AC power
chemical symbols for mercury (Hg) or lead (Pb)
source (mains) as long as it is connected to the
are added if the battery contains more than
wall outlet, even if the unit itself has been turned
0.0005% mercury or 0.004% lead. By ensuring
off.
these batteries are disposed of correctly, you will
help prevent potentially negative consequences
Do not install the appliance in a confined space,
for the environment and human health which
such as a bookcase or built-in cabinet.
could otherwise be caused by inappropriate
Excessive sound pressure from earphones and
waste handling of the battery. The recycling of
headphones can cause hearing loss.
the materials will help to conserve natural
resources.
Do not expose the batteries (battery pack or
In case of products that for safety, performance
batteries installed) to excessive heat such as
or data integrity reasons require a permanent
sunshine, fire or the like for a long time.
connection with an incorporated battery, this
The nameplate and important information
battery should be replaced by qualified service
concerning safety are located on the bottom
staff only. To ensure that the battery will be
exterior.
treated properly, hand over the product at
Notice for customers: the
end-of-life to the applicable collection point for
the recycling of electrical and electronic
following information is only
equipment.
applicable to equipment sold
For all other batteries, please view the section on
how to remove the battery from the product
in countries applying EU
safely. Hand the battery over to the applicable
directives
collection point for the recycling of waste
batteries.
This product has been manufactured by or on
For more detailed information about recycling of
behalf of Sony Corporation, 1-7-1 Konan
this product or battery, please contact your local
Minato-ku Tokyo, 108-0075 Japan. Inquiries
Civic Office, your household waste disposal
related to product compliance based on
service or the shop where you purchased the
European Union legislation shall be addressed to
product.
the authorized representative, Sony Deutschland
GmbH, Hedelfinger Strasse 61, 70327 Stuttgart,
Licence and Trademark Notice
Germany. For any service or guarantee matters,
MPEG Layer-3 audio coding technology and
please refer to the addresses provided in the
patents licensed from Fraunhofer IIS and
separate service or guarantee documents.
Thomson.
Disposal of Old Electrical &
Electronic Equipment
(Applicable in the European
Union and other European
countries with separate
collection systems)
This symbol on the product or on its packaging
indicates that this product shall not be treated as
household waste. Instead it shall be handed over
to the applicable collection point for the
recycling of electrical and electronic equipment.
By ensuring this product is disposed of correctly,
you will help prevent potential negative
consequences for the environment and human
health, which could otherwise be caused by
inappropriate waste handling of this product.
Power Sources
Connect the AC power cord
, or insert six R14 (size C) batteries (not supplied) into the battery
compartment
.
To a wall outlet
or
To AC IN jack
AC power cord (supplied)
Bottom
Use alkaline batteries with this unit. The use of manganese batteries
is not recommended, since this type of battery has an extremely short
usage time.
Notes
Replace the batteries when the OPR/BATT indicator
dims, or when the unit becomes inoperable. Replace all
of the batteries with new ones. Before you replace the batteries, be sure to remove any CD or tape and
disconnect any optional component from the unit.
To use the unit on batteries, disconnect the AC power cord from the unit and the wall outlet.
To use the power-management function (European models only)
This unit is equipped with an automatic standby function. With this function, the unit enters standby
mode automatically after about 15 minutes if there is no operation or audio signal output.
Notes
The displayed content starts flashing on the display about 2 minutes before entering standby mode.
In standby mode with the AC power cord connected, "STANDBY" appears on the display (European models
only).
The automatic standby function is not available with the FM/AM function.
Basic Operations
4-474-860-12(1)
Printed in China
POWER (or OPERATE) button
Function buttons
RADIO FM/AM–AUTO
PRESET button
Disposal of waste batteries
TAPE button
(applicable in the European
CD button
Union and other European
AUDIO IN button
countries with separate
collection systems)
TUNE/
(folder) + button
(folder) button
TUNE/
CD compartment cover
Tape operation buttons
(pause) button
(stop/open) button
Before using the unit
To turn the power on or off
Press POWER (or OPERATE)
on the power of this unit using the direct
power-on function (below).
In this manual, operations are mainly explained
using the direct power-on function.
To use the direct power-on function
Press CD
, TAPE
IN
while the unit is turned off. The power
turns on with the relevant function selected.
To adjust the volume
Press VOLUME + or
The volume level of this unit is adjustable in
steps from 0 to 31.
To listen through headphones
Connect headphones to the (headphones) jack
.
To reinforce the bass
Press MEGA BASS
"MEGA BASS" lights up on the display.
To return to normal sound, press the button
again.
Playing a music disc
You can play the following types of discs with
this unit.
Audio CDs on which CD-DA tracks are recorded
in CD-DA disc format
CD-R/CD-RW discs on which CD-DA tracks are
recorded in CD-DA disc format
CD-R/CD-RW discs on which MP3 audio files
are recorded in ISO 9660 Level 1/Level 2 or
Joliet
1
Press CD
to turn on the CD function.
2
Press PUSH OPEN/CLOSE
disc in the CD compartment and then
close the compartment cover.
Label side up
The disc is loaded and the disc information
appears on the display. The information
displayed varies depending on the disc type
(audio CD/MP3 disc).
(Example: when an audio CD is loaded)
(Example: when an MP3 disc is loaded)
Total
number of
folders
3
Press
to start playback.
Rear
(fast forward) button
MEGA BASS button
(rewind) button
DISPLAY/ENTER button
(play) button*
Cassette tape compartment
(record) button
cover
PUSH OPEN/CLOSE
OPR/BATT indicator
(go backward)/PRESET
MODE button
button
AC IN jack
(go forward)/PRESET +
(headphones) jack
button
AUDIO IN jack
(play/pause)/MANUAL
PRESET button*
*
, VOLUME +
(stop) button
have a tactile dot.
VOLUME button
VOLUME + button*
(Example: an audio CD)
. You can also turn
Playing time*
(Example: an MP3 disc)
, RADIO FM/AM
or AUDIO
Playing time*
Each time you press DISPLAY , the playback
*
1
screen switches between showing the playing
time and showing the current track number.
.
2
*
If the playing time is longer than 100 minutes,
"--:--" appears on the display.
*
3
Each time you press DISPLAY , the playback
screen switches between showing the playing
time and showing the current track number
and the number of the folder containing that
track.
Other operations
To
Do this
.
Pause playback Press
playback, press the button
again.
Stop playback
Press
after playback is
stopped, playback starts from
the beginning of the track/
file you were last playing
(Resume Play).
Cancel Resume
Press
Play
press
Resume Play, playback starts
from the beginning of the
first track/file.
Select a folder
Press
+ or
on an MP3 disc
Select a track/
Press
file
skip tracks/files one by one.
Hold down
Find a point in a
track/file
during playback, and release
the button at the desired
point. When locating a point
while paused, press
, place a
start playback after the
desired point is found.
Tip
Resume Play is cancelled if you open the CD
compartment.
Example of folder structure and
playing order
The playing order of the folders and files is as
follows:
Total playing time
Total
number of
tracks
Notes on MP3 discs
When a disc is loaded, the unit reads all the files
on that disc. During this time, "READ" is blinking. If
there are many folders or non-MP3 files on the
disc, it may take a long time for play to begin or
for the next MP3 file to start to play.
We recommend that non-MP3 files or unnecessary
folders are excluded when creating MP3 discs.
During playback, folders that contain no MP3 files
are skipped.
This system can only play MP3 files that have a file
extension of ".mp3".
Note that even if the file name has the correct file
extension but the actual file was created in a
different audio format, this unit may produce
noise or may malfunction.
MP3 PRO format is not supported.
This unit cannot play audio files on a disc in the
following cases:
When the total number of audio files exceeds
413.
When the total number of folders on a single
disc exceeds 99.
When the directory level (folder depths) exceeds
9 (including the "ROOT" folder).
To change play modes
Press MODE
repeatedly while the disc is
stopped.
For details, see "Selecting play mode."
Listening to the radio
1
Press RADIO FM/AM
repeatedly to
select the band "FM" or "AM."
2
Hold down TUNE + or
until the
frequency digits begin to change on the
display.
The unit automatically scans the radio
frequencies and stops when it finds a clear
station. When an FM stereo broadcast is
received, "ST" lights up on the display.
If you cannot tune to a station using
automatic tuning mode, press TUNE + or
repeatedly to change the frequency step by
step.
Tip
If the stereo FM reception is noisy, press MODE
repeatedly until "Mono" appears on the display. You
will lose the stereo effect, but the broadcast will
improve.
To change the FM/AM tuning interval
(Philippines, Singapore, Malaysia and India
models only)
The FM/AM tuning interval can be changed if
and
necessary using the following procedure.
1
Press RADIO FM/AM
repeatedly to
select a band.
2
Hold down MANUAL PRESET
"FM-xx" or "AM-xx" flashes on the display.
3
Hold down RADIO FM/AM
until the
current tuning step appears.
4
Press
or
to select the desired
tuning step.
"FM 50K" (for 50 kHz interval) or "FM 100K" (for
1
100 kHz interval) in the FM band, and "AM 9K"
(for 9 kHz interval) or "AM 10K" (for 10 kHz
interval) in the AM band can be selected.
5
Press ENTER
.
Changing the tuning interval erases all the FM/
AM preset stations stored in the unit. Reset your
preset stations after changing the tuning
2
*
3
interval.
To improve radio reception
Reorient the antenna to improve FM reception.
Reorient the unit itself to improve AM reception.
. To return to
. When you press
Playing a tape
twice. When you
after you cancel
Check the following items before starting
operation.
Use a type I (normal) tape only. You cannot
use any other types of tape with this
.
system.
If there is tape slack, rewind
or
. You can
the slack using a pencil to
avoid damaging the tape or
or
the unit.
1
Press TAPE
to turn on the tape
to
function.
2
Press
(
), insert a cassette tape
into the cassette tape compartment (
and then close the compartment cover.
Folder
MP3 file
3
Press
to start playback.
Other operations
To
Do this
Stop playback
Press
.
Pause playback Press
. To resume
playback, press the button
again.
Fast-forward or
Press
or
rewind
Eject the
Press
.
cassette
Notes
Do not turn off the power during the tape
playback. Doing so may cause malfunction. Make
sure to stop playback before turning off the
power.
After the tape is wound to the beginning or end,
press to release or (except for
European models).
Recording on a tape
Check the following items before starting
operation.
Use a type I (normal) tape only. You cannot
use any other types of tape with this
system.
Make sure that the overwrite protection tab
has not been removed. If the tab has been
removed, cover the broken tab using
adhesive tape.
1
Prepare the source you want to record.
To record CD-DA tracks or MP3 files
on a disc
Press CD
and place a disc in the CD
compartment. Make sure not to start playback.
See "Playing a music disc."
To record a radio program
Press RADIO FM/AM
repeatedly to select a
band and tune to the desired station. See
"Listening to the radio."
To record sound from a connected
optional component
Press AUDIO IN
and connect an optional
component, and then start playback.
2
Press
(
), insert a cassette tape
into the cassette tape compartment (
and then close the compartment cover.
until
3
Press
to start recording (the play
button
will depress automatically
at the same time).
Tips
Adjusting the volume or the audio emphasis will
not affect the recording level.
If the AM program makes whistling sound after
you have press in step 3, press MODE
repeatedly to select the position of ISS
(Interference Suppress Switch) that may decreases
the noise.
Use AC power as the power source for recording
for best recording results.
Other operations
To
Do this
Stop recording
Press
.
Pause
Press
. To resume
recording
recording, press the button
again.
To record from partway through the
current CD-DA track or MP3 file
Press
to pause playback where you want
to start recording, then press
.
To record favorite CD-DA tracks or MP3
files on a disc
Create a program (see "Creating your own
program (Program Play)"), then press
to
start recording.
To erase recorded cassette tapes
To erase a cassette tape, you need to record
silence over the previous recording.
1
Press TAPE
to turn on the tape
function.
2
Insert a recorded tape into the cassette
tape compartment.
3
Press
.
Erasing process starts, and previous recording
is overwritten with silent data.
)
.
)
Advertisement

Related Manuals for Sony CFD-S50


Summary of Contents for Sony CFD-S50
- Page 1 For more detailed information about recycling of Do this Each time you press DISPLAY , the playback behalf of Sony Corporation, 1-7-1 Konan this product or battery, please contact your local screen switches between showing the playing ...
-
Page 2: Connecting Optional Components
After playing, store the CD in its case. connection Reduce the volume. Approx. 150 s (sec.) with Sony cassette C-60 cable (not Frequency response Clean the CD, or replace it if the CD is badly Note on DualDiscs supplied) Type I (normal): 80 Hz –...
Need help?
Do you have a question about the CFD-S50 and is the answer not in the manual?
Questions and answers