Table of Contents
Advertisement
Advertisement
Table of Contents

Summary of Contents for Salton SOD 12
- Page 1 INSTRUCTIONS AND WARRANTY MODEL NO: SOD 12...
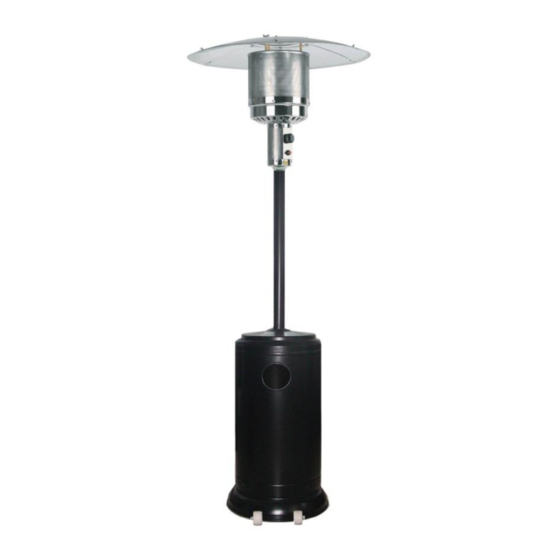
- Page 2 SALTON GAS PATIO HEATER...
-
Page 3: Important Safeguards
IMPORTANT SAFEGUARDS CAUTION PLEASE READ CAREFULLY THE FOLLOWING SAFETY GUIDELINES BEFORE OPERATIONING THIS APPLIANCE. Do not use the patio heater for indoors, as it may cause personal injury or property damage. This outdoor heater is not intended to be installed onto recreational vehicles ... -
Page 4: Heater Stand And Location
Important…Flash Back (i.e. Fire in the Burner Jet) In the event of a flash back occurring in the burner tube (that is when the flame burns inside the jet instead of the outside): Immediately turn off the gas supply at the gas cylinder. ... -
Page 5: Gas Requirements
GAS REQUIREMENTS Use LPG gas only. The pressure regulator and hose assembly to be used must conform to local standard codes. The installation must conform to local codes, or in the absence of local codes, with the standard for the storage and handling of liquid petroleum gases. A dented, rusted or damaged LPG cylinder may be hazardous and should be ... - Page 6 Note If the new cylinder has just been connected, please allow at-least one minute for the air in the gas pipeline to purge out through the pilot hole. When lighting the pilot flame, ensure that the Variable Control Knob is continuously pressed down while pressing the igniter button.
-
Page 7: Cleaning And Care
CLEANING AND CARE Wipe off powder coated surfaces with soft, moist rag. Do not clean heater with cleaners that are combustible or corrosive. Remove debris from the burner to keep it clean and safe for use. Cover the burner unit with the supplied protective cover when the heater is not in use. -
Page 8: Specifications
A. Construction and characteristics Transportable terrace/garden heater with cylinder housing Casing in steel with powder-coating or stainless steel Gas hose connections with metal clamp (screw caps for Germany) Stainless steel flame screen Heat emission from reflector B. -
Page 9: Assembly Procedures
ASSEMBLY PROCEDURES STEP 1 Put the 3 pcs post brackets on each position on the base as shown in the picture. Use 3 pcs M8 x 16 mm bolts to join the post brackets and stand. Square Metal Support Bolt Stand... - Page 10 STEP 3 Place the tank housing on the stand. Tank Housing STEP 4 Fit the gas hose/pipe nut to the burner gas inlet connector. Tighten the gas hose/pipe nut and gas inlet thread. Fix the completed burner unit to the post by 4 pcs M6 x 10 mm bolts. Bolt...
- Page 11 STEP 5 Check whether the connection of vertical post and burner are assembled according to instructions, and all bolts and nuts are tightened. Put washer Ø8 mm on each reflector support bolt. Reflector Flat Washer STEP 6 Fasten the reflector with 3 pcs washers and 3 pcs M8 mm dome nuts.
- Page 12 STEP 7 Bring up the tank housing and rest it on the post plate. Connect the regulator to the gas tank and tighten it with adjustable wrench. Connect the end thread of inlet gas hose to the regulator. ...
-
Page 13: Maintenance And Servicing Instructions
MAINTENANCE AND SERVICING INSTRUCTIONS There is very little maintenance required on this appliance. Important points to remember are: Always check that the regulator seal is undamaged when changing the gas cylinder. Always check that the hose is in good condition before using and that it is securely clamped on to the appliance and the regulator. -
Page 14: Problems Check List
PROBLEMS CHECK LIST PROBLEM PROBABLE CAUSE SOLUTION Pilot Flame will not light Gas valve may be OFF Turn the valve ON Tank fuel is empty Refill the LPG tank Opening is blocked Clean or replace the opening Air in supply system Purge air from the lines Loose connections Check all fittings... - Page 15 PLEASE AFFIX YOUR PROOF OF PURCHASE/RECEIPT HERE IN THE EVENT OF A CLAIM UNDER WARRANTY THIS RECEIPT MUST BE PRODUCED. W A R R A N T Y Tedelex Trading (Pty) Limited (“Tedelex”) warrants to the original purchaser of this product (“the customer”) that this product will be free of defects in quality and workmanship which under normal personal, family or household use and purpose may manifest within a period of 1 (one) year from the date of purchase (“warranty period”).
Need help?
Do you have a question about the SOD 12 and is the answer not in the manual?
Questions and answers