Table of Contents
Advertisement
Advertisement
Table of Contents

Related Manuals for Acorn Ltl 5210A


Summary of Contents for Acorn Ltl 5210A
- Page 1 Scouting Camera Ltl 5210A(12MP) USER’S MANUAL...
-
Page 2: Table Of Contents
TABLE OF CONTENTS General Information..............2 1.1 Introduction.............. 2 1.2 Application..............3 1.3 Illustration..............3 Quick Start................5 2.1 Load Batteries............5 2.2 Insert SD Card............6 2.3 Enter Test Mode............7 2.4 Enter Live Mode............9 Advanced Settings..............11 3.1 Parameter Settings............ 11 3.2 File Format............... 15 Warranty Information............16 Appendix I Technical Specifications........ -
Page 3: General Information
GENERAL INFORMATION 1.1 Introduction Our scouting camera (also called game camera/trail camera) is a scouting device. It can be triggered by sudden change of ambient temperature caused by moving game in a region of interest (ROI), which is detected by a highly sensitive Passive Infra-Red (PIR) sensor, and then take pictures or video clips automatically. -
Page 4: Application
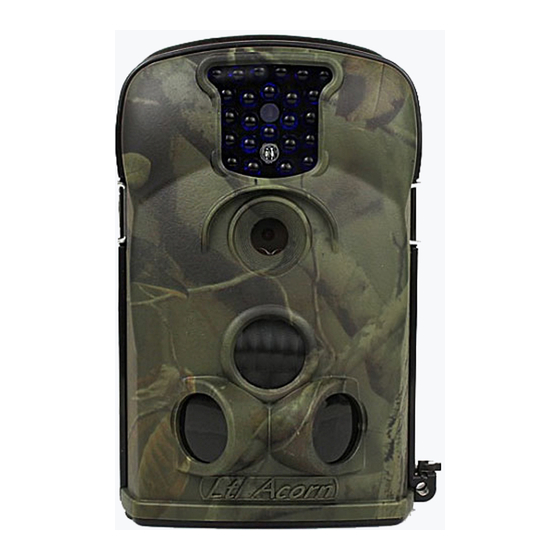
Serial Number function enables you to code locations in the photos. This helps multi-camera users identify the location when reviewing the photos Date, time, temperature, moon phase can be stamped in the pictures Lockable and password protected 1.2 Application ... - Page 5 Figure 1.1: Front View Figure 1.2: Bottom View-1 - 4 -...
- Page 6 Figure 1.2: Bottom View-2 The camera provides the following connections for external devices: USB port, SD card slot, TV out jack, and external DC power in jack. The 3-way Power/Mode Switch is used to select the main operation modes: OFF, ON and TEST. To supply power, it is recommended to use four new high-performance alkaline AA batteries or low self-discharge Ni-MH chargeable AA batteries.
-
Page 7: Quick Start
Figure 1.3: Back View QUICK START 2.1 Load Batteries Let us begin with loading the batteries. Please follow the instructions below. Open the bottom cover by pulling down the lock hole. Push the cover of the battery compartment and release. It will pop out. -
Page 8: Insert Sd Card
batteries are connected, the camera will be powered by the external one. 2.2 Insert SD Card The camera does not come with internal memory. So it will not work without a SD (Secure Digital) memory card or SDHC (High Capacity) card. Before inserting the SD card into the card slot, please make sure the write-protect switch on the side of the SD card is “off”... - Page 9 Switch to the TEST position to enter the Test mode. In this mode you can take pictures or video clips like a regular digital camera, or enter the Menu to set up parameters. On the keypad there are four “shortcut” functional keys (see Figure 2-1) working as below: Figure 2.2 ...
-
Page 10: Enter Live Mode
reference to 3.1 Parameter Settings in the Advanced Operation section. Under the test mode, one useful function you would like is testing the work area of the PIR (Passive Infrared) sensor, specifically the sensing angle and monitoring distance. To perform the test: ... - Page 11 Switch to the ON position to enter the live mode. The Motion Indicator will flash red for about 10 seconds and the camera starts working by itself without any manual handling. It will at once shoot pictures or record videos when game or other objects enter the PIR area of the main sensor directly.
-
Page 12: Advanced Settings
If the game continually enters into the PIR area of the main sensor, the camera takes pictures immediately, therefore catching the whole body of the game. This split-second process could be as short as 0.2 second. In the case the game browses only in the PIR area of the prep sensors, to avoid the camera being powered on constantly, the system is designed to work in the following way: If the game does not enter the PIR area of the main sensor and therefore not trigger... - Page 13 change the setting, and to confirm the change. Always remember to press to save the change. Otherwise you will lose your new setting. Parameter Settings Description (Bold = default) Mode Camera, Select whether still photos or Video, video clips are taken. In Camera+Video Camera+Video mode, Ltl-5210A can first take photos and then...
- Page 14 Video Size Select video resolution (pixels per 1280×720 (affects video frame). Higher resolution 720×480 clips only) produces better quality videos, but 640×480, creates larger files that take more 320×240 of the SD card capacity. Set Clock Enter Press Enter to set up date and time.
- Page 15 environments with more interference. Temperature also affects the sensitivity. The High setting is suitable when the ambient temperature is warm, and the Low setting is helpful in cold weather. Date Stamp On, Off Select On if you want the date & (affects still time imprinted in every photo.
- Page 16 reviewing the photos. Time Lapse Off, On If set On, the camera will automatically take photos/videos according to the set interval, regardless of whether the PIR sensor has detected any game. This is helpful when observing cold-blooded animals like snakes, or the process of flowering, etc.
-
Page 17: File Format
manufacturer default. 3.2 File format camera stores photos videos folder \DCIM\100MEDIA in the SD card. Photos are saved with filenames like PICT0001.JPG and videos like VIDO0001.AVI. In the OFF mode, you can use the provided USB cable to download the files to a computer. Or you can put the SD card to a SD card reader, plug in a computer, and browse the files on the computer without downloading. - Page 18 charge. This warranty only extends to the original retail buyer from our authorized dealer. Purchase receipt or other proof of the date of the original purchase is required to receive warranty benefits. The warranty on any replacement product provided under the original warranty shall be for the remaining portion of the warranty period applicable to the original product.
-
Page 19: Appendix I Technical Specifications
Appendix I: TECHNICAL SPECIFICATION Model Parameters Image 12 Mega Pixels Color CMOS Sensor Max. Pixel 4000x3000 Size Lens F=3.1; FOV=55°; Auto IR-Cut IR Flash 65 Feet/20 Meters LCD Screen 48x35.69mm(2.36"); 480(RGB)*234DOT; 16.7M Color Operation 6 Keys Keypad Memory SD Card (8MB ~32GB) 12MP=4000x3000;... - Page 20 Main PIR 58° Sensing Angle Day/Night Operation Mode Trigger Time 1 Second (When using the 2G SD card) 0sec. - 60min; Programmable Trigger Interval Shooting Numbers Video 1-30sec.; Programmable Length Camera + First take Picture then Video Video Playback 1~8Times Zoom In Time Stamp On /Off;...
- Page 21 Power 4xAA; Expandable to 8xAA (With additional battery box) Supply Stand-by 0.4mA Current Stand-by 3~6 Months(4xAA~8xAA) Time Auto power off in 2 minutes while no keypad Auto Power controlling Power 150mA (+500mA when IR LED lights up) Consumption Low Battery 4.2~4.3V Alarm Interface...
-
Page 22: Appendix Ii Package Contents
Appendix II: PACKAGE CONTENTS Part name Quantity Digital camera Additional battery box TV AV IN cable USB cable Strap External DC cable (optional) Instruction Manual Warranty Card - 21 -... -
Page 23: Appendix Iii Instruction On Installing Additional Battery Box
Appendix III: INSTRUCTION ON INSTALLING ADDITIONAL BATTERY...
Need help?
Do you have a question about the Ltl 5210A and is the answer not in the manual?
Questions and answers
I have changed the batteries, and the date has reset to a default in 2011, how do I set current date and time? I can't get menu to start.
To set the current date and time on an Acorn Ltl 5210A after changing the batteries, switch the camera to "TEST" mode using the OFF/ON/TEST switch. Ensure an SD card is inserted; otherwise, the screen will remain blank. Once in TEST mode, use the keypad to navigate the settings menu and set the date and time.
This answer is automatically generated