Table of Contents
Advertisement
AUTOATTENDANT
System Manual
Magyarországon a Matrix Telecom Ltd. képviselete,
Matrix termékek importőre, kizárólagos forgalmazója:
1095 Budapest, Mester u. 34.
Telefon: *218-5542, 215-9771, 215-7550, 216-7017, 216-7018
Fax: 218-5542 Mobil: 30 940-1970, 20 949-2688
E-mail: delton@delton.hu Web: www.delton.hu
Advertisement
Table of Contents

Subscribe to Our Youtube Channel
Summary of Contents for Matrix AutoAttendant
- Page 1 AUTOATTENDANT System Manual Magyarországon a Matrix Telecom Ltd. képviselete, Matrix termékek importőre, kizárólagos forgalmazója: 1095 Budapest, Mester u. 34. Telefon: *218-5542, 215-9771, 215-7550, 216-7017, 216-7018 Fax: 218-5542 Mobil: 30 940-1970, 20 949-2688 E-mail: delton@delton.hu Web: www.delton.hu...
- Page 2 Neither Matrix Telecom nor its affiliates shall be liable to the purchaser of this product or third parties for damages, losses, costs or expenses incurred by purchaser or third parties as a result of: accident, misuse or abuse of this product or unauthorized modifications, repairs or alterations to this product or failure to strictly comply with Matrix Telecom’s operating and maintenance instructions.
-
Page 3: Table Of Contents
Fax Homing ..................................46 Graph and Nodes ................................48 Greetings ..................................63 Initial Node ..................................64 Interfacing the AutoAttendant with a PBX ........................66 Operation of AutoAttendant .............................. 73 Operator ................................... 74 Port Parameters ................................75 Programming the System ..............................76 Prompts and Responses .............................. -
Page 5: Section 1: Introduction
Section 1: Introduction... -
Page 7: Welcome
If you still can’t find the answer, gather all the information or questions that apply to your problem and with the product close to you, call your dealer. Matrix dealers are trained and ready to give you the support you need to get the most from your Matrix product. -
Page 8: Packing List
Matrix Packing List The ideal sales package for AutoAttendant is as mentioned below: Sr. No. Accessories Qty. EPABX AutoAttendant AutoAttendant System Manual Fuse 2.5 A Fuse 3.15 A Battery Cable Screw Grip Screw M 7/30 Warranty Card Set Support Card... -
Page 9: Warranty Statement
Matrix has been advised of the possibility of such damages or losses, or for any claim by any other party. - Page 10 Matrix Except for the obligations specifically set forth in this Warranty Policy Statement, in no event shall Matrix be liable for any direct, indirect, special, incidental or consequential damages whether based on contract or any other legal theory and where advised of the possibility of such damages.
-
Page 11: Introducing The System
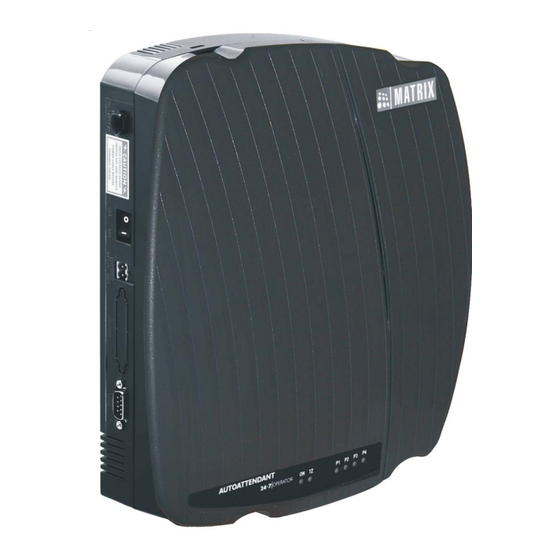
Introducing the System The AutoAttendant is a stand-alone, integrated one-box solution satisfying auto-attendant and information requirement delivery system. The AutoAttendant is available in two configurations viz. 2 ports or 4 ports. The AutoAttendant is shown in the figure given below:... - Page 12 (ext. numbers) to call the same person in an organization viz. one for calling a person through the AutoAttendant and the other for calling the person using the DID facility of the PBX. • DID feature in PBX not required to interface the AutoAttendant to a PBX.
-
Page 13: Configuring The System
Gateway. The AutoAttendant provides the flexibility to interface with any type of PBX. If the PBX integrated with the AutoAttendant is a Matrix digital product or Matrix analog Version 7 or above product, Siemens Hi Path 3550 or Panasonic KX-TD1232/KX TD816 no special programming is required. But in case the PBX type integrated is Unknown then additional programming is required. -
Page 14: Protecting The System
Protecting the AutoAttendant from heavy voltage from the mains The AutoAttendant is designed to work with input voltages ranging between 90V to 260V AC. The system should be protected from abrupt changes in the input voltage by using a CVT. -
Page 15: Installing The System
• Don’t power the system. • Fix the system on the selected site. Please refer “AutoAttendant Mechanical drawing” at the end of this topic for exact mechanical dimension and pitches of the AutoAttendant. - Page 16 CVT. • Tag each wire pair with respective extension of the PBX. • Connect the extensions of the PBX to the ports of the AutoAttendant. • Connect power cord of the system to the power supply. Ensure proper contacts.
-
Page 17: Getting Started
4. Call the AutoAttendant again. 5. Listen to the greetings. 6. Dial ‘*’. The AutoAttendant prompts to you to dial a name. Try out trial name. Check out whether the AutoAttendant transfers the call properly. 7. Please refer ‘Operation of AutoAttendant’ for more details. - Page 18 • It is always advisable for the caller to exit the AutoAttendant by dialing instructed codes. • In case the caller dials no codes, the AutoAttendant waits for timeout and then either disconnects the call or transfer the call to operator depending upon the state of the call. The timeout time depends on the state at which the caller is.
-
Page 19: Section 2: Features And Facilities
Section 2: Features and Facilities... -
Page 21: Call Transfer Types
AutoAttendant informs the name of the caller to the dialed extension. It prompts the called person to select whether to talk or not. If the called person selects to talk to the caller, the AutoAttendant transfers the call to the called person else plays busy message and transfers the call to the operator. - Page 22 If the extension does not respond for the time = wait for answer time then the AutoAttendant plays ‘No answer’ message to the caller and then offers him four options as above.
- Page 23 AutoAttendant responds: "Please hold, while your call is being transferred" AutoAttendant puts the caller on hold, and transfers the call to the extension number dialed by the caller AutoAttendant V2 System Manual...
- Page 24 Matrix AutoAttendant responds: "Please hold, while your call is being transferred" AutoAttendant puts the caller on hold and dials the extension number AutoAttendant then waits for Ring Back Tone Ring Back Error tone/Busy tone/Timeout Tone / Error tone / Busy tone...
- Page 25 Matrix AutoAttendant responds: "Please hold, while your call is being transferred" AutoAttendant puts the caller on hold and dials the extension number AutoAttendant then waits for the extension to answer the call Called extension busy ? AutoAttendant responds: "The extension, you have dialed is busy"...
- Page 26 Matrix AutoAttendant responds: "Please record your name after the beep" Caller speaks his/her name. AutoAttendant records the name for 3 seconds after the beep AutoAttendant responds: "Please hold, while your call is being transferred" AutoAttendant puts the caller on hold and dials the extension...
- Page 27 3 seconds after the beep AutoAttendant plays message: "Please hold, while your call is being transferred" AutoAttendant puts the caller on hold and dials the extension number and waits for the dialed extension to answer the call Called...
- Page 28 Please refer ‘Extension Parameters’ to know how SE can program the call transfer type for an extension. Programming by User • Call AutoAttendant • Dial #-2-Your Extension Number-User Password • On getting programming beeps, issue following command: 111-Call Transfer Type Where, AutoAttendant V2 System Manual...
- Page 29 3. Dial 111-5 4. Dial ‘0’ to exit user programming mode 5. AutoAttendant brings you to the initial node Important Point: • Only three call transfer types viz. Blind, Wait for Ring and Wait for Answer w/o name are applicable for operator.
-
Page 30: Communication Port
Matrix Communication Port What’s this? • The AutoAttendant has a communication port (DB-9 connector), which is used to download the configuration reports on to the computer. • The communication port uses RS-232C protocol. • Pin details of the COM ports: Pin No. - Page 31 You again get the Dialog Box having Options like and Change Emulation option to VT100 and click OK File, Edit, View, Call, Transfer, etc. Now enter the programming mode in the AutoAttendant You get the desired reports on the screen and give the printing commands...
-
Page 32: Configuration Reports
Matrix Configuration Reports What’s this? The AutoAttendant supports downloading the system’s configuration done through programming. This is done in the form of various reports. These reports are useful for: 1. Verifying whether the programming done is correct. 2. Storing them for future reference. -
Page 33: Default Configuration
When to use it? Many times it happens that due to some programming error, the system goes haywire and you are unable to analyse the problem. During such situation, it is advisable to load default values in the AutoAttendant. How to use it? -
Page 34: How It Works
How to use it? • Call the AutoAttendant. • AutoAttendant greets the caller as per the time of the day and then prompts the caller to dial extension number. • Dial ‘Extension Number’. • AutoAttendant transfers the call to the dialed extension if it is found in the extension table. - Page 35 PBX then it is advisable to change such numbers in the PBX. • If 25 and 251 are used in the AutoAttendant then the call would be transfer to the extension number that appears first in the extension table. Whereas, the other extension number will never be called.
-
Page 36: Dial By Name
• Dial ‘*’. • Dial first three letters of the name of the person you wish to call. • AutoAttendant transfer the call to the dialed extension name if it is found in the extension table. How it works? AutoAttendant V2 System Manual... - Page 37 Start Caller calls the AutoAttendant AutoAttendant greets the caller as per the time of the day AutoAttendant plays prompt for the initial node as per the timetable Caller dials '*' AutoAttendant prompts: "Please dial first three letters of the name"...
- Page 38 • The caller should have telephone instrument with alphabets printed on the keys. • AutoAttendant checks the dialed extension number for its validity. If the dialed number is not valid, it increments the retry count. When the current retry count equals the programmed retry count, it transfers the caller to the Operator.
-
Page 39: Extension Parameters
What’s this? • Extension is a logical port of the AutoAttendant. • The AutoAttendant has total 256 extensions. If a call for an extension is to be routed through AutoAttendant, it should be included in this extension table. • An extension has five attributes: •... - Page 40 Use following command to assign default password to all the extensions: 415-* On issuing above commands an extension table as shown below will be formed. Extension Extension Call Transfer Extension Extension User Index Number Type Name Status Password 2001 1111 2002 **** 2256 1111 AutoAttendant V2 System Manual...
- Page 41 • Avoid using extension numbers 25 and 251. If PBX supports it please change the extension number in PBX. By mistake, If 25 and 251 are programmed in the AutoAttendant then the call would be transferred to the extension number that appears first in the extension table. Whereas, the other extension number will never be called.
- Page 42 XT NAM S P/W | IND EXT XT NAM S P/W | IND EXT XT NAM S P/W -------------------------------------------------------------------------- 000 24 000 0 1111 | 001 21 000 0 1111 | -------------------------------------------------------------------------- MATRIX AUTO ATTENDANT V2R0 =X=X= AutoAttendant V2 System Manual...
-
Page 43: Extension Status
If the extension user changes its status to any other status viz. Out for lunch, Left for the day, etc. Then an appropriate prompt is played to the caller, when the tries to call him. The AutoAttendant taken the caller to Initial node. - Page 44 Caller calls AutoAttendant Autoattendant greets the caller as per the time of the day AutoAttendant plays prompt for the initial node as per the timetable User dials valid extension number or name or reaches the extension by navigating the graph...
- Page 45 SE mode, please refer “Extension Parameters”. Important Points: • Extension user can use this feature only after changing his user password. • Every extension can use this feature. Relevant Topics: 1. Extension Parameters 39 2. User Password 94 =X=X= AutoAttendant V2 System Manual...
-
Page 46: Fax Homing
What’s this? The AutoAttendant has capability to detect fax tone over trunk line and route the call to the extension where the fax machine is connected, provided fax tone of 1100 Hz (CNG signal, CNG stands for calling) is available from the caller’s end. - Page 47 • Call transfer type for the extension where fax machine is connected should always be programmed as ‘Blind’. Even if SE forget to program transfer type as ‘Blind’, the AutoAttendant takes care of it internally and sets call transfer type as ‘Blind.
-
Page 48: Graph And Nodes
• A Graph is a logical and meaningful association of various nodes. • When a caller calls the AutoAttendant, it greets the caller as per the time of the day. The AutoAttendant then plays the initial node prompt as per the timetable which offers a menu of functions to the caller. When the caller dials ‘8’... - Page 49 Node Node Node Menu Node ‘1’ ‘2’ Menu Menu Node Node Node A Node is an arbitrary point (a stop over) in a graph where an activity like making a decision, accessing information, etc. is made. AutoAttendant V2 System Manual...
- Page 50 Home Node • On pressing ‘8’ at initial node the AutoAttendant takes the caller to the Home Node. Home node is the starting point of the graph. Home node can be a menu node, transfer node or an information node. If Home node is defined as menu node then only five menu nodes will be available for the remaining part of the graph.
- Page 51 Menu Node: • Menu node is an arbitrary point in the graph at which the AutoAttendant presents few options (a menu) in form of a voice prompt to the caller to further traverse the graph. Since the caller is given a menu to select from, it is called a menu node.
- Page 52 User dials '8' AutoAttendant plays prompt of the home node Caller presses a digit as per the prompt AutoAttendant takes the caller to the next node as per the node programming Finally caller reaches information node / transfer node Information node...
- Page 53 The caller might forget the first option by the time he listens to the complete prompt. For example, please dial 1 for Divya, 2 for Amisha, 3 for Raju, 4 for Swati, 5 for Tanvi, 6 for Gauri,…………. AutoAttendant V2 System Manual...
- Page 54 This code is also programmable. Initial Node code: On dialing this digit at any of the nodes in the graph, the AutoAttendant takes the caller to the Initial node, as per the timetable. By default, this digit is ‘0’.
- Page 55 Menu Node Index is from 1 to 6 Digit is from 1 to 9 Use following command to delete all options at the Menu Node: 524-Menu Node Index-# Where, Menu Node Index is from 1 to 6 Step 8 Transfer Node Programming AutoAttendant V2 System Manual...
- Page 56 (Please refer ‘Recording Prompts and Responses’) Step 14 Use following command to playback recorded information message: 546-Information Node Index Where, Information Node Index is from 1 to 8 Step 15 Use following command to clear the entire graph: 551-SE Password AutoAttendant V2 System Manual...
- Page 57 Record appropriate prompts at each node Solution: First step is already done in the figure and table shown below: Node Number Node Type Menu Menu Menu Menu Menu Menu Information Information Information Transfer Transfer Transfer Transfer Transfer Transfer Transfer Transfer Transfer AutoAttendant V2 System Manual...
- Page 58 Not required for the example in question as we can use default code ‘8’ to reach home node. Step 3 Menu Node Programming Assign unique digit for each option of a menu node: 521-Menu Node Index-Digit-Destination Node Type-Destination Node Index 521-1-1-0-02 521-1-2-0-03 521-2-1-2-01 521-2-2-2-02 521-2-3-2-03 521-3-1-0-04 521-3-2-0-05 AutoAttendant V2 System Manual...
- Page 59 522-6-“Please dial ‘1’ for Bharti, ‘2’ for Minal, ‘3’ for Smita”. (Message file name-MSG026) These messages can be of maximum 10 seconds duration. Step 5 Verify the recorded prompt using command 523-Menu Node Index. On giving this command, AutoAttendant plays back the prompt. To rerecord, repeat step 3. Step 6 Not required for the example in question.
- Page 60 Step 12 Record message at Information Node Step 13 Verify the recorded message using command 546-Information Node. On giving this command, AutoAttendant plays back the prompt. To rerecord, repeat step 10. Step 14 No required for the example in question.
- Page 61 Matrix Relevant Topics: 1. Prompts and Responses 79 2. Extension Parameters 39 AutoAttendant V2 System Manual...
- Page 62 | 21 | 14 | 22 | 15 | 23 | 16 | 24 ---------------------------------------------------------------------- INFORMATION NODE(IN) ---------------------------------------------------------------------- MAXIMUM NODE : 0 MAX_TIME ACTUAL_TIME ---------------------------------------------------------------------- ---------------------------------------------------------------------- DNT:DESTINATION NODE TYPE,DNN:DESTINATION NODE NUMBER ---------------------------------------------------------------------- MATRIX AUTO ATTENDANT V2R0 =X=X= AutoAttendant V2 System Manual...
-
Page 63: Greetings
Matrix Greetings What’s this? Greetings are the voice files played by the AutoAttendant to greet its callers. The greetings are played as per the timings given below in the greeting table. Time Type of Greeting Default Greeting message 00:00-11:59 Morning Greeting "Good morning. -
Page 64: Initial Node
What’s this? On receiving a call, the AutoAttendant greets the caller as per the time of the day. Then it takes the caller to the Initial node as per the timetable. At the Initial node, the AutoAttendant guides the caller to do further activities as per the requirement. - Page 65 "I am Sorry. We are closed today. Dial '8' for information. Dial '9' for Holiday MSG020 assistance." These messages can be of maximum 15 seconds duration. Relevant Topic: 1. Recording Prompts and Responses 81 =X=X= AutoAttendant V2 System Manual...
-
Page 66: Interfacing The Autoattendant With A Pbx
How it works? As shown in the figure, the AutoAttendant is connected on four extensions of the PBX. If all the calls are to be routed through the AutoAttendant, the PBX should be programmed in such a way that all the incoming calls land on these four ports of the AutoAttendant. - Page 67 PBX to other. The AutoAttendant provides a command to integrate different PBXs with the help of a command. The AutoAttendant maintains the protocol of various PBXs as in its memory given in the following table. When the SE issues this command, the AutoAttendant associates itself to the selected protocol.
- Page 68 Most of the PBXs use a code(digit) ‘Flash’ to signify hold function. There could be few PBXs which might use some other code to signify this function. The AutoAttendant provides the flexibility to change this code. Use following command to program the code(digit) for ‘Hold’ function:...
- Page 69 For example, a PBX might ask the user to dial ‘8’ and then go on-hook to transfer the call. The AutoAttendant provides the flexibility to change this code. Use following command to program the code(digit) for transfer function:...
- Page 70 PBX type to 99. Different PBX manufacturers have different strings of digits to signify the various gateway events. Hence it is required to program these strings in the AutoAttendant. These strings are stored in the memory of the AutoAttendant.
- Page 71 When AutoAttendant dials a station it encounter only 2 tones, RBT and BT. The AutoAttendant needs to identify both the and act accordingly. To ensure this it is required to program the cadence of these tones in the AutoAttendant. A level of tolerance is also required to be programmed, to erase improper sensing of tones due synchronization problems between the PBX and the AutoAttendant.
- Page 72 Important Points: • It is advisable to keep the operator access code in AutoAttendant the same as used by the PBX. If ‘9’ is the operator access code in PBX, then ‘9’ should also be used to access operator through AutoAttendant.
-
Page 73: Operation Of Autoattendant
Dial ‘1’ + SE Please refer Dial ‘#’ Password ‘Programming the AutoAttendant’ Graph Programming the AutoAttendant Dial ‘2’ + Extension Dial ‘8’ number + User Please refer Please refer Password ‘Programming the ‘Graphs and AutoAttendant’ Nodes’ AutoAttendant V2 System Manual... -
Page 74: Operator
Important Points: • It is advisable to keep the operator access code in AutoAttendant the same as used by the PBX. If ‘9’ is the operator access code in PBX, then ‘9’ should also be used to access operator through AutoAttendant. -
Page 75: Port Parameters
AutoAttendant also does the same to hold the caller and dial extension number. Hence, it is required that the flash timer of the AutoAttendant should match with the flash time of the extension of PBX to which AutoAttendant is connected. -
Page 76: Programming The System
Matrix Programming the System What’s this? The AutoAttendant is a flexible system and can be programmed to suit your needs. AutoAttendant can be programmed at two levels viz. SE level and User level. System Engineer level At this level, System Engineer does the programming. This is called System Engineer Mode. - Page 77 Matrix Start Caller calls AutoAttendant AutoAttendant greets the caller as per the time of the day AutoAttendant plays prompt for the initial node as per the timetable Caller dials #1 / #2 ? AutoAttendant takes the caller to the User mode...
- Page 78 • Programming can be done at the site without opening the system. • The AutoAttendant can also be programmed from a remote end from anywhere in the world. • Programming is accomplished by dialing separate codes (string of digits) for different settings. This eliminates need for entering long and confusing programming sequences.
-
Page 79: Prompts And Responses
AutoAttendant responds by playing another message or by taking some action. These actions/messages are called Responses. For example, on calling the AutoAttendant it greets the caller and then plays a prompt for the initial node: "Please dial extension or dial '*' to dial by name, '9' to go to operator, '8' to go to home node, '0' to listen message again"... - Page 80 Played when caller select dial by Please dial first three MSG009 Message name option letters of the name Played before AutoAttendant informs Call Inform Message There is a call from MSG010 the name of the caller to the extension Out for Lunch...
-
Page 81: Recording Prompts And Responses
• Exit SE Mode by dialing ‘0’ 2. Using Auxiliary Port • Connect the ‘Audio out’ or ‘Speaker’ port of music system to the audio port of AutoAttendant marked ‘AUX’. • Call AutoAttendant • Enter SE mode by dialing #-1-SE Password at initial node •... - Page 82 ‘AUX’. Please refer ‘Technical Specifications’. • The recording tool will not work if any port of the AutoAttendant is Off-hook or any report printing is going on. • Message should be recorded with the fixed files names only (MSG000, MSG001..etc.). Where MSG000 is Good Bye Msg, MSG001 is Invalid Entry Msg etc.
-
Page 83: Restart The Autoattendant
What’s this? The AutoAttendant supports a command from the SE mode to restart the system. This command gives same effect as switching off the system and switching it on again. Many times it is difficult to physically walk to the system and restart it. -
Page 84: System Parameters
3. Greeting The AutoAttendant is equipped with built in Real Time Clock (RTC) circuit. This circuit is to be set once with current date, day and time values. It then updates itself regularly to keep track of the parameters. However, please note that the RTC circuit can drift over a long period. - Page 85 When the caller calls AutoAttendant and dials extension number, AutoAttendant checks for its validity. If the extension number is valid, AutoAttendant transfer the call to the extension as per the call transfer type. If the dialed extension is invalid (not present in extension table), the AutoAttendant increments this counter. If the count is less than programmed retry count, AutoAttendant gives another chance to the caller to try again.
- Page 86 RETRIVE CODE : & TRANSFER CODE --------------------------------------------------------------------- WORKING HOURS TABLE START TIME END TIME --------------------------------------------------------------------- 00:00 00:00 09:00 18:00 09:00 18:00 09:00 18:00 09:00 18:00 09:00 18:00 09:00 18:00 --------------------------------------------------------------------- HOLIDAY TABLE INDEX DATE MONTH YEAR --------------------------------------------------------------------- AutoAttendant V2 System Manual...
- Page 87 CALL FORWARD ON NO REPLY : --------------------------------------------------------------------- OTHER PARAMETERS --------------------------------------------------------------------- VOICE MODULE TYPE : 240 Sec RECORDING SOURCE : TELEPHONE FAX EXTENSION INDEX OPR EXT INDEXES : 000(W), 000(NW), 000(H) --------------------------------------------------------------------- '&':FLASH,',':PAUSE,W:WORKING,NW:NONWORKING,H:HOLIDAY --------------------------------------------------------------------- MATRIX AUTO ATTENDANT V2R0 =X=X= AutoAttendant V2 System Manual...
-
Page 88: System Security (Passwords)
Matrix System Security (Passwords) What’s this? The programming or usage of AutoAttendant is secured at two levels: • System Engineer level-This level is protected by SE password • User level-This level is protected by User password System Engineer (SE) Password •... -
Page 89: System Timers
Timer is in two-digit format from 00 to 30 By default, Delayed Answer Timer is 00 sec. First Digit Wait Timer: This timer signifies the time for which the AutoAttendant waits for caller to dial a code after playing prompt message. - Page 90 Screen Timer: This timer finds its significance when ‘Screen’ type of call transfer is selected. It signifies the time after which the AutoAttendant plays the busy message to the caller in case the called extension refuses to take the call. This timer is loaded when the called extension dials ‘2’ and goes on-hook to reject the call. Purpose of this timer is allow some time for called extension to hang-up before playing message.
-
Page 91: Time Table
Working hours The AutoAttendant offers the flexibility to program different working hours for each day of the week. Hence, it is possible to program Saturday as a weekly off or a half-day or a complete working day. Total seven entries (one for each day) are required for the week. - Page 92 Override current timetable. AutoAttendant offers a flexibility to override the programmed timing for the day. This feature is of great help when holiday is to be changed to working day and viceversa. Please note that this command affects only the current day and reverts to Auto mode at midnight.
- Page 93 Time Zone Meaning Working hour Non-working Hour Holiday Example: Firm ABC observes weekly off on Sunday. To program AutoAttendant to work as normal day on Sunday, use following command: 241-09:00-18:00-0 Use following command to revert to programmed timings: 241-# Important Point: •...
-
Page 94: User Password
What’s this? AutoAttendant provides security to its extension from unauthorized change of its parameters by way of providing password. • Each extension of AutoAttendant has a user Password. This password helps the user in using following features • Extension Status •... -
Page 95: Section 3: Appendices
Section 3: Appendices... -
Page 97: Appendix A: Technical Specifications
Power Consumption : 10 Watts Environment : Temperature : 0-45 : Humidity : 95% RH, non-condensing Dimensions (LxWxH) : 260 X 75 X 280 mm (10.236 x 2.953 x 11.024 Inch) Weight : 2.5kg. (5.51lbs) =X=X= AutoAttendant V2 System Manual... -
Page 98: Appendix B: Troubleshooting
• Replace the Metal Oxide Varistor (MOV) (275/14). • Check for loose connection of PT3 connector. • Contact authorized Matrix dealer. One of the ports of AutoAttendant is not working • Check the fuse (100mA, Auto resettable). • Replace the protection Diode. -
Page 99: Appendix C: Programming Commands
Program BT ON Time 284-BT ON Time Program BT ON Time Tolerance 285-BT OFF Time Tolerance Enable/Disable Port 311-Port-1/0 Program Flash Timer per port 312-Port-Flash Timer Print Extension parameters 4100 * These commands are issued from user programming mode. AutoAttendant V2 System Manual... - Page 100 Record Greeting message 621-Time Zone-<Record Greeting> Playback Greeting messsage 622-Time Zone Record Prompts and Responses 631-Prompt Index-<Record Prompt> Playback Prompts and Responses 632-Prompt Index Disable Fax homing 710-# Enable Fax homing and assign destination extension 710-Extension =X=X= AutoAttendant V2 System Manual...
-
Page 101: Glossary
: A code required by AutoAttendant to do certain functions. GRAPH : A logical and meaningful association of various nodes. INFORMATION NODE : An arbitrary point in the graph at which the AutoAttendant delivers some information to the caller. : Light Emitting Diode... -
Page 102: Index
Call Screening-Please refer ‘Call Transfer Types’ 21 Calling the AutoAttendant-Please refer ‘Getting Started’ 17 Company greetings-Please refer ‘Greetings’ 63 Configuring the AutoAttendant-Please refer ‘Interfacing the AutoAttendant with a PBX’ 66 Current Date-Please refer ‘System Parameters’ 84 Current Time-Please refer ‘System Parameters’ 84 Current Day-Please refer ‘System Parameters’... - Page 103 Single digit extension-Please refer ‘Graph and Nodes’ 48 System Reports-Please refer ‘Configuration Reports’ 32 SE Password-Please refer ‘Programming the System’ 76 Time Zones-Please refer ‘Time Table’ 91 Transfer node-Please refer ‘Graph and Nodes’ 48 Tolerance-Please refer ‘Interfacing the AutoAttendant with a PBX’ 66 AutoAttendant V2 System Manual...
- Page 104 Voice Module-Please refer ‘Prompts and Responses’ and ‘Recording Prompts and Responses’ 79, 81 Wait for Answer with name-Please refer ‘Call Transfer Types’ 21 Wait for Answer w/o name-Please refer ‘Call Transfer Types’ 21 Wait for Ring-Please refer ‘Call Transfer Types’ Working hours-Please refer ‘Time Table’ 91 =X=X= AutoAttendant V2 System Manual...
-
Page 105: Notes
Matrix Notes Requirement: AutoAttendant V2 System Manual... - Page 106 Matrix Notes AutoAttendant V2 System Manual...
-
Page 107: Programming Register
Matrix Programming Register S.N. Date Major Programming Changes made AutoAttendant V2 System Manual... - Page 108 Matrix Programming Register S.N. Date Major Programming Changes made AutoAttendant V2 System Manual...
Need help?
Do you have a question about the AutoAttendant and is the answer not in the manual?
Questions and answers