Table of Contents
Advertisement
Quick Links
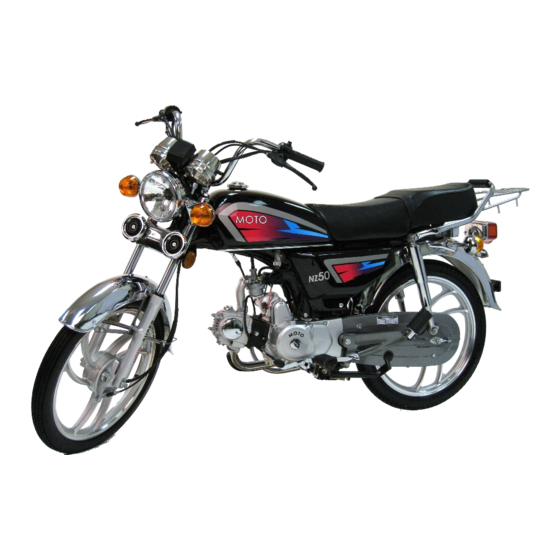
MOTO NZ50 ASSEMBLY INSTRUCTIONS
Congratulations, you have purchased a Jialing Honda manufactured MOTO NZ50 – a
modernised 40 year anniversary model of the legendary Honda SS50 which uses the extremely
robust Honda 'C' series engine design.
Correct assembly, running-in & regular maintenance will ensure many years of safe, reliable &
economical service. Do not attempt assembly with only an adjustable crescent wrench or the
tool kit provided. All assembly should be to hand tight only i.e. never force or over-tighten.
You will need a metric socket set or ring spanners comprising 8, 10, 12, 14, 15, 16, 17 & 19mm,
a large phillips head screwdriver, a 10ml bottle of 243 Loctite and a small quantity of good
quality general service or machinery grease.
REMOVING FROM CRATE READY FOR ASSEMBLY
The NZ50 arrives in carton covered metal frame crate 84cm H x 45cm W x 158cm L x 102kg.
Carefully check over the crate for any major external damage – take photos of any damage.
Immediately notify the delivery person if any external crate damage. Transportation related
broken or badly damaged parts will be replaced by NZ Moto Ltd.
Cut & remove the packing bands & vertically lift carton off the metal frame.
www.NZmoto.com
Page 1 of 10
Advertisement
Table of Contents

Summary of Contents for Jialing Honda MOTO NZ50
- Page 1 MOTO NZ50 ASSEMBLY INSTRUCTIONS Congratulations, you have purchased a Jialing Honda manufactured MOTO NZ50 – a modernised 40 year anniversary model of the legendary Honda SS50 which uses the extremely robust Honda ‘C’ series engine design. Correct assembly, running-in & regular maintenance will ensure many years of safe, reliable &...
- Page 2 10mm bolts Remove the front wheel & mudguard, carrier & cardboard carton containing assembly parts, mirrors, foot brake & gear levers, battery and Assembly & Service & Maintenance manuals. Remove all the 10mm bolts around the bottom of the frame & carefully lift the angle iron frame vertically off the bike.
- Page 3 Place the front wheel on a clean piece of the styrene packing cloth & lift the brake lever side of the hub out of the wheel. Apply grease to the speedo drive bevel gear & mating gear (they should already have some but make sure they’re completely greased) &...
- Page 4 Push spacer into lightly greased rubber cup & mount front wheel by sliding the hub lug into the slot on the left fork. Push the axle thru’ the hub & torque up the castle nut to 29-39 N.m (21-29 lbf-ft) & install supplied large split pin. This is tight but DO NOT OVER TORQUE [Note if you don’t have a torque wrench this is equivalent to 10-12 kgs force using a 30cm long socket set handle OR 32-44 lbs force using an 8”...
- Page 5 Mount the instruments & ignition. The fuel tank may need to be removed to route the ignition cables to the electrics behind the left side cover. Mount carrier taking particular care to line up the bolts correctly to avoid cross threading. Using Loctite make up the carrier bolts with washers &...
- Page 6 small split pin & washer spacer Connect brass brake rod to footbrake lever with supplied small washer & split pin installed on the side of the brake lever arm nearest the bike. Remove bolt from muffler support & loosen cylinder head exhaust bolts to allow swinging the muffler out away from the bike.
- Page 7 Using Loctite make up 15mm nut & washer until there is no lateral play in the footbrake lever but lever still moves freely up & down. A couple of drops of oil on either side of the mounting tube may help it move freely. Connect brass rod rear brake linkage to brake lever on hub of rear wheel &...
- Page 8 Connect fuel line to fuel cock & disconnect fuel line from carburettor. Remove locking fuel cap (if difficult to remove apply a tiny smear of grease to the rubber seal). With fuel cock closed pour ~0.5 ltr of petrol into the tank. Swish vigorously around by moving bike from side to side & then holding a container under the line from fuel cock, open to drain out the petrol.
- Page 9 For at least the first 300 kms do not exceed 5000 rpm & vary the speed & gears – around town driving is suitable. After 150 kms drain the oil out of the engine & replace with 0.6 ltr of good quality 20W-40 oil (or preferably 30 SAE mono-grade).
- Page 10 SUPPORT NZ MOTO LTD offers full after sales support including parts. If you experience any assembly or running problems this service can be accessed sales@NZmoto.com or 027 687 5059. REGISTRATION As your NZ50 is designed to meet Land Transport NZ regulations for mopeds (VIN Exempt Motor Vehicle) the registration form should be completed as below.
Need help?
Do you have a question about the MOTO NZ50 and is the answer not in the manual?
Questions and answers