Table of Contents
Advertisement
Quick Links
Advertisement
Table of Contents

Related Manuals for Zero 88 FROG 2

Summary of Contents for Zero 88 FROG 2
- Page 1 FROG 2 OPERATING MANUAL...
- Page 3 Software Version 4.0 Class A digital device, pursuant to removed before connecting or part 15 of the FCC rules. These limits © Zero 88 Lighting Ltd. 2006 disconnecting the supply. are designed to provide reasonable Serious damage will occur if the...
-
Page 4: Table Of Contents
Groups.............67 This Manual........... 7 Group Window ........67 Conventions .......... 7 Master Groups ........68 The Frog 2 Lighting Desk ...... 8 Automatic Groups ........68 Front Panel Controls ......10 User Defined Groups ......68 The Frog 2 Development Team ..16 Naming Groups........69 Quick Start Tutorial ......... - Page 5 Fixture UDK........126 Moving a Macro .........144 Palette UDK ........126 Deleting a Macro........144 Cue UDK ........... 127 Other Features ........145 Channel Data UDK......127 Windows ..........145 Macro UDK........127 Screen Navigation Keys.....146 Frog 2 Operating Manual – Issue 4 Page 5...
- Page 6 Artnet..........156 Video Output........164 Software Updates......156 CDRW Drive ........164 Glossary..........157 Desk Light..........164 Technical Specification ......161 DMX Input..........165 Power Supply ........161 DMX Output ........165 Audio ..........161 Index............167 Page 6 Frog 2 Operating Manual – Issue 4...
-
Page 7: Introduction
As the Frog 2 is a complex lighting desk which can be set up in many different ways, the best tool in learning the desk is experience. Through time you will develop your own operating style. -
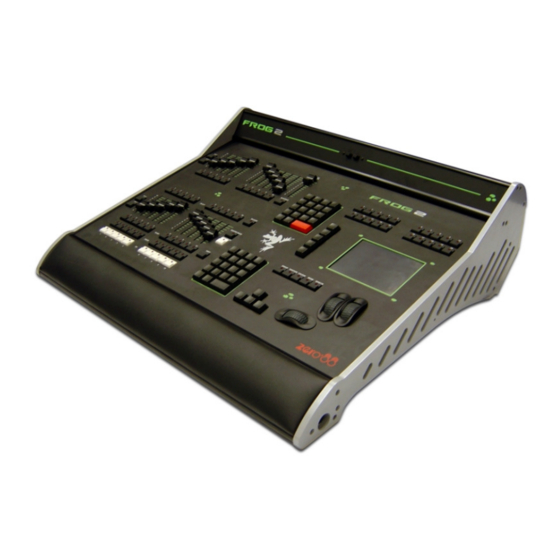
Page 8: The Frog 2 Lighting Desk
Introduction The Frog 2 Lighting Desk The following section is a summary of the main functions of the Frog 2 lighting desk. Graphical Interface The desk operates a graphical interface which is provided by a touch screen in the front panel of the desk and up to two external monitors. - Page 9 Groups, Fixtures, Palettes, Effects, Cues, or channel data. Output Processing on the Frog 2 Desk The Frog 2 has two distinct channel types: Intensity channels and Attribute channels (colour, beam and position). The main difference is that Intensity channels can be flashed, are mixed with their source's Master Fader and the GRAND MASTER, and can have distinct Fade Up and Down times.
-
Page 10: Front Panel Controls
Front Panel Controls This section of the manual describes the controls and displays on the front panel of the Frog 2 desk. The front panel controls have been divided into the following sections: • User Definable Faders (UDF) • Grand Master and Blackout •... - Page 11 Pressing the BLACKOUT key toggles between active and not active. The red LED in the BLACKOUT key flashes when blackout is active and BLK is displayed on the touch screen and monitor screens. Frog 2 Operating Manual – Issue 4 Page 11...
- Page 12 The SHIFT key is used in conjunction with a number of front panel controls to provide a wide variety of additional functions, for example bringing up windows on monitors. Page 12 Frog 2 Operating Manual – Issue 4...
- Page 13 The FULL key is used to set the intensity of the selected fixture(s) to FULL (ie 100%). The AT (@) key is used when setting intensity levels or DMX addresses. The ENTER key is used for confirming or completing commands. Frog 2 Operating Manual – Issue 4 Page 13...
- Page 14 This set of keys located to the left of the touch screen are used for selecting, moving, sizing and closing windows on the monitor displays. The keys are labelled CLOSE, SCREEN, SIZE, SELECT and VIEW. Page 14 Frog 2 Operating Manual – Issue 4...
- Page 15 To re-calibrate the touch screen, press and hold SETUP and press the ENTER key. The screen will then prompt you to press in the top left and bottom right corners. Frog 2 Operating Manual – Issue 4 Page 15...
-
Page 16: The Frog 2 Development Team
Electronic Design Simon Aspland Software Steve Chaplin Project Manager Nigel Daft Manual, Testing, Documentation and Support Forum Gareth Higginson PCB Design Peter Kirkup Manual, Testing, Fixture Library Nigel Upward Mechanical Design Page 16 Frog 2 Operating Manual – Issue 4... -
Page 17: Quick Start Tutorial
Press the SETUP key to display the Setup Window on the touch screen. Setup is intended to give you access to the core settings for the Frog 2, and you shouldn't need to enter the Setup area during a show. It is, however also used for saving and loading of show files and updating the desk software. -
Page 18: Adding Fixtures
Note – Fixture Types If the fixture type you require is not in the fixture library stored on the desk you can import the fixture type – see Setup chapter for full details. Page 18 Frog 2 Operating Manual – Issue 4... -
Page 19: Patching Fixtures
Patching involves telling the desk which fixture is located at which DMX start address. The Frog 2 has four universes of DMX output, numbered 1 to 4. It is important to ensure you patch the fixtures to the correct DMX universe. - Page 20 If an error is made in patching, the [Unpatch] soft key can be used in place of ENTER to undo a patching command. For example: GROUP [MAC 250] 1 THRU 5 @ 1 UNPATCH Page 20 Frog 2 Operating Manual – Issue 4...
-
Page 21: Editing Fixtures
Press SET to enter the field, adjust the value as required then press ENTER. Once all changes have been made, press the [OK] key to return to the Patch screen. Frog 2 Operating Manual – Issue 4 Page 21... - Page 22 Invert P, Invert T or P/T Swap column of the required fixture and then press the SET key. Use the left and right arrow keys, to toggle between the values. Press the ENTER key. Page 22 Frog 2 Operating Manual – Issue 4...
-
Page 23: Desk Setup
• Cue Stack Defaults – Set up the default options for all new cue stacks including timecode and chase modifiers. • Lock – Lock the desk; change the lock code (PIN). • Event Monitor – Indicates each front panel action (slider movement, key press etc.) Frog 2 Operating Manual – Issue 4 Page 23... -
Page 24: Saving Shows
Quick Start Tutorial Saving Shows The Frog 2 will save the show automatically to its internal memory at regular intervals. External backups of the show data can be made to a USB Storage Device (eg memory stick included with your Frog 2) or to recordable CD. -
Page 25: Loading Shows
Quick Start Tutorial Loading Shows Shows can be loaded onto the Frog 2 from either CD or USB Storage Device. Insert or connect the storage medium containing the show. Press the [Files] key on the touch screen or monitor. Press the [Load Show] key to enter the Load Show screen. -
Page 26: The Program Window
Quick Start Tutorial The Program Window The Program Window is central to the programming functionality on the Frog 2 desk. It is recommended that the Program Window is displayed on one of the monitor screens when programming cues, palettes, UDFs, UDKs etc. -
Page 27: Controlling Fixtures
(Position, Colour, Beam). Once a fixture, or group of fixtures has been selected, the attribute buttons and control wheels can be used to adjust the parameter output levels as required. Frog 2 Operating Manual – Issue 4 Page 27... - Page 28 BLACKOUT button is off. If the selected fixture(s) have a Shutter parameter, check that the shutter is open. Check that the Highlight key is not selected. Page 28 Frog 2 Operating Manual – Issue 4...
- Page 29 Press the [Details (%)] soft button on the touch screen. A drop down menu is displayed with the options Percent, DMX, Details (%), Details (DMX). Select the required option. For further details on the different display options see page 72. Frog 2 Operating Manual – Issue 4 Page 29...
- Page 30 Quick Start Tutorial Tagging Parameters On the Frog 2 desk, fixture parameters must be ‘tagged’ for them to be recorded when programming cues, palettes, UDF’s and UDK’s. The tag status of each fixture parameter is indicated on the touch screen and in the Program Window by it’s background colour –...
-
Page 31: Cues
When you press the RECORD key the Record Options Window is displayed on the touch screen. This window allows you to adjust what data is recorded, as required – see the Programming chapter for further details. Frog 2 Operating Manual – Issue 4 Page 31... - Page 32 Note – Fade and Delay Times The fade and delay times for all parameters programmed in a cue can also be globally edited from the Cue Stack Window. See the Programming chapter for further details. Page 32 Frog 2 Operating Manual – Issue 4...
- Page 33 Note that this is a snap function. Select the cue stack, using the Stack SELECT button, then press the RELEASE key. Frog 2 Operating Manual – Issue 4 Page 33...
-
Page 34: Palettes
Quick Start Tutorial Palettes The Frog 2 provides the user with four sets of 200 palettes. The palettes are stored under the nominal headings of Position, Beam, Colour and Effects. All palettes may contain any combination of Intensity, Colour, Beamshape, Position and Effects parameters. - Page 35 If the fixture data in the Program Window is then recorded into a cue, UDF or UDK, the desk will record the palette reference rather than the actual parameter value. Frog 2 Operating Manual – Issue 4 Page 35...
-
Page 36: User Definable Faders (Udf)
Clearing User Definable Faders To clear a UDF (ie remove the data assigned to it), enter the following command: DEL <UDF> (<UDF> = press the FLASH button for the required UDF). Page 36 Frog 2 Operating Manual – Issue 4... -
Page 37: User Definable Keys (Udk)
Clearing User Definable Keys To clear a UDK (ie remove the data assigned to it), enter the following command: DEL <UDK> (<UDK> = press the required UDK on the front panel). Frog 2 Operating Manual – Issue 4 Page 37... -
Page 38: Groups
Quick Start Tutorial Groups The Frog 2 provides 200 user definable Groups. Groups are most commonly used when selecting fixtures and programming data to be recorded in cues, palettes etc. Groups can also be assigned to User Definable Faders (UDF) and User Definable Keys (UDK). -
Page 39: Setup
Setup Window on the monitor. To exit Setup from any of the various Setup options, close the screen that is currently displayed using the [Close] button in the top right hand corner of the screen. Frog 2 Operating Manual – Issue 4 Page 39... -
Page 40: Patch
Repeat the above procedure for all the other fixtures in your rig. When you have finished adding all the fixtures you require to the schedule, press the [OK] key on the touch screen. The touch screen returns to the Patch screen. Page 40 Frog 2 Operating Manual – Issue 4... - Page 41 Setup User Fixture Types The Frog 2 desk provides a method for loading fixture types which are not in the fixture library stored on the desk, ie user fixture types which are stored on a memory stick or CD. Press the [User Fixture] key on the touch screen.
-
Page 42: Patching Fixtures
Fixtures can be patched individually or in groups. The Frog 2 has four universes of DMX output, numbered 1 to 4. There are dual outputs for each universe. It is important to ensure you patch the fixtures to the correct DMX universe. - Page 43 To unpatch an instance of a fixture from a specified universe and address (all views): GROUP [MAC 250] 1 @ <universe>/<address> UNPATCH To unpatch a fixture at a specified address: UNPATCH <universe>/<address> To unpatch all fixtures in a universe: UNPATCH <universe> ENTER Frog 2 Operating Manual – Issue 4 Page 43...
-
Page 44: Patch Views
The different patch views are described in the sections below: Outputs View This is the default patch view and displays the DMX start address for each fixture for each DMX universe, for example: Page 44 Frog 2 Operating Manual – Issue 4... - Page 45 Channel View This patch view shows the fixture type, fixture number and parameter (eg Gobo) patched to each DMX address in each of the DMX universes, for example: Frog 2 Operating Manual – Issue 4 Page 45...
-
Page 46: Editing Fixtures
If you make a mistake in Edit Fixtures, or simply wish to revert to the original values from the fixture library then press the [Reset All] key. If you wish to cancel all editing of the fixtures, press the [Cancel] key. Page 46 Frog 2 Operating Manual – Issue 4... - Page 47 (eg Left MAC 500, Centre MAC 500, Right MAC 500). Use the arrow keys to move the cursor to Name column and then press the SET key. Enter the name of the fixture using the external keyboard, then press ENTER. Frog 2 Operating Manual – Issue 4 Page 47...
- Page 48 Use the arrow keys to move to the required column of the selected fixture and then press the SET key. Enter the required value using the external keyboard or numeric keypad on the front panel of the desk, then press ENTER. Page 48 Frog 2 Operating Manual – Issue 4...
- Page 49 Setup Aligning Fixtures The Frog 2 desk is capable of making adjustments to your fixtures to take into account their rigging position. Inverting Pan and Tilt It is possible to invert Pan and Tilt independently for each fixture. This can be particularly useful if you’ve rigged Front of House fixtures the opposite way around to those onstage,...
-
Page 50: Auto Menus
These palettes are labelled with the stock colour names as supplied by the manufacturer. Fixtures with CMY or RGB colour mixing – The desk generates auto palettes for all of the standard colours listed above. Page 50 Frog 2 Operating Manual – Issue 4... -
Page 51: Absolute Addressing
DMX channels 513 – 1024 Universe 3 – DMX channels 1 - 512 DMX channels 1025 - 1536 Universe 4 – DMX channels 1 - 512 DMX channels 1537 – 2048 Frog 2 Operating Manual – Issue 4 Page 51... -
Page 52: Desk Setup
To make a change to any of the settings in Desk Setup, use the cursor keys to select the required option and press SET. Use the arrow keys to select between different options or enter the required value for numeric fields. Press ENTER to confirm the change. Page 52 Frog 2 Operating Manual – Issue 4... - Page 53 • Monitor 2 Calibration – Calibration of touch screen monitor 2. Press the [Calibrate] soft key and follow the instructions on the monitor screen. Frog 2 Operating Manual – Issue 4 Page 53...
- Page 54 • Wheel Sensitivity – Adjusts the sensitivity of the control wheels. Range 0% (least sensitive) to 100% (most sensitive); default = 50%. Page 54 Frog 2 Operating Manual – Issue 4...
- Page 55 • Set Date - Press the [Set Date] key on the touch screen. The Set Date Window is displayed on the touch screen. Enter the correct Day, Month and Year in the fields provided and then confirm by selecting the [OK] button. Frog 2 Operating Manual – Issue 4 Page 55...
- Page 56 • UDK Action - Flash/Latch, default = Flash. The default action of the UDK’s. • Tie UDF/Playback Pages – Yes/No, default = No. If this option is set to ‘Yes’ the page numbers for the UDF/UDK’s and playbacks will be tied. Page 56 Frog 2 Operating Manual – Issue 4...
- Page 57 • Beamshape Transition – Range = 0 – 99:59.9, Default = 3 seconds. • Position Delay – Range = 0 – 99:59.9, Default = 0. • Position Transition – Range = 0 – 99:59.9, Default = 3 seconds. Frog 2 Operating Manual – Issue 4 Page 57...
- Page 58 • Move on Dark – Range = Enabled or Disabled; default = Disabled. • Delay – Range = 0 – 99:59.9; default = 3 seconds. • Fade – Range = 0 – 99:59.9; default = 1 second. Page 58 Frog 2 Operating Manual – Issue 4...
- Page 59 Key presses, fader movements and wheel movements are displayed on the touch screen. Press the [Close] button on the touch screen to return to the Desk Setup screen. Frog 2 Operating Manual – Issue 4 Page 59...
-
Page 60: Files
Fixture Types (UFT). Saving Shows To save a copy of your show, you first need a storage media. The Frog 2 is supplied with a 32mb USB flash memory stick, although other storage media may be used with the console. Connect your media to the USB port on the desk (any port will do). If using an external floppy drive, remember to insert a floppy disk into the drive. - Page 61 Select the required show from the list of available shows displayed. Select the [Load Complete Show] box and toggle it until it displays the option you require. The Frog 2 allows you to load just the Setup, the Setup and Palettes, or the Complete show.
- Page 62 The desk provides a method for clearing all the user fixture types which have been loaded onto the desk. Press the [Clear UFT] soft key on the touch screen. A confirmation window is displayed. Press the [Yes] soft key to clear the UFT’s on the desk. Page 62 Frog 2 Operating Manual – Issue 4...
-
Page 63: Clear Options
• Clear All – Clears all of the above items from the show in the desk, but does not clear the Patch or change any of the Setup options. • Reset Desk – Performs the Clear All operation, clears the Patch and resets all the Setup options to factory defaults. Frog 2 Operating Manual – Issue 4 Page 63... - Page 64 Press SETUP, then press the [Clear Options] key on the touch screen, then press the [Update GFT File] button. The desk searches for the update file on the memory stick. Follow the instructions shown on the touch screen to update the GFT file. Page 64 Frog 2 Operating Manual – Issue 4...
-
Page 65: Ethernet Options
Art-Net A network connection between the Frog 2 and an ArtNet supportive device is required in order to utilise the ArtNet facilities of the console. This network connection can take many forms, but most commonly a Crossover Cat-5 cable or a network hub and two straight wired Cat-5 cables can be used. - Page 66 Setup Page 66 Frog 2 Operating Manual – Issue 4...
-
Page 67: Groups
Groups Groups The Frog 2 provides 200 user definable Groups. Groups are most commonly used when selecting fixtures and programming data to be recorded in cues, palettes etc. Groups can also be assigned to User Definable Faders (UDF) and User Definable Keys (UDK). -
Page 68: Master Groups
Simply select the fixtures that you wish to be in the group and then enter the command: RECORD GROUP N ENTER (N = Group Number). Page 68 Frog 2 Operating Manual – Issue 4... -
Page 69: Naming Groups
To move a group from one location to another, enter the following command: GROUP N MOVE P ENTER (Moves Group N to Group P) Deleting Groups To delete a group enter one of the following commands: GROUP N DELETE DELETE GROUP N ENTER. Frog 2 Operating Manual – Issue 4 Page 69... - Page 70 Groups Page 70 Frog 2 Operating Manual – Issue 4...
-
Page 71: Programming
UDF or UDK. The Program Window The Program Window is central to the programming functionality on the Frog 2 desk. It is recommended (but not mandatory) that the Program Window is displayed on one of the monitor screens when programming cues, palettes etc. - Page 72 Program Window. Program Window - Intensity View When the [Intensity] key in the Program Window is selected, only the intensity parameters of the fixtures in the programmer are displayed. Page 72 Frog 2 Operating Manual – Issue 4...
-
Page 73: Selecting Fixtures
501 ENTER (selects the first MAC 500 fixture) 502 + 503 ENTER (selects the second and third MAC 500) 511 THRU 520 ENTER (selects the last 10 MAC 500 fixtures) Frog 2 Operating Manual – Issue 4 Page 73... -
Page 74: Controlling Fixture Parameters
GRAND MASTER fader is at full and the BLACKOUT button is off. If the selected fixture(s) have a Shutter parameter, check that the shutter is open. Page 74 Frog 2 Operating Manual – Issue 4... - Page 75 If the fixture has more than three controllable parameters for the selected attribute, pressing the attribute key will select the next group of parameters. Frog 2 Operating Manual – Issue 4 Page 75...
-
Page 76: Tagging Parameters
N. Tagging Parameters On the Frog 2 desk, fixture parameters must be ‘tagged’ for them to be recorded when programming cues, palettes, UDF’s and UDK’s. The tag status of each fixture parameter is indicated on the touch screen and in the Program Window by it’s background colour as follows: grey = untagged;... -
Page 77: Record Options Window
If [Tagged Fixtures] is selected (as shown above), all the fixtures in the Program Window will be recorded. If [Selected Fixtures] is chosen, only the selected fixtures in the Program Window will be recorded. Frog 2 Operating Manual – Issue 4 Page 77... - Page 78 (the cue after the edited one is changed to ensure this). CUE 1 CUE 2 CUE 3 CUE 4 CUE 5 CUE 6 CUE 7 CUE 8 CUE 9 CUE 10 Green Blue Green Green Green Blue Page 78 Frog 2 Operating Manual – Issue 4...
- Page 79 Desk Setup. If [Default Times] is not selected the fade and delay times will be kept at their current values as displayed in the Fade and Delay views of the Program Window. Frog 2 Operating Manual – Issue 4 Page 79...
- Page 80 Intensity Position Colour Beamshape Effects Press the [Intensity] and [Colour] buttons to change their state to tagged: Intensity Position Colour Beamshape Effects Complete the record operation by pressing the ENTER key. Page 80 Frog 2 Operating Manual – Issue 4...
-
Page 81: Fade And Delay Times
Use the cursor keys to select a field in the table. Press the SET key, enter the fade time using the numeric keypad or external keyboard, then press ENTER. Delay times are edited in the same way as fade times. Frog 2 Operating Manual – Issue 4 Page 81... - Page 82 Sets the intensity fade up and fade down times to U and COLOUR X BEAM Y POSITION Z D, the colour fade times to X, the beamshape fade times ENTER to Y and the position fade times to Z. Page 82 Frog 2 Operating Manual – Issue 4...
- Page 83 Y and the position fade times to Z. Note – Fade and Delay Times The fade and delay times for all parameters programmed in a cue can also be globally edited from the Cue Stack Window. Frog 2 Operating Manual – Issue 4 Page 83...
-
Page 84: Wheel Editing Modes
This mode is most often used for adjusting position parameters (pan and tilt) For example: Fixture Parameter Fixture 1 Fixture 2 Fixture 3 Fixture 4 Fixture 5 Original Value New Value Change in Value Page 84 Frog 2 Operating Manual – Issue 4... - Page 85 Example – Fan-Last Mode (Fixture 5 locked): Fixture Parameter Fixture 1 Fixture 2 Fixture 3 Fixture 4 Fixture 5 Original Value New Value Change in Value Frog 2 Operating Manual – Issue 4 Page 85...
-
Page 86: Try Cue Function
COLOUR 0 ENTER (homes colour parameters; removes colour effects) BEAM 0 ENTER (homes beamshape parameters; removes beamshape effects) POSITION 0 ENTER (homes position parameters; removes position effects) EFFECTS 0 ENTER (removes all effects) Page 86 Frog 2 Operating Manual – Issue 4... -
Page 87: Active Key
ACTIVE POSITION X ENTER All channels currently outputting position palette X will be pulled into the PW. ACTIVE EFFECTS X ENTER All channels currently outputting effects palette X will be pulled into the PW. Frog 2 Operating Manual – Issue 4 Page 87... -
Page 88: Update Options Window
In the case where an item (cue, palette, UDF or UDK) has been loaded into the Program Window, parameter values or times adjusted and the UPDATE key pressed, the Update Options Window contains the loaded item as the only source option. This option is automatically selected. Page 88 Frog 2 Operating Manual – Issue 4... - Page 89 Red = All Parameters. OK and Cancel Buttons Press the [OK] button to update the selected source options. Press the [Cancel] button to close the Update Options Window without updating any items. Frog 2 Operating Manual – Issue 4 Page 89...
-
Page 90: Knockout Function
Pressing the CLEAR key once clears all the commands in the command line except for the fixture selection. Pressing the CLEAR key a second time clears the fixture selection from the Program Window. Page 90 Frog 2 Operating Manual – Issue 4... -
Page 91: Cues, Stacks And Pages
Real Time, SMPTE Time, MIDI Time, CD Time or macro). Cues may contain macros which are run automatically when the cue is triggered. Cues may also be named, edited, copied, moved and deleted. Frog 2 Operating Manual – Issue 4 Page 91... -
Page 92: The Cue Stack Window
An information bar at the bottom of the Cue Stack Window shows the Current, Next and Last cue numbers, and the Timecode, framerate (if applicable) and the current time, eg Current: 23 Next: 24 Last: 49 Timecode: Realtime 17:18:56 Page 92 Frog 2 Operating Manual – Issue 4... - Page 93 Pressing this soft button is the equivalent of entering the command STACK N SETUP and displays the Cue Stack Setup Window on the touch screen. The Cue Stack Setup Window shows the control parameters for the individual cue stack: Frog 2 Operating Manual – Issue 4 Page 93...
- Page 94 • Once the stack has been completed, learn mode is disabled. To stop the stack from learning at a time other than after the last cue, simply press the [Learn] button. Page 94 Frog 2 Operating Manual – Issue 4...
-
Page 95: Programming Cues
Note – Programming Cues The Frog 2 desk operates primarily as a tracking console. This means that if a parameter is programmed in one cue, it will track through all subsequent cues until it is programmed to do something else. -
Page 96: Naming Cues
(see earlier). To record the changes to the same cue press the UPDATE key. The Update Options Window is displayed – see Programming chapter for further details. Page 96 Frog 2 Operating Manual – Issue 4... -
Page 97: Editing Cue Fade And Delay Times
Each cue stack has it’s own ‘time code’ which can be set to Real Time, SMPTE Time, MIDI Time or CD Time (default = Real Time) via the Cue Stack Setup Window. Frog 2 Operating Manual – Issue 4 Page 97... -
Page 98: Adding Macros To Cues
The syntax for the various in-built macros is defined in the Macros section of the manual. Multiple macro commands can be entered using the colon as a delimiter, for example, G2:S3:C4. Page 98 Frog 2 Operating Manual – Issue 4... -
Page 99: Playing Back Cues
SHIFT key and press the GO button. The red LED in the GO button is on when the stack is outputting and flashes when the outputs are fading between cues. Frog 2 Operating Manual – Issue 4 Page 99... - Page 100 STACK 2 RELEASE, STACK 11 + 12 RELEASE, STACK 31 THRU 34 RELEASE. The command SHIFT RELEASE releases all cue stacks on the virtual playbacks as well as those on the physical playbacks. Page 100 Frog 2 Operating Manual – Issue 4...
-
Page 101: Copying Cues
DELETE S/C1 THRU C2 ENTER. Note – Deleting Cues Since the Frog 2 desk is a tracking based console, deleting a cue from a cue stack could possibly affect other cues in that stack. Think carefully about whether you need to make any changes to subsequent cues in order to maintain the state(s) required. -
Page 102: Cue Stacks
Cues, Stacks and Pages Cue Stacks The Frog 2 desk provides 1000 user programmable cue stacks. A programmed cue stack contains one or more programmed cues. The 1000 cue stacks are assigned to the 100 pages of playbacks. Cue stacks can be setup, named, copied, moved and deleted. -
Page 103: Naming Cue Stacks
STACK N DELETE or DELETE STACK N ENTER. To delete several cue stacks or a range of cue stacks enter the following commands: DELETE STACK A AND B ENTER DELETE STACK A THRU N ENTER Frog 2 Operating Manual – Issue 4 Page 103... -
Page 104: Cue Stack Setup Window
Press the [Renumber] soft key. This brings up the Renumber Cues dialogue box on the touch screen. Enter the required Start Number and Increment in the fields provided and then select the [OK] button in the window. Page 104 Frog 2 Operating Manual – Issue 4... - Page 105 A Blank Cue is the same as the first programmed cue in the cue stack, but with all the fixture intensity parameters set to zero. A blank cue is referred to as Cue 0 (zero). Frog 2 Operating Manual – Issue 4 Page 105...
- Page 106 The fader controls the HTP levels; the LTP channels are triggered when the fader is moved from zero and then fade according to the times defined in the incoming cue. Page 106 Frog 2 Operating Manual – Issue 4...
- Page 107 • Backward – The steps are output in reverse order (eg 5,4,3,2,1). • Bounce – Alternates between forwards and backwards (eg 1,2,3,4,5,4,3,2,1). • Random – The steps are output in a random order. Frog 2 Operating Manual – Issue 4 Page 107...
- Page 108 N is the total number of steps (cues) in the cue stack. Revert From Chase To return a cue stack from a chase to a normal cue stack, press the [Revert From Chase] button in the Stack Setup Window. Page 108 Frog 2 Operating Manual – Issue 4...
- Page 109 Select the [Trigger] button in the Cue Stack Setup Window: The various options are described below: • Trigger on Raise – Enabled or Disabled (default = Disabled) • Trigger Level – Range 0 – 100% (default = 5%). Frog 2 Operating Manual – Issue 4 Page 109...
- Page 110 • Delay Time – Range 0 – 99:59.9 (default = 3 seconds) • Fade Time – Range 0 – 99:59.9 (default = 1 second) Page 110 Frog 2 Operating Manual – Issue 4...
-
Page 111: Page Window
Cues, Stacks and Pages Pages The Frog 2 desk provides 100 pages of playbacks; each page containing 10 playbacks. Page Window To display the Page Window on the monitor hold down the SHIFT key and press the PAGE key: Each of the 100 pages has a soft button in the window. Each of these buttons shows the page number, program status (* = unprogrammed) and name, if defined. -
Page 112: Loading A Page Onto The Playbacks
Select the page in the Page Window and press the SET key, or enter the command PAGE N SET or SET PAGE N ENTER. Type in the required name using the external keyboard and then press the ENTER button to complete. Page 112 Frog 2 Operating Manual – Issue 4... -
Page 113: User Definable Faders (Udfs)
User Definable Faders User Definable Faders (UDFs) The Frog 2 provides 100 pages of 10 User Definable Faders (UDF), each with an associated ‘flash’ button. The page number is displayed in the seven segment PAGE display to the left of the bank of User Definable Faders. -
Page 114: The Udf / Udk Window
1 Channel Data 2 Cue 1 / 2, 3 Colour Latch, HTP, Latch, HTP, Palette 16 0%, Release 10%, Release, MAC 250 GREEN PARCANS 37-48 BLUE WASH Pages: 21, 22,23 Pages: 2, 3 Page 114 Frog 2 Operating Manual – Issue 4... -
Page 115: The Udf Setup Window
Not Applicable Not Applicable Not Applicable Not Applicable Not Applicable Override Not Applicable Not Applicable Not Applicable Not Applicable Not Applicable Virtual Playback Not Applicable Not Applicable Not Applicable Not Applicable Not Applicable Master Frog 2 Operating Manual – Issue 4 Page 115... - Page 116 The initial trigger level is defined as the position of the physical fader when the flash button is pressed to assign the channel data or cue to the UDF. The trigger level may be adjusted as required via the UDF Setup Window. Page 116 Frog 2 Operating Manual – Issue 4...
- Page 117 The fixtures being controlled by the UDF can be released by setting their values in the Program Window or by triggering another LTP command from elsewhere on the console or by holding down the RELEASE key and pressing the corresponding UDF flash key. Frog 2 Operating Manual – Issue 4 Page 117...
-
Page 118: Group Udf
The fixture data programmed in the cue is output by raising the fader or pressing the ‘flash’ button. The fixture data is released when the fader is lowered or the ‘flash’ button is released. Page 118 Frog 2 Operating Manual – Issue 4... -
Page 119: Channel Data Udf
The Time fader(s) work in an LTP manner, ie whenever any Time fader is moved, the internal level is updated to the new level. To adjust the Time value, simply move the Time fader to the required level. Frog 2 Operating Manual – Issue 4 Page 119... -
Page 120: Override Udf
Playback Master fader is moved, the internal level is updated to the new level. When the last Virtual Playback Master UDF is deleted the internal Virtual Playback Master level is reset to it’s default value of 100%. Page 120 Frog 2 Operating Manual – Issue 4... -
Page 121: Editing User Definable Faders
Deleting User Definable Faders Individual UDF’s can be deleted (cleared) by entering the following command: DEL <UDF> Where <UDF> represents pressing the actual flash button on the front panel. Frog 2 Operating Manual – Issue 4 Page 121... - Page 122 User Definable Faders Page 122 Frog 2 Operating Manual – Issue 4...
-
Page 123: User Definable Keys (Udks)
User Definable Keys User Definable Keys (UDKs) The Frog 2 desk provides 100 pages of 20 User Definable Keys (UDKs). The page number is displayed in the seven segment PAGE display to the left of the bank of user definable faders. Page 100 is displayed as “00”. Each of the User Definable Keys may be assigned to any one of the following items: •... -
Page 124: The Udk Setup Window
Not Applicable Not Applicable Channel Data Flash or Latch HTP or LTP Yes or No Flash or Latch HTP or LTP Yes or No Macro Not Applicable Not Applicable Not Applicable Page 124 Frog 2 Operating Manual – Issue 4... - Page 125 The fixtures being controlled by the UDK can be released by setting their values in the Program Window or by triggering another LTP command from elsewhere on the console or by holding down the RELEASE key and pressing the UDK on the front panel. Frog 2 Operating Manual – Issue 4 Page 125...
-
Page 126: Group Udk
EFFECTS N RECORD <UDK> Where <UDK> represents pressing the actual UDK on the front panel. The palette assigned to the UDK is applied to the selected fixtures when the UDK is pressed. Page 126 Frog 2 Operating Manual – Issue 4... -
Page 127: Cue Udk
To assign a user defined macro to a UDK enter the following command: MACRO N RECORD <UDK> where N is the macro number and <UDK> represents pressing the actual UDK on the front panel. The macro is run by pressing the UDK. Frog 2 Operating Manual – Issue 4 Page 127... -
Page 128: Editing User Definable Keys
Deleting User Definable Keys Individual UDK’s can be deleted (cleared) by entering the following command: DEL <UDK> Where <UDK> represents pressing the actual UDK on the front panel. Page 128 Frog 2 Operating Manual – Issue 4... -
Page 129: Palettes
Palettes Palettes The Frog 2 desk provides you with four sets of 200 palettes. The palettes are stored under the nominal headings of Position, Beam, Colour and Effects. Palettes may contain any combination of Intensity, Colour, Beamshape, Position or Effects parameters. -
Page 130: Recording Palettes
If the fixture data in the Program Window is then recorded into a cue, UDF or UDK, the desk will record the palette reference number rather than the actual parameter values. Page 130 Frog 2 Operating Manual – Issue 4... -
Page 131: Copying Palettes
DELETE COLOUR A THRU B ENTER When a palette is deleted, any cues that previously referenced the palette are updated to contain the actual values that were stored in the palette. Frog 2 Operating Manual – Issue 4 Page 131... - Page 132 Palettes Page 132 Frog 2 Operating Manual – Issue 4...
-
Page 133: Effects
Effects Effects The Frog 2 desk provides a powerful effects generator with a number of standard effects. By applying various mathematical functions (sine, cosine, ramp etc) to the outputs of different fixture parameters and adjusting the size, speed and offset values, a wide range of movement and other effects can be generated quickly and easily. -
Page 134: Standard Effects
Cyan = Sawtooth+ 90, Magenta = Sawtooth + 180, Yellow = Sawtooth Iris Step On Iris = Mark On Iris Step Off Iris = Mark Off Iris Iris = Sine Focus Focus = Sine Page 134 Frog 2 Operating Manual – Issue 4... -
Page 135: Effect Parameters
0% for first and last 5% of cycle then snaps to 100% for rest of cycle Mark Off 100% for first and last 5% of cycle then snaps to 0% for rest of cycle Frog 2 Operating Manual – Issue 4 Page 135... -
Page 136: Effect Parameters On The Wheels
Pressing the BLIND key twice synchronises the effects while programming. Page 136 Frog 2 Operating Manual – Issue 4... -
Page 137: The Effects Window
+100 is the fastest speed clockwise. Size – This parameter defines the magnitude of the effect (range 0 – 100). Offset – This parameter determines the offset into the effect when it is triggered. Frog 2 Operating Manual – Issue 4 Page 137... -
Page 138: Recording Effects
If any of the selected fixtures are not actually programmed in the applied effect palette, but there are one or more fixtures of the same type that are programmed, the fixture will use the values programmed for the first fixture of the same type. Page 138 Frog 2 Operating Manual – Issue 4... -
Page 139: Outputting Effects
DELETE EFFECTS A THRU B ENTER When an effect is deleted, any cues that previously referenced the effect are updated to contain the actual values that were stored in the effect palette. Frog 2 Operating Manual – Issue 4 Page 139... - Page 140 Effects Page 140 Frog 2 Operating Manual – Issue 4...
-
Page 141: Macros
Macros Macros The Frog 2 desk provides a number of in-built macros and 200 user programmable macros. The user interface provides mechanisms for recording, naming, running and deleting user definable macros. In-Built Macros The desk provides a number of in-built macros as follows:... - Page 142 They may also be entered via an external keyboard. Macro commands are entered as a text string, and multiple commands can be concatenated using the colon as a delimiter, for example, “G2:S3:C4:T3/4”. Page 142 Frog 2 Operating Manual – Issue 4...
-
Page 143: The Macro Window
Type in the series of key commands from the front panel (Note - the MACRO key cannot be recorded as part of the macro). Press the MACRO key to complete the recording. Frog 2 Operating Manual – Issue 4 Page 143... -
Page 144: Naming A Macro
To delete a macro enter either of the following commands: MACRO N DELETE or DELETE MACRO N ENTER To delete a range of macros enter the following command: DELETE MACRO A THRU B ENTER Page 144 Frog 2 Operating Manual – Issue 4... -
Page 145: Other Features
Other Features Windows The Frog 2 allows you to display a number of different windows on the touch screen and monitor screen(s) and to open, select, move, resize and delete windows, as required. A window displayed on a monitor can be full-size, half-size or quarter-size, and can be displayed in a number of different positions, as illustrated below: 1. -
Page 146: Screen Navigation Keys
Click on these buttons to force the windows to come to the front of the view. Right clicking with the mouse switches the mouse pointer between the monitor outputs. Page 146 Frog 2 Operating Manual – Issue 4... -
Page 147: Preview Cue Window
The parameter is programmed at the same value as previous (blocked). Magenta The parameter is not programmed in this cue and it’s value has tracked from a cue earlier in the cue stack. Frog 2 Operating Manual – Issue 4 Page 147... -
Page 148: Preview Palette Windows
The Preview Palette Windows are the same format as the Program Window and show what output levels are programmed in the specified palette on a fixture by fixture basis. The [Previous] and [Next] buttons can be used to view the palettes in sequence. Page 148 Frog 2 Operating Manual – Issue 4... -
Page 149: Preview Group Window
For each fader on the page that has a cue stack assigned, this window displays the cue stack number and name (if defined). The [Previous] and [Next] buttons can be used to view the pages in sequence. Frog 2 Operating Manual – Issue 4 Page 149... -
Page 150: Preview Udf / Udk Windows
The commands programmed into a user defined macro can be seen by displaying the Preview Macro Window on the monitor by entering the following command: VIEW MACRO N ENTER The [Previous] and [Next] buttons can be used to view the macros in sequence. Page 150 Frog 2 Operating Manual – Issue 4... -
Page 151: Output Window
(eg Red, Gobo 1) where they are defined in the fixture data. If parameter details are not defined, the window will show the actual numerical values in DMX (0-255 or 0 – 65535). Frog 2 Operating Manual – Issue 4 Page 151... - Page 152 When the [Intensity] button is selected the output window displays just the intensity parameters that are outputting from all areas of the desk. The different fixture types are grouped together and the fixture number and output value displayed. Page 152 Frog 2 Operating Manual – Issue 4...
-
Page 153: Dmx Output Window
This window shows all the currently active playbacks (Page Number, Playback Number, Stack Number, Master Fader Level, Current and Next cues). Virtual playbacks are shown as ‘Virtual’ under the Page column and the Playback field is left blank. Frog 2 Operating Manual – Issue 4 Page 153... -
Page 154: User Views
Other Features User Views The Frog 2 desk provides the facility to save up to 5 user defined views. A User View defines the configuration of the windows displayed on the two monitors, for example: Colour Beamshape Palette Palette Cue Stack Window... - Page 155 User View Toolbar or by entering the command: VIEW N ENTER. Deleting a User View To delete a user view enter either of the following commands: VIEW N DELETE or DELETE VIEW N ENTER. Frog 2 Operating Manual – Issue 4 Page 155...
-
Page 156: Artnet
Frog 2 or any of our other Frog range of consoles, visit the Zero 88 Product Support Forum and make a post. -
Page 157: Glossary
Glossary Glossary This section of the manual contains a list of terms used with the Frog 2 desk: Active A key used in conjunction with other keys to ‘pull’ various channel data into the Program Window. Alignment A function in Setup which allows the user to invert pan and/or tilt or swap pan/tilt parameters for individual fixtures. - Page 158 Flash buttons can also be set to operate in Latch mode. Flashdisk A USB device with storage capabilities. The Frog 2 is supplied with a 32mb USB Flashdisk. Full Key that sets the Intensity of the selected fixture(s) to 100%.
- Page 159 The Chase modifier which determines how fast a Chase runs. Stack A stack (or cue stack) is a group of cues in sequence. On the Frog 2 desk, there are 1000 user programmable Cue Stacks. Frog 2 Operating Manual – Issue 4...
- Page 160 A function that allows you to see the transition from a previous state to the current state before recording the data into a cue. User Defined Fader. The top bank of faders on the Frog 2, which can be defined as a number of options, according to user preference.
-
Page 161: Technical Specification
The desk has three audio ports on the rear panel (line in, line out and sound to light input) as stereo ¼ inch jack sockets. Connections Left Channel Ring Right Channel Sleeve 0V Signal Ground Frog 2 Operating Manual – Issue 4 Page 161... -
Page 162: Remote Input
0V Common Ground SMPTE 3 pin XLR input and output. Output 0dBm. Input 0dBm +/- 10dBm. 47 kOhm input impedance. Maximum 50V RMS. Connector Pin Number Description Signal Ground Output Input Page 162 Frog 2 Operating Manual – Issue 4... -
Page 163: Midi
Mini DIN connector (PS/2) and USB 1.1. External Keyboard Mini DIN connector (PS/2) and USB 1.1. External Floppy Drive If required, an external floppy drive can be connected to the desk, via USB 1.1. Frog 2 Operating Manual – Issue 4 Page 163... -
Page 164: External Storage Devices
Technical Specification External Storage Devices The primary method of storage for the Frog 2 is via USB Memory Sticks (also known as Flash Disks or Mass Storage Devices). These can be connected via the USB 1.1 ports. AV Port The desk also has a 9 pin D-type RS232/RS485 internally selectable – for future use. -
Page 165: Dmx Input
Data on channels 1 – 512 only. Connector Pin Number DMX Output Signal Ground (0V) DMX Drive Complement (1-) DMX Drive True (1+) Not Connected Not Connected Frog 2 Operating Manual – Issue 4 Page 165... - Page 166 Technical Specification Page 166 Frog 2 Operating Manual – Issue 4...
-
Page 167: Index
DMX Output ........165 Chase Options ........107 DMX Output Window ......153 Intensity Mixing .......105 Master Fader........106 Move on Dark Options.....110 Renumbering Cues ......104 Edit Fixtures Screen ......46 Timecode ........104 Editing Fixtures ........46 Frog 2 Operating Manual – Issue 4 Page 167... - Page 168 Frog 2 Development Team ....16 Move on Dark ........110 Front Panel Controls ......10 Full Key..........13 Function Keypad........13 Numeric Keypad ........13 Glossary..........157 Grand Master........11 Output Window ........151 Graphical Interface........8 Intensity...........152 Group Key..........16 Source..........152 Group Window ........67 Page 168 Frog 2 Operating Manual – Issue 4...
- Page 169 Highlight ..........86 Saving Shows ........60 Home Function........86 Screen Navigation Keys .....146 Intensity Parameters ......74 Close Key........146 Knockout Function......90 Screen Key........146 Park Function ........90 Select Key ........146 Position Parameters ......75 Size Key ..........146 Frog 2 Operating Manual – Issue 4 Page 169...
- Page 170 Fan Last Mode ........85 Updating Fixture Library......64 Fan Middle Mode ......85 USB Ports ...........163 Relative Mode ........84 User Definable Faders ......113 Windows ..........145 Channel Data UDF ......119 Mouse Operation......146 Cue UDF .........118 Page 170 Frog 2 Operating Manual – Issue 4...
- Page 172 Zero 88 Lighting Ltd. For news, views and the latest Tel: +44 (0)1633 838088 Usk House software visit the Zero 88 Fax: +44 (0)1633 867880 Llantarnam Park Product Support Forum at: email: sales@zero88.com Cwmbran Web: www.zero88.com www.zero88.com Gwent NP44 3HD...
Need help?
Do you have a question about the FROG 2 and is the answer not in the manual?
Questions and answers