Table of Contents
Advertisement
Quick Links
Advertisement
Table of Contents

Summary of Contents for Leutron Vision PicSight GigE Camera Series
- Page 1 PicSight GigE Camera Series Getting Started Guide...
-
Page 2: Table Of Contents
Getting an Image in a Web Browser ..........21 4.3.4. Logging Out..................21 4.4. Advanced Network Settings..............21 4.4.1. Understanding the LAN Traffic Issues..........21 4.4.2. Packet Sizes ................... 22 4.4.3. Setting the MTU ................23 PicSight GigE Getting Started Guide, version 1.96.169.1... - Page 3 4.4.4. Setting the Streaming Packet Size............. 24 4.4.5. Setting the Inter-Packet Delay ............24 4.4.6. Accessing PicSight on a Different Subnet..........25 4.5. Testing the Camera with PicSight Demo............ 25 4.5.1. Initial Settings ................25 4.5.2. Run-time Settings ................27 4.5.3.
- Page 4 +1-781-238 02 13 Phone: +420-377 260 342 Fax. +1-781-270 93 18 Fax: +420-377 260 944 E-mail: ussupport@leutron.com E-mail: czechsupport@leutron.com Contact information regarding our representatives and distributors worldwide is published on our WWW server: http://www.leutron.com PicSight GigE Getting Started Guide, version 1.96.169.1...
-
Page 5: Product Package
Orchid, high level library enabling fast and easy development of live-video applications in visual environments (MS Visual Basic, Borland C++ Builder, .Net Framework, etc.). PicSight Demo, an interactive test program for demonstrating basic PicSight capabilities. ® Twain driver which allows you to use PicSight with most of the popular image processing and office software, e.g. -
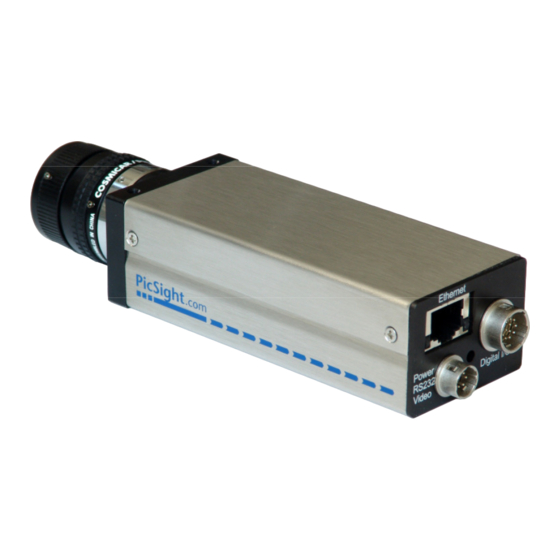
Page 6: Hardware Description
Opto Output 0 (Collector) Opto Output 1 (Collector) reserved, do not connect reserved, do not connect reserved, do not connect Opto Input 1 (bidirectional) Opto Input 0 (bidirectional) Opto Input Common (bidirectional) Trigger Input TTL Ground PicSight GigE Getting Started Guide, version 1.96.169.1... -
Page 7: Rs-232C, Power
The expected polarity on opto inputs can be configured by software on the host side. PicSight GigE Getting Started Guide, version 1.96.169.1... -
Page 8: Hardware Installation
Or it can be connected to a network with one or more switches between the PicSight and the host PC. As the PicSight complies with the IP protocol standard, so it should work with all standard Ethernet switches. However, the functions... -
Page 9: Software Installation
MS Visual Basic, Borland Delphi or C++ Builder, .Net Framework, etc. PicSight Demo program is supplied to guide the novice users of LV-SDS and Leutron hardware through the functionality range of the products via an intuitive user interface. -
Page 10: Installing Lv-Sds (Windows)
3.2.4. Installation Process The installation procedure is common for all supported versions of Windows operating system. The LV-SDS setup program inspects your system and allows PicSight GigE Getting Started Guide, version 1.96.169.1... - Page 11 Please note that Vision Blox 3.0 and Common Vision Blox 7.0 support may not be installed both together. If you select both of them, only Common Vision Blox 7.0 control will be installed. PicSight GigE Getting Started Guide, version 1.96.169.1...
- Page 12 LV-SDS installation: Registering Vision Blox control After fixing all the options, the setup program is ready to install LV-SDS to your computer. If you press the Next button, it will start copying all the needed files. PicSight GigE Getting Started Guide, version 1.96.169.1...
-
Page 13: Installation Results
Folder structure in Windows XP/2000 Under the destination folder the LV-SDS Setup program creates the 3rdParty folder: supporting software for use of 3rd party vision tools with our frame grabber boards (e.g. HALCON/ActivVisionTools of MVTec Software, PicSight GigE Getting Started Guide, version 1.96.169.1... - Page 14 The Twain_32 folder is created (if it did not exist) in the Windows folder. The Daisy folder is created in it and all appropriate files for TWAIN support are placed there. The kernel device driver is updated with the new installation of LV-SDS. PicSight GigE Getting Started Guide, version 1.96.169.1...
-
Page 15: Configuring And Testing The Camera
The firewall is a software which filters packets coming from the network and thus it can block some of the communication channels used by PicSight. So it can happen, for example, that although the ping command succeeds, the PicSight is not accessible via the HTTP protocol (the firewall has disabled access to machines on local network for web browsers). - Page 16 Exceptions tab. Click "Add Program..." button and locate the PicSight Demo program. Then click "OK" to add the PicSight Demo in the exceptions' list. Since now incoming communication will not be blocked for PicSight Demo. Repeat the same procedure for any other executables (including programs you compile yourself) you want to use for acquisition from the PicSight camera.
-
Page 17: Configuration Of Other Firewalls
If you have a firewall that allows more detailed configuration, for example configuring also outgoing connections, make sure that no restrictions are made for outgoing HTTP connections (so that you are able to configure the PicSight camera using your web browser), for ping, and in case you will need to access PicSight over FTP, than make sure also that no restrictions apply for outgoing FTP. - Page 18 PC an IP address beginning with 192.168.1. and an arbitrary number. In our example we use: 192.168.1.2 for the host, so it is then on the same subnetwork with PicSight having the default IP address 192.168.1.55. The gateway need not be set for this temporary TCP/IP settings (leave it empty).
-
Page 19: Http-Based Configuration
4.3. HTTP-based Configuration There is an HTTP server running on the PicSight camera, so after verifying the TCP/IP connection is correct, you can connect to it using a web browser, for example Internet Explorer, Firefox etc. To connect, type as the URL the following: http://192.168.1.55... - Page 20 Here you can set the desired IP address. The IP Gateway can be set to 0.0.0.0. In case you have a DHCP server in your network and want the PicSight to get the IP address assigned automatically from the DHCP server during the boot, set the IP address to 0.0.0.0.
-
Page 21: Changing The Password
One typical example is a wireless connection on the path. It has a lower bandwidth than the rest of the LAN. However, the host (PicSight) is not aware of it (it can determine only the speed to the nearest port), so it simply tries to stream out the data as fast as possible, which can lead to the buffer overflow on the wireless gate. -
Page 22: Packet Sizes
The MTU has to be set on both sides to the same value, on the host (PC) side as well as on the PicSight side Also, all devices along the network path from the host to the client (switches etc.) must support the used frame size. -
Page 23: Setting The Mtu
Start -> Settings -> Control Panel -> Network Connections -> Local Area Connection -> Properties: After pressing the Configure button, a driver dependent dialog box appears. The one in our example below is from the Intel PRO/1000 adapter: PicSight GigE Getting Started Guide, version 1.96.169.1... -
Page 24: Setting The Streaming Packet Size
The MTU settings is here available under the Jumbo Frames option, with a possibility to select from predefined values. On the PicSight side the MTU settings is available in the HTTP based configuration, in the Change Other INI Items page after successful login. -
Page 25: Accessing Picsight On A Different Subnet
LAN (the gateway) is able to redirect the packets. In other words, if you want to access PicSight with the default IP address 192.168.1.55, which is out of your local subnet range, it is not enough to set it as FixDiscoverIP. - Page 26 Note that if you connect the camera after the PicSight Demo was started, it will not be visible, until you restart the demo. If you want to test multiple cameras simultaneously, press the Add Camera button. Then you will have multiple cameras in the left list box and you can switch between them by clicking in this list box, or by clicking on each camera's window.
-
Page 27: Run-Time Settings
Here you can select the trigger input. Note that the dialog is designed to be more universal (also for frame grabbers), so not all options apply to PicSight GigE. In the Function combo box select Frame Trigger, in the Type select Direct. -
Page 28: Display
You can save the selected image to a file, or copy it to the Clipboard. Bayer Demosaic In case the PicSight has the Bayer Array color matrix, the Bayer Array Demosaic Method becomes available. Here you can select one of the methods to decode... -
Page 29: Info
Note that the decoding is done by software, in PicSight demo. 4.5.4. Info This tab is useful in case you are testing the transfer bandwidth of your LAN connection. -
Page 30: Expert Settings
PicSight may get into a status, in which it is not able to boot anymore. In such case the Recover Mode must be used to boot. -
Page 31: The Recover Mode
4.6.2. The Recover Mode For the case the PicSight system fails to load, a recover copy of the system is available in the PicSight flash memory. This system is limited in functionality (does not enable acquisition and streaming) and serves only for fixing the normal system.
Need help?
Do you have a question about the PicSight GigE Camera Series and is the answer not in the manual?
Questions and answers