Table of Contents
Advertisement
Quick Links
Advertisement
Table of Contents

Summary of Contents for Tibo A4050
- Page 1 А405 - A - N - U - A - L GPSClub.ru...
-
Page 2: Table Of Contents
А 4 0 5 0 M A N U A L Table of Contents 1. Introduction 2. Important tips and warnings 2.1 Genera 2.2 Safety precaution 3. Getting it started 3.1 Inserting SD card 3.2 Charging the unit 3.3 Attaching to the bike 4. - Page 3 WARNING | DANGER OF ACCIDENT When using Tibo navigation in your vehicle, it is your sole responsibility to use the device in a manner that will not cause accidents, personal injury or property damage, or in any manner that may obstruct your view or interfere with operation of vehicle safety equipment.
-
Page 4: Introduction
А 4 0 5 0 M A N U A L 1. Introduction This handbook is aimed to provide a quick guide to the Tibo’s basic features and functions in respect to the unit hardware. For Instructions on how to use the Navigation Software, please check out the Navigation Owners Manual which can also be found on this CD. -
Page 5: Important Tips And Warnings
2. Important Tips and Warnings 2.1 General ® Effective route planning prior to beginning each journey is highly recommended. If you need to setup o change your itinerary while on route, please ensure the vehicle is stopped. For your own safety and for others, please DO NOT OPERATE THIS UNIT WHILE DRIVING The Navigation feature is intended to be used only as an aid, not as a precise measurement of direction, distance, location or topography. - Page 6 А 4 0 5 0 M A N U A L 2. Important Tips and Warnings 2.1 General ф The mounting bracket is necessary when using the unit on your motorbike or in a car and we strongly recommended that you mount the unit in an appropriate place so it doesn’t obstruct your view, airbag panels and instrumentation.
-
Page 7: Safety Precaution
Tibo service agent. (Please contact Tibo for further information regarding battery replacement) You must use the specifed battery charger as approved by the manufacturer ©... -
Page 8: Getting It Started
Before inserting or removing your SD Card, please make sure the Power is Off. Locate the SD Card Slot at the bottom of your Tibo unit and insert your SD Card with the label facing up and the pins entering the slot first. -
Page 9: Charging The Unit
Please refer to Bluetooth section for details on the operation of Bluetooth Please allow the Tibo enough time to perform its operation before selecting the next option or feature. (E.g. taping buttons, tapping the touch screen, executing menu functions to quickly may cause problems.) -
Page 10: Attaching To The Bike
А 4 0 5 0 M A N U A L GPSClub.ru 3. Getting It Started Attaching to the bike (1) Fasten the mount on the handle of motorbike (2) Fasten the mount on the handle of motorbike (3) Attach the marked parts of main unit to the cradle (4) Slide the unit till it clicks. -
Page 11: Hardware Features
4. Hardware Features 4.1 Front View 4.2 Rear View [1] Volume up button [2] Turn indicating button [3] Menu button [4] Map reduce button [5] Volume down button [6] Map enlarge button [7] Bluetooth button [8] Power button [9] Optical button [10] Speaker... - Page 12 А 4 0 5 0 M A N U A L GPSClub.ru 4. Hardware Features 4.3 Left Side 4.4 Right Side [1] Cover [2] Terminal [3] USB Port [4] SD Card Slot [5] AC Jack...
-
Page 13: Hardware Accessories
5. Hardware Accessories 5.1 Standard Accessories Quick Start Guide Cradle & Mount Cigarette Lightert Containing SW Manuals DC Power Adaptor H Ф Bluetooth headset AC adapter SD Card Containing map data Note: Images are correct at time of publication. Subject to change without notice. - Page 14 Touch Screen The Tibo can easily be operated by the touch of your fingertip. Please note that the surface of the LCD screen may be damaged if a sharp object is used or if excessive pressure is placed on the screen 2008-01-15 오후...
-
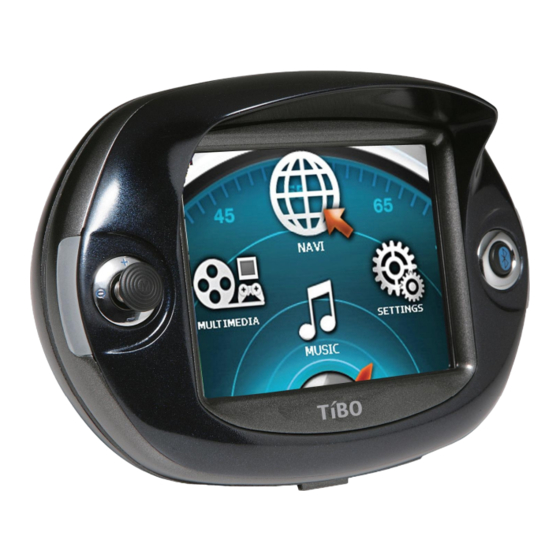
Page 15: Main Menu
6. MAIN MENU 6.2 Menu Options NAVI Starts navigation functions MUSIC Starts the music playback functions that enables playing MP3 files MOVIE Starts the movie playback function that enables playing avi and xvid files PICTURE Starts the picture function that enables viewing picture files (JPEG, BMP, PNG and GIF) GAME Starts the game function SETTINGS... - Page 16 For further information regarding the use of your navigation feature, please refer to the full-version of the navigation user manual which can be found on the CD provided with the Tibo navigation package.
-
Page 17: Music
SD memory card inserted in the unit, a sample file, which is permanently saved on the Tibo unit, will be shown. If the SD memory card is disconnected during playback, a sample file is located and the existing music playback stops. If the SD memory card is short of capacity, purchase another SD card Please be careful not to delete the map fle. - Page 18 А 4 0 5 0 M A N U A L GPSClub.ru 6. MAIN MENU 6.4 Music © Playing a Music File Tap the Play Button to play the music file displayed on the screen. The Playing time and Track duration will be displayed at the top right hand corner of the display.
- Page 19 6. MAIN MENU 6.4 Music ® Stop Playback stops. Current status is displayed as Stop. The current playing time in the top right corner appears as ’00:00:00’. If you tap the previous/next music file during Stop mode, it will scroll through the song names on the SD Card. (Play button must be taped to resume play)
- Page 20 А 4 0 5 0 M A N U A L GPSClub.ru ф Repeat The default setting is set to ‘All Repeat All Repeat 1 Track Repeat All Play (no repeat) Ш...
- Page 21 6. MAIN MENU 6.4 Music Volume Adjustment / Mute The Volume Cannot be adjusted by using the touch screen. The only way to adjust the volume up / down is to use the jog stick located on the left hand side of the unit oOooioOoo ■;...
-
Page 22: Movie
А 4 0 5 0 M A N U A L GPSClub.ru 6. A Look at the Home Screen 6.4 Movie ® Movie Play List Change the sequence of play list. Play the selected music and turn on the main screen of Music menu. - Page 23 If there is no SD memory card inserted in the unit, a sample MOVIE file, which is permanently saved on the Tibo unit, will be shown. If the SD memory card is disconnected during playback, the sample file is located and displayed. If the SD memory card is short of capacity, purchase another SD card for your Movie files Please be careful not to delete the map fle.
- Page 24 А 4 0 5 0 M A N U A L GPSClub.ru 6. MAIN MENU 6.5 Movie © Optimized to the movie size of 340 X 240 | MOVIE PLAYER SCREEN SHOTS Fast backward by 10 seconds / If this button is re-selected during the rewind, the movie is played from the last play position.
- Page 25 6. MAIN MENU 6.5 Movie © Optimized to the movie size of 340 X 240 resolution | MOVIE Play List To view the MOVIE play list menu, tap the Play list button in the MOVIE Player Menu. If you are in the middle of watching a MOVIE, it will pause.
- Page 26 А 4 0 5 0 M A N U A L GPSClub.ru 6. MAIN MENU 6.5 Movie ® FULL SCREEN View To view a MOVIE in Full Screen Mode, simply tap the image. If you tap the image while in Full Screen Mode, it will switch back to the Movie Player Screen.
- Page 27 6. MAIN MENU 6.5 Movie Playing a Movie Select the play (t>J button or touch the movie screen or select a file from the play list and selet the ДЗД1 button to play the movie Touch the screen to play by selecting a section The Control bar Ц^Е...
-
Page 28: Picture
If there is no SD memory card inserted in the unit, a sample PICTURE file, which is permanently saved on the Tibo unit, will be shown. If the SD memory card is disconnected the sample file is located and displayed. If the SD memory card is short of capacity, purchase another SD card for your Movie files Please be careful not to delete the map fle. - Page 29 6. MAIN MENU 6.6 Picture © Previous / Next Image Use the Arrow buttons to select the next or previous image. Next Previous Image in Full Screen Tap the Image to view the image in Full Screen. Tap the image again to go back to the Picture Viewer Screen.
- Page 30 А 4 0 5 0 M A N U A L GPSClub.ru 6. MAIN MENU 6.6 Picture ® Zoom in Mode If viewing an image in Full Screen Mode, you can zoom in on the image by using the jog stick on left hand side.
- Page 31 6. MAIN MENU 6.6 Picture Picture View List To search images using the Picture View list, simply tap the Picture view list icon which is shown below. Once you are in the Picture View List Screen, to select / view an image, simply scroll through the list of images and highlight the image you wish to view and tap the View button.
-
Page 32: Game
А 4 0 5 0 M A N U A L GPSClub.ru 6. MAIN MENU 6.7 Game [Game Name : Card Pairing] ® Environment Settings Among 32 different picture cards, you should pair 2 same picture cards. Once you execute the game, you will have the previewing mode during 5 seconds before starting the actual game. -
Page 33: Settings
6. MAIN MENU 6.8 Settings © Saving the Settings Calibrate И Set the brightness of LCD. f» Adjust automatically the brightness of LCD according to the brightness of circumstance Set the sound ^imi Reset GPS ft-J Move to the next setting page. Initiate menu Set language. - Page 34 А 4 0 5 0 M A N U A L GPSClub.ru 6. MAIN MENU 6.8 Settings © Calibrating/ Auto Dimming/Adjusting LCD Brightness/Setting the Sound Carefully press and briefly hold stylus on the center of the target. Repeat as the target moves around the screen. Adjusting LCD Brightness Setting the Sound...
- Page 35 6. MAIN MENU 6.8 Settings ® Resetting GPS/Setting Language/Initiating menu/Auto-booting Initiating menu Auto-booting GPSClub.ru...
-
Page 36: Bluetooth
А 4 0 5 0 M A N U A L GPSClub.ru 7. Bluetooth Please sync A4050 with headset to receive the wireless voice guidance. You can use any receiver supporting Bluetooth besides of include headset (RM-S360C). Push Bluetooth button and then tap headset option... - Page 37 7. Bluetooth After push OK button, it starts to search. Select the searched device and then click OK. You can see window for entering pincode. Tap key pad button. GPSClub.ru...
- Page 38 А 4 0 5 0 M A N U A L GPSClub.ru Key-in pincode and then click OK button. If you want to move to previous page, push I It starts to connect to Bluetooth headset. button. Push stop button to stop the connecting.
- Page 39 7. Bluetooth Device Connected Succeed to be connected. Press No to finish the program. Press Yes to try again. GPSClub.ru...
- Page 40 А 4 0 5 0 M A N U A L GPSClub.ru 7. Bluetooth When connecting to headset, the headset Sounds from headset only. image is toggling and the setting is chang Sounds both from the headset and main unit If you tap [Disconnect] the button, it’s disconnected.
- Page 41 7. Bluetooth Disconnect? Disconnecting…. Disconnect? If you want to stop disconnecting, tap Press No to Go back to the ‘stop’button. previous page. Press Yes to Disconnect [S360C] Device Disconnected Finish disconnecting. GPSClub.ru...
- Page 42 А 4 0 5 0 M A N U A L GPSClub.ru 7. Bluetooth Headset 7.1 How to charge the headset Charge with AC adapter included Connect AC adapter to AC input on side of unit. During charging, LED is flickering. When charging is finished, LED turns off In order to charge it fully, please charge 1 hour more after LED turns off During charging, LED is flickering...
-
Page 43: Bluetooth Headset
LED in blue. To set sync mode, remain pushing the power button until LED is flickering between blue and red. In this mode, you can sync headset with A4050. About the way of sync with A4050, please refer to page 41. The pincode of the headset is [0000] To set sync mode is necessary only for the first time. - Page 44 А 4 0 5 0 M A N U A L GPSClub.ru 8. Specifcation of A4050 LCD Type 3.5” Digital TFT LCD LCD Brightness 350 cd Display Resolution 320 x 240 pixels Display Colour 16.7M Colour Screen Touch Screen Enabled...
- Page 45 “Operation is subject to the following two conditions: (1) this device may not cause interference, and (2) this device must accept any interference, including interference that may cause undesired operation of the device.”...
Need help?
Do you have a question about the A4050 and is the answer not in the manual?
Questions and answers