Advertisement
Quick Links
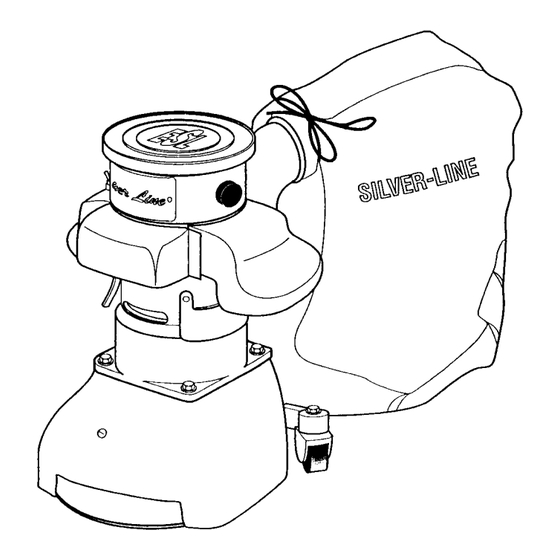
Silver-Line SL-7
Operator's Manual
Read This Book
This book has important information for the use and safe operation of this machine. Failure to read this book
prior to operating or attempting any service or maintenance procedure for your Silver-Line machine could
result in injury to you or to other personnel: damage to the machine or to other property could occur as well.
You must have training in the operation of this machine before using it. If you or your operator(s) cannot read
English, have this manual explained fully before attempting to operate this machine.
All directions given in this book are seen from operator's position at the rear of the machine.
Essex Silver-Line Corporation, 1118 Lakeview Ave. PO Box 40, Dracut, MA 01826
www.essex-silver-line.com
1
Advertisement

Summary of Contents for Essex Electronics Silver-Line SL-7
- Page 1 English, have this manual explained fully before attempting to operate this machine. All directions given in this book are seen from operator’s position at the rear of the machine. Essex Silver-Line Corporation, 1118 Lakeview Ave. PO Box 40, Dracut, MA 01826 www.essex-silver-line.com...
- Page 2 (Suggestions for Care & Operation…Parts List) Introducing: Your new Silver-Line SL-7 edger is the easiest and fastest cutting edger available to the professional and rental trades. It is complete and ready to operate having been adjusted and thoroughly tested at the factory. The following suggestions will assure your getting the long life and excellent performance engineered into each and every machine.
- Page 3 $0.30 C763 $0.90 C726 Spacer (New Style) $5.70 C764 Fiber Washer $0.30 C727 Ventura Plate $5.05 C765 Disc Guard Ring $24.65 Essex Silver-Line Corporation Toll Free 800 451-5560 1118 Lakeview Ave. Fax (978) 957-6989 PO Box 40 Phone (978) 957-2116...
- Page 4 Screw (Wrench Clip) $0.95 C778 Wrench $10.10 C779 Plug (Male Straight) #1447 $7.00 C780 Plug (Female Twistlok) #4729C $12.00 Silver-Line SL-7 Edger C781 Nameplate (Top) $1.80 C782 Disc Cutter (7") $60.70 C782A Cutter Blade $7.60 C782B Center Punch $5.70 C782D2 Nylon Bar (2) $25.00...
- Page 6 Simple Preventive Maintenance Will save you money and keep your working equipment sound Blow out the dust from you edger after every use. Make sure to blow out around the disc pad, guard, brushes and the hole for the paper retaining screw. Grease you machine every 2 to 3 months depending upon usage.
- Page 7 5. Tap out Jackshaft for Bolt & Washer 6. Clean Armature Commutator Before attempting any repairs on your Silver-Line SL-7 edger disconnect it from power. The tools referred to in these instructions are available from Essex Silver-Line Corporation, call us @ 800 451-5560 and ask for each tool separately or as a kit part # C7-92.
- Page 8 b) C7-41 (6202) Located on the bottom of the armature, You must take the edger apart & remove the armature to replace this bearing. Remove disc pad (See #1) ii) Remove the disc guard ring (C7-65), and disc guard (C7-67) (5 screws) iii) Remove the 6 flat head screws holding the gear housing cover (C7-3) in place.
- Page 9 Repeat b & c as needed. e) Tap the jackshaft with a 5/16-18” Tap. f) Test depth with new bolt (C7-70) from Essex Silver-Line Corporation. 6) Clean Armature Commutator: a) Remove disc pad, disc guard and disc guard retainer.
- Page 10 Figure A #1) Armature #2) Baffle Plate #3) Vacuum Fan #4) Bearing Seat (C7-41) Hit disc pad remover w/hammer Counterclockwise Back of edger Screwdriver C7-2 holding fan C7-1 Front of Edger Figure B C7-62 Jackshaft Note: C7-62 Jackshaft has threads on the interior and exterior of section C7-71 (6204) Bearing shown on the top of this diagram.
- Page 11 Proper Application & Use of Silver-Line Abrasives 12, 16, 20* grit Sheets & Discs For removing old surface coatings and leveling uneven floors 36, 40* grit Sheets & Discs For intermediate sanding of floors following rough sanding. For initial sanding of moderately worn floors 60*, 80, 100* grit Sheets &...
- Page 12 Wood Floor Refinishing The Silver-Line Way (Visit our website www.essex-silver-line.com under consumer tips for complete information) Job Preparation: Remove the furniture, wall hangings, etc. Clear the room out! Remove the old carpet, carpet pad and carpet strip (where necessary) Locate & Reserve only Silver-Line Sanders & Edgers from your local rental store Watch the Silver-Line “How to”...
- Page 13 Note: After sanding you should screen the floor before you apply any finish or stain to achieve the best possible finish. A professional floor sander will screen his work; spend the time and money to screen your floor. Essex Silver-Line Corporation PO Box 40 1118 Lakeview Ave.
-
Page 14: Limited One Year Warranty
Essex Silver-Line Corporation Limited One Year Warranty Essex Silver-Line Corporation warrants the floor sanding equipment for a period of one year from the date of original purchase. We will repair or replace at our option, any part or parts of the products under this warranty which examination proves to be defective in workmanship or materials during the warranty period.
Need help?
Do you have a question about the Silver-Line SL-7 and is the answer not in the manual?
Questions and answers