Table of Contents
Advertisement
Advertisement
Table of Contents

Related Manuals for Cocoon BT42740

Summary of Contents for Cocoon BT42740
- Page 1 MOTORCYCLE HELMET BLUETOOTH KIT Model Number: BT42740 INSTRUCTION MANUAL...
-
Page 2: Warranty Details/Support
For additional support including helpful guides and videos, visit the Cocoon support website at www.winplus.com.au/cocoon.html Telephone: 1300 663 907 Email: customercare@winplus.com.au... -
Page 3: Table Of Contents
ConTenTS Warranty Details / Support Contents General Safety Instrutions Parts List / Technical Specifications Product Features Instructions 7-13 Fitting the Bluetooth Receiver to Your Helmet Charging the Bluetooth Receiver Powering On and Off Pairing to Your Bluetooth Enabled Mobile Phone To Answer an Incoming Mobile Phone Call Ending a Mobile Phone Call Rejecting a Mobile Phone Call... -
Page 4: General Safety Instrutions
GenerAl SAfeTy InSTruCTIonS Read this manual thoroughly before first use and keep it in a safe place for future reference, along with the warranty card, purchase receipt and carton. The safety precautions enclosed herein reduce the risk of fire, electric shock and injury when correctly adhered to. Follow all instructions and take notice of all warnings to reduce the risk of fire or electric shock. -
Page 5: Parts List / Technical Specifications
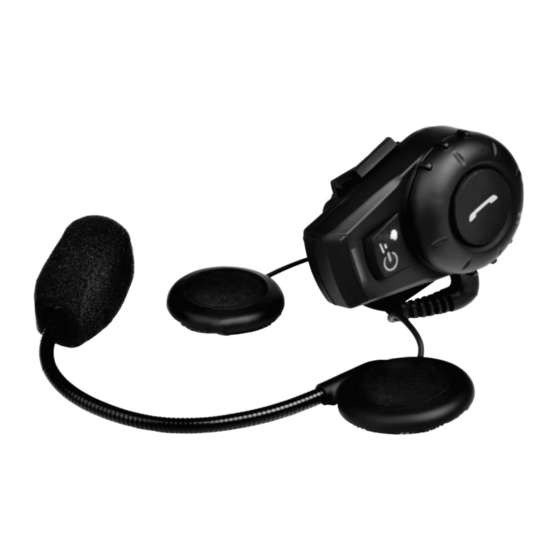
pArTS lIST • 1 x Motorcycle Bluetooth Headset & Microphone • 1 x USB Charging Cable • 1 x 240V Power Adaptor • 1 x Helmet Mount Clip • 2 x Hook & Loop Pad Earphone Mounts • 1 x Instruction Manual •... -
Page 6: Product Features
proDuCT feATureS Complete system for all your communication needs while riding your motorbike. The Bluetooth® function will keep you connected to your mobile phone, play music and connect with Bluetooth GPS systems. The intercom means you can communicate with your pillion or other riders within 500m while you ride. -
Page 7: Instructions
InSTruCTIonS fitting the Bluetooth receiver to your helmet 1. Using the provided screw driver, loosen the Headset Clip screws. 2. Slide the Headset Clip onto the left side of the helmet (when on your head). Take care to place the inside of the Headset Clip under the helmet padding. - Page 8 7. Attach ear speaker to the felted pad. Run the Microphone Arm along the inside wall of the helmet, to where your mouth will be. The Microphone Arm is flexible and should be adjusted so it sits in the best position in front of your mouth.
-
Page 9: Charging The Bluetooth Receiver
Charging the Bluetooth receiver Before using this device, fully charge the Bluetooth Receiver. This should take around 4 hours. 1. Insert the USB plug of the charging cable into the small USB jack on the headset. Insert the other end of the charging cable into the Power Adaptor or your computer’s USB port. -
Page 10: Pairing To Your Bluetooth Enabled Mobile Phone
pairing to your Bluetooth enabled Mobile phone 1. Place your Bluetooth enabled phone and the Bluetooth receiver near each other. Within 1m is recommended. 2. Make sure the Bluetooth receiver is turned on. 3. Press and hold down the power/intercom button for approximately 8 seconds until the receiver beeps twice. -
Page 11: Ending A Mobile Phone Call
ending a Mobile phone Call 1. Press the Multi Function button to end the call rejecting a Mobile phone Call 1. When you hear the phone ringing, immediately press and hold the Multi Function button on the headset until you hear a beep. redial the last number 1. -
Page 12: To Start A Conversation Via Intercom
To Start a Conversation via Intercom 1. Once the two headsets are paired with each other, press the power/ intercom button on either receiver to begin. 2. Use the jog wheel to increase or decrease the headset volume. Tip: You only need to press the power/intercom button once to establish a connection;... -
Page 13: To Answer A Call While Listening To Music
1. Select music to play directly from your music device (check your MP3 player or phone instructions for how to do this) 2. Play music through the headset press the Multi Function button once 3. Pause music press the Multi Function button again 4. -
Page 14: Troubleshooting
TrouBleShooTInG Problem Solution The Bluetooth The Headset must be charged for at least Receiver has no 4 hours prior to first use. Refer to Charging power. the Bluetooth Device on page 7 for further details. My helmet is The placement of the speakers within the uncomfortable to helmet may require repositioning. -
Page 15: Repair & Refurbished Notice
Motorcycle helmet Bluetooth Kit After Sales Support Telephone: 1300 663 907 Internet: www.winplus.com.au...
Need help?
Do you have a question about the BT42740 and is the answer not in the manual?
Questions and answers