Advertisement
Advertisement
Table of Contents

Summary of Contents for Welltec System postmate 3
- Page 1 Postmate 3 User’s Manual Postmate 3 User’s Manual User’s Manual Rev. 070514...
- Page 2 Copyright Any of the contents should not be copied, re-printed or translated by other languages without Welltec System’s approval. Postmate is the registered trademark of Welltec System. Notice Caution : Physical injury and serious mechanical damage will occur when disregarding this information.
-
Page 3: Table Of Contents
Postmate 3 User’s Manual Table of Contents Chapter 1 - Installation 1-1 Installation Environment 1-2 Unpacking 1-3 Removing Safety Tapes and Styrofoam 1-4 Power Connection Chapter 2 - Before Operating 2-1 Identifying Parts Chapter 3 - Operation 3-1 Paper Size... -
Page 4: Chapter 1 - Installation
Postmate 3 User’s Manual Chapter 1 - Installation 1-1 Installation Environment 1. Input power : 100~110V (5A), 220~240V (3A) 2. Machine size(mm) : 415 x 600 x 385 (without conveyor) 3. Machine weight : 45kg - Since the weight of a product is heavy, please use appropriate table for putting it on. -
Page 5: Chapter 2 - Before Operating
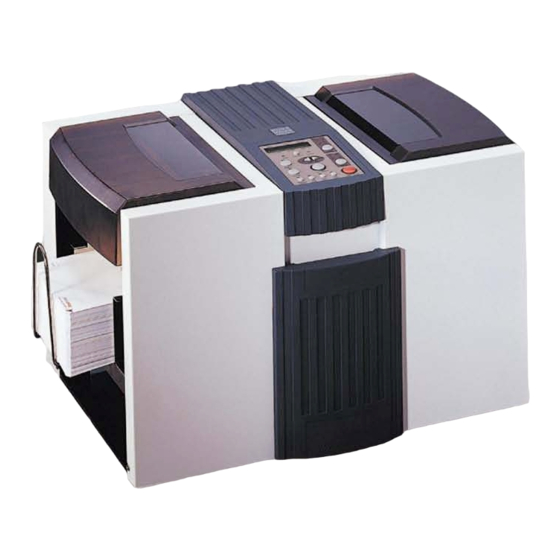
Postmate 3 User’s Manual Chapter 2 - Before Operating 2-1 Identifying Parts and Functions 1. Feeding Unit Safety Cover 2. Upper Fold Cassette Safety Cover 3. Lower Fold Cassette Door 4. Control Panel 5. Conveyor (option) - 4 -... - Page 6 Postmate 3 User’s Manual Large Capacity Tray 1. Feed Assist Hanger 2. Feed Guide (Left) 3. Feed Guide (Right) 4. Locking Knob 5. Infeed Roller Lower Cassette 1. Lower Cassette 2. Stopper 3. Stopper Adjustment Knob 4. Folding Scale Label Upper Cassette 5.
- Page 7 Postmate 3 User’s Manual Outfeed Unit 1. Power Switch 2. Main Power Socket 3. Conveyor Power Socket 4. Lower Press Roller Cover 5. Upper Press Roller Cover - 6 -...
- Page 8 Postmate 3 User’s Manual Name and Function of Each Button (Postmate 3 L) 1. Display Panel : shows the setting condition and working of the machine. 2. Start/Stop button : starts and stops the machine. If you press during setting, it returns to the prior condition.
- Page 9 Postmate 3 User’s Manual Name and Function of Each Button (Postmate 3 M) 1. Display Panel : showing the setting condition and working of the machine. 2. Start/Stop button : starts and stops the machine. If you press during setting, it returns to the prior condition.
-
Page 10: Paper Size
Chapter 3 - Preparing for operation 3-1 Paper Size Postmate 3 handles any form that is larger or smaller than the following forms. Reference - Using forms that do not fall under the specifi ed size may result in paper jam or machine damage. - Page 11 Postmate 3 User’s Manual 2. Open the safety cover of the feeding unit. The tray will go down. 3. When the feed tray is down to the bottom, loosen the green knobs on both paper guides. 4. Load the aligned forms onto the feed tray and adjust the paper guides so they are gently covering the sides of the stacked forms.
- Page 12 Postmate 3 User’s Manual 3-3 Setting of Paper and Folding Type (Postmate 3-M) The following instruction shows how to set A4 size Z-Fold. (Note: Please be noted that the position marker doesn’t guarantee 100% positioning.) 1. Lower Cassette Fold Setting - 99mm 1.
- Page 13 Postmate 3 User’s Manual (Postmate 3-L) 1. Press Paper button. The LED will light on. 2. Press - / + button until the correct paper shows. 3. It will change A5 - B5 - LET - A4 - LEG - USR. If the paper is non-standard, please press Set button on USR and select the paper length by - / + button.
- Page 14 Postmate 3 User’s Manual Understanding Folding Mechanism It is important to understand how Postmate 6 folds paper in order to accurately set the fold setting. Please read the following information carefully to fully understand the folding mechanism of Postmate 6.
- Page 15 Postmate 3 User’s Manual 4. The form hits the lower cassette stopper and forms a buckle. The folded form then enters in between the two outer rollers. 5. The folded form then exits the fold rollers and then are sent to the press unit.
- Page 16 Postmate 3 User’s Manual Z-Fold Setting Upper Cassette Paper Infeed Direction Outfeed Direction Stopper Lower Cassette Second Fold First Fold (Upper Cassette) (Lower Cassette) Infeed Direction When setting a Z-Fold, please read the following steps. 1. Measure the length from line 1 to line 2 of the form as indicated in the image above.
- Page 17 Postmate 3 User’s Manual V-Fold Setting V-Fold Guide First Fold (Upper Cassette) Infeed Direction When setting a V or a Single-Fold, please read the following steps. 1. Measure the length from line 1 to line 2 of the form as indicated in the image above.
- Page 18 Postmate 3 User’s Manual C-Fold Setting Second Fold (Lower Cassette) First Fold (Upper Cassette) Infeed Direction When setting a C-Fold, please read the following steps. 1. Measure the length from line 1 to line 3 of the form as indicated in the image above.
- Page 19 Postmate 3 User’s Manual Double Folding Second Fold (Lower Cassette) First Fold (Upper Cassette) Infeed Direction When setting a Double-Fold, please read the following steps. 1. Measure the length from line 1 to line 3 of the form as indicated in the image above.
- Page 20 Postmate 3 User’s Manual Window Folding Second Fold (Lower Cassette) First Fold (Upper Cassette) Infeed Direction When setting a Window-Fold, please read the following steps. 1. Measure the length from line 1 to line 4 of the form as indicated in the image above.
- Page 21 Postmate 3 User’s Manual 3-4 Count Setting You can set the number of jobs to be done. For example, if you set count on 100, machine will stop operating when the job reaches 100. Press Start/Stop button again, machine will start to fi nish another 100.
- Page 22 Postmate 3 User’s Manual 3-6 Memorizing of Present Fold Set-up You can memorize the current fold setting for later usage. Memorizing up to 4 jobs is possible. 1. Press Mem button once. LED will be on among M1 - M4.
-
Page 23: Thickness Sensor
Sensor button since the value is different depending on papers. Important The feeding system of Postmate 3 is FRR (Friction Reverse Roller), which prevents the double feeding by reserve roller. However, there are many possibilities of double or multiple feeding since Postmate 3 processes 100 sheets per minute. -
Page 24: Chapter 4 - Handling Errors
Chapter 4 - Handling Errors 4-1 Error Message There are various types of sensors located at different parts of Postmate 3. These sensors detect and display the location of an error on the panel. Please read the following errors to understand how to handle each error. -
Page 25: Handling Paper Jams
Postmate 3 User’s Manual 4-2 Handling paper jams Removing the jammed paper at the upper cassette 1. Open the top upper cassette safety cover. 2. Pull out the upper cassette and remove any jammed paper. Caution Please be cautious when removing jammed forms as it may result in damaging the upper cassette. -
Page 26: Chapter 5 - Maintenance
Postmate 3 User’s Manual Chapter 5 - Maintenance 5-1 Exchanging Friction Reverse Roller The feeding rollers consist of three different rollers; 1. Pick up roller 2. Feed roller 3. Separate roller It depends on the paper weight, type and etc., but please check the parts and change when you produce over 100,000 products, if necessary. -
Page 27: Cleaning Rollers
Postmate 3 User’s Manual 5-2 Cleaning Rollers Since pressure seal forms leave paper dust, ink and toner residues, it is very important to occasionally clean the surface of the each roller to maintain its best condition for better performance. 1. Paper dust - Use small air cleaner or dust remover. - Page 28 Postmate 3 User’s Manual 3. Cleaning press rollers - A professional’s aid is necessary to clean press rollers. Try to clean it by an engineer’s help, if possible. If you are going to do it by yourself, please turn of the power.
-
Page 29: Chapter 6 - Troubleshooting
Postmate 3 User’s Manual Chapter 6 - Troubleshooting Some of the errors can easily be fi xed by the user without a professional’s aid. 6-1 No Power 1. Check whether the power cable is properly connected. 2. Check the power supply. - Page 30 Postmate 3 User’s Manual WELLTEC SYSTEM CO., LTD. Headquarter & Factory 1075-93, Sungsuk-dong, Ilsan-gu, Goyang-si, Kyungki-do, Korea Tel : +82-31-977-4711 Fax : +82-31-977-4712 E-mail : welltec@welltec.co.kr Website : www.welltec-sys.com - 29 -...
Need help?
Do you have a question about the postmate 3 and is the answer not in the manual?
Questions and answers
Infeed sensor jam dusplayed after +- 10 folds...postmate III...first machines..old..