Advertisement
Advertisement

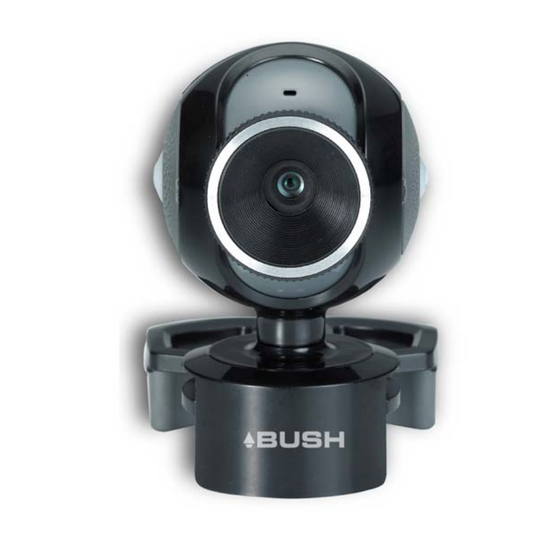
Summary of Contents for Bush DC-7132
- Page 1 DC-7132 2MP Webcam User’s Manual...
-
Page 2: Table Of Contents
Index Package Content................2 System Requirements..............2 Description for Each Part............. 3 Features ..................4 Setting the Software ..............5 Install the Hardware ..............7 Uninstall the Software..............13 Maintenance ................. 13... -
Page 3: Package Content
Package Content 7 MP PC Webcam Instruction System Requirements Windows XP(Service Pack2) / Vista / 7 Pentium III 800MHz or higher processor Available USB port & CD-ROM Drive 256MB RAM or higher Hard drive with 1GB free space 16-bit Color Display... -
Page 4: Description For Each Part
Description for Each Part... -
Page 5: Features
Features 1. 2.0MP Pixels 2. Easy Plug and Play 3. Multi-Swivel Design 4. Clip on LCD monitor / Laptop 5. USB PC Webcam Driver features: Effects and digital frames Face tracking and digital zoom Anti-flicker (50/60Hz) setting 6. Webcam Specification: Sensor type: CMOS Native resolution: 1600 x 1200 Software enhancement still resolution: 3200 x 2400... -
Page 6: Setting The Software
Setting the Software Install Device driver first and follow the on-screen instruction. The steps of installation: 1. Insert the CD into your CD-ROM drive 2. The installer screen will automatically come up. Note: If the installer screen does not come up automatically, click Start, then run and execute the file “launch.exe”... - Page 7 4. Click “Next” to begin the installation. 5. Select “ Finish” then the software installation is completed.
-
Page 8: Install The Hardware
Install the Hardware Ensure to install the device driver before connect the webcam. Plug Webcam’s cable to the USB port on your computer. Note: This Webcam features USB easy plug-and-play for Instant Messenger (e.g. MSN, Yahoo and Skype etc). When you connect the webcam to your PC, it will install the driver automatically. The different icons will pop up on Windows XP and VISTA as below: Windows XP Windows VISTA... - Page 9 How to use AMCAP tool AMCAP is an application that let you capture video in your system. Please click “ Start” “Program” USB2.0 UVC Camera “ AMCAP” to launch the program. After launch the AMCAP program, you can see the live picture is in the screen. If the live picture is not good, please turn the focus ring in either clockwise or anticlockwise until the picture is changed to sharp.
- Page 10 Device: under the devices menu you choose which of your video cameras you will be capturing from. Files/ Allocate file space: It is to set up the initial movie file size. The program will adjust the file automatically while recording. It is recommend to set it as default value. Options / preview: lets you watch the input video that is being recorded in the application window.
- Page 11 Options/ Video Capture Pin: choose the video color space and video size. Supported color spaces are RGB24, 1420 Supported size is 160 120, 176 144, 320 240, 352 288, 640 480, 800 600, 1024 768, 1280 960 and 1600 1200. Captures/ Start Capture: Save the capture file in your computer and select “...
- Page 12 Capture movies 1. Click “ File” “ Set Capture File” ” Desktop” ( Or Click “ File” ” Set Capture” to setup the path of the movie file in your computer.) 2. Create a file name : ABC.avi 3. To set the file size : Suggest to enter 1Mbyte and press “OK “ 4.
- Page 13 Anti-Flicker Setting When the flickers, the rolling horizontal (vertical) bands, appear on the screen, change the power frequency setting. Set 50Hz or 60Hz according to your region. 50Hz : Europe, Australia, Africa, Asia, China and Japan(East). 60Hz: America, Taiwan, Korea and Japan(West). Options/ Video Capture Filter: select 50Hz or 60Hz in the “Flicker”...
-
Page 14: Uninstall The Software
Uninstall the Software 1. Click “ Start” from the task bar and choose “ Programs” 2. Select “USB2.0 UVC Camera” “Uninstall” and follow the instructions. Maintenance Unplug the webcam before cleaning the unit. Only use a soft damp cloth to clean the plastic case. Do not touch the lens as it may get damaged. - Page 15 PRODUCT GUARANTEE This product is guaranteed against manufacturing defects for a period of Year This product is guaranteed for twelve months from the date of original purchase. Any defect that arises due to faulty materials or workmanship will either be replaced, refunded or repaired free of charge where possible during this period by the dealer from whom you purchased the unit.
Need help?
Do you have a question about the DC-7132 and is the answer not in the manual?
Questions and answers