Table of Contents
Advertisement
Advertisement
Table of Contents

Subscribe to Our Youtube Channel
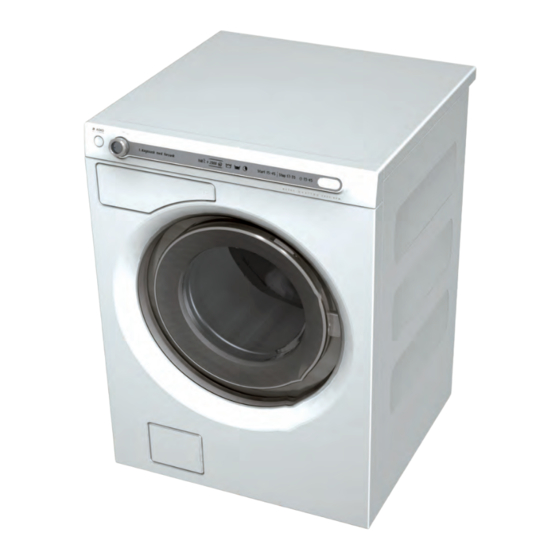
Related Manuals for Asko WM70


Summary of Contents for Asko WM70
- Page 1 Service manual: Washing machine Type: WM70...
- Page 2 Service manual WM70...
-
Page 3: Table Of Contents
Troubleshooting strategy ..........................................7 Overview: Panels and programs ......................................8 Program tables ............................................... 10 Program selection, options and making settings WM70.3 ............................18 Program selection, options and making settings WM70.2 ............................26 Program selection, options and making settings WM70.1 ............................28 Service menu WM70.3..........................................31 Service menu WM70.2.......................................... -
Page 4: Updates
Service manual WM70 Updates Date Description Sign 2010-10-06 First version developed... -
Page 5: Introduction
Service manual WM70 Introduction You are holding the service manual for WM70 type washing machines. It should be easy to service a washing machine. It is important that you, as a service technician, are given the conditions to be able to carry out work in an efficient and satisfactory way. Our hope is that this service manual is a useful tool for your daily work. -
Page 6: General Product Information
Service manual WM70 General product information In conjunction with the introduction of the WM70 (August 2010), our washing machines have been altered in a number of areas. Here we present the changes to the wash drum and wash agitators. - 60 litres (previously 50 litres) -
Page 7: Troubleshooting Strategy
Service manual WM70 Troubleshooting strategy At Asko, we believe in always remaining focused on the customer, and as an ASKO service technician, you are one of the most important ambassadors of our brand. As such, it is important that the customer finds the service callout a pleasant experience. Troubleshooting is an important part of the service callout, and as such we have drawn up a troubleshooting strategy that describes, in broad terms and step by step, what you need to do to find and diagnose faults arising... -
Page 8: Overview: Panels And Programs
Service manual WM70 Overview: Panels and programs WM70.3 LCD 3 LCD 2 LCD 1 Programs: 14, where one consists of the menu for settings (Program 15) for V826, it is possible to add a program(stain program) Optionsl: Settings: Programs: 14, where one consists of the menu for settings (Program 15) - Page 9 Service manual WM70 WM70.1 Programs: Options: 4 or 6 Settings:...
-
Page 10: Program Tables
Service manual WM70 Program The tables present a few examples of the energy, water and time consumption of a few different programme settings. Consumption can vary according to water pressure, water hardness, water supply temperature, room temperature, load weight and content, variations in the power supply no options were selected. - Page 11 Service manual WM70 Machine tpe: WM70.3 Market: EU Max load: 8kg Rinse setting:5 Prog Pre- Temp Rpm l h:mm kWh wash Auto Stain Time program Heavy Bomull 1600 2:46 2,17 1600 2:40 1,20 Cotton 1600 3:22 1,20 1600 3:04 0,67...
- Page 12 Service manual WM70 Machine type: WM70.3 Market: Swan Max load: 6kg Rinse Setting: 5 Prog Pre- Temp h:mm wash Auto Stain Time program Heavy Cotton 1600 2:36 2,17 1600 2:35 1,20 Cotton 1600 2:22 1,20 1600 2:08 0,59 Quick White/Colour...
- Page 13 Service manual WM70 Machine type: WM70.2 Market: EU Max load: 8kg Rinse setting: 3 Pre- Prog Temp h:mm wash Auto Time program 1600 2:46 2,17 Heavy Cotton 1600 2:40 1,20 1600 3:15 1,20 Cotton Colour 1600 2:57 0,67 Quick White/Colour...
- Page 14 Service manual WM70 Machine type: WM70.2 Market: US Max load: 8kg Rinse setting: 3 Pre- Prog Temp h:mm wash Auto Time program 1600 2:46 2,17 Heavy Cotton 1600 2:40 1,20 1600 2:21 1,20 Cotton Colour 1600 2:02 0,59 Quick White/Colour...
- Page 15 Service manual WM70 Machine type: WM70.2 Market: AU Max load: 7kg Rinse setting: 3 Pre- Prog Temp h:mm wash Auto Time program 1600 2:46 2,17 Heavy Cotton 1600 2:40 1,20 1600 3:21 1,13 Cotton Colour 1600 3:06 0,47 Quick White/Colour...
- Page 16 Service manual WM70 Machine type: WM70.1 Market: EU Max load: 8kg Rinse setting: 5 Pre- Prog Temp h:mm wash Auto Heavy Cotton 1600 2:46 2,17 1600 2:40 1,20 Cotton Colour 1600 3:22 1,20 1600 3:04 0,67 Quick White/Colour Cotton 1600...
- Page 17 Service manual WM70 Machine type: WM70.1 Market: Swan Max load: 6kg Rinse setting: 5 Pre- Prog Temp h:mm wash Auto Heavy Cotton 1600 2:36 1,79 1600 2:35 1,01 Cotton Colour 1600 2:22 1,14 1600 2:08 0,64 Quick White/Colour Cotton 1600...
-
Page 18: Program Selection, Options And Making Settings Wm70.3
Service manual WM70 Program selection, options and making settings WM70.3 Start/Stop Spin Press to start a programme. Max varvtal varierar beroende på val av program. Press and hold for three seconds to stop a programme. Delayed start Choose the number of hours that you want to delay the start by. - Page 19 Service manual WM70 Program selection WM70.3 displayed. Press/ Pos. Comments/instruction turn Turn on the main power Auto, Auto, Auto, Automatprogram, Autovask, This program automatically adjusts the length of the main wash Autovask, Automaattipesu, Automatique, and the number of rinses depending on the amount of washing and Automatikprogramm, Automatico, Auto, how heavily soiled it is.
- Page 20 Service manual WM70 Options selection WM70.3 displayed. Comments/Instructions Press/ 95°C Temperatur 80°C Temperature 70°C Selection of temperatures between Cold and 95°C. Cold is the same as the incoming water temperature. For program 8 and 9, the maximum 60°C temperature is 60°C, for program 10, the maximum temperature is 40°C.
- Page 21 Service manual WM70 Options selection WM70.3 cont. Comments/instructions Press/ turn High water level Can be selected in programs: 4, 5, 6, 7, 8 and 9. Cannot be selected With this option selected, extra water is taken in after approximately 15 minutes, the extra water is used in the main wash and rinses.
- Page 22 Service manual WM70 Make settings WM70.3 choices is done within 2 minutes the display will be set in Stand-by mode. Press/ Press/ Comments/instructions turn turn Settings, Settings, Settings, In the program menu: Scroll to Inställningar, Indstillinger, Program 15 (Settings) Innstillinger, Asetukset, Réglage, Einstellungen, Impostazioni, Ajustes, Haстрoйк, Instellingen...
- Page 23 Service manual WM70 Make settings WM70.3 cont. Comments/instruction Press/ Press/ turn turn Audible volume, Buzzer Volume, Hälytysääni, Volume buzzer, Off, Off, Off, Av, Fra, Av, Poissa, Off, Aus, Tonsignal, Volume allarme, Off, apagado, Bыкл., Uit Volumen timbre, Грoмкoсть сигнaлa, Geluidssignaal Buzzer that indicates the end of Hизкaя...
- Page 24 Service manual WM70 Make settings WM70.3 cont. Språk, Sprog, Språk, Kieli, Язык, Taal US English English Default Svenska Dansk Suomi Francais Deutsch Italiano espanol Русский nederlands Saves the setting and returns to the program menu, Program 14 Temperature , F° or C°...
- Page 25 Service manual WM70 Spin option, Spin option, Rpm alternativ, Centrifugeringsvalg, Sentrifuger alternativ, Spin option, Spin option, Spin option, центрифугирование, centrifuge-opties Spin option Spin option 0 Spin option Spin option 1 Spin option Spin option 2 Spin option Spin option 3...
-
Page 26: Program Selection, Options And Making Settings Wm70.2
Service manual WM70 Make settings WM70.2 Start/Stop Press to start a programme. Program selector Press and hold for three seconds to stop or Turn to choose between the different change a programme. programmes. Super rinse Spin High waterlevel Temperature Anticrease... - Page 27 Service manual WM70 Option selection WM70.2 cont. Press Comments/instructions The maximum number of rinses is seven and varies Superrinse Press depending on selected program. Can be used with all programs except Auto, Time, Rinse, Spin or Drain programs. Additional water is used during the main wash and...
-
Page 28: Program Selection, Options And Making Settings Wm70.1
Service manual WM70 Start/stop Only at option 6 Press to start a programme. Program selection WM70.1 Press and hold for three seconds Super wash to stop or change a programme. Program selector Turn to choose between Super rinse the different programmes Options buttons 40°... - Page 29 Service manual WM70 Turn/ Program Description Press 8. Wool/Hand A gentle laundry program for wool, silk and garments that should be washed by hand. The highest available temperature is 40°C. This program has a short spin. The maximum spin speed is 800 rpm.
-
Page 30: Automatic Door Opening
Service manual WM70 Make Settings WM70.1 Setting Instruction Automatic door opening 1. Turn off the machine using the main power switch. 2. Press the Super rinse button and then the main power switch. not been activated. 4. Press the Super rinse button to change the setting. -
Page 31: Service Menu Wm70.3
Service manual WM70 Service menu WM70.3 This is how to enter the service menu If the machine is on: First switch the power off with the main power switch. Press the program selector (S1) at the same time as the Main power switch. - Page 32 Service manual WM70 Service menu WM70.3 cont. versions are displayed. Press/ Comments/instructions turn Date for programming the software (Year_Week) Serienummer, Serienummer, serie, Сeрийный нoмeр, Serienummer CU date code, CU Date Code, CU date code, CU datum kod, CU dato kode, Styrekort prod dato, CU pvm koodi, Code date CU, CU Datumscode, Codice data CU, Código...
- Page 33 Service manual WM70 Service menu WM70.3 cont. Test motor, Testing Motor, Test motor, The motor is running at normal action (49 rpm) Motortest, Tester motor, Test av motor, Moottoritesti, Essai moteur, Motor testen, Test motore, Test motor, Teст мoтoрa, Test motor Test drain, Testing Drain, Test drain, Tömningstest, Tester...
-
Page 34: Service Menu Wm70.2
Service manual WM70 Service menu WM70.2 L3 L4 S2 S3 S4 S5 S6 S7 Switch off, and then on main power. Make all selections. Pressing S13 stores all selections made in service menu and leaves service mode. Tracking data reed out... -
Page 35: Service Menu Wm70.1
Service manual WM70 Service menu WM70.1 How to get to the service menu Is the machine turned on: turn off the power first at the main switch. Press and hold the button for super wash (S4) while you press the main switch. -
Page 36: Shop Program
Then press and hold the Start button while turning on the main power switch. Press the program selector 5 times. The Shop program is now stopped. Store program WM70.2 and WM70.1 There are no store programs on the WM70.2 and WM70.1. -
Page 37: Fault Indications Wm70.3
Service manual WM70 Fault indications WM70.3 Cause Action Over flow fault, Overflow Fault, Over Too much water in the machine Service action: flow fault, Överfyllnad, Overløbsfejl, Overflom, Ylitulviminen, Trop plein, Make sure that there is no leaks. Überfüllt, Troppo pieno, Desborde, Пeрeлив... -
Page 38: Fault Indications Wm70.2
Service manual WM70 Fault indications WM70.2 Error messages Cause Action Over flow fault Too much water in the machine Service action: Make sure that there is no leaks. The drain pump is on, without any Service action: water in the machine. -
Page 39: Fault Indications Wm70.1
Service manual WM70 Fault indications WM70.1 Error messages on the display Cause Action F10 – Overflow Too much water in the machine. Service action: - Check the machine's level system, inlet valve and drainage pump. - Check for any leaks. -
Page 40: Components And Measurement Values
See wiring diagram The door lock is electro mechanical and equipped with a magnet. 88 014 40 Control unit WM70.3 88 014 41 Control unit WM70.3 FI 80 896 72 Motor Control Unit, WM70.2 80 896 73 Motor Control Unit WM70.1, WM70.3... -
Page 41: Technical Data
Cylinder volume: 60 l Max. washing capacity EU 7,0/8,0kg, AU 7,0kg US 7,0/8,0kg Swan 6,0 kg Spin speed: WM70.3 400–1800 rpm, WM70.2 400–1800 rpm, WM70.1 400 –1600 spm Connection: 1 phase 10 A Element power: 2000W, 230V (See Type designation) Water pressure/inlet valve: 0,1 –... -
Page 42: Wiring Diagram Wm70.3
Service manual WM70 Wiring diagram WM70.3... -
Page 43: Wiring Diagramwm70.2
Service manual WM70 Wiring diagramWM70.2... -
Page 44: Wiring Diagramwm70.1 Cim
Service manual WM70 Wiring diagram WM70.1 CIM... -
Page 45: Wiring Diagram Wm70.1 Um
Service manual WM70 Wiring diagram WM70.1 UM... -
Page 46: Rehanging The Door
Service manual WM70 Rehanging the door Some machines in the WM60-series is supplied with a door - is that the case the door is hung on the left-hand side. It is, however, possible to re-hang it according to the instructions below. Take care not to damage the paint when carrying out work with tools. - Page 47 Service manual WM70 5. Remove the plastic plugs covering the holes for the hinge pins and switch location Method for removing plastic plugs, lock and catch located on the machine and the door: Carefully push the plug, catch or lock upwards with a flat screwdriver.
- Page 48 Service manual WM70 10. Align the door in the upper hinge. Carefully push the lower hinge down if necessary and align the door. 11. Screw the lower hinge into place securely. Use Torx. 12 Press the plinth into place. The door...
-
Page 49: Replacing Panels, Control Unit And Detergent Compartment
Service manual WM70 Replacing panels, control unit and detergent compartment Instruction Image 1. Attach the anti-static wristband to a part of the machine that is earthed! wristband must be used, otherwise you risk destroying the control card. 2. Unscrew the top cover.. - Page 50 Service manual WM70 Instruction Image 6. Carefully pull the programme selector from the panel. 7. Use a screwdriver to free the control card from the card must be placed in an ESD-safe bag. 8. Check that the push button, lens and decorative inlay are the new control card into replace the rubber seal.
- Page 51 Service manual WM70 Instruction Image Then remove the hose clamps for all hoses, which are secured in the detergent container. Then detach the hoses from the detergent compartment. 11.If necessary: Replace the decor panel for the detergent compartment. Detach the decor panel by pressing according to image 1.
-
Page 52: Replacing Front Panel, Door, Cover Plate And The Hinges
Service manual WM70 Replacing front panel, door, cover plate and the hinges Instruction Image 1. Unscrew the screws in the hooks holding the front panel. Then carefully pull off the drainage hose that is secured in the door for the drain pump. -
Page 53: Emergency Opener For Door Lock
Service manual WM70 Emergency opener for door lock Instruction Image 1. The emergency opener is in the documentation kit. 2. Push the emergency opener into the slot beside the glass door. 3. Push the emergency opener upwards. and the door will... -
Page 54: Wash Agitator Removal
Service manual WM70 Wash agitator removal When replacing or cleaning the wash agitators, or when removing items that have fallen through the wash drum, first you need to remove the agitators. Follow the instructions below. 1. Insert a screwdriver or the like into the hole on the agitator as illustrated and carefully pry to the left. - Page 55 Service manual WM70...
- Page 57 80 908 03 Service manual WM70 ASKO Rev. 01...
Need help?
Do you have a question about the WM70 and is the answer not in the manual?
Questions and answers