Table of Contents
Advertisement
Quick Links
Advertisement
Table of Contents

Summary of Contents for BenQ Wireless FHD Kit
- Page 1 Wireless FHD Kit User Manual...
- Page 2 Copyright Copyright © 2014 by BenQ Corporation. All rights reserved. No part of this publication may be reproduced, transmitted, transcribed, stored in a retrieval system or translated into any language or computer language, in any form or by any means, electronic, mechanical, magnetic, optical, chemical, manual or otherwise, without the prior written permission of BenQ Corporation.
-
Page 3: Table Of Contents
Setting up the IR blaster cable ........................8 Setting up the receiver (Rx) .......................... 9 Attaching receiver (Rx) to your BenQ projector with mounting holder-A ..............9 Attaching Receiver (Rx) to your BenQ projector with mounting holder-B ..............10 Booting up the transmitter and the receiver ..................11 Troubleshooting ........................14... -
Page 4: Introduction
This solution delivers uncompressed 1080p full HD video with all types of 3D content from a Blu- ray/DVD player, set-top box, game console, or even a computer to BenQ 1080P 3D video projectors wirelessly as well as 5.1 channel digital audio. -
Page 5: Overview
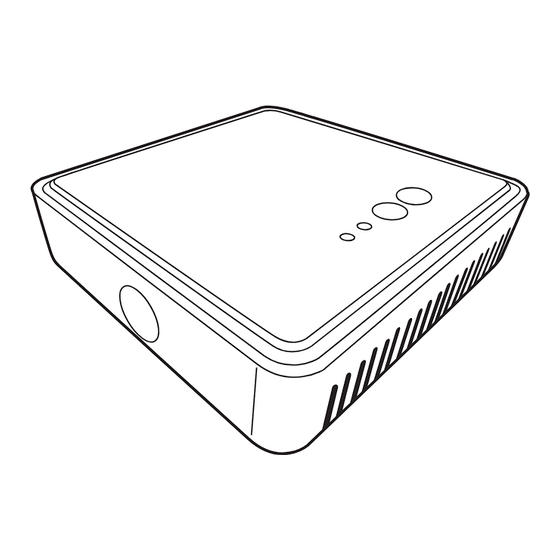
Mounting Holder-A Mounting Holder-B Quick Start Guide Batteries Screws Velcro HDMI Cable IR Blast Cable Overview Transmitter (Tx) Front panel buttons and indicators Source indicators These two LED indicators are lit in solid blue to show current input you switch. selection button Source Press to switch source inputs of the... -
Page 6: Receiver (Rx)
Source indicators selected HDMI 1 HDMI 2 indication. Main unit back panel Connect to USB type A (1.5V power supply) on BenQ video projector or the receiver’s power adapter. HDMI Connect to BenQ video projector via the provided HDMI cable. Introduction... -
Page 7: Remote Controller
Remote controller Power button Press to turn the transmitter & receiver on/off. When both power indicators of Tx & Rx are in red, press the power button on either Tx or Rx to wake up the other automatically. button INFO Press this button to display OSD of system related information on the display terminal connected the... -
Page 8: Installation
Installation This section will guide you on how to prepare the unit before its initial use. Setting up the transmitter (Tx) Connect up to two high-definition audio/video sources to the transmitter. 1. Connect the transmitter’s jacks to the high-definition AV equipment’s HDMI out HDMI 1 HDMI 2 jacks via HDMI cables. -
Page 9: Setting Up The Receiver (Rx)
The IR sensor supports remote’s signal protocol of NEC, RC5, and RC6 between 36 KHz ~ 56 KHz. Therefore, it is possible that some devices may not be supported. Setting up the receiver (Rx) Attaching receiver (Rx) to your BenQ projector with mounting holder-A 1. If your BenQ projector is one of following models: W1070+, W1080ST+, W1350,... -
Page 10: Attaching Receiver (Rx) To Your Benq Projector With Mounting Holder-B
Attaching Receiver (Rx) to your BenQ projector with mounting holder-B 1. If your BenQ video projector is not in the list as mentioned above, you can use mounting holder-B to fix the receiver to ceiling mount when the projector is installed on the ceiling. -
Page 11: Booting Up The Transmitter And The Receiver
Booting up the transmitter and the receiver 1. Place two AAA batteries into the remote control. 2. Once the projector is turned on or the power adaptor is connected to wall socket, the HDMI 1 HDMI 2 HDMI OUT DC 5V IR OUT receiver and transmitter will be turned on automatically. - Page 12 6. Ensure your projector is already turned on and being switched to the correct HDMI source. HDMI IR IN Y/Pb/Pr Video HDMI S-Video 7. Press button on the remote control or on the top of the receiver/the transmitter for SOURCE source input switching until you see the video being transmitted.
- Page 13 1.If the RF connection is not established after over 80 seconds, the link might be lost or the transmitter is most likely out of range. You may have to verify the range and adjust or shorten the distance between the transmitter and the receiver.
-
Page 14: Troubleshooting
Troubleshooting The power indicator doesn't light up. Check if the power plug of the receiver or the transmitter is properly inserted into a functional power outlet. Poor picture quality or intermittent video. • Check if your video resolution with HDMI input from your device is set to 1080p, 1080i, 720p, 576p, or 480p. - Page 15 No video is displayed on the screen. • Verify that that the proper cables have been selected and installed between the transmitter input jack and your high-definition equipment jack. • At your projector side (connected to the receiver), select HDMI as the input source. •...
-
Page 16: Supported Resolution
Supported resolution If the indicator continues to blink in blue (slower than “no signal” mode); OSD display: SOURCE , and there is no video displayed or the video quality suffers, it indicates that the video frame rate from your A/V source device is not supported. Ensure that the consumer timing of your HD device is compliant with the standard listed below: 2D Video Format Timings Resolution... -
Page 17: Audio Bit Rate Support
Audio bit rate support • Digital Audio from HDMI inputs: Up to 6Mbit/s bit-rate support. • Audio formats supported: AC-3 and DTS. • 2-channel PCM: 16~24 bits audio sample with 32~96KHz sampling rate as listed below. 2channel PCM 32KHz 44.1KHz 48KHz 96KHz 16 bits... -
Page 18: Product Specification
Product specification General specifications Supported video HDMI input 1080p, 1080i, 720p, 576p, 480p resolutions Supported audio Digital audio Up to 6 Mbps AC-3 and DTS formats The maximum video transmission range is 30 meters (100 Transmission distance feet) in line of sight (LOS). The minimum range is 1.98 meters (6.5 feet).
Need help?
Do you have a question about the Wireless FHD Kit and is the answer not in the manual?
Questions and answers