Table of Contents
Advertisement
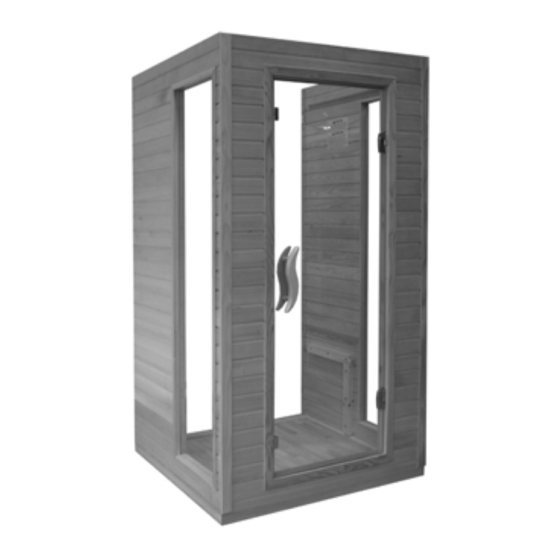
BS-9101
1-2 PERSON SAUNA
OWNER'S MANUAL
BEAUTY & SAUNA
CONNECTION
FOR INDOOR USE ONLY
120VAC 15 AMP DEDICATED CIRCUIT
Enjoy Health And
Beauty In Your Life!
Sauna: the European secret for youthful vitality, now enjoy it for yourself!
-------------------------------------------------------------------------------------------------------------------------------------------------
Carefully and thoroughly read this manual before using the sauna for the first time. We recommend
Advertisement
Table of Contents

Related Manuals for Keys Backyard 1-2 Person Sauna BS-9101

Summary of Contents for Keys Backyard 1-2 Person Sauna BS-9101
- Page 1 BS-9101 1-2 PERSON SAUNA OWNER’S MANUAL BEAUTY & SAUNA CONNECTION FOR INDOOR USE ONLY 120VAC 15 AMP DEDICATED CIRCUIT Enjoy Health And Beauty In Your Life! Sauna: the European secret for youthful vitality, now enjoy it for yourself! ------------------------------------------------------------------------------------------------------------------------------------------------- Carefully and thoroughly read this manual before using the sauna for the first time. We recommend...
- Page 2 keeping this manual for regular review and future reference. Congratulations on your purchase of a Far Infra-Red (FIR) Dry Sauna from Keys Backyard. Please take a moment to read through some of the features and benefits of your new sauna. And remember to always consult your physician before beginning any sauna therapy program.
- Page 3 exposure to infrareds outside of overheating. WHAT WILL HAPPEN INSIDE – You will feel the heat being generated by the infrared emitters immediately. The wavelength of this heat will allow the rays to penetrate your skin and heat your body beneath the surface. This will excite the water molecules stored in the layer of fat just beneath your skin, and cause you to start to sweat.
-
Page 4: Product Introduction
any adverse effects, but should also consult their surgeon before beginning infrared therapy. < MANUAL INDEX > Product Introduction Parts Description Assembly Instructions Sauna Controls Tips for Using Your Sauna Safety Instructions Safeguards for Your Sauna Troubleshooting Guide Certificate of Warranty Product Introduction The infrared sauna room is composed of a wood cabin, infrared heaters, and a control system. -
Page 5: Parts Description
A. FRONT PANEL (SEE FIGURE 1) B. PRODUCT INSIDE (SEE FIGURE 2) Figure 1 1) Handle 2) Safety glass door 3) Ventilation grid 4) Speaker 5) Reading lamp (11~15W) 6) Control panel 7) Temperature sensor 8) Heater 9) Bench panel 10) Back frame 11) Window 12) MP3 socket... -
Page 6: Tools Required
1) TOOLS REQUIRED Screwdriver, ladder 2) INSTALLATION ORDER BOTTOM PANEL------ FRONT PANEL ------ RIGHT PANEL ------ LEFT PANEL ------ BACK PANEL ------BENCH---TOP PANEL---TOP COVER For easy installation, please distinguish each panel feature: Buckle inside panel ,for left/right and front panel To distinguish the back of the side panels, the front side has no clamps, while back side has clamps. - Page 7 1) Choose a good location to install the sauna room A. MAIN POWER cord must be easily accessible. B. The location must be dry and leveled. C. Far from any source of water Caution: Assembly of sauna requires at least 2 adults to complete. 2) Place the BOTTOM PANEL Place the bottom panel on the floor, put ”long size”...
-
Page 8: Install The Bench Panel
Figure 15 Figure 16 5) Put on the BACK PANEL Remove the gum paper on the clamps, place the BOTTOM PANEL in the correct direction and click on tightly. Align clips with LEFT/RIGHT PANEL and secure in place by fastening them. (see figure 17~18) Figure 18 Figure 17 6) BUCKLE CONNECTIONS... -
Page 9: Place The Top Panel
8) Place the TOP PANEL 1>. The side with the CONTRO 2> The edge nearest to the CONTROL BOX is the fro Be careful of the wires in the SIDE PANELS before you set the TOP PANEL down. wires through the holes in the TOP PANEL. Feed the control cable and CD connectors down from the TOP PANEL through the long-shaped hole to the inside of the sauna. -
Page 10: Component Markings
MAIN POWER HT1, HT2, READING LAMP CTRL PANEL CD/SIG 10) COMPONENT MARKINGS For easy and proper installation, please read the information below thoroughly to make sure all connections are correct. (see form 1) MARKING COMPONENT CONNECTION POWER Power cord FUSE Fuse (15A) (reset) HT1, HT2 Heater power cord... -
Page 11: Temperature Sensor
it on . (see figure 26) 3> Plug the buzzer. (see figure 27) Figure 23 Figure 26 12) Temperature sensor After connecting all the plugs, remove the adhesive film from the TEMPERATURE SENSOR. 13) Put on the TOP COVER Lift the TOP COVER to the top of sauna room; take out the power cord from the round hole on the TOP COVER, gently place the TOP COVER onto the rest of the TOP PANEL. -
Page 12: Preparation
15) Preparation Plug the unit into a grounded (3-prong) outlet (120V 60Hz). The sauna is ready to be used. Read and follow all OPERATING INSTRUCTION. SAUNA OPERATION NOTE: Before powering on the sauna for the first time, please check and confirm the connection of all wiring (CONTROL BOX, HEATERS, TEMPERATURE SENSOR etc.) are correct and undamaged. - Page 13 set-up button continuously for more than 2 seconds, the digital will change quickly. If you don’t press the button in more than 5 seconds, the digital will stop flashing, set-up value will be memorized. This value will be shown when you restart next time. During sauna session, set-up time will count down the minutes one by one.
-
Page 14: Tips For Using Sauna
Tips for Using Your Sauna 1) If you take a hot /warm shower or bath before your sauna session, you may perspire more and feel more comfortable. 2) Drink some water prior to, during, and after your sauna session to replenish body moisture. 3) Regulate the set temperature inside the sauna until you feel comfortable, or use the movable roof ventilation, or leave the door open (by setting it at an angle). -
Page 15: Safeguards For Your Sauna
temperature has a high potential for causing fetal damage during the early months of pregnancy. 5. Hyperthermia Danger: the normal body temperature can’t rise above 39 excessive hyperthermia include dizziness, lethargy, drowsiness, and fainting. The effects of excessive hyperthermia may include failure to perceive heat, physical inability to exit sauna, unawareness of impending hazard, unconsciousness and fetal damage in pregnant women. -
Page 16: Troubleshooting Guide
Troubleshooting Guide 1. Press LIGHT on the control panel, but reading lamp does not on. Solution: 1) Unplug the MAIN POWER 2) Before you check the light, please feel if the light cover is hot, YOU can check it until it cools down. 3) Remove the TOP COVER of the sauna room. -
Page 17: Warranty
Warranty Infrared Saunas Keys Backyard PRODUCTS, LP – LIMITED WARRANTY PLEASE CONSULT YOUR PHYSICIAN BEFORE USING THIS PRODUCT. This Limited Warranty applies in the United States and Canada to products manufactured or distributed by Keys Backyard Products, LP (“Keys”) under the KEYS brand name. The warranty period on the Keys Infrared Sauna is limited to the original purchaser. The warranty period is as follows: One Year -Wood, Electronics, Heating Elements. - Page 18 arrangements for payment. This sauna is not intended for outdoor use. Placing your sauna outdoors will void this warranty. Any alterations to the product will void the warranty. Any damage to the sauna due to exposure to outdoor elements (Rain, Snow, Wind, Sun) is not covered under this warranty. EXCEPT AS EXPRESSLY SET FORTH IN THIS WARRANTY, KEYS MAKES NO OTHER WARRANTIES, EXPRESSED OR IMPLIED, INCLUDING ANY IMPLIED WARRANTIES OF MERCHANTABILITY AND FITNESS FOR A PARTICULAR PURPOSE.
Need help?
Do you have a question about the 1-2 Person Sauna BS-9101 and is the answer not in the manual?
Questions and answers
I have a Josen Infrared sauna Model BS-9101, s/n 32200 It works but after about 10 minutes, it trips off. I press the reset button on the top of the control box and it works for another few minutes and trips off. Any idea of what needs to be fixed?
The context does not provide a specific reason for the sauna tripping off after 10 minutes of use. However, possible causes may include overheating, electrical issues, or a malfunctioning component such as the control panel, emitters, or power supply. It is recommended to contact the distributor’s customer service for proper diagnosis and repair.
This answer is automatically generated