Table of Contents
Advertisement
Quick Links
Advertisement
Table of Contents

Subscribe to Our Youtube Channel
Related Manuals for Pentax LX Winder


Summary of Contents for Pentax LX Winder
- Page 1 Quick Help/Reference Guide for LX Winder CONTENTS...
-
Page 2: Table Of Contents
SPECIFICATIONS Note: This manual is created just aiming to support the Pentax LX users who has lost his original manual or for those who has just bought a used unit in the secondary used market. We would still advise anyone who wishes to acquire a complete official manual either from Jebsen & Jebsen, local distributor for Pentax cameras or write to Asahi Optical Co Ltd for a copy. -
Page 3: Description Of Parts
Welcome to the World of Action Photography! Exclusively designed for use with the Pentax LX camera, the Winder LX is a high precision instrument which affords you the pleasures and convenience of automatic film advance. Compact and lightweight, it attaches quickly and easily to the camera's tripod socket and can be fired with the camera's shutter release hutton or remotely via the optional Remote Control Cord. -
Page 4: Inserting The Batteries
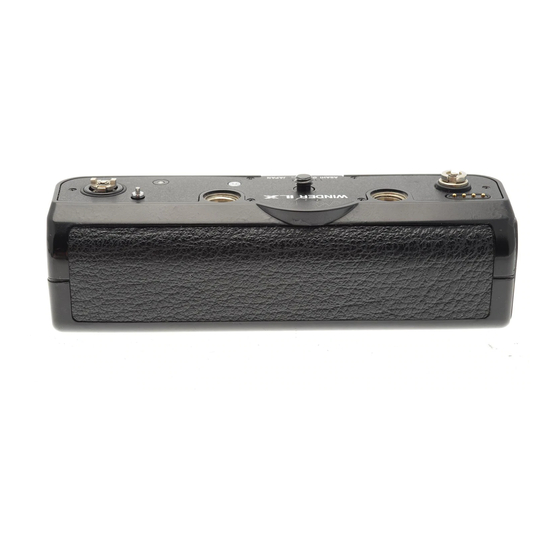
Shutter release button Battery chamber Remote control socket Auto rewind claw Holders for camera coupling caps Screw Film rewind release pin Film transport claw Film rewind release button Sattery cartridge lock release Tripod socket Auto rewind lever Thumbwheel LED indicator C/S dial INSERTING THE BATTERIES... -
Page 5: Battery Care
Four 1.5-volt AA-size batteries are required to operate the winder. Alkaline, manganese or rechargeable Nickel Cadmium (Nicad) types may be used • Press the battery cartridge lock release button (BATT.) at the base of the winder until the cartridge pops out slightly •... - Page 6 Attaching the Winder • Hold the base of the camera away from the light and remove the caps covering the camera film transport and auto rewind couplings. Screw both caps into the cap holders on top of the winder to prevent loosing them.
-
Page 7: Film Loading/Blank Exposures (With Unloaded Cameras)
Film Loading/Blank Exposures (With Unloaded Cameras): Set the camera shutter dial to a manual shutter speed and load the film in the usual manner by extending the film leader and inserting it between the magic needles of the take-up sPool. At this point, you may continue by making blank exposures in the usual manner (provided the winder C/S dial is set to OFF) or you can make them with the winder as follows: •... - Page 8 from the camera. "S" (Single-Frame) Setting: If you wish only to use the winder to advance the film after each individual exposure, set the winder C/S dial to S and press the shutter button: when the exposure is completed, the film advances automaticaliv to the next exposure and prepares the shutter for shooting.
-
Page 9: Exposure Check
NOTE: If the shutter is not cocked when you set the dial to "C' shutter release will be delayed when you press the shutter button until the film advances. To avoid this delay, press the shutter button once quickly and let go before beginning the shooting sequence (the shutter is cocked if the shutter cocked indicator on top of the camera turns red). - Page 10 The OFF-Setting When the CIS dial is set to OFF, the winder is disengaged from the camera, so it's a good idea to keep the dial set to "C" or "S" while shooting so as not to miss shooting opportunities, However, when storing the camera and the winder, the dial should be set to OFF.
-
Page 11: Automatic Film Rewind
AUTOMATIC FILM REWIND Winder LX is equipped with a convenient automatic film rewind mechanism that enables you to rewind a complete 36-exposure film roll in just seconds. • When you reach the end of the film, the winder will cease to operate and the LED indicator on the back will light continuously as a signal that it's time to rewind the film. -
Page 12: Cord Hook-Up
The winder may be used both for single-frame and consecutive remote control shutter release when it is used in conjunction with the optional Remote Control Cord. Cord Hook-up: • Remove the cap over the remote control socket at the side of the winder by grasping it beneath the rim with your fingernail and pulling it off.
Need help?
Do you have a question about the LX Winder and is the answer not in the manual?
Questions and answers