Table of Contents
Advertisement
Instruction manual
TUMBLE DRYER
EN
English
IDVL 75B R
www.indesit.co.uk
!
This symbol reminds you to read this
instruction manual.
!
Keep this manual at hand for immediate reference whenever
necessary. Always store this manual close to the tumble dryer and
remember to pass it on to any new owners when selling or tran-
sferring the appliance, so they may familiarise with the warnings
and suggestions herein contained.
!
Read these instructions carefully: the following pages contain
important information on installation and useful suggestions for
operating the appliance.
Contents
Installation, 2
Warnings, 4
Saving energy and respecting the environment
Features
Special programmes
Laundry, 13
Troubleshooting, 14
GB
1
Advertisement
Table of Contents

Related Manuals for Indesit IDVL 75B R


Summary of Contents for Indesit IDVL 75B R
-
Page 1: Table Of Contents
Checking the drum after each cycle Cleaning the tumble dryer Description of the tumble dryer, 7 Features Control panel IDVL 75B R How to carry out a drying cycle, 9 Starting and selecting a programme Programmes and options, 10 Programme chart... -
Page 2: Installation
Installation Where to install the tumble dryer Wall ventilation hole 1. Leave an opening in the wall Install the dryer far • to the left of the tumble dryer from gas ranges, stoves, installation site. radiators or hobs, as 2. Make the hose as short and flames may damage it. -
Page 3: Electrical Connections
Electrical connections Before plugging the appliance into the so- cket, check the following: • Make sure your hands are dry. • The socket must have an earth connec- tion. • The socket must be able to withstand the machine’s maximum power output as indica- ted on the rating plate (see Description of the tumble dryer). -
Page 4: Warnings
Warnings warm items inside. This appliance has been designed and built according to international safety standards. These warnings are given for • Clean the filter after each use (see safety reasons and must be followed carefully. Maintenance). General safety • Do not allow lint to collect around the dryer. •This appliance can be used by children •... - Page 5 Product Data - Regulation 392/2012. such as shower caps or babies waterproof covers, polythene or paper. Brand Indesit • Do not tumble dry rubber backed articles, Model clothes fitted with foam rubber pads, IDVL 75 B R (UK) - IDVL 75 B R K (UK) - IDVL 75 B R S (UK) pillows, galoshes and rubber coated tennis shoes.
-
Page 6: Care And Maintenance
Care and maintenance Disconnecting the power supply Do not use solvents or abrasives. Have the dryer checked regularly by authorised technical ! Disconnect the dryer when not in use or personnel in order to ensure that the electrical and mechani- during cleaning and maintenance operations. -
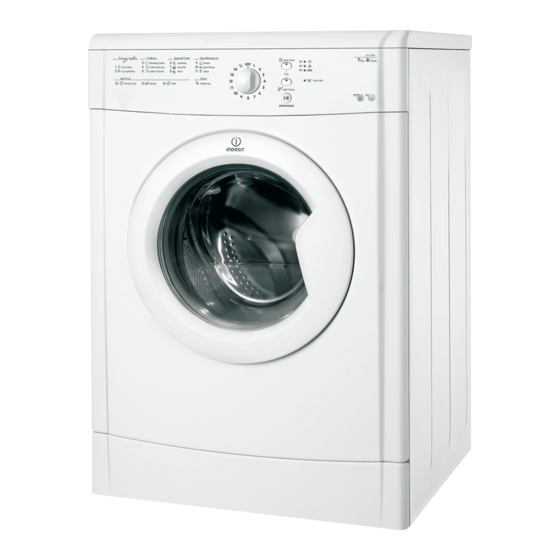
Page 7: Description Of The Tumble Dryer
Description of the tumble dryer Front side Rear side Control panel Drum Air inlet Rating Plate Caution, high Filter Connection for temperature Serial number ventilation hose and model number Control panel Options Drying phase buttons and or Delay timer indicator lights indicator lights Programme selection knob with OFF... -
Page 8: Indicator Lights
Programme selection knob Allows for setting the programme: turn until the indicator points towards the desired programme. The OFF position switches off the dryer (see Starting and selecting a programme). Options buttons Allow for selecting the options available for the selected programme. The relative indicator lights switch on when the option has been selected (see Programmes and options). -
Page 9: How To Carry Out A Drying Cycle
How to carry out a drying cycle Starting and selecting a programme 1. Plug the dryer into the power supply socket. 2. Select the programme according to the type of laundry (see Laundry). 3. Open the door, ensure that the filter is clean and securely placed (see Care and maintenance). 4. -
Page 10: Programmes And Options
Programmes and options Programme chart Max. load Cycle Programme Compatible options (kg) duration* Energy Saver 1 Eco Cotton Delay timer 2 Eco Synthetics Delay timer Cottons 3 Standard Cotton Delay timer - Light Drying 120' 4 Cotton Extra Dry Delay timer 130' 5 Cotton Fast Iron Delay timer - Light Drying... - Page 11 Wool This programme is specific for items that withstand tumble drying and are labelled with the symbol. It is suitable for loads of up to 1 kg (about 3 jerseys). We recommend turning the garments inside out before drying them. Garments dried with this programme are usually ready to be worn, although the edges of heavier garments may be slightly damp.
-
Page 12: Options
Options The options allow for customising the selected programme according to one’s own needs. Delay timer The start of some programmes (see Programmes and options) may be delayed up to 9 hours. Press the button repeatedly to enter the desired delay time. Before setting a delayed start, make sure that the filter is clean.The drum will rotate occasionally before the drying programme starts to prevent the formation of creases. -
Page 13: Laundry
Laundry Sorting laundry Drying times • Check the symbols on the care labels of the various gar- Drying times are approximate and may vary depending on ments to verify whether the garments can be safely tumble the following: dried. • Sort laundry according to the type of fabric. •... -
Page 14: Troubleshooting
Troubleshooting If you feel that the dryer is not working properly, consult the following troubleshooting suggestions before contacting the Technical Assistance Centre (see Assistance). Problem: Possible causes / Solutions: The dryer does not start. • The plug has not been inserted far enough into the socket to make contact. •... -
Page 15: Assistance And Guarantee
Assistance Spare parts Before contacting the Technical Assistance Centre: • Follow the troubleshooting guide to check whether pro- This dryer is a complex machine. Attempting to repair it per- blems can be solved personally (see Troubleshooting). sonally or with the aid of an unqualified personnel may put •... -
Page 16: Essential Contact Information
‘Right first time’ – our engineers have the latest tools to help get your Indesit appliance back up and running the first time we visit. Experts in our field – all of our engineers are trained to the highest standard at our Training Centre of Excellence and possess unrivalled expertise and product knowledge.
Need help?
Do you have a question about the IDVL 75B R and is the answer not in the manual?
Questions and answers