Table of Contents
Troubleshooting

Related Manuals for CareFusion Micro I

Summary of Contents for CareFusion Micro I
- Page 1 Micro I Diagnostic Spirometer Operating Manual – English Operating Manual – CareFusion USA Mode d’emploi - Français Bedienungsanleitung - Deutsch Manual de funcionamiento – Español Manual de Instruções - Português Gebruikshandleiding – Nederlands...
-
Page 3: Table Of Contents
Cleaning the Transducer ..........35 Servicing ............... 35 Trouble Shooting Information ........... 36 Safety Designation per IEC 60601-1 ........37 Electromagnetic Compatibility (EMC) to EN60601-1:2007 ..39 Symbols ................ 44 Specifications of the Micro I..........46 Consumables & Accessories ..........47... - Page 4 Cleaning the Transducer ..........75 Servicing ............... 75 Trouble Shooting Information ........... 76 Safety Designation per IEC 60601-1 ........77 Electromagnetic Compatibility (EMC) to EN60601-1:2007 ..79 Symbols ................ 84 Specifications of the Micro I..........86 Consumables & Accessories ..........87...
- Page 5 Contre-indications, avertissements et mises en garde ..91 Utilisation prévue............93 Conditions d'utilisation............. 93 Première utilisation ............93 Configuration ..............94 Logiciel Micro I PC Software..........95 Fonctionnement.............100 Présentation du menu principal ........100 Examen rapide ..............101 Examen à l'aide de valeurs prédites ........103 Examen Post BD ............107...
- Page 6 Ausschalten des Gerätes ..........151 Instandhaltung ..............151 Batteriemanagement ............151 Batterieaustausch ............152 Kalibrationsprüfung ............154 Reinigungsanleitung ............155 Reinigen des Transducers..........156 Wartung ...............156 Informationen zur Fehlerbehebung ........157 Sicherheitsbestimmungen gemäß IEC 60601-1....158 Elektromagnetische Verträglichkeit (EMV) gemäß EN60601-1:2007 ............160 Symbole ...............165 Spezifikationen des Micro I ..........167 Verbrauchsartikel/Zubehör ..........168...
- Page 7 Comprobación de calibración ...........194 Instrucciones de limpieza ..........195 Limpieza del transductor ..........196 Reparaciones ..............196 Información sobre resolución de problemas .......197 Designación de seguridad según IEC 60601-1 ....198 Compatibilidad electromagnética (CEM) con EN60601-1:2007 ............200 Símbolos ..............205 Especificaciones del Micro I ..........207 Consumibles/Accesorios..........208...
- Page 8 Conteúdo da Embalagem ..........211 Contra-indicações, Avisos e Cuidados........212 Utilização Prevista............214 Ambiente..............214 Primeira Utilização ............214 Configuração ..............215 Micro I PC Software............216 Funcionamento ..............221 Descrição Geral do Menu Principal ........221 Quick Exam (Exame Rápido)..........222 Exame com Valores Previstos ..........224 Post BD Exam (Exame Pós-BD) ........228 Modo NLHEP..............228...
- Page 9 Interpretatie NLHEP ............270 Uitschakelen ..............271 Onderhoud..............271 Batterijbeheer ...............271 Batterij vervangen ............272 Calibration Check (kalibratiecontrole)........274 Reinigingsinstructies............275 De transducer reinigen ...........276 Reparatie..............276 Informatie over probleemoplossing........277 Veiligheidsaanduiding volgens IEC 60601-1 .......278 Elektromagnetische compatibiliteit (EMC) volgens EN60601-1:2007 ............280 Symbolen ..............285 Specificatie van de Micro I..........287 Verbruiksartikelen/Accessoires.........288...
- Page 10 Micro I Diagnostic Spirometer Operating Manual – English Contents...
-
Page 11: I Introduction
Introduction The Micro I is a compact, rechargeable battery operated and fully portable diagnostic spirometer. It is accurate to the requirements of the ATS/ERS TASK FORCE: STANDARDISATION OF LUNG FUNCTION TESTING 2005. Its ergonomic and user-friendly design allows diagnostic spirometry measurements, including predicted values and automatic interpretation, to be made quickly and simply. -
Page 12: Package Contents
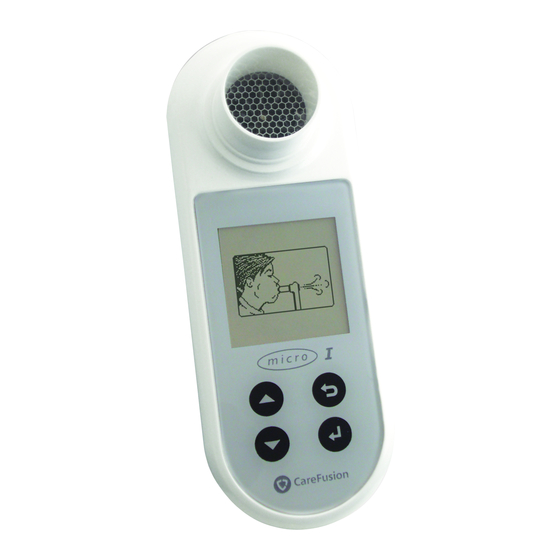
Package Contents The Micro I is packaged in a convenient carrying case and comes complete with the following items (Fig.1): Micro I spirometer CareFusion Digital Volume Transducer together with disposable cardboard mouthpieces and instruction manual. Universal power supply (36-PSU1017 5VDC 1.2A) -
Page 13: Contraindications, Warnings And Cautions
Contraindications, Warnings and Cautions Contraindications: As performing spirometry might be physically demanding, it is contraindicated in patients with recent myocardial infarction. Also extensive exhalation might lead to syncope. The following terms are used as follows in this manual Caution: Possibility of injury or serious damage Warning: conditions or practices that could result in personal injury. - Page 14 CAUTION: Do not allow the patient to handle the spirometer when connected to either the power supply for charging or to a PC when configuring the unit. WARNING: The user must not touch any voltage-carrying parts and the patient at the same time. PLEASE NOTE: The product you have purchased should not be disposed of as unsorted waste.
-
Page 15: Intended Use
Getting Started It is recommended that Micro I spirometer is fully charged before use. The power supply is provided with separate UK, USA and European plugs. Connect the required plug to the power supply and plug in to a mains outlet. -
Page 16: Configuration
It is recommended that the PC software be used to adjust these settings, if required. Connect Micro I to the PC using the USB cable supplied. Run the software, and turn on the Micro I. The PC software will detect that the Micro I is connected. -
Page 17: Micro I Pc Software
Micro I PC Software This software allows you to customise the settings on your Micro I spirometer, and allows full spiormetry reports containing patient demographics, indices and flow volume and volume time graphs to be generated and saved as a PDF file or printed. Once successfully installed, comprehensive help is available through the Help menu when using the application. - Page 18 To change this location select ‘Browse’. Click ‘Next’ to display the Select program manager group dialog. This will be the location where the Micro I PC Software launch icon will be placed under the Start Menu. Either a new location can be entered or an existing location used.
- Page 19 Click ‘Finish’ to complete the installation process. Running Micro I PC software Connect your Micro I to a USB port on the PC using the cable provided. The Micro I will take power from the USB port on the PC.
- Page 20 The Micro I PC software will automatically be launched when a Micro I unit is connected to the PC, the first screen will show: From this screen you can enter an ID and the patient’s names to generate a report. The Patient options allows the last results to be...
- Page 21 When the change settings option is used the display will change to: By selecting the ‘Custom’ option at the top of the screen all of the Micro I features may be tailored to you specific requirements.
-
Page 22: Operation
Operation The Micro I is designed to suit a range of applications from the very simplest spirometry test where only a few indices are required to be displayed to more complex operation where deviation from the norm, bronchodilator response, and interpretation of results are required. -
Page 23: Quick Exam
Quick Exam After selecting this option the display will change to: The Micro I may be used directly with a MicroGuard filter or with a disposable cardboard mouthpiece with the adapter supplied. Insert mouthpiece or MicroGuard filter into the mouthpiece holder of the spirometer. - Page 24 The spirometry results for that blow are then displayed together with the manoeuvre quality check based upon ATS/ERS guidelines: Further indices, if configured, and the best results from a sequence of blows may be displayed by pressing the down key. Each manoeuvre is quality checked for a slow start, abrupt end, short blow, poor effort or cough according to ATS/ERS 2005 guidelines.
-
Page 25: Exam With Predicted Values
Exam with Predicted Values When this option is selected the following is displayed: The date of the birth displayed will be the last patient tested, select ‘Yes’ to confirm the date of birth is correct or ‘No’ to enter the date of birth of the patient to be tested. - Page 26 NHANES III equations. If Quanjer-GLI (2012) predicted values are used then the ethnic origin will be used according to Quanjer-GLI (2012) equations. Please note that the Micro I may be configured to accept height in inches.
- Page 27 If a mistake is made then simply touch the back key to go back to the previous entry. When all the patient data has been entered the following screen will be displayed and a spirometry test may be performed: After performing a test the results are displayed: Each manoeuvre is quality checked for a slow start, abrupt end, short blow, poor effort or cough according to ATS/ERS 2005 guidelines.
- Page 28 The Micro I may be configured to display the Z score instead of the percentage of predicted values where data from the predicted value sets are available:...
-
Page 29: Post Bd Exam
In this mode the functionality of the Micro I becomes fully compliant with the National Lung Health Education Program requirements. Only FEV1, FEV6 and the ratio, FEV1/FEV6, are displayed and stored,... -
Page 30: Nlhep Quality Checks
NLHEP Quality Checks In order for the interpretation to be displayed a manoeuvre must pass a set of enhanced quality checks. After the patient has performed a poor quality manoeuvre, one of the three following messages will appear: Message Criteria Recommended action Don’t Back-extrapolated volume... -
Page 31: Nlhep Qc Grades
When two manoeuvres fail either of the consistency checks, then the best individual results of the two are saved (FEV1, FEV6, and PEF individually). When any of the above messages appear, instruct the patient on how to improve their manoeuvre and demonstrate the correct manoeuvre yourself. -
Page 32: Switching Off
The battery is not required to hold the internal memory and stored results will not be lost when the battery becomes exhausted. To recharge the battery connect the Micro I to the charger provided and then plug the charger into a suitable wall socket ensuring that access to the charger is not restricted so that it may easily be removed. -
Page 33: Battery Replacement
( ) Remove the power adapter from the wall socket and from the base of the unit. Micro I is now ready for portable use. Note: Micro I may be also charged from PC or laptop using the USB cable provided. - Page 34 To aid this process clip 1 has a recess moulded into the device body to allow a small flat bladed screw driver to be carefully slid under the clip to release it. Once released work the screw driver around to clips 2, 3 and 4. Finally slide the cover off the bottom of the unit which in turn releases clips 5 and 6 Replace the battery paying particular attention to the orientation of...
-
Page 35: Calibration Check
To perform a calibration check select calibration check option from the setting menu and the display will show: Connect a 3L syringe to the Micro I with the minimum of adapters and inject the syringe volume into the transducer evenly, without pausing. -
Page 36: Cleaning Instructions
When using a paediatric/Adult disposable mouthpiece without a filter under the prerequisite that the patient was instructed only to exhale into the Micro I device, the following parts have to be cleaned once a day: Volume Transducer, Mouthpiece adaptor and paediatric adapter. -
Page 37: Cleaning The Transducer
Servicing If your unit requires service or repair please see page 289 for contact details. There are no user serviceable parts in the Micro I. -
Page 38: Trouble Shooting Information
Contact your instrument on the time is battery of Micro dealer. shown as 00:00 I is defective Micro I is outside of % There are leaks Check the syringe when conducting the in the syringe and connections for calibration check... -
Page 39: Safety Designation Per Iec 60601-1
(5V DC) • Make sure the adapter does not get wet • Do not use a damaged adapter • Always unplug your Micro I before cleaning WARNING: Do not connect devices that are not specified as part of the system. - Page 40 NOTE: If an MPSO (Multiple Portable Socket Outlet) is used with the system, the maximum permitted load should not be exceeded. Do not connect electrical equipment that has not been supplied as part of the system.
-
Page 41: Electromagnetic Compatibility (Emc) To En60601-1:2007
(including other medical devices). The purpose of this testing is to ensure that the Micro I is not likely to adversely affect the normal operation of other such equipment and that other such equipment is not likely to adversely affect the normal operation of the Micro I. - Page 42 Guidance and Manufacturer’s Declaration – Electromagnetic Emissions The Micro I is intended for use in the electromagnetic environment specified below. The customer or the user of the Micro I should assure that it is used in such an environment Emission Test Compliance Electromagnetic Environment –...
- Page 43 Guidance and Manufacturer’s Declaration – Electromagnetic Immunity The Micro I is intended for use in the electromagnetic environment specified below. The customer or the user of the Micro I should assure that it is used in such an environment. Immunity Test...
- Page 44 Guidance and Manufacturer’s Declaration – Electromagnetic Immunity The Micro I is intended for use in the electromagnetic environment specified below. The customer or the user of the Micro I should assure that it is used in such an environment. Immunity...
- Page 45 Micro I The Micro I is intended for use in an electromagnetic environment in which radiated RF disturbances are controlled. The customer or the user of the Micro I can help prevent electromagnetic interference by maintaining a minimum...
-
Page 46: Symbols
Symbols Type B device In accordance with Directive 93/42/EEC 0086 Disposal in compliance with WEEE Consult the instructions for use Caution: consult the accompanying documents Date of manufacture Manufacturer Serial number Federal U.S. law restricts this device to sale by or on the order of a physician. - Page 47 Please Note: Information in this manual is subject to change without notice and does not represent commitment on the part of CareFusion UK 232 Ltd. The software may be used or copied only in accordance with the terms of that agreement. No part of this manual may be...
-
Page 48: Specifications Of The Micro I
Specifications of the Micro I Measurements: Forced Expired Volume in 1 second (FEV1) Forced Expired Volume in 6 second (FEV6) Forced Vital Capacity (FVC) Forced Expiratory Ratio (FEV1/FEV6) Forced Expiratory Ratio (FEV1/FVC) Peak Expiratory Flow Rate (PEF), Mid Expiratory Flow (FEF25-75) -
Page 49: Consumables & Accessories
PeraSafe Sterilising Powder 81g (to make up 5 litres of solution) 36-VOL2104 Nose Clips (pack of 5) 36-SM2125 3 Litre Calibration Syringe 36-MLD1621 Mouthpiece adaptor 36-BAT1043 Battery Pack (NiMH AA 2.4V, 1600mAh) 36-PSU1017 5V DC 1.2A (GlobTek WR9QA1200USBNR-G2267) PLEASE NOTE: USE ONLY CAREFUSION ACCESSORIES... - Page 50 Micro I Diagnostic Spirometer Operating Manual – CareFusion USA Federal (USA) law restricts this device to sale by or on the order of a physician or licensed practitioner. CareFusion, 22745 Savi Ranch Parkway, Yorba Linda CA 92887-4668 Contents...
-
Page 51: Introduction - Carefusion Usa
Introduction – CareFusion USA The Micro I is a compact, rechargeable battery operated and fully portable diagnostic spirometer. It is accurate to the requirements of the ATS/ERS TASK FORCE: STANDARDISATION OF LUNG FUNCTION TESTING 2005. Its ergonomic and user-friendly design allows diagnostic spirometry measurements, including predicted values and automatic interpretation, to be made quickly and simply. -
Page 52: Package Contents
Package Contents The Micro I is packaged in a convenient carrying case and comes complete with the following items (Fig.1): Micro I spirometer CareFusion Digital Volume Transducer together with disposable cardboard mouthpieces and instruction manual. Universal power supply (36-PSU1017 5VDC 1.2A) -
Page 53: Contraindications, Warnings And Cautions
Contraindications, Warnings and Cautions Contraindications: As performing spirometry might be physically demanding, it is contraindicated in patients with recent myocardial infarction. Also extensive exhalation might lead to syncope. The following terms are used as follows in this manual Caution: Possibility of injury or serious damage Warning: conditions or practices that could result in personal injury. - Page 54 CAUTION: Do not allow the patient to handle the spirometer when connected to either the power supply for charging or to a PC when configuring the unit. WARNING: The user must not touch any voltage-carrying parts and the patient at the same time. PLEASE NOTE: The product you have purchased should not be disposed of as unsorted waste.
-
Page 55: Intended Use
Getting Started It is recommended that Micro I spirometer is fully charged before use. The power supply is provided with separate UK, USA and European plugs. Connect the required plug to the power supply and plug in to a mains outlet. -
Page 56: Configuration
It is recommended that the PC software be used to adjust these settings, if required. Connect Micro I to the PC using the USB cable supplied. Run the software, and turn on the Micro I. The PC software will detect that the Micro I is connected. -
Page 57: Micro I Pc Software
Micro I PC Software This software allows you to customise the settings on your Micro I spirometer, and allows full spiormetry reports containing patient demographics, indices and flow volume and volume time graphs to be generated and saved as a PDF file or printed. Once successfully installed, comprehensive help is available through the Help menu when using the application. - Page 58 To change this location select ‘Browse’. Click ‘Next’ to display the Select program manager group dialog. This will be the location where the Micro I PC Software launch icon will be placed under the Start Menu. Either a new location can be entered or an existing location used.
- Page 59 Click ‘Finish’ to complete the installation process. Running Micro I PC software Connect your Micro I to a USB port on the PC using the cable provided. The Micro I will take power from the USB port on the PC.
- Page 60 The Micro I PC software will automatically be launched when a Micro I unit is connected to the PC, the first screen will show: From this screen you can enter an ID and the patient’s names to generate a report. The Patient options allows the last results to be...
- Page 61 When the change settings option is used the display will change to: By selecting the ‘Custom’ option at the top of the screen all of the Micro I features may be tailored to you specific requirements.
-
Page 62: Operation
Operation The Micro I is designed to suit a range of applications from the very simplest spirometry test where only a few indices are required to be displayed to more complex operation where deviation from the norm, bronchodilator response, and interpretation of results are required. -
Page 63: Quick Exam
Quick Exam After selecting this option the display will change to: The Micro I may be used directly with a MicroGuard filter or with a disposable cardboard mouthpiece with the adapter supplied. Insert mouthpiece or MicroGuard filter into the mouthpiece holder of the spirometer. - Page 64 The spirometry results for that blow are then displayed together with the manoeuvre quality check based upon ATS/ERS guidelines: Further indices, if configured, and the best results from a sequence of blows may be displayed by pressing the down key. Each manoeuvre is quality checked for a slow start, abrupt end, short blow, poor effort or cough according to ATS/ERS 2005 guidelines.
-
Page 65: Exam With Predicted Values
Exam with Predicted Values When this option is selected the following is displayed: The date of the birth displayed will be the last patient tested, select ‘Yes’ to confirm the date of birth is correct or ‘No’ to enter the date of birth of the patient to be tested. - Page 66 NHANES III equations. If Quanjer-GLI (2012) predicted values are used then the ethnic origin will be used according to Quanjer-GLI (2012) equations. Please note that the Micro I may be configured to accept height in inches.
- Page 67 If a mistake is made then simply touch the back key to go back to the previous entry. When all the patient data has been entered the following screen will be displayed and a spirometry test may be performed: After performing a test the results are displayed: Each manoeuvre is quality checked for a slow start, abrupt end, short blow, poor effort or cough according to ATS/ERS 2005 guidelines.
- Page 68 The Micro I may be configured to display the Z score instead of the percentage of predicted values where data from the predicted value sets are available:...
-
Page 69: Post Bd Exam
In this mode the functionality of the Micro I becomes fully compliant with the National Lung Health Education Program requirements. Only FEV1, FEV6 and the ratio, FEV1/FEV6, are displayed and stored,... -
Page 70: Nlhep Quality Checks
NLHEP Quality Checks In order for the interpretation to be displayed a manoeuvre must pass a set of enhanced quality checks. After the patient has performed a poor quality manoeuvre, one of the three following messages will appear: Message Criteria Recommended action Don’t Back-extrapolated volume... -
Page 71: Nlhep Qc Grades
When two manoeuvres fail either of the consistency checks, then the best individual results of the two are saved (FEV1, FEV6, and PEF individually). When any of the above messages appear, instruct the patient on how to improve their manoeuvre and demonstrate the correct manoeuvre yourself. -
Page 72: Switching Off
The battery is not required to hold the internal memory and stored results will not be lost when the battery becomes exhausted. To recharge the battery connect the Micro I to the charger provided and then plug the charger into a suitable wall socket ensuring that access to the charger is not restricted so that it may easily be removed. -
Page 73: Battery Replacement
( ) Remove the power adapter from the wall socket and from the base of the unit. Micro I is now ready for portable use. Note: Micro I may be also charged from PC or laptop using the USB cable provided. - Page 74 To aid this process clip 1 has a recess moulded into the device body to allow a small flat bladed screw driver to be carefully slid under the clip to release it. Once released work the screw driver around to clips 2, 3 and 4. Finally slide the cover off the bottom of the unit which in turn releases clips 5 and 6 Replace the battery paying particular attention to the orientation of...
-
Page 75: Calibration Check
To perform a calibration check select calibration check option from the setting menu and the display will show: Connect a 3L syringe to the Micro I with the minimum of adapters and inject the syringe volume into the transducer evenly, without pausing. -
Page 76: Cleaning Instructions
When using a paediatric/Adult disposable mouthpiece without a filter under the prerequisite that the patient was instructed only to exhale into the Micro I device, the following parts have to be cleaned once a day: Volume Transducer, Mouthpiece adaptor and paediatric adapter. -
Page 77: Cleaning The Transducer
Servicing If your unit requires service or repair please see page 289 for contact details. There are no user serviceable parts in the Micro I. -
Page 78: Trouble Shooting Information
Contact your instrument on the time is battery of Micro dealer. shown as 00:00 I is defective Micro I is outside of % There are leaks Check the syringe when conducting the in the syringe and connections for calibration check... -
Page 79: Safety Designation Per Iec 60601-1
(5V DC) • Make sure the adapter does not get wet • Do not use a damaged adapter • Always unplug your Micro I before cleaning WARNING: Do not connect devices that are not specified as part of the system. - Page 80 NOTE: If an MPSO (Multiple Portable Socket Outlet) is used with the system, the maximum permitted load should not be exceeded. Do not connect electrical equipment that has not been supplied as part of the system.
-
Page 81: Electromagnetic Compatibility (Emc) To En60601-1:2007
(including other medical devices). The purpose of this testing is to ensure that the Micro I is not likely to adversely affect the normal operation of other such equipment and that other such equipment is not likely to adversely affect the normal operation of the Micro I. - Page 82 Guidance and Manufacturer’s Declaration – Electromagnetic Emissions The Micro I is intended for use in the electromagnetic environment specified below. The customer or the user of the Micro I should assure that it is used in such an environment Emission Test Compliance Electromagnetic Environment –...
- Page 83 Guidance and Manufacturer’s Declaration – Electromagnetic Immunity The Micro I is intended for use in the electromagnetic environment specified below. The customer or the user of the Micro I should assure that it is used in such an environment. Immunity...
- Page 84 Guidance and Manufacturer’s Declaration – Electromagnetic Immunity The Micro I is intended for use in the electromagnetic environment specified below. The customer or the user of the Micro I should assure that it is used in such an environment. Immunity...
- Page 85 Micro I The Micro I is intended for use in an electromagnetic environment in which radiated RF disturbances are controlled. The customer or the user of the Micro I can help prevent electromagnetic interference by maintaining a minimum...
-
Page 86: Symbols
Symbols Type B device In accordance with Directive 93/42/EEC 0086 Disposal in compliance with WEEE Consult the instructions for use Caution: consult the accompanying documents Date of manufacture Manufacturer Serial number Federal U.S. law restricts this device to sale by or on the order of a physician. - Page 87 Please Note: Information in this manual is subject to change without notice and does not represent commitment on the part of CareFusion UK 232 Ltd. The software may be used or copied only in accordance with the terms of that agreement. No part of this manual may be...
-
Page 88: Specifications Of The Micro I
Specifications of the Micro I Measurements: Forced Expired Volume in 1 second (FEV1) Forced Expired Volume in 6 second (FEV6) Forced Vital Capacity (FVC) Forced Expiratory Ratio (FEV1/FEV6) Forced Expiratory Ratio (FEV1/FVC) Peak Expiratory Flow Rate (PEF), Mid Expiratory Flow (FEF25-75) -
Page 89: Consumables & Accessories
PeraSafe Sterilising Powder 81g (to make up 5 litres of solution) 36-VOL2104 Nose Clips (pack of 5) 36-SM2125 3 Litre Calibration Syringe 36-MLD1621 Mouthpiece adaptor 36-BAT1043 Battery Pack (NiMH AA 2.4V, 1600mAh) 36-PSU1017 5V DC 1.2A (GlobTek WR9QA1200USBNR-G2267) PLEASE NOTE: USE ONLY CAREFUSION ACCESSORIES... -
Page 90: Table Des Matières
Table des matières Spiromètre de diagnostic Micro I Mode d’emploi... -
Page 91: Iii. Introduction
III. Introduction Le Micro I est un spiromètre de diagnostic portable compact, fonctionnant sur batterie rechargeable. Il est conforme aux recommandations de l'ATS et de l'ERS sur les explorations fonctionnelles respiratoires de 2005 (ATS/ERS TASK FORCE: STANDARDISATION OF LUNG FUNCTION TESTING 2005). Son design agréable et ergonomique permet une prise de mesure simple et... -
Page 92: Contenu De L'emballage
Contenu de l'emballage Le Micro I est emballé dans une mallette de rangement pratique et est fourni avec les éléments suivants (Fig. 1) : Spiromètre Micro I Transducteur de volume numérique CareFusion, avec embouts buccaux jetables en carton et mode d'emploi. -
Page 93: Contre-Indications, Avertissements Et Mises En Garde
Contre-indications, avertissements et mises en garde Contre-indications : les tests de spirométrie demandent un effort physique et sont donc contre-indiqués pour les patients ayant récemment souffert d'un infarctus du myocarde. L'effort intense d'expiration peut également provoquer des syncopes. Les termes suivants sont utilisés dans le manuel : Mise en garde : risque de blessures ou de dommages graves. - Page 94 MISE EN GARDE : ne laissez pas le patient manier le spiromètre lorsqu'il est relié à l'alimentation pour être chargé ou à un PC pour configuration. AVERTISSEMENT : L'utilisateur ne doit pas toucher en même temps les pièces sous tension et le patient. REMARQUE : ce produit ne doit pas être mis au rebut dans le circuit de traitement des déchets non triés.
-
Page 95: Utilisation Prévue
Utilisation prévue Le spiromètre Micro I permet de mesurer le volume et le débit maximaux de l'air sortant des poumons du patient. Le système est conçu pour être utilisé avec des patients adultes et enfants à partir de 3 ans, à l'hôpital, en cabinet médical, en laboratoire et dans le cadre d'examens de la médecine du travail. -
Page 96: Configuration
Il est recommandé d'utiliser le logiciel pour le réglage de ces paramètres si nécessaire. Reliez le Micro I au PC à l'aide du câble USB fourni. Lancez le logiciel et mettez le Micro I sous tension afin que le logiciel le détecte. -
Page 97: Logiciel Micro I Pc Software
Logiciel Micro I PC Software Ce logiciel vous permet de personnaliser les paramètres de votre spiromètre Micro I et de générer des rapports complets incluant les données démographiques, les indices ainsi que les graphiques de débit/volume et de volume/temps du patient, que vous pouvez enregistrer au format PDF ou imprimer. - Page 98 Cliquez sur « Suivant » pour continuer. La fenêtre de sélection de l'emplacement de destination s'affiche et montre dans quel répertoire le logiciel Micro I PC Software va être installé. L'emplacement par défaut est : C:\Program Files\CareFusion\Micro I PC Software Pour choisir un autre emplacement, cliquez sur «...
- Page 99 Cliquez sur « Terminer » pour mettre fin à la procédure d'installation. Logiciel Micro I PC software Reliez votre Micro I à un port USB du PC à l'aide du câble fourni. Le Micro I est alors alimenté par ce port. Attention, un port USB à haut débit est requis pour alimenter le Micro I.
- Page 100 Le logiciel PC Micro I se lance automatiquement lorsqu'une unité Micro I est connectée au PC. Le premier écran affichera : Sur cet écran, vous pouvez saisir l'ID et le nom du patient à des fins génération rapport. options patient incluent téléchargement des derniers résultats à...
- Page 101 Lorsque vous utilisez les options de modification des paramètres, l'écran suivant affiche : Sélectionnez l'option « Personnalisé » en haut de l'écran pour adapter toutes les fonctions du Micro I à vos besoins spécifiques.
-
Page 102: Fonctionnement
Fonctionnement Le Micro I est conçu pour une diversité d'applications, du test de spirométrie le plus simple, avec affichage de seulement quelques indices, à des opérations plus complexes, avec calcul de l'écart par rapport à la norme, réponse au bronchodilatateur et interprétation des résultats. -
Page 103: Examen Rapide
Examen rapide Une fois cette option sélectionnée, l'écran suivant s'affiche : Le Micro I peut être utilisé directement avec un filtre MicroGuard ou un embout buccal jetable en carton et l'adaptateur fourni. Insérez l'embout buccal ou le filtre MicroGuard dans le porte-embout du spiromètre. - Page 104 Les résultats du test de spirométrie pour cette respiration s'affichent avec la contrôle qualité du test, basé sur les recommandations ATS/ERS : Appuyez sur la flèche bas pour afficher d'autres indices, s'ils sont configurés, et les meilleurs résultats, dans le cas de plusieurs tests. La qualité...
-
Page 105: Examen À L'aide De Valeurs Prédites
Examen à l'aide de valeurs prédites Si vous sélectionnez cette option, l'écran suivant s'affiche : La date de naissance affichée correspond à celle du dernier patient testé. Sélectionnez « Oui » pour confirmer la date de naissance ou « Non » pour saisir la date de naissance du patient à tester. Si vous sélectionnez «... - Page 106 équations NHANES III. Lorsque les valeurs théoriques Quanjer-GLI (2012) sont utilisées, l'origine ethnique est prise en compte selon les équations Quanjer-GLI (2012). Veuillez noter que le Micro I peut être configuré pour accepter une valeur en pouces pour la taille.
- Page 107 En cas d'erreur, appuyez sur la touche Retour pour revenir au paramètre précédent. Une fois toutes les données du patient saisies, l'écran suivant s'affiche et le test de spirométrie peut commencer : Une fois le test terminé, les résultats s'affichent : La qualité...
- Page 108 Retour pour revenir à l'écran des résultats. Vous pouvez configurer le Micro I de sorte à afficher une note Z au lieu du pourcentage par rapport aux valeurs prédites, lorsque les données tirées des ensembles de valeurs prédites sont disponibles : La note Z est le nombre de déviations standard des résultats au-...
-
Page 109: Examen Post Bd
(NLHEP) dans le menu de configuration lors de la première mise sous tension de l'unité ou, par la suite, dans les options de paramétrage du menu principal. Ce mode permet d'utiliser le Micro I en conformité totale avec les exigences du NLHEP (National Lung Health Education Program). -
Page 110: Contrôles Qualité Nlhep
Contrôles qualité NLHEP Pour pouvoir être interprété, un test doit réussir une série de contrôles qualité. Si le test du patient est de mauvaise qualité, l'un des trois messages suivants s'affiche : Message Critère Action recommandée N'hésitez pas Le volume obtenu par Le patient doit expirer extrapolation inverse l'air plus rapidement et... -
Page 111: Niveaux De Qualité Nlhep
Lorsque deux tests échouent l'un des contrôles de cohérences, le meilleur résultat des deux pour chaque indice est enregistré (FEV1, FEV6 et PEF individuellement). Si l'un des messages ci-dessus s'affiche, expliquez au patient comment améliorer le test en le lui montrant vous-même. Niveaux de qualité... -
Page 112: Mise Hors Tension
La batterie n'est pas nécessaire pour maintenir la mémoire interne et les résultats enregistrés ne sont pas perdus si la batterie se vide. Pour recharger la batterie, reliez le Micro I au chargeur fourni, puis branchez ce dernier sur une prise murale adaptée, à un endroit permettant de facilement y accéder afin de le débrancher si nécessaire. -
Page 113: Remplacement De La Batterie
5 heures), elle est remplacée par l'icône indiquant que la batterie est complètement chargée ( ). Débranchez l'adaptateur de la prise murale et de la base de l'unité. Le Micro I est prêt pour l'utilisation en mode portable. Remarque : il est également possible de charger le Micro I par le biais d'un PC ou ordinateur portable à... - Page 114 Pour faciliter la procédure, un renfoncement est prévu sur l'appareil au niveau de l'attache 1 de sorte à pouvoir insérer un petit tournevis plat sous l'attache pour la libérer. Une fois l'attache libérée, faites de même pour les attaches 2, 3 et 4. Faites ensuite glisser le couvercle par le bas de l'unité...
-
Page 115: Contrôle De L'étalonnage
Contrôle de l'étalonnage Le Micro I est étalonné pour donner des valeurs BTPS en litres (à la température corporelle, saturé en vapeur d'eau). L'étalonnage reste indéfiniment stable, à moins que le transducteur soit endommagé, et il est en principe inutile de procéder à un nouvel étalonnage de l'unité. -
Page 116: Instructions De Nettoyage
Si vous utilisez un embout enfant/adulte à usage unique sans filtre, et sous condition absolue qu'il ait été demandé au patient de n'expirer que dans le dispositif Micro I, les pièces suivantes doivent être nettoyées une fois par jour : capteur de volume, adaptateur d'embout et adaptateur pédiatrique. -
Page 117: Nettoyage Du Transducteur
éviter d'endommager irrémédiablement des composants électroniques qu'ils contiennent. Réparation Reportez-vous aux coordonnées indiquées en page 289 si votre unité nécessite une réparation. Aucune pièce interne du Micro I ne peut être réparée par l'utilisateur. -
Page 118: Dépannage
En cas de problème avec votre spiromètre, veuillez consulter le tableau suivant : Problème Cause Solution possible Impossible de mettre le Batterie épuisée Rechargez la Micro I sous tension batterie. L'heure affichée est 00:00 La batterie Contactez votre chaque fois que vous interne du revendeur. mettez l'appareil sous Micro I est tension. -
Page 119: Classification Selon La Norme Cei 60601-1
• Veillez à ne pas mettre l'adaptateur au contact de liquides. • N'utilisez pas l'adaptateur s'il est endommagé. • Débranchez toujours le Micro I avant de le nettoyer. AVERTISSEMENT : ne reliez pas d'équipement qui ne fait pas spécifiquement partie du système. - Page 120 AVERTISSEMENT : vous n'êtes pas autorisé à modifier l'équipement. REMARQUE : en cas d'utilisation d'une prise de courant portable (MPSO) sur le système, ne dépassez pas la capacité de charge maximale autorisée. Ne reliez pas d'équipement électrique qui n'a pas été...
-
Page 121: Compatibilité Électromagnétique (Cem) À La Norme En60601-1:2007
équipements électriques / électroniques (y compris d'autres appareils médicaux). Le but de ce test est de garantir que le Micro I n'est pas susceptible de porter atteinte au fonctionnement normal d'un tel autre équipement et qu'un tel autre équipement n'est pas susceptible de porter atteinte au... - Page 122 Directives et déclaration du fabricant - Émissions électromagnétiques Le Micro I est destiné à être utilisé dans l'environnement électromagnétique spécifié ci-dessous. Le client ou l'utilisateur du Micro I devra s'assurer que celui-ci est utilisé dans un tel environnement. Test d'émission Conformité...
- Page 123 Directives et déclaration du fabricant - Immunité électromagnétique Le Micro I est destiné à être utilisé dans l'environnement électromagnétique spécifié ci-dessous. Le client ou l'utilisateur du Micro I devra s'assurer que celui-ci est utilisé dans un tel environnement. Test Niveau de test...
- Page 124 Directives et déclaration du fabricant - Immunité électromagnétique Le Micro I est destiné à être utilisé dans l'environnement électromagnétique spécifié ci-dessous. Le client ou l'utilisateur du Micro I devra s'assurer que celui-ci est utilisé dans un tel environnement. Test Niveau...
- Page 125 à empêcher les interférences électromagnétiques en respectant une distance minimale entre les systèmes de communication portables et mobiles RF (émetteurs) et le Micro I comme recommandé ci-dessous, en fonction de la puissance de sortie maximale du système de communication.
-
Page 126: Symboles
Symboles Appareil de classe B Conforme à la directive 93/42/CEE 0086 Déchet de type DEEE Consulter le mode d'emploi Mise en garde : consulter la documentation jointe Date de fabrication Fabricant Numéro de série la loi fédérale américaine limite la vente de cet appareil à... - Page 127 Remarque : les informations contenues dans ce manuel peuvent être modifiées sans préavis et ne constituent en aucun cas une garantie de la part de CareFusion UK 232 Ltd. Le logiciel peut être utilisé et copié uniquement conformément aux termes du présent contrat. Aucune partie de ce manuel ne peut être reproduite ou transférée, sous...
-
Page 128: Caractéristiques Du Micro I
Caractéristiques du Micro I Mesures : Volume expiratoire forcé en 1 seconde (FEV1) Volume expiratoire forcé en 6 secondes (FEV6) Capacité vitale forcée (FVC) Rapport expiratoire forcé (FEV1/FEV6) Rapport expiratoire forcé (FEV1/FVC) Débit expiratoire de pointe (PEF) Débit expiratoire moyen (FEF25-75) Débit expiratoire avec 75 % du volume restant (FEF75) -
Page 129: Consommables/Accessoires
(pour 5 litres de solution) 36-VOL2104 Pince-narines (lot de 5) 36-SM2125 Seringue d'étalonnage de 3 L 36-MLD1621 Adaptateur d'embout buccal 36-BAT1043 Batterie (NiMH AA 2,4 V, 1 600 mAh) 36-PSU1017 5 V CC 1,2 A (GlobTek WR9QA1200USBNR-G2267) REMARQUE : UTILISEZ UNIQUEMENT DES ACCESSOIRES CAREFUSION... -
Page 130: Inhalt
Micro I Diagnosespirometer Bedienungsanleitung Inhalt... -
Page 131: Iv. Einführung
IV. Einführung Das Micro I ist ein kompaktes, vollständig tragbares Diagnosespirometer für den Betrieb mit einer wiederaufladbaren Batterie. Es erfüllt die Genauigkeitsanforderungen gemäß ATS/ERS TASK FORCE: „STANDARDISATION OF LUNG FUNCTION TESTING 2005“. Das ergonomische und anwenderfreundliche Design ermöglicht eine schnelle und einfache Durchführung diagnostischer Spirometriemessungen, einschließlich Prognosewerten und... - Page 132 CareFusion kann weitere Spirometer zur Erfüllung Ihrer diagnostischen und überwachenden Spirometrieanforderungen zur Verfügung stellen.
-
Page 133: Packungsinhalt
Packungsinhalt Das Micro I ist in einer handlichen Tragetasche verpackt. Im Lieferumfang sind folgende Komponenten enthalten (Abb. 1): Micro I Spirometer CareFusion Digital Volume Transducer mit Einweg-Mundstücken aus Karton und Bedienungsanleitung Universal-Netzteil (36-PSU1017 5 V DC 1,2 A) Mundstück-Adapter aus Karton USB-/Ladekabel Abb. -
Page 134: Kontraindikationen, Warn- Und Vorsichtshinweise
Kontraindikationen, Warn- und Vorsichtshinweise Kontraindikationen: Die Durchführung von Spirometrietests kann körperlich anstrengend sein und ist daher bei Patienten mit kürzlich aufgetretenem Myokardinfarkt kontraindiziert. Zu langes Ausatmen kann außerdem eine Synkope auslösen. Die folgenden Begriffe werden in dieser Bedienungsanleitung verwendet: Vorsicht: Risiko von Verletzungen oder schwerwiegenden Schäden Warnung: Bedingungen oder Vorgehensweisen, die Verletzungen verursachen können Bitte beachten: Wichtige Informationen, um Schäden am Instrument... - Page 135 VORSICHT: Wenn das Spirometer zum Aufladen am Netzteil oder zur Konfiguration des Gerätes an einem PC angeschlossen ist, darf das Spirometer nicht vom Patienten gehandhabt werden. WARNUNG: Der Benutzer darf keine spannungsführenden Teile und den Patienten gleichzeitig berühren. BITTE BEACHTEN: Das erworbene Produkt darf nicht als unsortierter Abfall entsorgt werden.
-
Page 136: Verwendungszweck
Verwendungszweck Das Micro I-Spirometer dient zur Messung des ein- und ausgeatmeten Luftvolumens und des Luftvolumenstroms aus der Lunge. Das System ist zur Verwendung für pädiatrische Patienten über 3 Jahre und erwachsene Patienten in Krankenhäusern, Arztpraxen, Laboren sowie den Einsatz im Arbeitsschutz vorgesehen. -
Page 137: Konfiguration
Einstellungen geändert werden sollen. Das Micro I mit dem USB-Kabel im Lieferumfang an den PC anschließen. Die Software ausführen und das Micro I einschalten. Die PC-Software erkennt, dass das Micro I angeschlossen ist. Die Anweisungen auf dem Bildschirm befolgen, um... -
Page 138: Micro I Pc Software
Installation der Software bietet das Hilfe-Menü umfassende Hilfestellung beim Gebrauch der Anwendung. Systemanforderungen Damit die Micro I PC Software ordnungsgemäß ausgeführt werden kann, sind bestimmte Hardware- und Softwarekomponenten erforderlich. PC-Anforderungen Es ist ein IBM-kompatibler PC erforderlich, dessen Hardware den folgenden Mindestanforderungen entspricht oder darüber hinausgeht. - Page 139 Klicken Sie auf ‚Weiter‘, um das Dialogfeld „Select Program Manager Group“ (Programmgruppen auswählen) anzuzeigen. An dieser Stelle wird das Symbol zum Aufrufen der Micro I PC Software im Startmenü positioniert. Sie können entweder eine neue Gruppe eingeben oder eine bestehende Gruppe verwenden.
- Page 140 Add Micro I PC Software icon to the desktop (Symbol für die Micro I PC Software auf dem Desktop hinzufügen) Klicken Sie auf ‚Weiter‘, um die Dateien in das System zu kopieren. Wenn die Dateien in das System kopiert wurden, werden Sie darauf hingewiesen, dass die Micro I PC Software erfolgreich installiert wurde.
- Page 141 Die Micro I-PC-Software wird automatisch gestartet, wenn ein Micro I- Gerät an den PC angeschlossen wird. Der erste Bildschirm zeigt Folgendes an: Über diesen Bildschirm können Sie eine ID und den Namen des Patienten eingeben, um einen Bericht zu erstellen. Über die Option „Patient“...
- Page 142 Wählt man „Geräteeinstellungen ändern“ an, wird folgendes Fenster angezeigt. Durch Auswahl Option „Benutzerdefiniert“ oben Bildschirm, können Sie alle Micro I Funktionen im Hinblick auf Ihre speziellen Anforderungen anpassen.
-
Page 143: Betrieb
Betrieb Das Micro I ist für eine Reihe von Anwendungen ausgelegt – vom einfachen Spirometrietest, bei dem nur wenige Indizes angezeigt werden, komplexen Betriebsfunktionen, denen Abweichungen von der Norm, Reaktionen auf den Bronchodilatator und eine Interpretation der Ergebnisse erforderlich sind. -
Page 144: Schnelluntersuchung
Kalibrationsprüfung durchführen. Schnelluntersuchung Bei Auswahl dieser Option wird der folgende Bildschirm angezeigt: Das Micro I kann direkt mit einem MicroGuard Filter oder mit einem Einweg-Mundstück aus Karton und dem Adapter im Lieferumfang verwendet werden. Führen Sie das Mundstück bzw. den MicroGuard Filter in die Mundstück-Halterung des Spirometers ein. - Page 145 Die Spirometrie-Ergebnisse für diesen Atemstoß werden daraufhin zusammen mit der Qualitätsprüfung des Atemmanövers nach ATS/ERS-Richtlinien angezeigt: Weitere Indizes (falls konfiguriert) sowie die besten Testergebnisse aus einer Reihe von Atemstößen können durch Drücken der Pfeiltaste nach unten angezeigt werden. Jedes Atemmanöver wird einer Qualitätsprüfung im Hinblick auf einen langsamen Start, ein abruptes Ende, einen kurzen Atemstoß...
-
Page 146: Untersuchung Mit Sollwerten
Untersuchung mit Sollwerten Bei Auswahl dieser Option wird der folgende Bildschirm angezeigt: Das Geburtsdatum des zuletzt gemessenen Patienten wird angezeigt. Wählen Sie „Ja“ zum Bestätigen des Geburtsdatums oder „Nein“, um das Geburtsdatum des zu messenden Patienten einzugeben. Wenn „Nein“ ausgewählt wird, wechselt der Bildschirm zur Eingabe des korrekten Geburtsdatums. - Page 147 Wenn „Ja“ ausgewählt wird und das Geburtsdatum korrekt ist, werden die Patientendaten auf dem Bildschirm angezeigt. Geben Sie das Alter des Patienten mit den Pfeiltasten nach oben/unten ein und drücken Sie dann auf die Eingabetaste. Verfahren Sie entsprechend mit den Angaben für Geschlecht, Körpergröße und ethnische Zugehörigkeit.
- Page 148 Wenn Sollwerte nach Quanjer-GLI (2012) verwendet werden, wird die ethnische Zugehörigkeit entsprechend der Gleichungen nach Quanjer- GLI (2012) verwendet. Bitte beachten Sie, dass das Micro I für eine Angabe der Körpergröße in Zoll konfiguriert werden kann. Falls Sie einen Fehler machen, drücken Sie einfach auf die Rücktaste, um zum vorherigen Eintrag zurückzugehen.
- Page 149 Wird die Eingabetaste versehentlich gedrückt, drücken Sie einfach auf die Rücktaste, um zur Ergebnisanzeige zurückzukehren. Das Micro I kann so konfiguriert werden, dass der Z-Wert anstatt der prozentualen Prognosewerte angezeigt wird, wenn Daten aus den Prognosesätzen zur Verfügung stehen: Der Z-Wert ist die Anzahl der Standardabweichungen der Ergebnisse über (positiver Z-Wert) bzw.
-
Page 150: Untersuchung Nach Bronchodilatator
Konfigurationsmenü beim ersten Einschalten des Gerätes oder nachfolgend über die Option „Einstellungen“ im Hauptmenü aufgerufen. In diesem Modus erfüllen die Funktionen des Micro I alle Anforderungen des „National Lung Health Education Program“ (NLHEP). Es werden nur FEV1, FEV6 und das Verhältnis von FEV1/FEV6 angezeigt und gespeichert. -
Page 151: Nlhep-Qualitätsprüfungen
NLHEP-Qualitätsprüfungen Ein Atemmanöver muss eine Reihe erweiterter Qualitätsprüfungen bestehen, damit die Interpretation angezeigt wird. Falls der Patient ein Atemmanöver mit unzureichender Qualität ausgeführt hat, wird eine der folgenden drei Meldungen angezeigt: Meldung Kriterien Empfohlene Aktion Nicht Rück-extrapoliertes Der Patient sollte die Luft zögern Volumen (BEV) größer schneller und... -
Page 152: Nlhep Qc-Stufen
Wenn zwei Atemmanöver eine Konsistenzprüfungen nicht bestehen, werden besten Einzelergebnisse beiden Atemmanöver gespeichert (FEV1, FEV6 einzelne Testergebnisse). Wenn eine der oben aufgeführten Meldungen erscheint, sollten Sie den Patienten anweisen, wie das Atemmanöver verbessert werden kann, und selbst ein korrektes Atemmanöver vorführen. NLHEP QC-Stufen Die Qualität jeder Testsitzung wird anhand der folgenden Kriterien eingestuft:... -
Page 153: Ausschalten Des Gerätes
Gerät mit Strom versorgt werden kann. Batterie vollständig geladen. Die Batterie ist nicht für den internen Speicher erforderlich, daher bleiben die gespeicherten Ergebnisse erhalten, wenn die Batterie leer ist. Um die Batterie wiederaufzuladen, das Micro I an das mitgelieferte Ladegerät anschließen. Dann Ladegerät... -
Page 154: Batterieaustausch
Symbol der vollständig geladenen Batterie ( ) auf dem Bildschirm. Das Netzteil aus der Netzsteckdose und von der Unterseite des Gerätes abziehen. Das Micro I kann nun als tragbares Gerät verwendet werden. Hinweis: Das Micro I kann auch mit dem mitgelieferten USB-Kabel über einen PC oder Laptop aufgeladen werden. - Page 155 Um diesen Vorgang zu erleichtern, weist Halteklemme 1 eine Vertiefung im Gerätegehäuse auf, sodass ein kleiner Schraubendreher mit flacher Spitze vorsichtig unter die Klemme geschoben werden kann, um diese zu lösen. Anschließend die Halteklemmen 2, 3 und 4 mit dem Schraubendreher lösen.
-
Page 156: Kalibrationsprüfung
Kalibrationsprüfung Das Micro I ist auf die Anzeige in Litern bei Körpertemperatur und Luftdruck mit Wasserdampfsättigung (BTPS) kalibriert. Solange der Transducer nicht beschädigt wird, sollte die Kalibration auf unbegrenzte Zeit erhalten bleiben und das Gerät keine erneute Kalibration erfordern. Um die korrekte Funktionsfähigkeit des Gerätes sicherzustellen, wird allerdings die regelmäßige Durchführung einer... -
Page 157: Reinigungsanleitung
Reinigung der im Gasweg des Patienten befindlichen Teile empfohlen. Bei Verwendung eines pädiatrischen/erwachsenen Einmal-Mundstücks ohne Filter und unter der Voraussetzung, dass der Patient angewiesen wurde nur in das Micro I Messgerät auszuatmen, müssen die folgenden Teile ein Mal täglich gereinigt werden: Volumentransducer, Mundstückadapter und pädiatrischer Adapter. -
Page 158: Reinigen Des Transducers
Wasser oder Reinigungslösungen gereinigt oder eingetaucht werden. Dadurch können die internen elektronischen Komponenten permanent beschädigt werden. Wartung Falls Ihr Gerät Wartungs- oder Reparaturarbeiten erfordert, siehe Kontaktinformationen auf Seite 289. Das Micro I enthält keine Teile, die vom Anwender gewartet werden können. -
Page 159: Informationen Zur Fehlerbehebung
Interne Batterie An den Instrumentes wird die des Micro I ist Vertragshändler Uhrzeit als 00:00 fehlerhaft wenden angezeigt Das Micro I liegt bei der Undichtigkeiten Pumpe und Kalibrationsprüfung in der Pumpe Anschlüsse auf außerhalb des %-Bereichs oder den Undichtigkeiten Anschlüssen... -
Page 160: Sicherheitsbestimmungen Gemäß Iec 60601-1
Sicherstellen, dass das Netzteil nicht feucht wird • Das Netzteil nicht verwenden, wenn es beschädigt ist • Vor der Reinigung das Micro I stets von der Stromversorgung trennen • Keine Geräte anschließen, die nicht als Bestandteil des WARNUNG: Systems angegeben sind... - Page 161 WARNUNG: Es dürfen keine Modifikationen an diesen Geräten vorgenommen werden. HINWEIS: Wenn eine Mehrfachsteckdose (MPSO) mit dem System verwendet wird, darf die maximal zulässige Last nicht überschritten werden. Keine elektrischen Geräte anschließen, die nicht als Bestandteil des Systems geliefert wurden.
-
Page 162: Elektromagnetische Verträglichkeit (Emv) Gemäß En60601-1:2007
Wenn Kabel vom Bediener verlängert werden oder wenn unzulässiges Zubehör eingesetzt wird, kann dies zu vermehrten Emissionen oder einer verminderten Immunität in Bezug auf die EMV des Micro I führen. Da Zubehör zum Micro I sollte nicht mit anderen Geräten verwendet werden, da dies zu erhöhten Emissionen oder einer verminderten Immunität in Bezug auf die EMV der... - Page 163 Leitlinien und Erklärung des Herstellers – elektromagnetische Emissionen Das Micro I dient zur Anwendung im nachstehend beschriebenen elektromagnetischen Umfeld. Der Kunde oder der Bediener des Micro I sollten sicherstellen, dass es in einer solchen Umgebung betrieben wird Emissionsprüfung Compliance Elektromagnetisches Umfeld –...
- Page 164 (>60 % Abfall von < 40 % UT gebung entsprechen. (>60 % Wenn der Bediener Spannungs- über 5 Zyklen Abfall von des Micro I während versorgungs- < 70 % UT eines Netzausfalls leitungen (>30 % Abfall von über 5 einen fortgesetzten...
- Page 165 Leitlinien und Erklärung des Herstellers – elektromagnetische Immunität Das Micro I dient zur Anwendung im nachstehend beschriebenen elektromagnetischen Umfeld. Der Kunde oder der Bediener des Micro I sollten sicherstellen, dass es in einer solchen Umgebung betrieben wird. Störfestig- IEC 60601- Compliance- Elektromagnetisches Umfeld –...
- Page 166 Für die Einschätzung der elektromagnetischen Umgebung von ortsfesten HF-Transmittern sollte eine Standortaufnahme durchgeführt werden. Wenn die gemessene Feldstärke an dem Ort, an dem das Micro I verwendet wird, die Werte der anwendbaren Hochfrequenzauflagen übersteigt, sollte das Micro I beobachtet werden, um einen einwandfreien Betrieb sicherzustellen. Wenn Abweichungen von der normalen Funktion festgestellt werden, sind u.
-
Page 167: Symbole
Symbole Gerät Typ B In Übereinstimmung mit der Richtlinie 93/42/EEC 0086 Entsorgung gemäß WEEE (Richtlinien zur Entsorgung von Elektro- und Elektronik-Altgeräten) Gebrauchsanweisung beachten Vorsicht: beiliegende Dokumente beachten Herstellungsdatum Hersteller Seriennummer Laut Bundesgesetz der USA darf diese Vorrichtung ausschließlich an einen Arzt oder auf dessen Anordnung verkauft werden. - Page 168 Bitte beachten: Die Angaben in dieser Bedienungsanleitung können ohne Vorankündigung geändert werden und stellen keine Verpflichtung seitens CareFusion UK 232 Ltd. dar. Die Software darf nur in Übereinstimmung mit den Bedingungen dieser Vereinbarung verwendet oder kopiert werden. Kein Teil dieser Bedienungsanleitung darf ohne schriftliche Genehmigung von CareFusion UK 232 Ltd.
-
Page 169: Spezifikationen Des Micro I
Spezifikationen des Micro I Messungen: Forciertes exspiratorisches Volumen in 1 Sekunde (FEV1) Forciertes exspiratorisches Volumen in 6 Sekunden (FEV6) Forcierte Vitalkapazität (FVC) Forciertes exspiratorisches Verhältnis (FEV1/FEV6) Forciertes exspiratorisches Verhältnis (FEV1/FVC) Max. Exspirationsfluss-Rate (PEF) Mittlerer Exspirationsfluss (FEF25-75) Exspirationsfluss bei 75 % Restvolumen (FEF75) -
Page 170: Verbrauchsartikel/Zubehör
36-SSC5000A PeraSafe Sterilisationspulver, 81 g (zur Herstellung von 5 Litern Lösung) 36-VOL2104 Nasenklemmen (5er-Packung) 36-SM2125 3-Liter-Kalibrationspumpe 36-MLD1621 Mundstück-Adapter 36-BAT1043 Batteriepackung (NiMH AA 2,4 V, 1600 mAh) 36-PSU1017 5 V DC 1,2 A (GlobTek WR9QA1200USBNR-G2267) BITTE BEACHTEN: NUR ZUBEHÖRTEILE VON CAREFUSION VERWENDEN... - Page 171 Espirómetro de diagnóstico Micro I Manual de funcionamiento Contenido...
-
Page 172: Introducción
Introducción El Micro I es un espirómetro de diagnóstico compacto y totalmente portátil que funciona con batería recargable. Cumple con precisión con los requisitos del ATS/ERS TASK FORCE: STANDARDISATION OF LUNG FUNCTION TESTING 2005. Su diseño ergonómico y fácil de usar permite realizar mediciones de espirometría de diagnóstico, incluidos... -
Page 173: Contenido Del Envase
Contenido del envase El Micro I viene envasado en un práctico estuche de transporte y acompañado de los siguientes artículos (Fig.1): Espirómetro Micro I Transductor de volumen digital de CareFusion junto con boquillas de cartón desechables y manual de instrucciones. -
Page 174: Contraindicaciones, Advertencias Y Precauciones
Contraindicaciones, advertencias y precauciones Contraindicaciones: dado que la realización de una espirometría puede ser físicamente exigente, está contraindicada en pacientes que hayan sufrido recientemente un infarto de miocardio. Asimismo, la espiración extensa puede ocasionar un síncope. Los términos siguientes se utilizan en este manual con el significado que se explica a continuación Precaución: Posibilidad de lesiones o daños graves Advertencia: situaciones o prácticas que pueden provocar lesiones... - Page 175 PRECAUCIÓN: no permita que el paciente manipule el espirómetro cuando esté conectado al suministro eléctrico para cargarlo o a un PC durante la configuración de la unidad. ADVERTENCIA: El usuario no debe tocar piezas bajo tensión y al paciente al mismo tiempo. TENGA EN CUENTA QUE: El producto que ha adquirido no debe desecharse como parte de los residuos sin clasificar.
-
Page 176: Uso Indicado
Uso indicado El espirómetro Micro I está diseñado para medir el volumen y el flujo de aire máximos que pueden expulsarse de los pulmones de un paciente. El sistema está diseñado para su uso en pacientes pediátricos a partir de los 3 años de edad y en adultos en hospitales, consultas médicas, laboratorios y entornos de pruebas sanitarias ocupacionales. -
Page 177: Configuración
Conecte el Micro I al PC con el cable USB suministrado. Ejecute el software y encienda el Micro I. El PC software detectará que el Micro I está conectado. Siga las instrucciones en... -
Page 178: Micro I Pc Software
Micro I PC Software Este software le permite personalizar los ajustes del espirómetro Micro I, así como generar, guardar como PDF e imprimir informes completos de espirometría con información demográfica, índices y gráficos de volumen de flujo y de volumen/tiempo de los pacientes. - Page 179 Haga clic en “Siguiente” para continuar. Aparecerá el cuadro de diálogo Seleccionar ubicación de destino donde se muestra el directorio en el que se instalará el Micro I PC Software. La ubicación predeterminada es: C:\Archivos de programa\CareFusion\Micro I PC Software Si desea cambiar esta ubicación seleccione “Examinar”.
- Page 180 Cuando los archivos se hayan copiado en el sistema, se le informará de que el Micro I PC Software se ha instalado correctamente y se le recomienda que reinicie el equipo antes de usar la aplicación. Haga clic en “Finalizar” para completar el proceso de instalación.
- Page 181 El Micro I PC software se iniciará de forma automática cuando se conecte una unidad Micro I al ordenador y aparecerá la primera pantalla: Desde esta pantalla, puede introducir un ID y el nombre del paciente para generar un informe. Las opciones en Paciente permiten que se carguen los últimos resultados desde Micro I y puede generarse una...
- Page 182 Cuando se utilice la opción para cambiar la configuración del dispositivo, la pantalla cambiará a: Si selecciona la opción “Personalizado” en la parte superior de la pantalla, todas las funciones del Micro I podrán personalizarse según sus requisitos específicos.
-
Page 183: Funcionamiento
Funcionamiento El Micro I está indicado para una amplia variedad de aplicaciones, desde las pruebas de espirometría más simples en las que solo es necesario visualizar algunos índices hasta un funcionamiento más complejo que precisa desviación de la norma, respuesta del broncodilatador e interpretación de los resultados. -
Page 184: Examen Rápido
Examen rápido Tras seleccionar esta opción, la pantalla cambiará a: El Micro I puede usarse directamente con un filtro MicroGuard o con una boquilla de cartón desechable con el adaptador suministrado. Introduzca la boquilla o el filtro MicroGuard en el soporte de la boquilla del espirómetro. - Page 185 Los resultados del espirómetro para dicho soplido aparecen junto con la revisión de calidad de la maniobra en función a las pautas de ATS/ERS. Pulsando la tecla de dirección arriba es posible visualizar otros índices (si están configurados) y los mejores resultados de una secuencia de soplidos.
-
Page 186: Examen Con Valores Previstos
Examen con valores previstos Cuando se ha seleccionado esta opción aparece lo siguiente: La fecha de nacimiento que se muestre será la del último paciente analizado, seleccione "Sí" para confirmar que la fecha de nacimiento es correcta o "No" para introducir la fecha de nacimiento del paciente que se vaya a analizar. - Page 187 étnico de acuerdo con las ecuaciones de NHANES III. Si se utilizan valores previstos de Quanjer-GLI (2012), se utilizará el origen étnico de acuerdo a las ecuaciones de Quanjer-GLI (2012). Tenga en cuenta que el Micro I puede configurarse para aceptar la altura en pulgadas.
- Page 188 Si se comete un error, no tiene más que pulsar la tecla de retroceso para volver a la entrada anterior. Una vez que se hayan introducido todos los datos del paciente, aparecerá la siguiente pantalla y puede realizarse una prueba de espirometría: Tras realizar una prueba se muestran los resultados: En cada maniobra se revisa la calidad para un inicio rápido, un final...
- Page 189 Si se toca accidentalmente esta tecla, no tiene más que pulsar la tecla de retroceso para volver a la pantalla de los resultados. El Micro I puede configurarse para mostrar la puntuación Z en lugar del porcentaje de valores previstos, donde están disponibles los datos de los conjuntos de valores previstos: La puntuación Z es el número de desviaciones estándar que los...
-
Page 190: Examen Post Bd
EE.UU. (NLHEP) en el menú de configuración cuando se enciende la unidad por primera vez o posteriormente en la opción Ajustes en el menú principal. En este modo, la funcionalidad del Micro I cumple estrictamente los requisitos del National Lung Health Education Program (Programa Nacional de Educación en Salud Pulmonar). -
Page 191: Revisiones De Calidad Del Nlhep
Revisiones de calidad del NLHEP A fin de que sea posible mostrar la interpretación, es necesario que una maniobra pase una serie de revisiones de calidad mejoradas. Después de que el paciente haya realizado una maniobra de mala calidad, aparecerá uno de los tres mensajes siguientes: Mensaje Criterios Acción recomendada... -
Page 192: Niveles Del Cc Del Nlhep
Cuando dos maniobras fallen alguna de las revisiones de uniformidad, se guardarán los mejores resultados individuales de ambas (FEV1, FEV6, y PEF individualmente). Cuando aparezca alguno de los mensajes anteriores, indíquele al paciente modo mejorar maniobras hágale demostración de una maniobra correcta. Niveles del CC del NLHEP La calidad de cada sesión se puntúa de acuerdo con los siguientes criterios:... -
Page 193: Desconexión
USB. Mantenimiento Gestión de la batería El Micro I recibe la alimentación de un paquete de batería recargable. El voltaje de la batería se supervisa y aparece una advertencia al activar la unidad cuando la batería comienza a agotarse. -
Page 194: Cambio De La Batería
) Retire el adaptador de alimentación del tomacorriente y de la base de la unidad. El Micro I ya puede utilizarse como dispositivo portátil. Nota: el Micro I también puede cargarse desde un PC o un ordenador portátil con el cable USB suministrado. Cambio de la batería La duración de todas las baterías recargables es limitada, por lo que... - Page 195 Para facilitar este proceso, la presilla 1 tiene un hueco moldeado en el cuerpo del dispositivo que permite introducir un destornillador pequeño de hoja plana bajo la presilla y soltarla. Cuando haya liberado esta presilla, continúe con la 2, la 3 y la 4. Por último, retire la cubierta de la parte inferior de la unidad que libera a su vez las presillas 5 y 6.
-
Page 196: Comprobación De Calibración
Comprobación de la calibración en el menú Ajustes y en la pantalla aparecerá: Conecte una jeringa de 3 l al Micro I con el mínimo de adaptadores e inyecte el volumen de la jeringa al transductor uniformemente y sin efectuar ninguna pausa. Cuando termine en la pantalla se vera:... -
Page 197: Instrucciones De Limpieza
Si esto ocurre, compruebe que no haya fugas en la jeringa y en las conexiones, y repita la prueba. Si el Micro I está fuera del intervalo de calibración repetidas veces, es necesario devolver la unidad a CareFusion para reparación. -
Page 198: Limpieza Del Transductor
Reparaciones Si su unidad requiere mantenimiento o reparaciones, consulte la página 289 para obtener la información de contacto. El Micro I no cuenta con ninguna pieza que pueda reparar el usuario. -
Page 199: Información Sobre Resolución De Problemas
00:00 Micro I está su distribuidor. defectuosa Micro I está fuera del % Hay fugas en la Compruebe que no cuando se lleva a cabo jeringa o en las haya fugas en la una comprobación de... -
Page 200: Designación De Seguridad Según Iec 60601-1
(5 V CC) • Asegúrese de que el adaptador no pueda mojarse • No utilice un adaptador deteriorado • Desenchufe siempre el Micro I antes de su limpieza ADVERTENCIA: no conecte dispositivos que no se hayan especificado como componentes del sistema. - Page 201 NOTA: si se utiliza un tomacorriente portátil múltiple con el sistema, no deberá excederse la carga máxima permitida. No conecte equipo eléctrico que no se haya suministrado como componente del sistema.
-
Page 202: Compatibilidad Electromagnética (Cem) Con En60601-1:2007
Los cambios o las modificaciones en Micro I pueden dar lugar a un aumento en las emisiones o a una reducción en la inmunidad de Micro I en relación con el rendimiento de la CEM. - Page 203 Directrices y declaración del fabricante: emisiones electromagnéticas Micro I está diseñado para su uso en el entorno electromagnético especificado a continuación. El cliente o usuario de Micro I debe asegurarse de que se utilice en este tipo de entorno Prueba de Conformidad Entorno electromagnético:...
- Page 204 Si el voltaje en las 40% UT 40% UT usuario de Micro I líneas de (descenso >60 % (descenso >60 necesita un entrada del en UT) % en UT) funcionamiento...
- Page 205 Directrices y declaración del fabricante: inmunidad electromagnética Micro I está diseñado para su uso en el entorno electromagnético especificado a continuación. El cliente o usuario de Micro I debe asegurarse de que se utilice en este tipo de entorno. Prueba de...
- Page 206 Si la intensidad de campo medida en la ubicación en la que se utiliza Micro I supera el nivel de conformidad de RF aplicable descrito anteriormente, el sistema Micro I debe someterse a una inspección para verificar que funciona correctamente.
-
Page 207: Símbolos
Símbolos Dispositivo tipo B De conformidad con la directiva 93/42/CEE 0086 Eliminación de conformidad con RAEE Consultar las instrucciones de uso Precaución: consultar la documentación adjunta Fecha de fabricación Fabricante Número de serie las leyes federales (EE.UU.) sólo permiten la venta de este dispositivo bajo prescripción facultativa. - Page 208 Tenga en cuenta que: La información recogida en este manual está sujeta a cambios sin previo aviso y no representa compromiso alguno para CareFusion UK 232 Ltd. El software puede utilizarse y copiarse solo de acuerdo con los términos de este acuerdo. Ninguna sección de este manual puede reproducirse ni transmitirse de ninguna forma o mediante ningún medio, electrónico o mecánico, incluidos el...
-
Page 209: Especificaciones Del Micro I
Especificaciones del Micro I Mediciones: Volumen de expiración forzada en 1 segundo (FEV1) Volumen de expiración forzada en 6 segundos (FEV6) Capacidad vital forzada (FVC) Relación de expiración forzada (FEV1/FEV6) Relación de expiración forzada (FEV1/FVC) Frecuencia del flujo espiratorio máximo (PEF) -
Page 210: Consumibles/Accesorios
Pinzas nasales (paquete de 5) 36-SM2125 Jeringa de calibración de 3 litros 36-MLD1621 Adaptador de boquilla 36-BAT1043 Paquete de baterías (NiMH AA 2,4 V, 1.600 mAh) 36-PSU1017 5 V CC 1,2 A (GlobTek WR9QA1200USBNR-G2267) TENGA EN CUENTA QUE: SOLO DEBEN USARSE ACCESORIOS DE CAREFUSION... -
Page 211: Índice
Espirómetro de Diagnóstico Micro I Manual de Instruções Índice... -
Page 212: Vi. Introdução
VI. Introdução O Micro I é um espirómetro de diagnóstico compacto, que funciona com pilhas recarregáveis e é completamente portátil. Está em conformidade com as exigências da TASK FORCE ATS/ERS: UNIFORMIZAÇÃO DE TESTES DE FUNÇÃO PULMONAR DE 2005. O seu design ergonómico e prático permite que as medições de espirometria... -
Page 213: Conteúdo Da Embalagem
Conteúdo da Embalagem O Micro I vem embalado com um prático estojo de transporte e os seguintes itens (Fig.1): Espirómetro Micro I 2. Transdutor de Volume Digital CareFusion, juntamente com bocais descartáveis de cartão e manual de instruções. Fonte de alimentação universal (36-PSU1017 5 V CC 1,2 A) Adaptador de bocal de cartão... -
Page 214: Contra-Indicações, Avisos E Cuidados
Contra-indicações, Avisos e Cuidados Contra-indicações: Dado que a realização de espirometria pode ser fisicamente desgastante, está contra-indicada para pacientes que tenham tido um enfarte do miocárdio recentemente. Além disso, a exalação profunda pode dar origem a síncope. Os termos que se seguem são utilizados da seguinte forma neste manual Cuidado: Possibilidade de lesões ou danos graves Aviso: condições ou práticas que podem resultar em lesões corporais. - Page 215 CUIDADO: Não permita que o paciente manuseie o espirómetro quando está ligado à fonte de alimentação para carregar ou a um PC para configurar a unidade. AVISO: O usuário não deve tocar em nenhuma peça condutora de tensão e no paciente ao mesmo tempo. ATENÇÃO: O produto que comprou não deve ser eliminado como lixo comum.
-
Page 216: Utilização Prevista
Utilização Prevista O Espirómetro Micro I destina-se a medir o volume máximo e fluxo de ar que pode ser retirado dos pulmões de um paciente. O sistema destina-se a ser utilizado em pacientes adultos e pediátricos com idade superior a 3 anos, em hospitais, consultórios médicos, laboratórios e ambientes de testes de saúde ocupacional. -
Page 217: Configuração
Ligue o Micro I ao PC utilizando o cabo USB fornecido. Execute o software e ligue o Micro I. O software de PC irá detectar que o Micro I está conectado. Siga as instruções no ecrã para... -
Page 218: Micro I Pc Software
Micro I PC Software Este software permite-lhe configurar as definições do seu espirómetro Micro I e criar relatórios de espirometria completos que contenham os dados demográficos do paciente, os índices e os gráficos de fluxo/e de volume/tempo que irão ser gerados e guardados como ficheiro PDF ou impressos. - Page 219 Se o programa de configuração não se abrir automaticamente, utilize o Explorador do Windows para seleccionar manualmente a unidade de CD e, em seguida, abra o ficheiro Micro I PC Software.exe. É apresentado o Contrato de Licença. Leia e certifique-se de que compreende o documento na íntegra antes de aceitar os termos da...
- Page 220 Executar Micro I PC Software Ligue o seu Micro I a uma porta USB no seu PC utilizando o cabo fornecido. O Micro I receberá energia da porta USB no seu PC. Por favor, tenha em mente que o Micro I requer uma porta USB de corrente elevada e que, se for ligado a uma porta USB de baixa potência, o aparelho desligar-se-á...
- Page 221 O software Micro I PC é iniciado automaticamente sempre que é ligada uma unidade Micro I ao computador, sendo apresentado o primeiro ecrã: Neste ecrã pode introduzir um ID e os nomes dos pacientes, para gerar um relatório. As opções de Paciente permitem que os últimos resultados sejam transferidos do Micro I, podendo ser feita uma pré-visualização do relatório para preparar a impressão ou, em...
- Page 222 Quando as opções de mudança de definições são utilizadas, o ecrã muda para: Ao seleccionar a opção ‘Personalizado’ no topo do ecrã poderá ajustar todas as funcionalidades do Micro I de acordo com as suas necessidades específicas.
-
Page 223: Funcionamento
Funcionamento O Micro I foi concebido para servir uma variedade de aplicações, desde o mais simples teste de espirometria, onde apenas alguns índices são necessários, a operações mais complexas, onde são necessárias informações como o desvio à norma, resposta ao broncodilatador ou interpretação de resultados. -
Page 224: Quick Exam (Exame Rápido)
Quick Exam (Exame Rápido) Após seleccionar esta opção, o ecrã muda para: O Micro I pode ser utilizado directamente com um filtro MicroGuard ou com um bocal de cartão descartável com o adaptador fornecido. Insira o bocal ou o filtro MicroGuard no suporte para o bocal do espirómetro. - Page 225 Os resultados de espirometria para esse sopro são, então, exibidos juntamente com o controlo de qualidade de procedimento de acordo com as directrizes ATS/ERS: Índices adicionais, se configurados, e os melhores resultados de uma sequência de sopros podem ser exibidos ao pressionar a tecla para baixo.
-
Page 226: Exame Com Valores Previstos
Exame com Valores Previstos Quando esta opção está seleccionada, é exibido o seguinte: A data de nascimento apresentada corresponderá à do último paciente testado, devendo ser selecionado ‘Sim’ para confirmar que a data de nascimento está correta ou ‘Não’ para introduzir a data de nascimento do paciente que vai ser testado. - Page 227 Se forem utilizados valores previstos Quanjer-GLI (2012), a origem étnica irá ser utilizada de acordo com as equações Quanjer-GLI (2012). Por favor, tenha em mente que o Micro I pode ser configurado para aceitar a altura em polegadas. Se for cometido um erro, toque simplesmente na tecla para trás e...
- Page 228 Quando tiver inserido todos os dados do paciente, o seguinte ecrã será exibido e será possível efectuar um teste de espirometria: Após efectuar um teste, os resultados são exibidos: É feito um controlo de qualidade a cada procedimento em termos de início lento, fim súbito, sopro curto, esforço fraco ou tosse de acordo com as directrizes ATS/ERS de 2005.
- Page 229 Enter acidentalmente, só necessita de carregar na tecla para trás para regressar ao ecrã dos resultados. O Micro I pode ser configurado para exibir o valor-Z em vez da percentagem dos valores previstos onde os dados dos conjuntos de valor previsto estiverem disponíveis: O valor-Z é...
-
Page 230: Post Bd Exam (Exame Pós-Bd)
(NLHEP) do menu de configuração quando o aparelho é ligado pela primeira vez ou, subsequentemente, através da opção Definições no menu principal. Neste modo, o Micro I fica a funcionar de acordo com os requisitos do Programa Nacional de Educação para a Saúde Respiratória (NLHEP). -
Page 231: Controlos De Qualidade Nlhep
Controlos de Qualidade NLHEP De forma a poder ser exibida a interpretação, um procedimento deverá passar conjunto controlos qualidade optimizados. Após o paciente efectuar um procedimento de fraca qualidade, deverá aparecer uma das três seguintes mensagens: Mensagem Critérios Acção recomendada Não hesitar Volume retroextrapolado O paciente deverá... -
Page 232: Grau De Cq Do Nlhep
No caso de dois procedimentos falharem qualquer um dos controlos de consistência, serão guardados os melhores resultados individuais dos dois (FEV1, FEV6 e PEF individualmente). Quando qualquer uma das mensagens supracitadas aparecer, instrua o paciente sobre como melhorar o seu procedimento e demonstre você... -
Page 233: Desligar
Para recarregar as pilhas, ligue o Micro I ao carregador fornecido e, em seguida, ligue o carregador a uma tomada de parede adequada, assegurando um fácil acesso ao carregador para o poder desligar facilmente. -
Page 234: Substituição Das Pilhas
ícone de pilhas totalmente carregadas. ( ) Desligue o adaptador da tomada de parede e da base da unidade. O Micro I pode agora ser utilizado como um aparelho portátil. Nota: O Micro I também pode ser carregado através de um computador fixo ou portátil, utilizando o cabo USB fornecido. - Page 235 Para ajudar este processo, o grampo 1 tem uma reentrância no aparelho que permite que se insira cuidadosamente uma pequena chave de fendas por baixo do grampo, para o soltar. Uma vez solto, utilize a chave de fendas nos grampos 2, 3 e 4. Por fim, faça deslizar a tampa pelo fundo do aparelho, o que soltará...
-
Page 236: Teste De Calibração
Para efectuar um teste de calibração, seleccione a opção de teste de calibração do menu de definições e o ecrã irá exibir: Ligue uma seringa de 3 L ao Micro I com o mínimo de adaptadores e injecte o volume da seringa no transdutor, de uma forma uniforme, sem parar. -
Page 237: Instruções De Limpeza
Usando um bocal descartável em crianças ou adultos sem um filtro e de acordo com o pré-requisito de que foi dito ao paciente para expirar para o aparelho Micro I, as seguintes peças devem ser limpas uma vez por dia: Transdutor de turbina, adaptador de bocal e adaptador pediátrico. -
Page 238: Assistência Técnica
água ou líquido de limpeza, uma vez que contêm componentes electrónicos que ficarão permanentemente danificados. Assistência técnica Se o seu aparelho necessitar de assistência técnica ou reparação, consulte a página 289 para os detalhes de contacto. Não existem peças que o utilizador possa reparar no Micro I. -
Page 239: Informações Sobre Resolução De Problemas
Informações sobre Resolução de Problemas Se encontrar problemas ao utilizar o seu espirómetro, por favor consulte a tabela abaixo: Problema Causa Solução Possível Não é possível ligar o Micro I As pilhas Recarregue as estão pilhas descarregadas De cada vez que liga o... -
Page 240: Designação De Segurança Segundo A Norma Iec 60601-1
• Certifique-se de que o adaptador não é molhado • Não utilize o adaptador se estiver danificado • Desligue sempre o Micro I antes de o limpar AVISO: Não ligue aparelhos que não são especificados como fazendo parte do sistema. - Page 241 AVISO: Não são permitidas quaisquer alterações a este equipamento. NOTA: Se o sistema for utilizado com tomadas portáteis múltiplas, a carga máxima permitida não deve ser excedida. Não ligue equipamento eléctrico que não tenha sido fornecido como parte do sistema.
-
Page 242: Compatibilidade Eletromagnética (Cem) De Acordo Com En60601-1:2007
(incluindo outros dispositivos médicos) O objetivo deste teste é garantir que o Micro I não irá afetar negativamente o funcionamento normal de tal equipamento e de que esse equipamento não afeta negativamente o funcionamento normal do Micro I. - Page 243 Orientações e Declaração do Fabricante – Emissões Eletromagnéticas O Micro I se destina à utilização nos ambientes eletromagnéticos especificados abaixo. O cliente ou o usuário do Micro I devem garantir que é utilizado nesse tipo de ambiente Teste de Conformidade Ambiente Eletromagnético -...
- Page 244 (60% queda em for necessário um linhas de em UT) funcionamento entrada de para 5 ciclos para 5 ciclos contínuo do Micro I alimentação 70% UT 70% UT durante as interrupções IEC61000-4- (30% queda (30% queda em de corrente elétrica,...
- Page 245 Orientações e Declaração do Fabricante – Imunidade Eletromagnética O Micro I se destina à utilização nos ambientes eletromagnéticos especificados abaixo. O cliente ou o usuário do Micro I devem garantir que é utilizado nesse tipo de ambiente Teste de Nível de Nível de...
- Page 246 Se as forças de campo medidas no local em que o Micro I estiver sendo utilizado excederem o nível de conformidade de RF aplicável indicado acima, o Micro I deve ser inspecionado para verificar o funcionamento normal.
-
Page 247: Símbolos
Símbolos Dispositivo tipo B Em conformidade com a Directiva 93/42/CEE 0086 Eliminação de acordo com a directiva de REEE Consulte as instruções de utilização Cuidado: consulte a documentação fornecida Data de fabrico Fabricante Número de série A lei federal dos Estados Unidos restringe a venda deste aparelho a médicos ou a pedido de um médico. - Page 248 Atenção: As informações contidas neste manual estão sujeitas a alterações sem aviso prévio e não representam qualquer compromisso por parte da CareFusion UK 232 Ltd. O software apenas poderá ser utilizado ou copiado em conformidade com os termos desse acordo. Nenhuma parte deste manual pode ser reproduzida ou transmitida em qualquer formato ou por qualquer meio, electrónico...
-
Page 249: Especificações Do Micro I
Especificações do Micro I Medições: Volume Expirado Forçado em 1 segundo (FEV1) Volume Expirado Forçado em 6 segundos (FEV6) Capacidade Vital Forçada (FVC) Relação Expiratória Forçada (FEV1/FEV6) Relação Expiratória Forçada (FEV1/FVC) Taxa de Débito Expiratório Máximo (PEF), Débito Expiratório Médio (FEF25-75) Débito Expiratório a 75% do volume restante (FEF75) -
Page 250: Consumíveis/Acessórios
36-VOL2104 Molas para o nariz (embalagens de 5) 36-SM2125 Seringa de calibração de 3 litros 36-MLD1621 Adaptador para bocal 36-BAT1043 Pilhas (NiMH AA 2,4 V, 1600 mAh) 36-PSU1017 5 V CC 1,2 A (GlobTek WR9QA1200USBNR-G2267) ATENÇÃO: UTILIZE APENAS ACESSÓRIOS CAREFUSION... -
Page 251: Inhoud
Micro I diagnostische spirometer Gebruikshandleiding Inhoud... -
Page 252: Vii. Inleiding
VII. Inleiding De Micro I is een compacte, geheel draagbare diagnostische spirometer die werkt op een herlaadbare batterij. De spirometer voldoet volledig aan de eisen van de ATS/ERS TASK FORCE: STANDARDISATION OF LUNG FUNCTION TESTING 2005. Door het ergonomisch en... -
Page 253: Inhoud Van De Verpakking
Inhoud van de verpakking De Micro I wordt geleverd in een handig draagtasje en omvat de volgende onderdelen (afbeelding 1): Micro I-spirometer CareFusion Digital Volume Transducer met wegwerpbare kartonnen mondstukken en instructieboekje. Universele voeding (36-PSU1017 5VDC 1,2A) Passtuk voor het kartonnen mondstuk USB-/oplaadkabel Afb. -
Page 254: Contra-Indicaties, Waarschuwingen En Aandachtspunten
Contra-indicaties, Waarschuwingen en aandachtspunten Contra-indicaties: Omdat het uitvoeren van spirometrie fysiek inspannend kan zijn, is dit gecontra-indiceerd voor patiënten die onlangs een myocardinfarct hebben gehad. Bovendien kan intense uitademing leiden tot flauwvallen. De volgende termen worden in deze handleiding als volgt gebruikt: Voorzichtig: Kans op letsel of ernstige schade Waarschuwing: omstandigheden of gebruikswijzen die kunnen leiden tot lichamelijk letsel. - Page 255 VOORZICHTIG: Laat de patiënt niet in aanraking komen met de spirometer als de spirometer op een voeding is aangesloten om te worden opgeladen of met een pc is verbonden om het apparaat te configureren. WAARSCHUWING De gebruiker dient niet tegelijkertijd onderdelen onder spanning en de patiënt aan te raken.
-
Page 256: Beoogd Gebruik
Aan de slag Het is aan te bevelen de Micro I-spirometer volledig op te laden voordat u het instrument gebruikt. Bij de voeding worden afzonderlijke stekkers geleverd voor gebruik in het Verenigd Koninkrijk, de VS en Europa. Sluit de benodigde stekker aan op de voeding en steek deze in een stopcontact. -
Page 257: Configuratie
Het is aan te raden om deze instellingen desgewenst te wijzigen via de pc-software. Sluit de Micro I op de pc aan met de meegeleverde USB-kabel. Voer het softwareprogramma uit en schakel de Micro I in. -
Page 258: Micro I Pc Software
Deze kunnen vervolgens worden opgeslagen als PDF-document of worden afgedrukt. Systeemvereisten Micro I PC Software heeft bepaalde hardware- en softwareonderdelen nodig om goed te werken. Pc-vereisten Er is een IBM-compatibele pc nodig met hardware die voldoet aan minimaal de volgende vereisten. - Page 259 Klik op ‘Volgende’ om verder te gaan. Het dialoogvenster Kies doellocatie geeft aan in welke map Micro I PC Software voor de pc zal worden geïnstalleerd. De standaardlocatie is: C:\Program Files\CareFusion\Micro I PC Software Klik op ‘Bladeren’...
- Page 260 Sluit met de meegeleverde kabel de Micro I aan op een USB-poort op de pc. De Micro I wordt gevoed vanaf de USB-poort op de pc. Het is van belang te weten dat er voor de Micro I een USB-poort nodig is die hoge spanning kan leveren.
- Page 261 In dit scherm kunt u een patiënt-id en de naam van de patiënt invoeren om een rapport te genereren. Met de opties onder Patiënt kunt u de laatste resultaten van de Micro I laden, tijdens de voorbereiding van het afdrukken een afdrukvoorbeeld van het rapport bekijken of een PDF maken van het te genereren rapport om deze op een specifieke locatie op te slaan.
- Page 262 Als de optie voor instellingen wijzigen wordt geselecteerd, krijgt u dit scherm te zien: Door de optie ‘Aangepast' boven in het scherm te kiezen, kunnen alle functies van Micro I aan uw specifieke eisen worden aangepast.
-
Page 263: Bediening
Bediening De Micro I is bedoeld om te kunnen worden gebruikt voor een reeks applicaties, van de eenvoudigste spirometrietest waar slechts een paar indices hoeven te worden weergegeven, tot complexer gebruik, waarvoor afwijking norm, bronchodilatorrespons interpretatie van resultaten vereist zijn. -
Page 264: Snel Onderzoek
Snel onderzoek Nadat deze optie is geselecteerd, krijgt u dit scherm te zien:+ De Micro I kan rechtstreeks worden gebruikt met een MicroGard-filter of met een wegwerpbaar kartonnen mondstuk met het meegeleverde passtuk. Breng het mondstuk of de MicroGard-filter in de mondstukhouder of de spirometer in. - Page 265 De spirometrieresultaten voor die uitblazing worden vervolgens samen met de kwaliteitscontrole van de manoeuvre op basis van de ATS/ERS-richtlijnen weergegeven: Verdere indices, indien dit zo is ingesteld, en de beste resultaten van een reeks uitblazingen kunnen worden weergegeven door de toets omlaag in te drukken.
-
Page 266: Onderzoek Met Voorspelde Waarden
Onderzoek met voorspelde waarden Als deze optie is geselecteerd, wordt het volgende weergegeven: De weergegeven geboortedatum zal van de laatst geteste patiënt zijn. Selecteer 'Ja' om te bevestigen dat deze geboortedatum juist is of 'Nee' om de juiste geboortedatum van de te testen patiënt in te vullen. Als 'Nee' wordt geselecteerd zal het scherm zo wijzigen dat de juiste geboortedatum kan worden ingevoerd. - Page 267 Quanjer-GLI (2012). Het is van belang op te merken dat de Micro I zo kan worden geconfigureerd dat lengte in inch wordt geaccepteerd. Als u een fout maat maakt, dan hoeft u alleen de toets Terug aan te raken om terug te keren naar de eerdere invoer.
- Page 268 Nadat de test is uitgevoerd, worden de resultaten weergegeven: De kwaliteit van elke manoeuvre wordt gecontroleerd op trage start, abrupt einde, korte uitademing, slechte inspanning of kuch volgens ATS/ERS 2005-richtlijnen. Een asterisk ( * ) aan het einde van de regel duidt op een resultaat onder de ondergrens van het normale bereik.
- Page 269 Indien de toets Enter onbedoeld wordt aangeraakt, druk dan op de toets Terug om terug te keren naar het scherm Resultaten. De Micro I kan zo worden geconfigureerd dat de Z-score wordt weergegeven in plaats van het percentage voorspelde waarden, als de...
-
Page 270: Postbronchodilatoronderzoek
- vanuit het configuratiemenu de optie USA (NLHP) te selecteren, of daarna, vanuit de optie Instellingen in het hoofdmenu. In deze modus conformeert de functionaliteit van de Micro I zich volledig aan de vereisten van het National Lung Health Education Program. -
Page 271: Kwaliteitscontroles Nlhep
Kwaliteitscontroles NLHEP Voor het weergeven van de interpretatie moeten manoeuvres een reeks strengere kwaliteitscontroles ondergaan. Nadat de patiënt een manoeuvre van slechte kwaliteit heeft verricht, verschijnt een van de drie volgende berichten: BERICHT Criteria Aanbevolen handeling Niet Teruggeëxtrapoleerd De patiënt moet de lucht aarzelen volume (BEV) hoger dan sneller, gelijkmatiger en... -
Page 272: Classificatie Kwaliteitscontroles Nlhep
Als twee manoeuvres een van beide consistentiecontroles niet doorstaan, dan worden de beste afzonderlijke resultaten van de twee opgeslagen (FEV1, FEV6 en PEF afzonderlijk). Wanneer een van bovenstaande berichten verschijnen, instrueer de patiënt dan hoe hij/zij zijn/haar manoeuvre kan verbeteren en doe de correcte manoeuvre voor. -
Page 273: Uitschakelen
De opgeslagen resultaten raken daarom niet verloren als de batterij leeg raakt. Om de batterij opnieuw op te laden moet de Micro I op de meegeleverde oplader worden aangesloten. Vervolgens moet de oplader op een geschikt stopcontact worden aangesloten, waarbij erop moet worden gelet dat de toegang tot de oplader niet wordt beperkt, zodat deze makkelijk kan worden verwijderd. -
Page 274: Batterij Vervangen
) Haal de voedingsadapter uit het stopcontact en uit de basis van het apparaat. De Micro I is nu gereed voor mobiel gebruik. Opmerking: De Micro I kan met de meegeleverde USB-kabel ook worden opgeladen via een pc of laptop. - Page 275 Gemakshalve is er bij klem 1 een inkeping in het apparaat aangebracht zodat een kleine, platte schroevendraaier voorzichtig onder het klemmetje kan worden gebracht om deze los te maken. Zodra het klemmetje is losgemaakt, doet u met de schroevendraaier hetzelfde met de klemmetjes 2, 3 en 4. Ten slotte schuift u de kap van de onderkant van het apparaat af, waardoor de klemmetjes 5 en 6 los komen.
-
Page 276: Calibration Check (Kalibratiecontrole)
U ziet dan het volgende scherm: Sluit een injectiespuit van 3 liter aan op de Micro I met zo min mogelijk verloopstukken en injecteer de inhoud van de spuit gelijkmatig en zonder onderbreking in de transducer. Zodra dit gereed... -
Page 277: Reinigingsinstructies
Als dit het geval is, controleer dan de spuit en de aansluitingen op lekkage en herhaal de controle. Indien de Micro I bij herhaling buiten het kalibratiebereik valt, moet het apparaat voor reparatie aan CareFusion worden geretourneerd. -
Page 278: De Transducer Reinigen
Reparatie Op pagina 289 leest u waarmee u contact kunt opnemen als uw apparaat onderhoud of reparatie nodig heeft. De Micro I bevat geen onderdelen die door de gebruiker kunnen worden gerepareerd. -
Page 279: Informatie Over Probleemoplossing
Informatie over probleemoplossing Raadpleeg onderstaande tabel als u problemen ondervindt bij het gebruik van uw spirometer: Probleem Mogelijke Oplossing oorzaak De Micro I kan niet worden De batterijen Batterijen opladen ingeschakeld zijn dood Telkens waneer het De inwendige Neem contact op... -
Page 280: Veiligheidsaanduiding Volgens Iec 60601-1
(5V DC) • Zorg dat de adapter niet nat wordt • Gebruik geen beschadigde adapter • Haal altijd de stekker uit het stopcontact voordat u de Micro I gaat reinigen WAARSCHUWING: Sluit geen apparaten aan die niet zijn aangegeven als onderdeel van het systeem. - Page 281 WAARSCHUWING: Er mogen geen wijzigingen aan deze apparatuur worden uitgevoerd. OPMERKING:Indien er met het systeem een draagbare stekkerdoos wordt gebruikt, mag de maximaal toegestane belasting niet worden overschreden. Sluit geen elektrische apparatuur aan die niet is meegeleverd als onderdeel van het systeem.
-
Page 282: Elektromagnetische Compatibiliteit (Emc) Volgens En60601-1:2007
Indien de gebruiker een van de kabels verlengt of zich van niet-goedgekeurde accessoires bedient, leidt dit mogelijk tot een verhoogde emissie of kan dit de weerstand van de Micro I op het vlak van EMC benadelen. Geen van de Micro I-accessoires mag in combinatie met andere apparaten worden gebruikt,... - Page 283 Richtlijnen en verklaring van de fabrikant – Elektromagnetische emissies De Micro I is bedoeld voor gebruik in de elektromagnetische omgeving die hieronder is vermeld. De klant of de gebruiker van de Micro I moet controleren of deze in een dergelijke omgeving wordt gebruikt Emissietest...
- Page 284 Richtlijnen en verklaring van de fabrikant – Elektromagnetische immuniteit De Micro I is bedoeld voor gebruik in de elektromagnetische omgeving die hieronder is vermeld. De klant of de gebruiker van de Micro I moet controleren of deze in een dergelijke omgeving wordt gebruikt.
- Page 285 Richtlijnen en verklaring van de fabrikant – Elektromagnetische immuniteit De Micro I is bedoeld voor gebruik in de elektromagnetische omgeving die hieronder is vermeld. De klant of de gebruiker van de Micro I moet controleren of deze in een dergelijke omgeving wordt gebruikt.
- Page 286 Er moet een elektromagnetisch onderzoek op locatie worden overwogen om de elektromagnetische omgeving bij vaste RF-zenders te beoordelen. Als de gemeten veldsterkte in de locatie waar de Micro I wordt gebruikt het geldende RF-overeenstemmingsniveau overstijgt, moet de Micro I worden gecontroleerd op normale werking.
-
Page 287: Symbolen
Symbolen Apparaat type B Conform richtlijn 93/42/EEG 0086 Afvoer in overeenstemming met WEEE-richtlijn Raadpleeg de gebruiksinstructies Voorzichtig: raadpleeg de meegeleverde documentatie Fabricagedatum Fabrikant Serienummer De Amerikaanse federale wetgeving bepaalt dat dit hulpmiddel alleen mag worden gekocht door of in opdracht van een arts. ("Rx only") NRTL-laboratorium officieel erkend door het Amerikaans agentschap voor veiligheid en gezondheid op het werk (OSHA) voor wat betreft elektrische... - Page 288 N.B.: De informatie in deze handleiding kan zonder kennisgeving worden gewijzigd en vertegenwoordigt geen enkele verbintenis van de kant van CareFusion UK 232 Ltd. De software mag alleen worden gebruikt of gekopieerd in overeenstemming met de voorwaarden van die overeenkomst. Niets van deze handleiding mag worden gereproduceerd of in enige vorm of op enige wijze, elektronisch of mechanisch, waaronder het maken van fotokopiën en opname voor...
-
Page 289: Specificatie Van De Micro I
Specificatie van de Micro I Metingen: Geforceerd expiratoir volume in 1 seconde (FEV1) Geforceerd expiratoir volume in 6 seconden (FEV6) Geforceerde vitale capaciteit (FVC) Geforceerde expiratoire ratio (FEV1/FEV6) Geforceerde expiratoire ratio (FEV1/FEV) Expiratoire piekflowfrequentie (PEF) Middenflow uitademing (FEF25-75) Expiratoire flow op 75% van resterend volume (FEF75) -
Page 290: Verbruiksartikelen/Accessoires
36-SSC5000A PeraSafe sterilisatiepoeder 81 g (voor 5 liter oplossing) 36-VOL2104 Neusclips (pak van 5) 36-SM2125 Kalibratiespuit van 3 liter 36-MLD1621 Passtuk voor mondstuk 36-BAT1043 Batterij (NiMH AA 2.4V, 1600mAh) 36-PSU1017 5V DC 1,2A (GlobTek WR9QA1200USBNR-G2267) OPMERKING: GEBRUIK ALLEEN ACCESSOIRES VAN CAREFUSION... - Page 291 Customer contact information UK Customers only For all Sales Order processing for products, training and spare parts, Service and Technical Support enquiries, please contact the following: CareFusion UK 232 Ltd UK Customer Service & Support The Crescent Jays Close Basingstoke...
- Page 292 International customers only For all Sales Order processing for products and Spare parts, Service and Technical Support enquiries, please contact the following: Carefusion Germany 234 GmbH Customer Service & Support International Leibnizstrasse 7 97204 Hoechberg Germany Customer Service Sales Enquiries:...
- Page 294 CareFusion UK 232 Ltd. The Crescent Jays Close Basingstoke RG22 4BS U.K. 0086 JDE no. 36-MAN1290 Drg no. 122-14WW (PART 1) Issue 1.2 May 2014 © CareFusion 2014 carefusion.com/micromedical...
Need help?
Do you have a question about the Micro I and is the answer not in the manual?
Questions and answers