Table of Contents
Advertisement
Quick Links
THIS IS NOT A UL
LISTED APPLIANCE
Contact your local building or fire officials about
obtaining permits, restrictions and installation inspection
requirements in your area.
Save these instructions.
SAFETY NOTICE:
If this heater is not properly installed, a house fi re may result.
For your safety, follow the installation instructions. Never
use make-shift compromises during the installation of this
heater. Contact local building or fi re offi cials about permits,
restrictions and installation requirements in your area.
United States Stove Company • 227 Industrial Park Road • P.O. Box 151 • South Pittsburg, TN 37380 • www.usstove.com
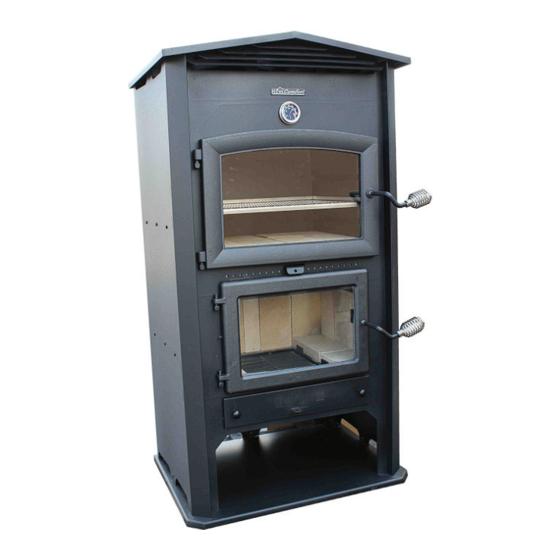
MODEL: PW100
WOOD BURNING OVEN
OWNER'S MANUAL
FOR TECHNICAL ASSISTANCE: PHONE: (800) 750-2723
CAUTION!
Please read this entire manual before you install or use
your new room heater. Failure to follow instructions may
result in property damage, bodily injury, or even death.
Improper Installation Could Void Your Warranty!
FAX: (423) 837-2129
Part No.: 852121B
Advertisement
Table of Contents

Related Manuals for HomComfort PW100

Summary of Contents for HomComfort PW100
- Page 1 MODEL: PW100 WOOD BURNING OVEN THIS IS NOT A UL LISTED APPLIANCE Contact your local building or fire officials about obtaining permits, restrictions and installation inspection requirements in your area. Save these instructions. OWNER’S MANUAL SAFETY NOTICE: CAUTION! If this heater is not properly installed, a house fi re may result.
- Page 2 CONGRATULATIONS! You’ve purchased an oven from North America’s oldest manufacturer of wood burning products. By cooking with wood you’re helping to CONSERVE ENERGY! Wood is our only Renewable Energy Resource. Please do your part to preserve our wood supply. Plant at least one tree each year. Future generations will thank you. The instructions pertaining to the installation of your wood burring oven comply with NFPA 211.
-
Page 3: Safety Precautions
SAFETY PRECAUTIONS IMPORTANT: Read this entire manual before installing and Creosote-Formation and need for removal. When wood is operating this product. Failure to do so may result in property burned slowly it produces tar and other organic vapors that damage, bodily injury, or even death. -
Page 4: Firebrick Installation
ASSEMBLY ASSEMBLY INSTRUCTIONS This appliance is offered with optional side tables. You must purchase the kit separately from your appliance dealer. Read and follow instructions in this manual and inside the kit to ensure proper assembly, installation and operation of you new appliance. Caution! The appliance is very heavy. -
Page 5: Oven Installation
OVEN INSTALLATION SAFETY NOTICE • IF THIS OVEN IS NOT PROPERLY INSTALLED, A HOUSE FIRE MAY RESULT. TO REDUCE THE RISK OF FIRE, FOLLOW THE INSTALLATION INSTRUCTIONS. • CONSULT YOUR MUNICIPAL BUILDING DEPARTMENT OR FIRE OFFICIALS ABOUT PERMITS, RESTRICTIONS AND INSTALLATIONS REQUIREMENTS IN YOUR AREA. •... -
Page 6: Floor Protection
FLOOR PROTECTION This heater must have a non-combustible fl oor protector (ember protection) installed beneath it if the fl oor is of combustible material. If a fl oor pad is used, it should be UL listed or equal. If the fl oor protector is not UL Listed, then it must comply with NFPA 211. -
Page 7: Chimney Connector (Stove Pipe)
VENTILATION CHIMNEY CONNECTOR (STOVE PIPE) Your chimney connector and chimney must have the same diameter as the appliance outlet (6”). If this is not the case, we recommend you contact your dealer in order to insure there will be no problem with the draft. The stove pipe must be made of aluminized or cold roll steel with a minimum thickness of 0.021”... - Page 8 CHIMNEY Your wood appliance may be hooked up with a 6” factory built or masonry chimney. If you are using a factory built chimney, it must comply with UL 103 or CSA-B365 standard; therefore, it must be a Type HT (2100°F). It is extremely important that it be installed according to the manufacturer’s specifi...
-
Page 9: Masonry Chimney
MASONRY CHIMNEY : Ensure that a masonry chimney meets the minimum standards of the National Fire Protection Association (NFPA) by having it inspected by a professional. Make sure there are no cracks, loose mortar or other signs of deterioration and blockage. Have the chimney cleaned before the appliance is installed and operated. -
Page 10: Factory Built Chimney
FACTORY BUILT CHIMNEY : When a metal prefabricated chimney is used, the manufacturer’s installation instructions must be followed. You must also purchase (from the same manufacturer) and install the ceiling support package or wall pass-through and “T” section package, fi restops (where needed), insulation shield, roof fl... -
Page 11: Combustible Wall Chimney Connector Pass-Throughs
COMBUSTIBLE WALL CHIMNEY CONNECTOR PASS-THROUGHS Method A. 12” (304.8 mm) Clearance to Combustible Wall Member: Using a minimum thickness 3.5” (89 mm) brick and a 5/8” (15.9 mm) minimum wall thickness clay liner, construct a wall pass-through. The clay liner must conform to ASTM C315 (Standard Specifi cation for Clay Fire Linings) or its equivalent. -
Page 12: Vent Termination Clearances
VENT TERMINATION CLEARANCES: Minimum 4-foot (1.22m) clearance below or beside any door or window that opens. Minimum 1-foot (0.3m) clearance above any door or window that opens. Minimum 3-foot (0.91m) clearance from any adjacent building. Minimum 7-foot (2.13m) clearance from any grade when adjacent to public walkways. Minimum 2-foot (0.61m) clearance above any grass, plants, or other combustible materials. -
Page 13: Testing Your Wood
OVEN UTILIZATION Your oven was designed to burn wood only; no other materials should be burned. Waste and other fl ammable materials should not be burned in your oven. Any type of wood may be used in your oven, but specifi c varieties have better energy yields than others. Please consult the following table in order to make the best possible choice. -
Page 14: The First Fires
THE FIRST FIRES The fresh paint on your oven needs to be cured to preserve its quality. Once the fuel charge is properly ignited, only burn small fi res in your oven for the fi rst four hours of operation. Never open the air control more than necessary to achieve a medium burn rate. Make sure that there’s enough air circulation while curing the oven. -
Page 15: Ash Disposal
WARNINGS NEVER OVERFIRE YOUR OVEN. IF ANY PART OF THE OVEN STARTS TO GLOW RED, OVER FIRING IS HAPPENING. READJUST THE AIR INTAKE CONTROL AT A LOWER SETTING. THE INSTALLATION OF A LOG CRADLE OR GRATES IS NOT RECOMMENDED IN YOUR WOOD OVEN. BUILD FIRE DIRECTLY ON FIREBRICK. -
Page 16: Maintenance
MAINTENANCE Your wood oven is a high effi ciency oven and therefore requires little maintenance. It is important to perform a visual inspection of the oven every time it is emptied, in order to insure that no parts have been damaged, in which case repairs must be performed immediately. -
Page 17: Seasonal Start Up
SEASONAL START UP Prior to starting the fi rst fi re of the heating season, check the outside area around the exhaust and air intake systems for obstructions. Clean and remove any fl y ash from the exhaust venting system. Clean any screens on the exhaust system and on the outside air intake pipe. -
Page 18: Troubleshooting Guide
TROUBLE SHOOTING GUIDE When your appliance acts out of the ordinary, the fi rst reaction is to call for help. This guide may save time and money by enabling you to solve simple problems yourself. Problems encountered are often the result of only fi ve factors. 1. - Page 19 REPAIR PARTS DIAGRAM...
-
Page 20: Repair Parts List
Part No. Description Qty. 69681 Main Weldment, Pw100 891372 Pad, Door Hinge (Threaded) 26433 Ash Pan 02 88057 (Pw100 Ash Pan) Thermocord 1/2 26434 Ash Pan Baffl e 40076 Grate, Cast Iron 24103 Firebrick, Half (4-1/2 X 4-1/2) 89066 Firebrick (4-1/2 X 9) -
Page 22: How To Order Repair Parts
HOW TO ORDER REPAIR PARTS This manual will help you obtain effi cient, dependable service from your Oven, and enable you to order repair parts correctly. Keep this manual in a safe place for future reference. When writing, always give the full model number which is on the nameplate attached to the oven. When ordering repair parts, always give the following information as shown in this list: The part number ___________________________________________ The part description ___________________________________________... -
Page 23: Warranty Registration Form
PLEASE SEAL WITH CLEAR TAPE BEFORE MAILING Warranty Registration Form Please take a moment and properly register your new stove within 10 days of purchase by completing this form. You can also complete this form by visiting us at usstove.com Owner: ____________________________________________________________________ Address:__________________________________________________________________ City:____________________________ State: __________ Zip:______________________... - Page 24 ______________________ PLACE ______________________ STAMP HERE ______________________ United States Stove Company 227 Industrial Park Road South Pittsburg, TN 37380 Attn: Registration Form PLEASE SEAL WITH CLEAR TAPE BEFORE MAILING 851997...
Need help?
Do you have a question about the PW100 and is the answer not in the manual?
Questions and answers