Table of Contents
Advertisement
Quick Links
TARGA GmbH
Lange Wende 41
D-59494 Soest
www.targa-online.com
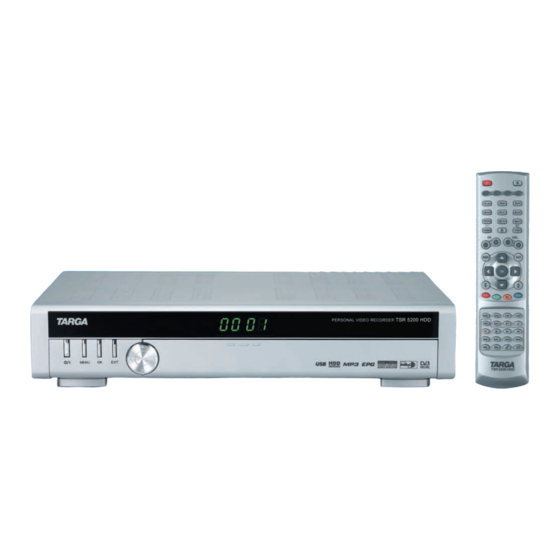
Targa TSR 5200 HDD
User's Manual and Service Information
1
2 3 4
5
6
7
Front Panel Adjustments
1
Stand-by (On/Off)
2
Menu (display main menu)
3
OK (enter a selection)
4
EXIT (quit a menu)
5
Arrow buttons
to select menu items
6
Display window
7
Add-on card slots (Pay TV)
For open the flap please push on the marking below the display
8
9 10 11 12 13 14
15
16 17
19
20
21
22
23
24
Rear Panel Connections
8
USB port
9
Optical digital output (audio)
10
Coaxial digital output (audio)
11
S-Video output (video)
12
CVBS output (video)
13
YPbPr output (video)
14
Input for terrestrial antenna signal
15
Scart output (TV)
16
IF 1 output
17
IF 1 input
18
Power switch
19
Audio output (left + right)
20
Antenna signal output
21
Scart in/output (VCR/AUX)
22
RS 232 interface
23
IF 2 output
24
IF 2 input
18
Advertisement
Table of Contents

Summary of Contents for Targa TSR 5200 HDD
- Page 1 2 3 4 Front Panel Adjustments Targa TSR 5200 HDD Stand-by (On/Off) Menu (display main menu) OK (enter a selection) EXIT (quit a menu) Arrow buttons to select menu items User's Manual and Service Information Display window Add-on card slots (Pay TV)
- Page 2 Standby (On/Off) Mute Remote control Toggle to TV control Toggle to VCR control Toggle to Set Top Box control Toggle to DVD control Numeric keys (0 to 9) TV/Radio switching TV/Sat switching 10 Channel up 11 Channel down 12 Reduce audio volume 13 Increase audio volume 14 Menu (display main menu) 15 Exit (quit a menu)
-
Page 3: Table Of Contents
TSR 5200 HDD Table of Contents Table of Contents INTRODUCTION............................1 ............................1 AFETY NSTRUCTIONS ..............................2 OSITIONING ..............................3 NTENDED ............................3 ACKAGE CONTENTS ........................3 OTICE ON SE OF THIS ANUAL CONNECTION TYPES ..........................4 .......................4 ONNECTING TO A ATELLITE NTENNA INGLE USER SATELLITE SYSTEM... - Page 4 TSR 5200 HDD Table of Contents ............................... 16 IDEO UTPUT ................................17 IMER ............................18 ODULATOR ..........................18 ODULATOR HANNEL OSD T ............................ 19 RANSPARENCY OSD T ..............................19 IMEOUT PLAYBACK..............................20 TV C ..........................20 ATCHING HANNELS TV C...
- Page 5 TSR 5200 HDD Table of Contents ROGRAMMING A ECORDING ANUALLY ............................33 DITING ECORDINGS UTTING A ECORDING AUDIO FUNCTIONS ............................37 ..........................37 ISTENING TO THE ADIO ADIO TATION ETTINGS ECORDING ADIO ROADCASTS TV M WITCHING ACK TO MP3 M .............................39 LAYING USIC ADVANCED SETTINGS ..........................40...
- Page 6 TSR 5200 HDD Table of Contents ............................. 58 ETWORK ............................58 DVANCED .............................. 59 MART EARCH ......................60 DITING RANSPONDERS ATELLITES DITING RANSPONDERS ........................... 62 RANSFERRING OFTWARE ............................62 YSTEM PGRADE PC ....................... 64 XCHANGING ATA WITH THE ................65...
-
Page 7: Introduction
TSR 5200 HDD Introduction Introduction Safety Instructions • Please read the following instructions carefully. • Please keep this User's Guide for later use. • If you sell or pass this device on to another person, it is imperative that you also hand over this manual. -
Page 8: Positioning
TSR 5200 HDD Introduction Install all batteries correctly, with + and - signs matching the marks indicated. Do not mix batteries (old and new or carbon and alkaline, etc.). Remove batteries when the device is not used for a long time. -
Page 9: Intended Use
Only connection cables and external devices may be used that comply with safety standards and the electromagnetic compatibility and shielding quality of the TSR 5200 HDD. If the product is labelled with a struck-out waste bin, it is subject to the European Guideline 2002/96/EC. -
Page 10: Connection Types
TSR 5200 HDD Connection Types Connection types The TSR 5200 HDD offers many connection possibilities. This ensures that the device is usable in any environment. Connecting to a Satellite Antenna The device has two tuners. With these you can use it with a satellite antenna that has one or two ports, or two different satellite antennas. -
Page 11: Multiple-User Satellite Antenna System
TSR 5200 HDD Connection Types Multiple-User Satellite Antenna System Independently of whether you are using a satellite antenna with a multi-switch, or whether your satellite equipment is equipped with a multiple LNB, connect both the coaxial cables with the connectors IF 1 INPUT [17] and IF 2 INPUT [24], as shown in the following figure. -
Page 12: Connecting To Tv
SCART 1 (TV) [15]). Insert the other end of the Scart cable into the Scart jack of the TV. The picture of the TSR 5200 HDD will be transmitted on the AV channel of your TV. If you are not sure how to switch to the AV channel on your TV, please refer to the TV manual. -
Page 13: Coaxial (Tv Antenna Connector)
TV on channel 38 to be able to reproduce the image and sound of the TSR 5200 HDD. If you are not sure how to tune to channel 38 on your TV, please refer to the TV manual. -
Page 14: Component Connector
TSR 5200 HDD Connection Types S-VHS connector jack If your TV offers an S-VHS connector, you can connect the TSR 5200 HDD to your TV using an S-VHS cable. This enhances the playback quality compared to the regular antenna or Scart connection. -
Page 15: Connecting To A Video Recorder
If your video recorder has a Scart jack, plug the Scart cable into the Scart jack SCART 2 (VCR, AUX) [21] on the TSR 5200 HDD. Insert the other end of the Scart cable into the Scart jack of the video recorder. -
Page 16: Getting Started
TSR 5200 HDD Getting Started Getting Started When you have connected all required cables, plug the TSR 5200 HDD power plug into a wall outlet and switch on the power switch on the back of the device. Power switch in "Off" position Power switch in "On"... -
Page 17: Powering The Device On/Off
Powering On Make sure that the power switch on the back of the TSR 5200 HDD is switched on. Press key [1] on the remote control or key [1] on the front of the device to power on the TSR 5200 HDD. -
Page 18: Setting The Time
In order to be able to enter the correct time for recording, you must set the clock in your satellite receiver. The TSR 5200 HDD receives the current time from the respective programmes, but you can also set the clock manually. - Page 19 TSR 5200 HDD Getting Started - Select the desired setting with the buttons. - Press the buttons to alter the respective settings or enter the data using the numeric keypad. - Press to exit Time Setting: the changes will be saved.
-
Page 20: User Settings
User Setup menu. Aspect Ratio In this menu you can adjust the picture format of the TSR 5200 HDD to your TV or projector. To do so, first go to the User Setup menu as described in previous pages. -
Page 21: Display Mode
NTSC is the standard on the American continent. The setting AUTO is also possible, and the TSR 5200 HDD will automatically detect the suitable system. First go to the User Setup menu, as described on page 14. -
Page 22: Video Output
TSR 5200 HDD User Settings Video Output Here you can set the picture output according to the cabling to the TV or projector. CVBS, RGB and YpbPr are available. By default, the CVBS is configured. First go to the User Setup menu, as described on page 14. -
Page 23: Timer
(the corresponding channel name will be shown in the next line). - Select the menu option Sleep Timer using and then the power-off countdown time for the TSR 5200 HDD with the buttons. - Press to exit Timer: the programming will be saved. -
Page 24: Modulator Type
TV and this is sending signals on channel 38, you can change the output channel of the TSR 5200 HDD to here to avoid any picture interference. -
Page 25: Osd Transparency
TSR 5200 HDD User Settings If you change the modulator channel of the TSR 5200 HDD you must correspondingly adjust the tuned channel on the connected device (video recorder or TV). OSD Transparency This function allows you to set the transparency of the OSD menu. Choose a value between 5% (lower transparency) and 70% (higher transparency). -
Page 26: Playback
TSR 5200 HDD Playback Playback Watching TV Channels After powering the device on, the last channel you have been watching will appear. Switching TV Channels Press on the remote control to switch the channels up or down, or press the... -
Page 27: Favorites
TSR 5200 HDD Playback Favorites Displaying Favorites Press the button [38] on the remote control to display the channel favourite menu. - Press to select the desired favourite channel. - Press to display the list of selected favourite channels. - Press to select the desired channel. -
Page 28: Renaming Favourites
TSR 5200 HDD Playback Renaming Favourites Favourites are divided into five groups. By default, these groups are named Nachrichten, Musik, Sport, Fav4 and Fav5. To edit these names, proceed as follows: - Press the button on the remote control to go to the Main Menu. -
Page 29: Programming Favorites
TSR 5200 HDD Playback Press to select the first character for the new favourite name and to overwrite the existing name. Press to enter the selected character. Repeat the above steps until you have written the full name (if you... - Page 30 TSR 5200 HDD Playback - Press to select the desired favourite channel (our example shows Fav1) from the selection bar. - Press to select the desired channel from the channel list. - Press to add the selected channel to the favourites (pressing...
-
Page 31: Playing Back Recordings From Hard Disk
TSR 5200 HDD Playback Playing Back Recordings from Hard Disk You can play back your recorded TV shows form hard disk. Playback - Press the button [29] on the remote control to open a list containing all recordings. - Press on the remote control to select the desired recording. -
Page 32: Bookmarks
Viewing Two TV Shows Simultaneously (PIP) PIP (Picture In Picture) allows you to display a second TV channel while viewing another one. This function will only be available while both tuners of the TSR 5200 HDD are receiving a signal. -
Page 33: Displaying Multiple Channels Simultaneously (Multi-Picture)
This function allows you to watch several channels at the same time. You can watch 4, 9 or 16 channels simultaneously. This function will only be available while both tuners of the TSR 5200 HDD are receiving a signal. If you have only one satellite antenna or are only using one connection while operating a multi-user antenna system you can use the supplied adapter cable (6) to interconnect both tuners (see page 4 - Single-user satellite system). -
Page 34: Recording And Editing
Recording and Editing Recording and Editing Recording The TSR 5200 HDD allows you to record TV programmes onto the internal hard disk. The hard disk has a capacity of 250GB. This allows you to record approx. 120 hours of TV programmes. -
Page 35: Programmed Recording
TSR 5200 HDD Recording and Editing Programmed Recording EPG Recording This function lets you select entries from the Electronic Programme Guide (EPG) for recording. Select the desired TV channel (see page 20 – Switching TV Channels) and press [28] on the remote control to display the Electronic Programme Guide. -
Page 36: Erasing Programmed Recordings
TSR 5200 HDD Recording and Editing In order for the recording to work properly it is essential that date and time are set correctly. If necessary, read - Setting the Time - on page 12. Press the Information button [39] to display further information about the highlighted programme in a popup window. -
Page 37: Programming A Recording Manually
TSR 5200 HDD Recording and Editing - Select the menu option Pre-recording using the buttons. - Press to go to the Pre-recording menu. - Press to select the menu option Event Number and then press to select the event number of the programmed recording you want to erase. - Page 38 Event Alarm Press to ENABLE or DISABLE this function. When enabled, the TSR 5200 HDD will advise you of any approaching recordings. Satellite If you are linked to multiple satellites, press and then...
-
Page 39: Editing Recordings
The TSR 5200 HDD will record the specified station at the set time. The programmed event number will be occupied until the specific programmed recording has been completed or erased. If you want to add further programmed recordings, select a new free event number and repeat the above steps. - Page 40 TSR 5200 HDD Recording and Editing - Press to select the desired action (our example shows "Delete") from the selection bar. - Press the buttons to choose the recording. - Press to apply the selected action to the recording. The following functions are available: Play The selected recording is played back.
-
Page 41: Cutting A Recording
TSR 5200 HDD Recording and Editing Cutting a Recording This function allows you to cut specific scenes out of a recording. - Press the button on the remote control to go to the Main Menu. - Select the menu option HDD Interface using the buttons. - Page 42 TSR 5200 HDD Recording and Editing - Press to select the recording you wish to cut. - Press : the recording plays back in the monitor window. - Press [24] to set the beginning of the segment. - Press [26] to set the end of the segment.
-
Page 43: Audio Functions
Radio Stations Audio Functions The TSR 5200 HDD also allows you to receive radio broadcasts. To listen to the radio we recommend that you connect your TSR 5200 HDD to you Hifi equipment via audio cables. For this, use the audio output [19] on the back panel. If you have established no connection to external audio equipment, the sound will be played back through the TV set. -
Page 44: Recording Radio Broadcasts
TSR 5200 HDD Radio Stations - Press to select the desired radio channel. - Press to select the desired action. - Press to apply the selected action to the radio station. The function description for radio stations is equivalent to those of the TV stations (see page 40 –... -
Page 45: Playing Mp3 Music
TSR 5200 HDD Radio Stations Playing MP3 Music You can play back music from the hard disk. Just as on a computer, you can also store music files in subfolders (see page 64 – Exchanging Data with a PC) - Press the button [29] on the remote control to open a list containing all recordings. -
Page 46: Advanced Settings
TSR 5200 HDD Advanced Settings Advanced Settings Editing TV Channels - Press the button on the remote control to go to the Main Menu. - Press to select the menu item Channel Edit. - Press to go to the Channel Edit menu. -
Page 47: System Setup
System Setup System Setup contains further settings to configure the TSR 5200 HDD. - Press the button on the remote control to go to the Main Menu. -
Page 48: Parental Control
TSR 5200 HDD Advanced Settings - Press to select the desired option. On the following pages you'll find a more detailed description on the different settings. - Press to exit the System Setup menu. The following settings are available: Parental Control Here you can change the PIN code. -
Page 49: Factory Setting
Advanced Settings Factory Setting This option will restore the factory-default configuration of your TSR 5200 HDD. All personal settings will be erased, only the recording on your hard disk will be kept. Select Factory Setting from the System Setup menu (see page 41) and press on the remote control. -
Page 50: Finding The Satellite
TSR 5200 HDD Advanced Settings Finding the Satellite If your satellite antenna doesn't point to the satellite, proceed as follows: - Press the button on the remote control to go to the Main Menu. - Select the menu option Installation using the buttons. -
Page 51: The Hard Disk
Formatting the Hard Disk The TSR 5200 HDD saves the recording on a hard disk drive. This function allows you to erase all data from the hard disk and to restore its factory-default configuration. All recording, channel lists and software data stored on the hard disk will be erased during formatting. -
Page 52: Saving The Channel List On The Hard Disk
TSR 5200 HDD working memory in order for the device to use it. Select Channel Upgrade from HDD from the HDD Interface menu (see page 45) and press on the remote control. -
Page 53: Updating The Software From Hard Disk
[18] to restart it. Updating the Software from Hard Disk If you have downloaded an updated device software (firmware) for your TSR 5200 HDD (see page 64 – Exchanging Data with the PC), you can use this function to execute this software. -
Page 54: Time Shift
TSR 5200 HDD Advanced Settings After restarting your TSR 5200 HDD you must restore the factory-default configuration in order for the new software to be used (see page 43 – Factory Setting). Depending on the type of upgrade, the menus and display structure may change. -
Page 55: Common Interface Cards
TSR 5200 HDD Advanced Settings Common Interface Cards In order to be able to receive coded channels you need a CI card (Common Interface smart card) from your channel provider. They will also inform you of any additional hardware (e.g. card slot module) necessary to use the smart card with your device's card slots. - Page 56 Use this setting if you are using only the second satellite antenna input connector on the TSR 5200 HDD. Tuner 1and2 Use this setting if you are using both satellite antenna input connectors on the TSR 5200 HDD or if you are using a multi-user satellite antenna system. Loop...
-
Page 57: Lnb Type
LNB Type Depending on the type of satellite antenna system the setting LNB type allows you to customize the TSR 5200 HDD to your antenna system. LNB means "Low Noise Block Converter" and is the signal reception unit of a satellite antenna. -
Page 58: Enabling/Disabling The 22Khz Signal
DiSEqC is a new standard for different status switching. The DiSEqC standard is available in different levels: from Level 1.2 DiSEqC allows you to control rotor units. The TSR 5200 HDD supports this technology. -
Page 59: Lnb Power
TSR 5200 HDD Advanced Settings - Select the menu option DiSEqC using buttons. - Select one of the options Tone A, Tone B, #1, #2, #3, #4 and OFF using buttons. - Press and then press to save the settings, or press to cancel the process. -
Page 60: Transponder
This function is for monitoring purposes only. While configuring the TSR 5200 HDD for your satellite antenna system you can use this feature to verify whether all required transponders can be received. -
Page 61: Positioner Control Via Diseqc 1.2
TSR 5200 HDD Advanced Settings Positioner Control via DiSEqC 1.2 - Press to select the desired menu item. - Press to select the desired setting. - Press to exit the menu. The following settings are available: Current position Press the buttons to choose the position. -
Page 62: Positioner Control Via Usals
TSR 5200 HDD Advanced Settings Positioner Control via USALS - Press to select the desired menu item. - Press to select the desired setting. - Press to exit the menu. The following settings are available: Satellite Position Enter the satellite's position via the numeric keys and select... - Page 63 TSR 5200 HDD Advanced Settings The available settings have the following meaning: Free To Air (free channels) Digital (digital channels) Scrambled (encoded channels) To cancel the scanning at any time, press It is also possible to launch the scanning process from the Installation menu. For this purpose it contains the menu items Scan Mode and Satellite Scan.
-
Page 64: Tp Scan (Transponder Scan)
TSR 5200 HDD Advanced Settings TP Scan (Transponder Scan) The Transponder Scan allows you to scan a specific transponder for available channels. Select TP Scan from the Installation menu (see page 57) and press on the remote control. - Press to select the desired satellite. -
Page 65: Smart Search
TSR 5200 HDD Advanced Settings - Press to select the desired menu item. - Enter the required digits via the numeric keys. - Press to exit the menu. - Press several times to exit all menus. The following settings are required: Down Frequency Enter the transponder frequency in MHz. -
Page 66: Editing Transponders/Satellites
TSR 5200 HDD Advanced Settings Select Smart Search from the Installation menu (see page 57) and press on the remote control. - Select the menu option Symbol Rate using the buttons. - Press to select the desired symbol rate. - Press to exit the menu. -
Page 67: Editing Transponders
TSR 5200 HDD Advanced Settings Editing Transponders - Press to select the desired transponder of the current satellite. - Press - Press to select Delete or Edit. - Press - Press several times to exit all menus. The following settings are available:... -
Page 68: Transferring Software
TSR 5200 HDD Advanced Settings Transferring Software Using this function you can transfer data through the RS232 interface [22] on the back panel. This feature has been designed for service purposes. To transfer program data and device software (firmware) you can use the USB port (see the descriptions starting on page 46 –... - Page 69 The system upgrade can take up to 15 minutes. To cancel the process at any time, press . As soon as all data has been loaded the TSR 5200 HDD will restart. After your TSR 5200 HDD has restarted you have to restore the factory-default configuration in order for the new software to be used (see page 43 –...
-
Page 70: Exchanging Data With The Pc
Recorded programmes are stored on the internal hard disk. You can also access this hard disk from your computer. To do so, connect the computer and the TSR 5200 HDD via a USB cable on the USB port [8] on the back panel of the device. -
Page 71: Using The Remote Control With Other Devices
Advanced Settings Using the Remote Control with Other Devices The remote control unit of the TSR 5200 HDD is a preset remote control for different devices. It also allows you to control your TV set, VCR and DVD player. The appendix in this User's Manual contains a list of codes for different devices from multiple manufacturers. -
Page 72: Appendix
No picture and no sound Make sure that the TSR 5200 HDD and the TV set are connected to the mains and have been powered on. Check if all connection cables are free of damage and seat properly in the respective jacks on the TSR 5200 HDD and the TV set. - Page 73 When using a Scart cable you should select RGB (see page 16 – Video Output). The remote control doesn't function Make sure that the TSR 5200 HDD is connected to the mains and has been powered on. Check if the batteries have been inserted properly into the remote control and they are charged.
-
Page 74: Technical Specifications
TSR 5200 HDD Appendix Technical Specifications General Input voltage AC 220-240 V, 50/60Hz Power consumption max. 48 W Dimensions 340 x 265 x 65 mm Weight 3 kg Operating temperature 0°C – 35°C Storage temperature -20°C – 60°C Receiver / LNB... - Page 75 TSR 5200 HDD Appendix EEPROM 32 kB Hard Disk Drive 250 GB Data input Connector 9pin D-Sub Protocol RS232 serial Data transfer speed max. 115.2 kbps RF Modulator RF interface 75 Ohm IEC 169-2 connector/jack Frequency 470 – 860 MHz (UHF) Output channel CH 21 –...
-
Page 76: Device Codes
TSR 5200 HDD Appendix Device codes TV s e ts... - Page 77 TSR 5200 HDD Appendix TV sets...
- Page 78 TSR 5200 HDD Appendix TV sets...
- Page 79 TSR 5200 HDD Appendix TV sets...
- Page 80 TSR 5200 HDD Appendix TV sets...
- Page 81 TSR 5200 HDD Appendix TV sets...
- Page 82 TSR 5200 HDD Appendix TV sets...
- Page 83 TSR 5200 HDD Appendix TV sets...
- Page 84 TSR 5200 HDD Appendix TV sets...
- Page 85 TSR 5200 HDD Appendix TV sets...
- Page 86 TSR 5200 HDD Appendix TV sets...
- Page 87 TSR 5200 HDD Appendix TV sets...
-
Page 88: Video Recorders
TSR 5200 HDD Appendix Video recorde rs... - Page 89 TSR 5200 HDD Appendix Video recorde rs...
- Page 90 TSR 5200 HDD Appendix Video recorde rs...
- Page 91 TSR 5200 HDD Appendix Video recorde rs...
-
Page 92: Dvd Players
TSR 5200 HDD Appendix DVD- Playe rs... - Page 93 TSR 5200 HDD Appendix DVD- Play e rs...
- Page 94 TSR 5200 HDD Appendix DVD- Play e rs...
Need help?
Do you have a question about the TSR 5200 HDD and is the answer not in the manual?
Questions and answers