
Subscribe to Our Youtube Channel
Related Manuals for SunPower SPR-5200


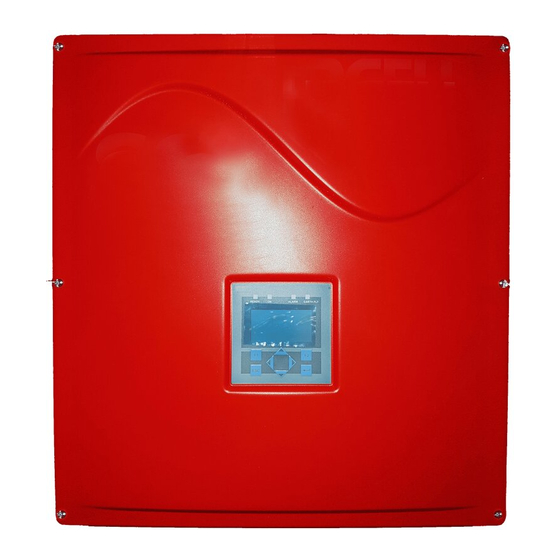
Summary of Contents for SunPower SPR-5200
- Page 1 SPR-5200 and SPR-4600 Installation and Operation Manual SunPower Corporation Document # 001‐69178 Rev** 1 ...
- Page 2 SunPower Inverter SPR-5200 and SPR-4600 Table of Contents SunPower Corporation Document # 001‐69178 Rev** 2 ...
-
Page 3: Important Safety Instructions
Please read and follow all instructions for installation, use and servicing of this product. Note: A locking tab has been designed into the SPR-5200 and SPR- 4600. It is the sole responsibility of the end user to provide a locking mechanism that utilizes the tab, and permanently secures the cover on the inverter. -
Page 4: Product Features
The SunPower Inverter is a utility interactive inverter for photovoltaic (PV) systems. The SunPower Inverter is tied to an electrical source provided by the local utility company (i.e. on- grid), as well as to the photovoltaic system. The SunPower Inverter contains everything needed to convert the DC voltage generated by the solar arrays into the AC voltage required to power a house. -
Page 5: Installation
• Visibility of the operating LED’s and display located at the top front of the inverter box should also be considered. ♦ If the SunPower Inverter is to be installed in an enclosed space, adequate ventilation must be provided. SunPower Corporation ... - Page 6 2.2 Mounting the SunPower Inverter The SunPower Inverter should be mounted vertically to a flat, solid surface such as wallboard, concrete or wood siding. The inverter should be located in close proximity to the solar panels to minimize the DC wire length. The mounting bracket provided makes mounting the SunPower Inverter quick and simple.
- Page 7 8. Locate the two inverter mounting holes below the power board. (See Figure 2) Insert the two mounting screws through the inverter and tighten securely. PLEASE NOTE: Remove the lower inverter cover to allow for electrical connection in section 2.3 SunPower Corporation Document # 001‐69178 Rev** ...
-
Page 8: Electrical Connection
2.3 Electrical Connection Do not proceed with the electrical connection of the SunPower Inverter until it has been properly mounted. WARNING: Electrical connections must be done in accordance with local electrical codes and the National Electrical Code (NEC), ANSI/NFPA 70. Use 10 AWG, minimum 90° (194°F), copper wire for the SPR-5200, SPR-4600 connections. - Page 9 A single point ground connection is located in the lower right hand side of the SunPower Inverter cabinet. The PV panel grounding wire is terminated there. The AC ground connection is terminated next to the Line and Line 2/Neutral connections on the circuit board.
- Page 10 WARNING: For continued protection against risk of fire, replace only with same type and ratings of fuse. The SPR-5200 and SPR-4600 both use only Littelfuse 30 AMP 250V AC rated fuse SunPower provides overcurrent protection on the Power Distribution Board with two 30 AMP fuses in the SPR-5200 and SPR-4600 (See warning above).
- Page 11 2. Feed the LINE 1, LINE 2/NEUTRAL and GROUND wires through the conduit and into the center opening of the SunPower Inverter. 3. Connect the GROUND wire to the terminal marked ‘earth ground’ inside the SunPower Inverter. 4. Connect the LINE 2/NEUTRAL wire to the terminal marked ‘line 2/neutral’ inside the SunPower Inverter.
- Page 12 Each DC input to the DC terminal block must be less than the voltages listed in Figure 8. To wire the DC inputs from the PV panels to the SunPower Inverter (Refer to Figure 9): Note: Each DC input connection must carry the same input voltage. The SunPower Inverter allows up to three connections for both the + and the –...
-
Page 13: Operation
Nothing should be placed on top of the heat sink. Starting up the SunPower Inverter requires the following steps in the order indicated below: 1. Turn the AC breaker ON. -
Page 14: Led Indicator Lights
If all 3 conditions are met the inverter will illuminate the “OK” (Green) LED. If any one of the operating conditions is not met there is a fault and the SunPower Inverter will illuminate the “STAND BY” (Red) LED. -
Page 15: Troubleshooting
Please refer to Section 4.0 Troubleshooting. 4.0 TROUBLESHOOTING If the SunPower Inverter’s “STAND BY” LED remains solid red or blinking red for a prolonged period (more than 24 hours), the AC breaker or AC disconnect should be turned to the OFF position for 1 minute and then returned to the ON position. - Page 16 The 4 in the first code indicates a heat sink over temperature fault. WARNING: These servicing instructions are for use by qualified personnel only. To reduce the risk of electric shock, do not perform any servicing other than that specified in the operating instructions unless you are qualified. SunPower Corporation Document # 001‐69178 Rev** 16 ...
-
Page 17: Specifications
5.0 SPECIFICATIONS SunPower Corporation Document # 001‐69178 Rev** 17 ... -
Page 18: Return Procedure
6.0 Return Procedure Before returning the product directly to SunPower Corporation, you must first obtain a Return Authorization Number from SunPower Corporation. The product must also be shipped prepaid. When you contact a SunPower Corporation representative, please have the following information ready: 1. - Page 19 Notes: SunPower Corporation Document # 001‐69178 Rev** 19 ...
- Page 20 SunPower Corporation Document # 001‐69178 Rev** 20 ...
- Page 21 SunPower Corporation Document # 001‐69178 Rev** 21 ...
Need help?
Do you have a question about the SPR-5200 and is the answer not in the manual?
Questions and answers
What does it mean when there is a fault code in my inverter? The fault code is 1000 0000 0200
Fault code 1000 0000 0200 indicates a voltage fault. The "2" in code three signifies a DC over voltage condition.
This answer is automatically generated