Table of Contents
Advertisement
Quick Links
Advertisement
Table of Contents

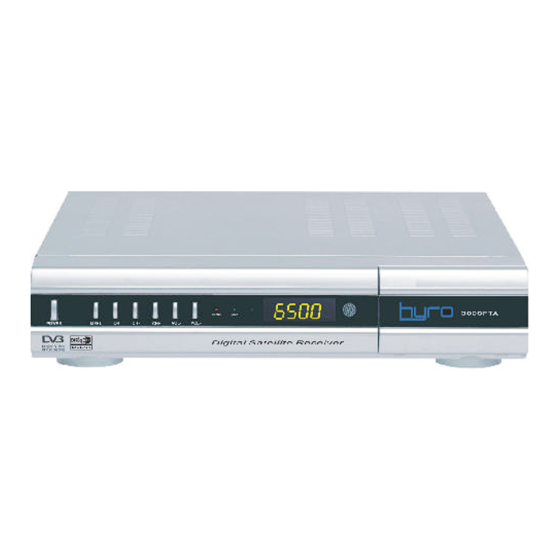
Summary of Contents for Hyro 3000FTA
-
Page 2: Table Of Contents
Content Content ................... Safety Precaution 1. Reference 1.1 General Features ................1.2 Accessories ..................2. Basic Function 2.1 Front Panel ..................2.2 Rear Panel ..................2.3 Remote Control Unit ................3. Installation and Connection 3.1 Connecting to TV ................3.2 Connecting to Dish LNB ..............4. -
Page 3: Safety Precaution
Safety Precaution Safety Precaution This STB has been designed and manufactured to satisfy the international safety standards. Please read the following safety precautions carefully before operating this receiver. 4 Main Supply: Before operating, please check the units operating voltage is 90~250V AC 50/60Hz. -
Page 4: Reference
Reference--General Features 1. Reference 1.1 General Features MPEG-2 & Fully DVB Compliant PLL RF-Modulator UHF 21~69 with PAL B/G,I,D/K Multi LNB Control by DiSEqC 1.0,1.2,1.3(USALS) SCPC/MCPC Receivable from C / Ku-Band Satellites Digital Tuner with Loop-Through PAL/NTSC Conversion Variable Aspect Ratio (4:3,16:9) for TV 4-digi 7-segment LED Display RS232 Port for Updating software and Additional Information User Friendly OSD Menu with Full Function... -
Page 5: Accessories
Reference--Accessories 1.2 Accessories l User’ s manual l Remote Control Unit l A/V Cable l Batteries User Manual User’ s Manual A/V Cable Battery Remote control Figure 1. Accessories... -
Page 6: Basic Function
Basic Function--Front Panel 2. Basic Function 2.1 Front Panel Figure 2. Front Panel 1. Power Button The POWER button is used to turn the power on or to make it on Standby Mode. 2. MENU Button Activate the main menu in viewing mode, or exit all menu. 3. -
Page 7: Rear Panel
Basic Function--Rear Panel 2.2 Rear Panel AUDIO R VIDEO AC 90~240v~ ANTENNA LNB IN VCR SCART 50~60Hz Max.30W RF OUT LOOP OUT RS232 AUDIO L DC 0/12V 150mA OUT TV SCART 1. LNB IN 13/18V 500mA Max Figure 3. Rear Panel Connect the Satellite Dish LNB. -
Page 8: Remote Control Unit
Basic Function--Remote Control 2.3 Remote Control Unit(RCU) You can control this receiver by this remote controller with full function. 1. POWER: Switch the receiver on or set it to standby mode. 2. MUTE: Turn the sound On/Off. 3. SAT: Show the scanned satellite list. 4. - Page 9 Basic Function--Remote Control 17.PAUSE: Freeze the picture. 18.ZOOM: Picture Zooming function. 19.INFO: Show the information of the current channel. press EXIT button to exit this menu. 20.SUB: Showing Subtitle information if the channels contains. 21. Multi picture Activate Multi picture menu and select picture 22.A~Z: Sort channels.
-
Page 10: Installation And Connection
Installation and Connection--Connecting to TV & VCR 3. Installation and Connection The following diagram shows you the connections among receiver, TV, LNB and other equipment, please read this first if you are not sure abou the connection, and it will guide you to the correct connection. 3.1 Connecting to TV AUDIO VIDEO TV SCART RF IN ANTENNA... -
Page 11: Connecting To Dish Lnb
Installation and Connection--Connecting to Dish LNB 3.2 Connecting to Dish LNB You can connect one fixed dish LNB directly to the LNB IN, or connect at least two dish LNB by DiSEqC Switch, you can also connect to HH mount dish LNB. - Page 12 Installation and Connection--Connecting to Dish LNB LNB 2 LNB 3 LNB 1 LNB 4 DiSEqC ANTENNA AUDIO R VIDEO AC 90~250v~ LNB IN VCR SCART 50~60Hz Max.30W RF OUT LOOP OUT RS232 AUDIO L DC 0/12V 150mA OUT TV SCART Figure 7.
-
Page 13: Installation And Operation
Installation and Operation--Menu Guide 4. Installation and Operation Ater connecting the receiver to other required equipment, turn on the receiver, there should be no channel information available at the first startup, you need to follow the procedure to setup your receiver to search the channel. 4.1 Menu Guide During the installation there is a short information showed at the bottom of the menu screen which will guide you to set up, after finishing installation, you... -
Page 14: Satellite List
Installation and Operation--Menu Guide Antenna setup Press OK button on the Antenna Setting, you will get this window. 1 Satellite list This window shows the pre-stored satellite list, you can change satellite by t /u, press OK to see the satellite list and select satellite. - Page 15 Installation and Operation--Menu Guide Motorised System If you connect receiver to DiSEqC 1.2 or DiSEqC 1.3 antenna, set Motorised system to DiSEqC1.2 or USALS, you can change the direction of the dish to aim to the satellite you selected through the option. 1 USALS Set Motorised system to USALS, press OK you will get this window, you can...
- Page 16 Installation and Operation--Menu Guide Manual Search Please select the transponder offered by the satellite that antenna has been configured. Select the LNB frequency, polarisation (Horizontal/Vertical), symbol rate, FEC(1/2, 2/3,3/4,5/6,7/8,Auto), Network search (YES/NO), Search Type (ALL, FTA only, Scramblel), Advanced PID search. The network search will be applied if you want to find more transponders.
- Page 17 Installation and Operation--Menu Guide Edit Satellite Here you can Add, Delete, Rename, Move Satellite. Even you can hide satellite, once you select this function, only searched and and stored satellite will be displayed, press OK on one satellite you will hide all the channels under this satellite, when you switch channel they will not be displayed, but all channels will still be edited in...
- Page 18 Installation and Operation--Menu Guide --Main Menu--Easy tuning 4 Use p/q button to select item, use t /u to change setting. This function will enable multi satellite search if your receiver connects to DiSEqC Switch. Fast Tuning will enable you to search stored transponder and Auto Tuning will enbable you to search new transponder which is newly released.
- Page 19 Installation and Operation--Menu Guide Sort Channel In this menu you can sort the channels in different type, such as language(selectable), FTA, satellite, transponder, favor(selectable) and Alphabet. --Main Menu--System Setting System You can setup the menu language, audio language,RF, TV output and Video output according to the standard of your country.
- Page 20 Installation and Operation--Menu Guide Game There are four games stored in the receiver, tetris, snake, pompon and push box, you can play with the remote control by p/q t / ubutton. Facility This is the calendar, and it will give you the convenience to check the date of your day.
- Page 21 Installation and Operation--Menu Guide Parent Control You can select if need the password or not for Installation, Edit Channel and System, also you can change the password, the default password is 0000. Timer Setup The default time setup is auto, you can select manual and input by hand, select the time zone of your country and you will get the correct current time which is based on...
-
Page 22: Other Useful Information
Installation and Operation--Useful Information 4.2 Other Useful Information General Information 4 In the viewing mode when you press INFO button, the info bar will pop up, it contains satellite and channel information, press INFO twice you will get the detailed channel infor, press again the info you will get detailed EPG info if there is in channel. - Page 23 Installation and Operation--Useful Information AUDIO In viewing mode press AUDIO button and you will get a menu, you can set the Audio mode here and change. Teletext 4 Press the TEXT button and you will get a window to view the teletext contents if the teletext is transmitted in the channel.
-
Page 24: Additional Information
Additional Information--Problem Solving 5. Additional Information 5.1 Problem Solving You might meet abnormal working of this STB with various reasons, check the following which may help you. Problem What to do Possible causes LED on the front panel Mains supply cable is Check if the mains supply cable fail to light up/is not lit. -
Page 25: Technical Specification
Additional Information--Specification 5.2 Technical Specification Tuner & Demodulator Frequency Range 950 MHz to 2150 MHz Input Connector F-type, IEC 169-24, Female Signal Level -25 to -65 dBm RF Impedance 75 ohm¸ unbalanced IF Band width 55 MHz/8Hz(Per 5Msps) LNB Power & Vertical : +13 V, 14V +/-5% Polarisation Horizontal : +18 V, 19V+/-5%... -
Page 26: Menu Screen Structure
Additional Information--Menu Structure 5.3 Menu Screen Structure Language Setting Audio Language First Time Install Search Channel Englis h. . Picture Englis h. . Time Zone Setup W izard Easy Tuning ......Main Menu Menu Navigator Ins tallat ion Easy Tuning Channel Manager System Setting Parental Control... -
Page 27: Glossary
Additional Information--Glossary 5.4 Glossary 4 Antenna A device that collects and radiates electromagnetic waves. Includes a satellite dish and abroadband antenna. 4 DiSEqC DiSEqC(Digital Satellite Equipment Control)system, it is a communication bus between satellite receivers and peripheral equipment using only the existing coaxial cable. - Page 28 Additional Information--Glossary 4 QPSK(Quaternary Phase Shift Keying) Phase-shift keying in which four different phase angles are used. 4 Transponder An automatic device that receives, amplifies and retransmits a signal on a different frequency. Symbol rate Speed of the digital transmission 4 RF Radio frequency (known as HF in some countries).
- Page 29 ............................................................................................................................................................................................................................................................................................................................................................................................................................................................................................................................................................................................................................@ 28...
Need help?
Do you have a question about the 3000FTA and is the answer not in the manual?
Questions and answers