Advertisement
Table of Contents
Advertisement
Table of Contents

Subscribe to Our Youtube Channel
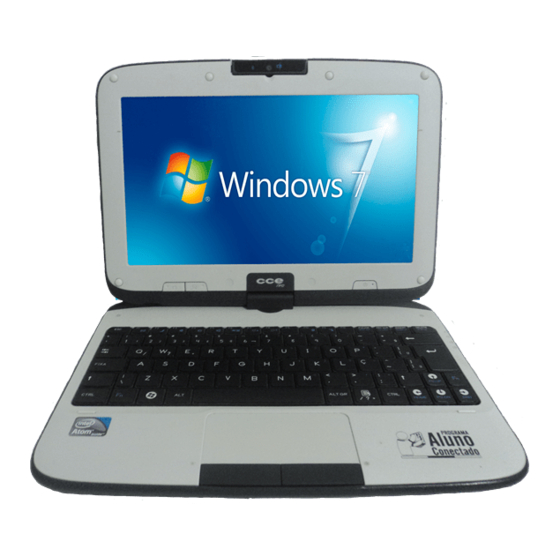
Summary of Contents for CCE EC10IS2
- Page 1 Chapter 1 General System Description Page 1 of 23...
- Page 2 Chapter 1 General System Description 1 Hardware Specifications…………………………………………………… 2 Software Specifications………..……………………………….…………... Page 2 of 23...
-
Page 3: Hardware Specifications
Chapter 1 General System Description 1. Hardware Specifications This section describes about the key component list that using on EC10IS2 machine and its product specification. 1.1 Main Chip Intel Cedarview‐M Intel® Atom processor Cedarview 1.6GHz/512K L2,3.5W/6.5W CPU(T.B.D) ... - Page 4 Chapter 1 General System Description Pointing Device Synaptics/Sentelic PS/2 Touch Pad with Left and Right Click Button and scrolling Bar. CPT/CMO/IVO TFT Color LCD, LED Backlight 10.1” with 1024X600 (Anti-Glare) 10.1” with 1366X768(HD) (Anti-Glare)/optional Touch screen ETT/CATCHER/N-trig <60g with R0.8mm ...
-
Page 5: Usb 2.0 Ports
Chapter 1 General System Description I/O Port 1 DC-in jack (2.5Ø ) 2 USB 2.0 ports 1 RJ-45 LAN 3 Jacks for Micro-in/headphone: a). External Mic-in jack 1/8” b). External headphone jack 1/8”x2 1D-Sub 15Pin VGA port ... - Page 6 Chapter 1 General System Description Caps Lock Num Lock Scroll Lock WLAN On/Off HSPA On/Off Bluetooth On/Off Volume up/down Brightness up/down Function Key Fn + Esc: Bluetooth on/off (optional) Fn + F1 : RF on/off (WLAN/ Bluetooth/3G, Bluetooth &...
- Page 7 Chapter 1 General System Description Battery Life Battery Charge time 3.5 hrs (Fast charge) Battery Life: 3 cells (2200mAH) 3.5hrs(w/ HDD)~ 4hrs (w/ SSD) (T.B.D) 6 cells (4400mAH) 8hrs (w/ HDD)~ 8.5hrs (w/ SSD) (T.B.D) 6 cells (5200mAH) 9.5hrs (w/HDD) ~ 10hrs (w/ SSD) (T.B.D) ***Base on 3.5W CPU,10.1”...
- Page 8 Chapter 1 General System Description 1.2 Getting to Know Your Computer Opening the LCD Panel The Intel-powered convertible classmate PC also features a rugged design that helps protect the computer from scratches and light falls. Please be careful when handling your computer and recommended not to let the computer fall from high places. To avoid damage to the display panel: 1.
-
Page 9: Front View
Chapter 1 General System Description Front View Built-in Rotating Camera Use the Built-in rotating camera for video conference. Built-in Rotating Camera The built-in rotating camera can rotate from -35 ~ +200 degrees. You can rotate the built-in rotating camera back and forth using on both sides of the display panel. The built-in rotating camera must be returned to its original position for the display panel to close properly. - Page 10 Chapter 1 General System Description System and Power Status Indicators LED Graphic Indication Symbol Blue light indicates the numeric keypad is activated. Blue light indicates the cap-lock is activated. Blue light indicates the is reading/writing data. Blue light indicates the WLAN module is active. The battery LED reflects according to the following status: Blue light indicates the battery is fully charged...
-
Page 11: Quick Menu
Chapter 1 General System Description Quick Menu Brightness Control – Decrease or increase the screen brightness after you click the + / - key. Volume Control – Decrease or increase the volume when you click on the + / - key. ... - Page 12 Chapter 1 General System Description TouchPad The touch pad is a built-in pointing device with functions similar to a mouse. Touchpad Buttons Works like the two buttons on an ordinary mouse. Water Resistance Precautionary Measures on Keyboard, Power Button and Touch pad Buttons The Intel-powered convertible classmate PC features a spill-resistance function on keyboard, power button and touch pad buttons to ensure greater protection against spills in the classroom or...
- Page 13 Chapter 1 General System Description Left Views External Monitor Port Use this port to connect to an external monitor. HDMI Port Compact audio/video interface for transmitting uncompressed digital data. USB 2.0 Port This port conforms to the latest USB2.0 plug-and-play standards. Ventilation Opening The ventilation opening allows the computer to cool off and prevent overheating.
-
Page 14: Right View
Chapter 1 General System Description Right View Stylus Pen Slot The stylus pen for the touch screen is stored here. Stereo Headphone Jack Use the headphone jack to connect an external headphone set. Microphone Jack Use the microphone jack to connect an external microphone. USB 2.0 Ports This port conforms to the latest USB2.0 plug-and-play standards. -
Page 15: Rear View
Chapter 1 General System Description Rear View Handle Use the handle to carry the computer. Name Field Place your name tag here. LCD Display Rotating Bar This bar is used to rotate the LCD display. Scroll Bar Use the scroll bar when the system is in tablet mode. ... -
Page 16: Bottom View
Chapter 1 General System Description Bottom View Battery Bay This compartment contains the battery pack for your system. Battery Release Latch/Lock Latch Slide this latch to release or lock the battery from the battery bay. Handle Use this to carry the computer. Page 16 of 23... -
Page 17: Software Specifications
Chapter 1 General System Description 2. Software Specifications 2.1. Preface The software engineering specification is a deployment from product marketing specification. It should outline major tasks to be implemented in a specific model. For any model which has been defined from product marketing division, there should have a product marketing specification comes out. -
Page 18: Power Management
Chapter 1 General System Description 2.2.6 PCI Device All the PCI devices will occupy the system resources, such as I/O, Memory and IRQ, especially the IRQ assignment is relative to H/W and system arrangement. The following will list all PCI devices: 2.3. - Page 19 Chapter 1 General System Description 2.3.2 Power Management State Transition Full-On (S0) CPU in full speed (C0) Power/Suspend button All Devices are working Lid switch Idle (S0) resume CPU STPCLK (C2) Power/Suspend button All Devices are working Lid switch Suspend (S3) resume CPU STPCLK (C2) Power/Suspend button...
- Page 20 Chapter 1 General System Description All the devices in the state D0. Suspend The state is more power saving than above, the CPU will change to C3 state and most of power consumption parts will enter to suspend or idle mode. The system in the state S3.
- Page 21 Chapter 1 General System Description 2.4. CMOS Setup Menu Page 21 of 23...
- Page 22 Chapter 1 General System Description Page 22 of 23...
- Page 23 Chapter 1 General System Description Page 23 of 23...
Need help?
Do you have a question about the EC10IS2 and is the answer not in the manual?
Questions and answers