Table of Contents
Advertisement
Advertisement
Table of Contents

Related Manuals for RIDLEY Bicycle

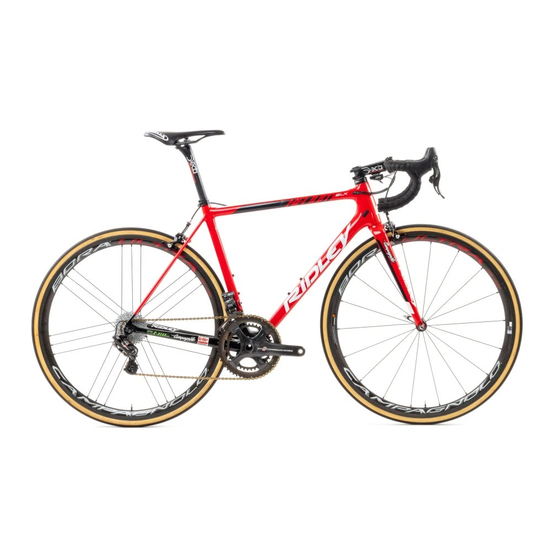
Summary of Contents for RIDLEY Bicycle
- Page 1 SE AND MAINTENANCE BOOKLET OF YOUR RIDLEY BICYCLE...
- Page 2 Manual. Please take the time to read it, as it contains a lot of information that is The decision you've made to buy a Ridley bicycle is one we're sure essential for getting the highest performances out of your bike and you'll be glad you made.
-
Page 3: Why You Should Read This Manual
We have tried to make this manual interesting and instructive for both you and your child. It is also important that your first ride on a new bicycle takes place in Make sure that your child always wears an approved bicycle helmet a controlled environment, away from cars, obstacles and other cyclists. -
Page 4: What It's Called
2. WHAT IT'S CALLED 1. frame 2. top tube 3. down tube 4. seat tube 5. chain stay 6. seat stay 7. head tube 8. fork 9. wheel 10. tire 11. tread 12. sidewall 13. valve stem 14. tube 15. rim 16. - Page 5 23. pedal 24. reflectors 25. rear derailleur 26. front derailleur 27. shifter 28. shifter cable 29. adjusting barrel 30. cassette 31. headset 32. stem 33. handlebar 34. adjusting barrel 35. seatpost 36. saddle 37. seat binder 38. brake lever 39. brake 40.
-
Page 6: What Kind Of A Bike Is It
Sometimes called a racing bike because it is derived from the bikes The Mountain Bike is designed to give the rider greater control and used by bicycle road racers and triathletes, the road bike is for fast durability on a wide variety of harsh terrain. Everything about the travel, hard training and competition on paved surfaces. - Page 7 (i.e. riding your road bike on single track or rugged terrain) can cause is it designed for hard off-road use on “single track” or rocky, rutted, you to lose control and fall. Only ride your bicycle in the manner that rugged terrain like a Mountain Bike.
-
Page 8: Fit And Safety
Make sure the bike fits. A bike that's too big or too small for the rider is harder to control and can be uncomfortable. WARNING: If your bicycle does not fit properly, you may lose control and fall. If your new bike doesn't fit, ask your dealer to exchange it before you ride it. - Page 9 INTEGRATED Seat post: All Ridley frames with an integrated seat post must be cut according If your leg is not completely straight and just touching the centre of to the following directions.
-
Page 10: Front And Back Adjustment
There should be no the distance to cut from the top of the seat tube. Using the Ridley saddle movement in any direction. If, after making this adjustment,... -
Page 11: Handlebar Height And Angle
ASTM, Snell, CPSC or CE and fall. Place the front wheel of the bicycle between your legs and standards. Most serious bicycle injuries involve head injuries that attempt to twist the handlebar/stem assembly. - Page 12 4.2.3. Lights WARNING: Always wear a helmet when riding your bike. Always If you ride your bike after dusk, your bicycle must be equipped with keep the chinstrap securely buckled. Refer to your helmet owner's lights so that you can see the road and avoid road hazards, and so manual for additional information.
-
Page 13: Eye Protection
inflated, and adjust if necessary. See Section 6.7.1 for details and 4.2.5. Eye protection recommended tire pressures. Any kind of riding, but particularly off-road riding, involves airborne Tires in good shape? Spin each wheel slowly and look for cuts in the dirt, dust and bugs, so it's a good idea always to ride with protective tread and sidewall. -
Page 14: Handlebar And Saddle Alignment
WARNING: Riding with an improperly adjusted wheel quick release 4.3.3. Brakes can cause the wheel to wobble or disengage from the bicycle, which can cause damage to the bicycle and serious injury or death. Squeeze the brake levers. Are the brake quick releases closed? Is the straddle cable securely engaged? Are the brake shoes 4.3.6. -
Page 15: Riding Safely And Responsibly
Respect their rights, and be tolerant if 6. Wear bright, visible clothing that is not so loose that it can catch on they infringe on yours. moving parts of the bicycle or be snagged by objects at the side of the road or frail. - Page 16 15. Never ride your bicycle while under the influence of alcohol or drugs. 6. Stop at stop signs and traffic lights; slow down and look both ways at street intersections.
-
Page 17: Rules Of The Trail
Have 3. Surface hazards make off-road riding much more difficult and your bicycle and equipment carefully inspected by a qualified therefore more dangerous than riding on paved roads. Start slowly mechanic and be sure it is in perfect condition. Consult with expert... -
Page 18: Wet Weather Riding
• Make sure your clothing or anything you may be carrying on the Riding a bicycle at night is a lot times more dangerous than riding bicycle does not obstruct a reflector or light. during the day. Therefore, children should never ride at dusk or at night. -
Page 19: How Things Work
WARNING: Riding with an improperly adjusted wheel quick release clamping force is controlled by the tension adjusting nut. Turning the can allow the wheel to wobble or disengage from the bicycle, causing tension adjusting nut clockwise while keeping the cam lever from damage to the bicycle, and serious injury or death to the rider. -
Page 20: Front Wheel Secondary Retention Devices
NOTE: Once the manufacturer or the dealer installs the quick 6.1.3. Removing or Installing Quick Release release in the hub axle, it never needs to be removed unless the hub Wheels itself 6.1.3.a. Removing a Quick Release Front Wheel 6.1.2. Front Wheel Secondary Retention Devices (1) Open up the brake shoes. -
Page 21: Installing A Quick Release Front Wheel
- the fork dropouts. The quick release lever should be on the left side of the bicycle (Fig. 12 & 13). (1) Open up the brake shoes (see Section 6.3.1, Figs. 16a, b, c and If your bike has a clip-on type secondary retention device, engage it. -
Page 22: Removing And Installing Bolt-On Wheels
(4) Put the chain on top of the smallest freewheel sprocket. Then, 6.1.4. Removing and Installing Bolt-On Wheels insert the wheel into the frame dropouts and pull it all the way in to the dropouts (Fig. 14). 6.1.4.a. Removing a Bolt-On Front Wheel (5) Tighten the adjusting nut until it is tight against the frame dropout;... - Page 23 (2) While pushing the wheel firmly to the top of the slots in the fork axle nut washers should be on the outside, between the frame and dropouts, and at the same time centering the wheel rim in the fork, the axle nut.
-
Page 24: Seatpost Quick Release
Less The braking action of a bicycle is a function of the friction between than half a turn of the tension adjusting nut can make the difference the brake surfaces (usually the brake shoes) and the wheel rim or between safe clamping force and unsafe clamping force. - Page 25 Most brakes have some form of quick release mechanism to allow the brake WARNING: Some bicycle brakes, such as linear-pull and disc shoes to clear the tire when a wheel is brakes, are extremely powerful. You should take extra care in removed or reinstalled.
-
Page 26: Adjusting Your Brakes
Moisture or dirt on the brake shoes reduces their ability to grip. The resistance. The purpose of having multiple gears on a bicycle is to let way to maintain control on loose or wet surfaces is to go more slowly you chose the gear that allows you to maintain your optimum to begin with. -
Page 27: Shifting Gears
There are many different types of shifter mechanisms, each preferred for specific types of application because of its ergonomic, performance and Whether upshifting or downshifting, the bicycle derailleur system price characteristics. The designers of your bike have selected the shifter design requires that the drive chain be moving forward and be under design that they believe will give the best results on your bike. -
Page 28: Shifting The Front Derailleur
(i.e. the rider must be pedaling forward). 6.4.3.c. Shifting an internal gear hub drivetrain 6.4.3.b. Shifting the Front Derailleur If your bicycle has an internal gear hub drivetrain, the gear changing mechanism will consist of: front... -
Page 29: What Gear Should I Be In
WARNING: Getting into and out of pedals with toeclips and straps What gear should I be in? requires skill which can only be acquired with practice. Until it becomes a reflex action, the technique requires concentration that The numerically lowest gear (1) is for the steepest hills. The can distract the rider's attention, causing you to lose control and fall. -
Page 30: Tires And Tubes
The best way to inflate a bicycle tire to the correct pressure is with a that pressure. Then, check inflation as described in Section 4.3 so bicycle pump. -
Page 31: Tire Valves
There are many different types of suspension systems - To inflate a Schraeder valve tube, too many to deal with individually in this Manual. If your bicycle has a remove the valve cap and push the air suspension system of any kind, ask your dealer to provide you with hose or pump fitting onto the end of the appropriate manufacturers’... -
Page 32: Service And Maintenance
6.7.4. Accessories properly complete them. Improper adjustment or service may result in damage to the bicycle or in an accident that can cause serious injury or death. To install the 4ZA Wing and Tail bottle cages, use the bottle cage mounting bolts installed on the down tube and seat tube of the frame. -
Page 33: Service & Maintenance Schedule
Your Mechanical Safety Check (Section 4.3) will help you 3. Ask your dealer about the availability of bicycle repair courses in identify some things that need readjustment. - Page 34 • Grab one pedal and rock it toward and away from the centerline of the bike; then do the same with the other pedal. Anything feel loose? WARNING: Like any mechanical device, a bicycle and its If so, have your dealer check it.
- Page 35 If half turn to a full turn of the cable adjusting barrel does not cure the problem, see your dealer. Torque Force Specifications: Proper lubrication and grease on your bicycle and components will Seat post clamp bolt: 6 Nm. ensure better functioning and increase the longevity of your bicycle.
-
Page 36: Rear Derailleur
Insert the quick release skewer through the hub, with the lever is boxed and must be mounted before riding. These parts must be on the left side of the bicycle. Place the spring onto the skewer and installed by your authorized Ridley dealer. -
Page 37: Getting Home When Something Breaks
If you have trouble getting the last few inches of bead over the edge of the rim with thumb pressure, use a Remove the wheel from the bicycle (see Section 6.1.3 or 4). tire lever and be careful not to pinch the tube. -
Page 38: If You Break A Spoke
If you break a spoke while on a ride, do not ride comfort, performance and appearance of your bicycle is almost your bicycle, as the spoke may strike or get caught in the fork blades endless. Your Authorized Dealer can help you select those that will or the drive train and cause you to fall. - Page 39 The most popular way to improve the performance of a bicycle is to your hands if you fall. substitute higher priced drivetrain or brake components.
- Page 40 10.
-
Page 41: Additional Conditions
warranty. - Page 42 11.4. Disclaimer useful product life cycle, and the type and amount of use the bicycle or frameset is subject to. Uses in competitive events, trick riding, ramp riding, jumping, aggressive riding, riding on severe terrain,...
Need help?
Do you have a question about the Bicycle and is the answer not in the manual?
Questions and answers