Table of Contents
Advertisement
Quick Links
Advertisement
Table of Contents

Summary of Contents for Boss BV10.2AI
-
Page 3: Table Of Contents
Contents Safety Information..................……2 DVD Player Features……................…4 DVD Video Features..................4 Controls......................5 Monitor Stowed View..............………..5 Monitor Open View..............………..6 Remote Control................………..7 Basic Operation ................………..9 Open the monitor............... ………..9 Stow the monitor................ ………..9 Handling disc................…..…..Turn the player on..............…..…..Turn the player off..............…..…..Adjust the display............... -
Page 4: Safety Information
Safety Information Thank you for buying the Roof Mount LCD Monitor with DVD player. Please read this manual carefully before using the player in order to get the most out of all the features and functions. Keep this manual in a safe place, as it can be a valuable tool in helping you to understand all the features and functions. - Page 5 permanent damage to the LCD panel. Should LCD panel break, avoid touching glass and fluid. If do, please clean it with plenty of water and ask for medical attention immediately. Due to different car specifications, please kindly ensue that the display monitor is properly located and not obstructing the air-conditioning vent.
-
Page 6: Dvd Player Features
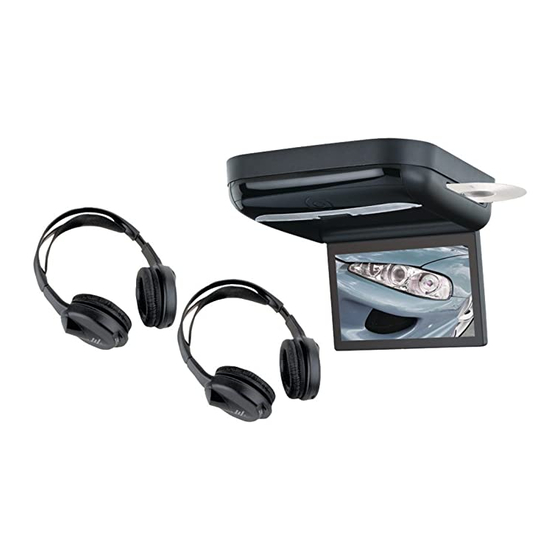
DVD Player Features This player is a Roof Mount 10.2" TFT-LCD Color Display with DVD player that can be used as a stand-alone display, or can be integrated into a mobile multimedia system. This player has the following features: 10.2" TFT-LCD color monitor(16:9) ... -
Page 7: Controls
Controls Monitor Stowed View Item Name Function or Control Touch and hold to display the OSD menu , touch again to close the OSD menu . On DVD mode , touch to display DVD list, touch again to MENU close the DVD list ; On iPod/iPhone mode , touch to display the current list ,touch again to enter the main menu . -
Page 8: Monitor Open View
Receives IR signals from the remote control or IR Window sends IR signals to IR wireless headphone. Eject the disc. Press to release the monitor Panel . Panel open switch Insert the disc. Disc slot Enter / Confirm choose. ENT. To illuminate in the car. - Page 10 Press to fast reverse playback at 2x, 4x, 8x,16x Fast reverse and 32x speeds. Press to play chapters or tracks in random order. RANDOM Press to repeat playback from point A to point B. For a DVD: Change the language during play . For a VCD/CD: Change audio channel (left, right, AUDIO stereo) during playback...
-
Page 11: Basic Operation
Basic Operation Open the monitor 1. Press the Panel open button to lower the overhead monitor screen. 2. Gently swing the LCD down and adjust the angle for viewing. CAUTION:The LCD opens to a maximum angle of 120° degrees. Do not attempt to open it further. Stow the monitor Gently push the back side of the display panel until it clicks into the overhead housing.The monitor turns off automatically when you return it to the closed... -
Page 12: Turn The Player Off
Turn the player off Close the monitor or press the power button on the remote control to turn the player off . If a disc is playing when you turn the power off and back on again, the player continues playback from where you stopped. Note: Once the player is turned off, you cannot eject a disc in the player. -
Page 13: Use The Remote Control
Servicing the monitor In the event that trouble arises, never open the monitor case, disassemble the player or attempt to repair it yourself. The internal parts are not serviceable by user. Opening any components will void the warranty. CAUTION: Changes or modifications to this product not approved by the manufacturer may void the warranty. -
Page 14: Use The Ipod/Iphone
3. Remove the old battery. 4. Place the new battery in the slot with the plus(+) side up. 5. Push the battery holder back into the slot until it locks in place. Use the iPod/iPhone Press OPEN icon on the iPod/iPhone placed board to lower the iPod/iPhone placed board . -
Page 15: Play
Play 1. On DVD mode , insert a disc into the disc slot when the screen display " NO DISC ". When the disc was inserted , “LOADING” displayed , the system will read and play the disc automatically . 2. -
Page 17: Play Audio Cd Disc
• To zoom in (enlarge) the image when watching a DVD, press ZOOM during playback. As you press ZOOM on the remote, the player alternates among the available zoom settings (2x, 3x, 4x, 1/2, 1/3, 1/4). • To zoom in when viewing photographs (JPEG/JPG images) stored on a disc , press ZOOM on the remote, the player alternates among the available zoom settings: ZOOM 100%, ZOOM 125%, ZOOM 150%, ZOOM 200%, ZOOM 75%, ZOOM 50%. -
Page 18: Play Usb Device And Sd/Mmc Card
3. To choose a folder from the list, press the ▲ / button . 4. Press the ENTER button, the player displays the contents of the selected folder. 5. To select the MP3 file, press the ▲ / button. 6. Press the ENTER button to play the file. MP3 controls To play back to the next MP3 file, press the next button ( ... -
Page 19: Installation And Wiring
Installation and Wiring Do not attempt to install or service your player by yourself. Installation and servicing in electronic equipment and automotive accessories . If you do not have knowledge or experience this installation may be dangerous and could expose you to the risk of electric shock or other hazards. Read these instructions and precautions carefully . -
Page 20: Mounting And Wiring Precautions
Caution:Do not open the case . There are no serviceable parts inside . If you drop anything into the unit during installation , consult with your Boss Dealer or an authorized Boss service center . Mounting and Wiring precautions This unit is exclusively for vehicles with a negative ground, 12V power ... -
Page 21: Installation Procedure
Insulate unconnected wires with vinyl tape or other similar material. Warning! To prevent short circuits during installation, disconnect the vehicle’s negative battery lead before making any power connections. Installation procedure Screw the Installation Bracket to the beam or plywood using the ST4.2x16 screws. -
Page 23: System Setup
System Setup 1. Press SETUP on the remote control to access the setup menu. 2. Press button to select among menu items. 3. Press button to change the values of selected option . 4. Press button to select the option you wish to change. 5. -
Page 24: Specifications
PARENTAL: Restricts the viewing of movies to children of appropriate age levels only. You can select 1 to 8. 1 KID SAF (safe for children) (general audience) 3 PG (parental guidance suggested) 4 PG 13 (some material unsuitable for children under 13) 5 PGR (some material unsuitable for children under 17) (some material unsuitable for under 17) -
Page 25: Troubleshooting
Troubleshooting If operation freezes, the screen goes black or the unit should otherwise not function properly, try turning the unit on and off. If the unit does not respond, press the reset switch on the Front Panel. Problem Cause Solution Reinsert the disc with the label Disc inserted incorrectly side up (facing the ceiling). -
Page 26: Legal Notice
Legal Notice and Credit Line: “Made for iPod,”and“Made for iPhone,”mean that an electronic accessory has been designed to connect specififically to iPod or iPhone, respectively, and has been certifified by the developer to meet Apple performance standards. Apple is not responsible for the operation of this device or its compliance with safety and regulatory standards.
Need help?
Do you have a question about the BV10.2AI and is the answer not in the manual?
Questions and answers