Advertisement
INSTALLATION INSTRUCTIONS FOR HERON 2.2
The Heron 2.2 is suitable for installation in most caravans & motorhomes.
Installation in Commercial and Industrial vehicles and equipment should be
referred to AIRCOMMAND AUST for assessment of suitability.
The capacity of the airconditioner to adequately cool or heat a van, is dependent on:
• The size of the van
• The thickness and quality of thermal insulation installed in the van
• The expected outside or ambient conditions.
The HERON 2.2 is recommended for vans up to 5.2 m overall, but assumes that
wall and ceilings are insulated with a minimum of 25 mm of insulation, wool or
foam. Windows should all have shades or curtains as a minimum.
If the van is to be used mainly in extreme conditions (40°C plus), then be
conservative, i.e. ensure the best insulation is installed, consider double glazed
windows, and size the airconditioner down to 4.8 m maximum.
Figure 1
460
235
Condenser
440
1
315
Advertisement
Table of Contents

Summary of Contents for HERON 2.2
- Page 1 • The thickness and quality of thermal insulation installed in the van • The expected outside or ambient conditions. The HERON 2.2 is recommended for vans up to 5.2 m overall, but assumes that wall and ceilings are insulated with a minimum of 25 mm of insulation, wool or foam.
- Page 2 DESCRIPTION OF THE HERON 2.2 SYSTEM The HERON 2.2 is a split system, utilizing a condenser set (referred to throughout this text as a CON/SET) and an airhandler (referred to as an A/H). The Con/set is designed for installation beneath a bunk, settee, or in the bottom of a floor cupboard.
- Page 3 Choosing a position for the con/set Generally, avoid installation on the left hand side (annex side), as the condenser set will discharge hot air into this space. It is usual to install the con/set on the right hand side, either under a bunk, settee, or at the bottom of a floor cupboard.
- Page 4 Installing the Condenser set Marking out the floor Use the floor template as provided (or refer to fig. 3). Both, or either end of the con/set may be hard against a wall or panel, but the back of the unit must have sufficient clearance to allow easy access to the line valves (see fig.
- Page 5 Marking out the wall Now mark out the hole in the wall for the condenser discharge grille (see fig. 5). Mark out the position and size of the air outlet hole, from inside the van, using the floor as reference. Witness holes can be drilled at the four corners, and the hole cut out from the outside.
- Page 6 PIPE INSTALLATION & CONTROL WIRING The pipe work consists of a ” tube (liquid line), and a ” tube (return gas) running between the Con/set and the A/H. The ” line must be insulated with 10x 10 mm foam rubber insulation. Connection is made at the back of the Con/set.
-
Page 7: Air Handler Installation
AIR HANDLER INSTALLATION The A/H needs to be installed in as central as possible position, such that no short cycling of discharge air will occur. See figs. 6 & 7. 3 most important points that must be satisfied 1. The distance from the back of the cupboard to the back of the A/H must not be less than 90 mm to allow proper air entry to the fan. - Page 8 Refer to figs 8a & 8b and the full size template provided in the kit The following describes the procedure for a cupboard with a full front that can be removed. For cupboards that cannot be disassembled (retrofitting) see pp.5. Set up the paper template on the front panel of cupboard and position it such that: 1.
- Page 9 From the template the height of the two support rails may be measured. Ref. to fig. 10 to make the two support rails. Note that the rails are cut out to assist air flow into the cupboard. Install the 2 return air grilles frames, usually equispaced along the under side of the cupboard.
-
Page 10: Power Supply
POWER SUPPLY The unit is designed to plug into a normal GPO. If there is not a convenient outlet available, then one should be installed either within the cupboard or in close proximity. NOW TO INSTALL THE AIRHANDLER Sit the A/H on the rails and adjust its position as per the cutting out template, the front being flush with back of front panel when fitted. -
Page 11: Connecting The Drain
CONNECTING THE DRAIN With the special elbow connected to the tube running to back corner, moisten the vertical leg and insert it into the drain grommet with rotating motion. Now check that the drain runs downhill all the way! (fig. 11) FIT THE FRONT PANEL OF THE CUPBOARD 1. - Page 12 INSTALLING AN AIRHANDLER INTO AN EXISTING CUPBOARD, THE FRONT PANEL OF WHICH IS NOT EASILY REMOVED This is often the case with retrofits. Please note: The installation requires that there be a minimum of 16mm between the front of the A/H and the back of the front panel, to allow sufficient room for the turning vanes on the facia to be accommodated.
- Page 13 Now screw the frame to the A/H, using the 32 x no 6 screws provided (ensure they are countersunk flush with the surface of the frame). See fig. 12 & 13. Cut out the holes for the two return air grilles and install them. Now fit the two support rails.
- Page 14 To summarize Before fitting the A/H: Install copper pipework Fit the drain Provide the power supply (GPO) Now fit the A/H with the sub frame into the cupboard. Screw the subframe into the cupboard front panel Connect the drain (pp 9) Connect up the refrigeration pipes (pp 8 &...
-
Page 15: Charging The System
CHARGING THE SYSTEM The condenser set is factory precharged, but the airhandler and connecting pipework needs to be purged or evacuated of non-condensables. PLEASE NOTE: State laws re the handling of prescribed refrigerants may prohibit the purging method. Such laws take precedence. Method 1 (Purging) Make sure all connections are tight at the A/H. - Page 16 Method 2 (Use a vacuum pump to remove non-condensable from A/H and pipe work.) Tighten all flare nut connections on both Con/set & A/H. Remove schrader valve caps and connect vac. pump hoses, preferably to both valves. (Make sure valve depressors are set OK.) If both hoses are fitted, evacuate for 10 mins.
-
Page 17: Leak Testing
LEAK TESTING It is of the utmost importance that a leak check be made on the 4 flare nut connections. A leak however small will result in the aircon system loosing capacity and endanger the compressor. 1. Use either soapy water or a proprietary leak test solution. Paint on each flare nut (particularly the neck) and inspect carefully for any telltail bubbles. - Page 18 FITTING OF AIRHANDLER FACIA With leak testing of the A/H flare nuts completed, the Facia may be fitted. 1. Feed the service lead into the cupboard and plug in to GPO but leave turned off. 2. Now plug in the Con/set control cable to back of switch box (6 pin). Plug in the A/H cable (9 pin).
-
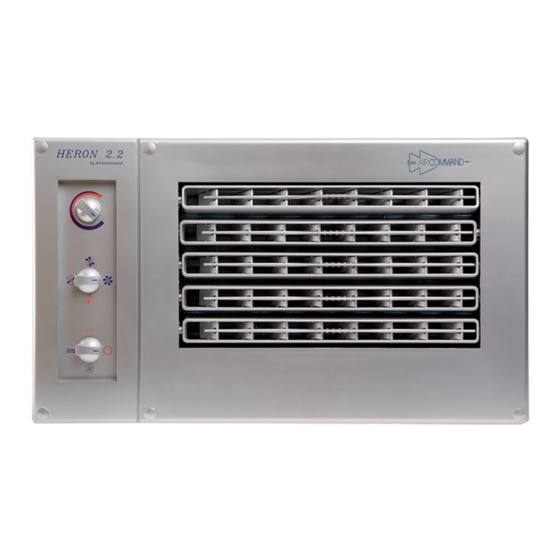
Page 19: Fan Speed Selector
THERMOSTAT MEDIUM COOLING FAN SPEED LOW COOLING SELECTOR SPEED HEATING SPEED HIGH SPEED COOLING HEATING MODE SELECTOR COOLING FAN ONLY (VENTILATION) Figure 18... - Page 20 Test to be carried out by the Installer prior to delivery Refer to fig. 18. COOLING: N.B. The unit will not run on cooling if the inside temperature is much below 20°C. 1. Turn fan speed selector to (Hi speed cooling) 2.
-
Page 21: Unit Specifications
385 mm Depth 230 mm Weight 4 kg Minimum cupboard dimensions: 300 high x 500 wide x 305 deep Cooling output: 2.2 KW Heating output: 1.5 KW Maximum current (cooling): 4.0 amps Maximum current (heating): 6.5 amps Maximum locked rotor current:... - Page 22 cannot print?????
-
Page 23: Troubleshooting
Trouble Shooting Symptom Probable Cause Remedy Condenser set is noisy Check that general Gently bend or pull and vibrates pipework is not away from panel etc touching cabinet, lid, or chassis Ease motor retaining Fan rotor touching inlet “Tipping” noise from screws, and adjust. - Page 24 Insufficient cooling 1. Thermostat set too Adjust more into blue high Switch fan to high 2. Fan speed too low Check free to turn 3. Condenser fan not Check resistor ok running 4. Unit is low on Refrigeration Mech. to refrigerant charge.
Need help?
Do you have a question about the 2.2 and is the answer not in the manual?
Questions and answers