Table of Contents
Advertisement
Advertisement
Table of Contents

Summary of Contents for Exo MB40IIX
- Page 2 Preface Copyright 2010 All Rights Reserved. The information in this document is subject to change without prior notice in order to improve reliability, design and function and does not represent a commitment on the part of the manufacturer. In no event will the manufacturer be liable for direct, indirect, special, incidental, or consequential damages arising out of the use or inability to use the product or documentation, even if...
-
Page 3: Table Of Contents
Table of Content ................2 EFORE YOU TART ............2 ONVENTIONS OF ANUAL ................ 2 AFETY RECAUTIONS LASS ASER RODUCT PPAREIL ASER LASSE ............6 ASERSCHUTZKLASSE RODUKT ............6 ICHTIGE ICHERHEITSHINWEISE .. 9 HINGS YOU MUST REMEMBER BEFORE WORKING ON YOUR COMPUTER ... - Page 4 ..............28 OWER AVING ODES The Battery Power System ..............28 ............28 EMOVING THE ATTERY Preparing the Battery Pack for Use (Battery Calibration) ....28 Automatic Battery Pack Charging Function ......... 29 Battery Status ..................29 ...
-
Page 7: Before You Start
Before you Start Use this manual will help you get the most from your notebook computer. If you are an experienced user of computers and/or Microsoft’s Windows operating systems, you might find it useful to read the Quick Start Guide that comes along with your accessories. If you are a less experienced user, you should go through the manual carefully before using your system. - Page 8 Make sure to use the right voltage for the power source when connecting the equipment to the power outlet. Place the power cord in such a way that people can not step on it. Do not place anything on top of the power cord. All cautions and warnings on the equipment should be noted.
- Page 9 The minimum specifications for the flexible cord are No. 18 AWG, (2) Type SPT-2, and (3) 2-conductor. For Japan: All components of the cord set must bear a “PSE” mark and in accordance with the Japanese Dentori Law. The minimum specifications for the flexible cord ...
- Page 10 Do not use the telephone to report a gas leak in the vicinity of the leak. Use only the power cord and batteries indicated in this manual. Do not dispose of batteries in a fire. They may explode. Check with local codes for possible special instructions.
-
Page 11: Class 1 Laser Product Appareila Laser D E Classe 1 Laserschutzklasse 1 Produkt
Bitte lesen Sie diese Hinweis sorgfältig durch. Heben Sie dirse Anleitung für den späteren Gebrauch auf. Vor jedem Reinigen ist das Gerät vom Stromnetz zu trennen. Versenden Sie Keine Flüssig- oder Aerosolreiniger. Am besten eignet sich ein angefeuchtetes Tuch zur Reinigung. Die Netzanschluβsteckdose soll nahe dem Gerät angebracht und leicht zugänglich sein. - Page 12 Wenn folgende Situationen auftreten ist das Gerät vom Stromnetz zu trennen und von einer qualifizierten Servicestelle zu Überprüfung.: Netzlabel oder Netzstecker sind beschädigt. Flüssigkeit ist in das Gerät eingedrungen. Das Gerät war Feuchtigkeit ausgesetzt. Wenn das Gerät nicht der Bedienungsanleitung entsprechend funktioniert oder Sie mit Hilfe dieser Anleitung keine Verbesserung erzielen.
- Page 13 Die Minimalanforderungen für das Kabel sind .75m ㎡ Leiter. (2) Type VCTF oder VCTFK, und (3) 2- conductor. Der Kabelsatz muss mindestens für eine Stromstärke von 7A geeignet sein. Der Wandstecker muss ein zweipoliger geerdeter Steckertyp gemäß dem Japanese Industrial Standard C8303 (15A, 125 VAC) sein.
-
Page 14: Things You Must Remember Before Working On Your Computer
Verwenden Sie nur die in diesem Benutzerhandbuch angegebenen Stromkabel und Batterien. Werfen Sie die Batterien nicht ins Feuer, sie könnten explodieren. Informieren Sie sich über die örtlichen Bestimmungen bezüglich der Entsorgung. Benutzen Sie das Netzteil nicht in unmittelbarer Nähe zu Wasser oder anderen Flüssigkeiten. -
Page 15: Suitable Place To Work
Try to avoid the computer components from being destroyed if it is overheated, so try to allow plenty of room for air to circulate around the case. Do not block the ventilation opening. Do not place your computer in direct sunlight. Your computer will run well wherever you’re comfortable but extreme temperature and humidity can be challenging to your system’s parts. -
Page 17: Introduction
Introduction Install the battery pack Connecting the AC adapter Opening the display panel Turning on your computer... -
Page 18: Knowing Your Computer
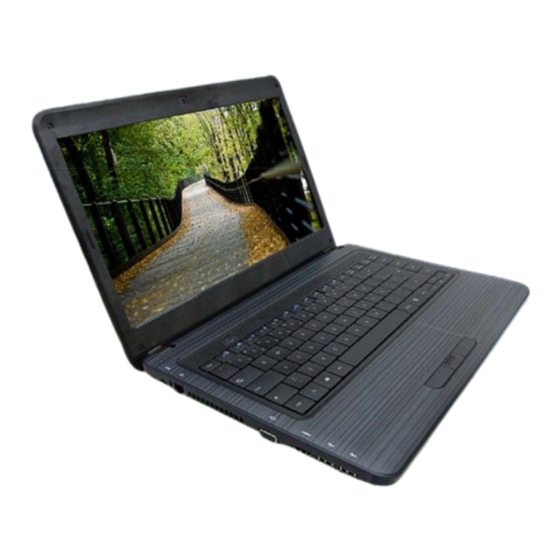
With the LCD screen open, you will see several features important for operating your notebook computer. Camera (Optional) - Page 19 LCD Display Power/Suspend Button Press for 1~1.5 seconds to turn on the system. Press and hold for at least 4 seconds to turn off the system. Press the power / suspend button again to return from the suspend mode. Multi Media Buttons Stop Pause Play...
-
Page 20: Left Views
Volume down Volume up Keyboard The keyboard differs for each territory Touchpad Touchpad Buttons Finger Print Button (optional) - Page 21 DC In Ethernet / LAN Port CRT Port HDMI Port (Option) USB 2.0 Port or 3.0 Port (Either one)
-
Page 22: Right View
Stereo Headphone Jack Microphone/Audio Line-in Jack USB 2.0/E-SATA combo 6-in-1 Card Reader SD / SDXC / SDHC / MS / MMC / MS Pro Memory Card Optical Drive Kensington Lock... -
Page 23: Bottom View
Battery Lock Battery Compartment Battery Release Latch... -
Page 25: Getting Started
Getting Started A universal AC adapter is provided to supply your computer with power and also charge the computer’s battery pack. The adapter’s AC input voltage can range anywhere from 100 to 240 volts, covering the standard voltages available in almost every country. To connect the computer to an external power source: Whenever possible, keep the AC adapter plugged into the... -
Page 26: Computer
notebook and an electrical outlet to recharge the battery. ’ ’ Hold the button down for a second or two and release. The Power- On Self Test (POST) runs automatically. After the POST is completed, the computer reads the operating system from the hard disk drive into computer memory (this is commonly referred to as “booting”... -
Page 27: Installing And Removing The Battery Pack
’ ’... -
Page 28: To Remove The Battery Pack
The installed battery pack charges automatically any time the computer is connected to the AC adapter and an external power source. It is a good idea to occasionally discharge the battery pack fully to preserve its operating performance. -
Page 30: Using The Notebook Computer
Using the Notebook Computer The LCD screen display can be adjusted by the following key combinations. Fn + F7 Changes Display Mode: LCD-only, CRT/HDMI –only, and simultaneous LCD&CRT/HDMI. Fn + F8 Decrease the brightness level. Fn + F9 Increase the brightness level. LCD screens are delicate devices that need careful handling. -
Page 31: T N H K C
You can switch between these display configurations by pressing the key combination [Fn] + [F7]. ’ ’ Fn + F1 Enable/Disable the Touchpad. Fn + F2 Enable/Disable the LCD. Fn + F3 Enters Suspend Mode. Fn + F4 Mute On/Off Fn + F5 Decrease the speaker volume. -
Page 32: Touchpad Precautions
The TouchPad is a pressure sensitive device. Please take note of the following precautions. Make sure the TouchPad does not come into contact with dirt, liquids or grease. Do not touch the TouchPad if your fingers are dirty. Do not rest heavy objects on the TouchPad or the TouchPad buttons. -
Page 33: Power Saving Modes
This section contains information on the notebook’s power system, including the AC Adapter, the battery system, recharging the battery, and tips for conserving battery power. The power system is comprised of two parts, the AC Adapter and the battery system. The AC Adapter converts AC power from a wall outlet to the DC power required by the computer. -
Page 34: Automatic Battery Pack Charging Function
To calibrate the battery pack follows the instructions below: Insert the battery into the battery compartment and turn on the notebook. If the battery is completely without power go to the next step. Otherwise, let the battery run down until the battery low-low warning beeps are heard. -
Page 35: Battery Low Warning
When the pack initially reaches the “Battery Low” state approximately 7 ~ 10 minutes of the usable battery life is left. You will hear an audible beep signal every 15 seconds alerting you to the “Battery Low” status. When the battery power reaches the “Battery Low Low”... -
Page 36: Adjusting The Brightness
the notebook lock up for some reason, pressing this button powers the notebook off. To adjust the brightness on the LCD screen, press and hold down the [Fn] key in the lower left hand corner of the keyboard and press the [F9] key to increase the brightness or [F8] to decrease the brightness. -
Page 37: Recycle Bin
Recycle Bin Used for storing deleted files in case you want to recover and save it in your system. The files will only be deleted from the Recycle Bin permanently only if you empty it by right clicking your mouse and select the “Empty Recycle Bin”. - Page 38 The Start menu allows you to adapt and show the programs used most frequently. If you wish to keep an item, right click the item and click Pin to Start menu. Log Off will enable the current user to log off and allows a new user to log on.
-
Page 39: Control Panel
It is in this area that you can change how Windows looks and works. Click Start Control Panel dialog box. There are two interfaces – Classic View. -
Page 41: Internet Connection
Internet Connection... -
Page 43: Ebios S S
The Setup Utility is a hardware configuration program built into your computer’s BIOS (Basic Input/Output System). It runs and maintains a variety of hardware functions. It is menu-driven software, which allows you to easily configure and change the settings. The BIOS contains manufacturers default settings for the computer’s standard operations. -
Page 44: Bios Action Keys
Function Key Command Description Leaves a sub-menu to return to the Exit previous menu OR exits the BIOS setup while saving changes. Enter Go to Sub Screen Shows the Sub Menu General Help Shows the Help Screen Default Set as default Saves changes and reboots the Save and Exit computer. -
Page 50: Troubleshooting
Troubleshooting Your computer has been fully tested and complies with the system specifications before shipping. However, incorrect operations and/or mishandling may cause problems. This chapter provides a reference for identifying and correcting common hardware and software problems that you may encounter. When you encounter a problem, you should first try to go through the recommendations in this chapter. - Page 51 Be sure all the device drivers are installed properly. For example, without the audio driver properly installed, the speakers and microphone will not work. If external devices such as USB cameras, scanner, printer do not function correctly when connected to the system, it is usually the device’s own problem.
-
Page 53: Specification
Specification O.S. Supports Windows 7 Home Premium Support Intel Sandy Bridge SV Dual Core 35W Processor Frequency (Base/Turbo boost): (2.7GHz/3.1GHz) / (2.6GHz/3.0GHz) / (2.5GHz/2.9GHz) / (2.1GHz/2.5GHz) / (1.8GHz/2.4GHz) / (1.6GHz/2.2GHz) Memory DDRIII DDR3 speed up to 1333/1066MHz RAM socket * 2 Standard system DRAM module 4GB supported System DDRIII up to 8 GB total depends on module availability (Only Windows 7 Home Premium 64 bits support 8GB) - Page 54 WLAN/Bluetooth Combo Combo Half-Mini Card type IEEE 802.11 B/G/N (1x1;2x2) BT 3.0 + HS support (WLAN should be turne on at the same time.) WLAN Half-MiniCard type IEEE 802.11 B/G/N (1x1;1x2) Camera CCD (Optional) Support 1.3M camera Keyboard US-300.8mm keys KB support Pointing Device PS2 Touch Pad with 2 buttons Support gesture function...
- Page 55 MMB (Multi Media Button) Stop, Pause, Play, Fast forward, Rewind, volume down, volume up Finger Printer (Optional) Validity Solution USB interfaces Optional with touchpad button Speaker/MIC Build-in 2 speakers Internal Microphone support BIOS Supports PnP, ACPI 3.0 Support external USB flash memory card boot up. With Phoenix BIOS and 4MB flash ROM Power Management (default: Silent mode) “Smart Power II”...
Need help?
Do you have a question about the MB40IIX and is the answer not in the manual?
Questions and answers