Advertisement
Available languages
Available languages
Advertisement
Table of Contents

Subscribe to Our Youtube Channel
Summary of Contents for Tronios Road Safety Guard 351.136
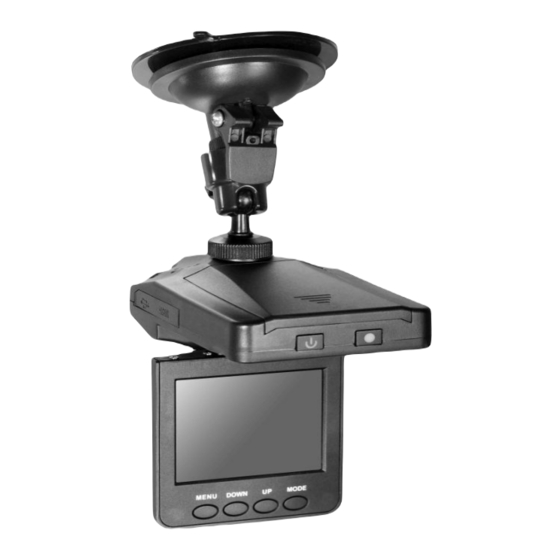
- Page 1 Road Safety Guard 351.136 Instruction Manual Handleiding Gebrauchsanweisung...
-
Page 2: Product Features
Install and remove the memory card: : : : 1: In accordance with the direction of the memory card into the slot until the memory card is fixed in the slot so far. 2: Remove the memory card, gently press a memory card until the card pops out, that can be removed. 3: If no card insert then the screen will be prompted: "No Card"... -
Page 3: Product Structure
Product Structure: : : : Charge: the first three CAR DVR, insert the product batteries run out of charge, and each time to keep the 12 hours of continuous charging the battery to maximum performance. Native built-in rechargeable lithium battery, use it the first time, please charge firstly, CAR DVR can charge by: 1) connected to the computer charge, use the USB data cable connected to the computer, you can charge... -
Page 4: Camera Settings
Camera Settings Press the "POWER" key to boot, in camera mode, press the "MODE" button to enter the camera mode, select the "MENU" key to enter menu setting mode, and then through "DODE" selection 1 Image Size: 2592 * 1944, 2048 * 1536, * 1200, * 1024, Image quality: quality / better / General Shooting modes: Close / self-timer to 2 seconds / 10 seconds self-timer / Burst Exposure: exposure brightness adjusting knot... -
Page 5: Functional Operation
Functional operation Boot loop photography CAR DVR complete the boot program to enter the camera mode, the upper left corner of display red camera symbol, has entered the shooting standby. Press the the Camera "OK" button to start recording, the recording process, if no manual control products, CAR DVR will automatically save a video file in 2 minutes, when the card is full, it will automatically be the first to file delete, continue recording to achieve loop recording function (night light camera, the machine automatically open infrared light to capture light camera). -
Page 6: Replay Mode
Replay mode. CAR DVR complete the boot program, press the "MODE" button to enter the playback mode, the player is displayed in the upper left corner of the icon, if you want to play video files or audio files, press "DOWN / UP" key up or down to select files, selectafter a good player, press "OK", press "UP"... - Page 7 Installeren van de geheugenkaart: : : : 1: Steek de kaart in de kaarthouder tot deze niet verder wil. 2: Bij het verwijderen, druk rustig op de kaart tot deze uit de houder komt. 3: "No Card" wordt weergegeven indien zich geen kaart in de houder bevindt. Let op: Kijk goed hoe de kaart geplaatst moet worden, als deze omgekeerd geplaatst wordt kan dit schade aanbrengen aan het product en de geheugenkaart.
- Page 8 Voeding: : : : Let op : Voordat u deze DVR gebruikt dienen de batterijen eerst 12 uur geladen te worden. De DVR kan geladen worden: 1) Via de computer, gebruik een USB datakabel. 2) Via de lader. NB: Als batterijen bijna leeg zijn gaat de DVR onmiddellijk in “protect status” en werkt de DVR dus niet.
- Page 9 Replay Druk de power toets, druk in camera mode de "MODE" toets twee keer op in opname mode te komen en drie keer om in playback mode te komen, druk de "MENU" toets om in menu setting mode te komen, en selecteer via de "MODE" toets: File locking: Lock all, unlock all: Bestanden vergrendelen/ontgrendelen File delete: Delete / delete all : Bestanden verwijderen Slide show: Foto’s bekijken met een interval van 1 seconde.
-
Page 10: Opname Functie
Camera mode Druk de "MODE" toets om de camera mode te selecteren (in het scherm verschijnt een (rood) camerasymbool). Gebruik de "DOWN / UP" toetsen voor digitale zoom. Zelfontspanner : In camera mode, druk de "MENU" toets, selecteer met de "UP" toets "shooting mode", druk "OK" te bevestigen. - Page 11 Installieren Sie die Speicherkarte: 1: Stecken Sie die Karte in den Kartenschlitz, bis sie wird gestoppt. 2: Beim entnehmen, drücken Sie vorsichtig auf die Karte, um sie aus der Halterung zu entfernen. 3: "No Card" wird angezeigt, wenn sich keine Karte in der Halterung befindet. Hinweis: Schauen Sie genau, wie die Karte eingesteckt werden soll.
- Page 12 Vor der Verwendung dieses DVR sollten die Batterien für 12 Stunden geladen werden. Der DVR kann geladen werden: 1) Verwenden Sie den Computer mit einem USB-Datenkabel. 2) Verwenden Sie das Ladegerät. Hinweis: Wenn die Batterien schwach sind, kommt den DVR sofort in "Schutz-Status" und funktioniert dann nicht.
- Page 13 Replay Drücken Sie die Power-Taste, drücken Sie in Kamera-Modus die "MODE"-Taste zweimal um in den Aufnahme-Modus zu gelangen, und dreimal um in den Wiedergabe-Modus zu gelangenen, drücken Sie die "MENU" Taste um ins Menü Einstellmodus zu gelangen, und wählen Sie mit der "MODE"-Taste: Sperren von Dateien: sperren Sie alle / entsperren alle (File Lock / Unlock) Datei löschen: Löschen / Alle löschen: Löschen von Dateien Diashow: Wiedergabe Fotos mit einem Intervall von 1 Sekunde.
- Page 14 Im Kameramodus, drücken Sie die "MENU" Taste, wählen Sie mit der "UP" Taste "Shooting Mode", "OK" um zu drücken Sie "OK" um zu bestätigen. Wählen Sie (Auslöser)Timer-Parameter, drücken Sie speichern. Auch Qualität, Helligkeit und andere Optionen können eingestellt werden (Bildqualität, Belichtung). So verwenden Sie die "UP"-Taste um die Items zu wählen, die eingestellt werden müssen.
- Page 15 The date the product leaves the importer is considered to be the date the warranty begins. Only companies approved by Tronios are allowed to work on the equipment. During warranty period (defective) equipment must be returned to the dealer by pre-paid mail in the original box.
-
Page 16: Ce Declaration Of Conformity
CE Declaration of Conformity Importer: TRONIOS BV Bedrijvenpark Twente 415 7602 KM - ALMELO Tel : 0031546589299 Fax : 0031546589298 The Netherlands 351.136 Product number: Road Safety Guard Product Description: Regulatory Requirement: EN 55013: 2001/A2:2006 EN 55020: 2007 EN 61000-3-2 : 2006+A2:2009 EN 61000/-3-3: 2008 The product meets the requirements stated in the above mentioned Standards.
Need help?
Do you have a question about the Road Safety Guard 351.136 and is the answer not in the manual?
Questions and answers