Table of Contents
Advertisement
Advertisement
Table of Contents

Summary of Contents for NETGEAR N600 WN2500RP
- Page 1 Installation Guide N600 WiFi Range Extender Model WN2500RP...
-
Page 2: Table Of Contents
Contents Getting Started......... 3 Meet Your Extender. -
Page 3: Getting Started
Getting Started The NETGEAR WiFi Range Extender increases the distance of a WiFi network by boosting the existing WiFi signal and enhancing the overall signal quality over long distances. An extender repeats the signals from an existing WiFi router or access point. -
Page 4: Meet Your Extender
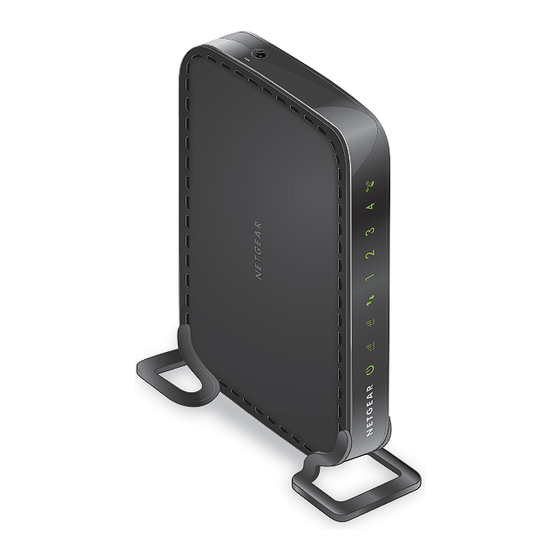
Meet Your Extender Before you install your extender, familiarize yourself with its LEDs, buttons, and ports. Front Panel WPS button WPS LED LAN LEDs 1–4 Device to Extender LED 5 GHz Link Rate LED 2.4 GHz Link Rate LED Power LED... -
Page 5: Rear Panel
Rear Panel Restore Factory Settings button LAN ports 1–4 Power input Power On/Off button... -
Page 6: Led Descriptions
• Solid Amber. The extender is booting. • Solid Green. The extender is powered on. • Blinking Green. The firmware is corrupt. Visit http://support.netgear.com/. • Blinking Amber. The firmware is upgrading or the Restore Factory Settings button was pressed. • Off. The extender is powered off. - Page 7 5 GHz Link This LED indicates a 5 GHz WiFi connection between the Rate LED extender and the router or access point. • Solid Green. Best connection • Solid Amber. Good connection • Solid Red. Poor connection • Off. No connection Device to Extender LED •...
-
Page 8: Install The Wifi Extender
WiFi network. You can do this in one of two ways: • Connect with WPS. For more information, see Connect with on page 9. • Connect with the genie® Smart Setup. For more information, Connect with NETGEAR genie Smart Setup on page 11. -
Page 9: Connect With Wps
WPS does not support WEP network security. If you are using WEP security, follow the instructions in Connect with NETGEAR genie Smart Setup on page 11. Press the WPS button on the extender. - Page 10 The extender’s wireless network name (SSID) changes to your existing WiFi network name, with _2GEXT or _5GEXT at the end of the name, depending on whether the extender is connecting to your WiFi network in 2.4 GHz or 5 GHz. For example: •...
- Page 11 Device to Extender LED lights solid green. Open a web browser window from the same computer or mobile device. The browser takes you directly to the NETGEAR genie smart setup. Note: If you are not automatically directed to NETGEAR genie, launch a web browser and type www.mywifiext.net in the...
- Page 12 Type the network password (also called passphrase or security key) in the Password (network key) field and click the Continue button. Select a 5 GHz WiFi network and click the Continue button. If your router does not support the 5 GHz band, click the Skip button.
- Page 13 Type the name (SSID) for your new extender WiFi network in the 2.4GHz Network Name (SSID) field and the 5GHz Network Name (SSID) field and click the Continue button. Note: To use the same security settings as your existing network, select the check box. The settings are applied and the following screen displays: Use a WiFi network manager on the computer or mobile device to connect to the extender’s newly created WiFi network.
- Page 14 Repeat this step for all of your computers and mobile devices. Select the check box and click the Continue button. Unplug the extender and move it to a new location closer to the area with a poor WiFi signal. The location you choose must be within the range of your existing WiFi router network.
-
Page 15: Connect Ethernet-Enabled Devices
Connect Ethernet-Enabled Devices After the extender is connected to your existing WiFi network, you can connect a device to the extender using an Ethernet cable. Then that device can access your existing network through the extender- to-router WiFi connection. Blu-ray player Gaming Extender console... -
Page 16: Access Extender Settings
Access Extender Settings After installation, you can log in to the extender to view or change the extender’s settings. Connect a computer or mobile device to the extender’s network. Launch a web browser and enter www.mywifiext.net or www.mywifiext.com in the address field. A login screen displays. -
Page 17: Frequently Asked Questions
You can find more information about your product in the user manual, which is available at http://support.netgear.com. The web browser setup guide keeps asking me for my network security key (password), and I am sure I have entered the correct password. - Page 18 Will the extender work if I connect it to the router with an Ethernet cable? No. The extender is designed to connect wirelessly to the router or access point. What are the user name and password to log in to the extender? The user name is admin and the default password is password.
- Page 19 I enabled a wireless MAC filter (wireless access control or ACL) on my router. What should I do when installing the extender? When the wireless device connects through the extender to your router, the MAC address of the wireless device shown on the router is translated to another MAC address.
- Page 20 You must register your product before you can use NETGEAR telephone support. NETGEAR recommends registering your product through the NETGEAR website. For product updates and web support, visit http://support.netgear.com.


Need help?
Do you have a question about the N600 WN2500RP and is the answer not in the manual?
Questions and answers