
Summary of Contents for OpenEye CA-501J
-
Page 1: User Manual
OPTIX PTZ Joystick Keyboard Controller User Manual CA-501J model no. model no. Please carefully read these instructions before using this product. Save this manual for future use. 28563AA... - Page 2 28563AA...
- Page 3 THE INFORMATION IN THIS PUBLICATION IS PROVIDED “AS IS” WITHOUT WARRANTY OF ANY KIND. THE ENTIRE RISK ARISING OUT OF THE USE OF THIS INFORMATION REMAINS WITH RECIPIENT. IN NO EVENT SHALL OPENEYE BE LIABLE FOR ANY DIRECT, CONSEQUENTIAL, INCIDENTAL, SPECIAL, PUNITIVE, OR OTHER DAMAGES WHATSOEVER (INCLUDING WITHOUT LIMITATION,...
-
Page 4: Important Safeguards
Object and Liquid Entry Points – Never insert foreign objects into the Joystick Controller, other than the media types approved by Openeye, as they may touch dangerous voltage points or short-out parts that could result in a fire or electrical shock. Never spill liquid of any kind on the product. - Page 5 IMPORTANT SAFEGUARDS, continued Damage Requiring Service – Unplug the unit from the outlet and refer servicing to qualified service personnel under the following conditions: When the power-supply cord or plug is damaged. If liquid has been spilled, or objects have fallen into the unit. If the unit has been exposed to rain or water.
- Page 6 This Joystick Controller is designed to last for long periods of time. To keep your Joystick Controller operational we recommend regular inspection and maintenance (cleaning parts or replacement). For details on maintaining your Joystick Controller, contact your nearest Openeye dealer. NOTES ON MOISTURE CONDENSATION Moisture condensation damages the Joystick Controller.
- Page 7 WARNING TO REDUCE THE RISK OF ELECTRICAL SHOCK, DO NOT EXPOSE THIS APPLIANCE TO RAIN OR MOISTURE. DANGEROUS HIGH VOLTAGES ARE PRESENT INSIDE THE ENCLOSURE. DO NOT OPEN THE CABINET. REFER SERVICING TO QUALIFIED PERSONNEL ONLY. CAUTION C A U T I O N RISK OF ELECTRIC SHOCK DO NOT OPEN CAUTION: TO REDUCE THE RISK OF ELECTRIC SHOCK,...
- Page 8 Standard Warranty Openeye warrants all products to be free from defects in workmanship and material under normal use for a period of one year after the date of purchase. Any defective product that falls under this warranty will, at OpenEye's discretion, be repaired or replaced at no additional charge.
- Page 9 28563AA...
- Page 10 NOTES: 28563AA...
-
Page 11: Table Of Contents
Table of Contents INTRODUCTION ......................1 PRODUCT DESCRIPTION ........................1 FEATURES .............................. 1 CONTROLS AND CONNECTIONS ................3 FRONT PANEL ............................3 REAR PANEL ............................4 GETTING STARTED ...................... 7 SYSTEM SETUP ............................7 Connecting RS-485 Cables ........................7 RJ-11 (6P6C) Connector Definition ...................... 7 Turn On the Keyboard .......................... - Page 12 Zoom Function ..........................15 Auto Focus Function ........................15 DVR CONTROL ............................16 Connect the Control Keyboard to the DVR ..................17 Select a DVR ............................17 Display Function ..........................17 Search Function ..........................17 NOTES:APPENDIX A: SPECIFICATIONS ..............18 APPENDIX A: SPECIFICATIONS ................
- Page 13 NOTES: 28563AA xiii...
- Page 14 NOTES: 28563AA...
-
Page 15: Introduction
System Configuration NOTE: To extend the network distance up to 1.2 km (4000 feet) and to protect the connected devices, Openeye highly recommends placing a repeater at the mid-point. However, a repeater may be needed in the network distance less than 1.2 km if the used cables are not the CAT 5, 24-gauge cables. - Page 16 NOTES: 28563AA...
-
Page 17: Controls And Connections
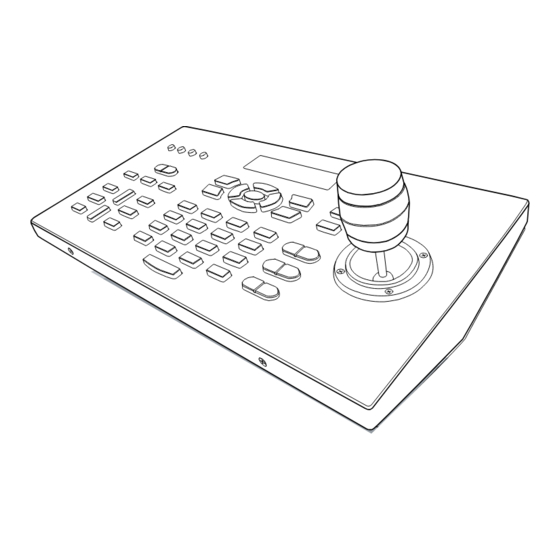
CONTROLS AND CONNECTIONS FRONT PANEL DVR Control Mode Camera Control Mode System Setup Mode LCD Display Screen SYSTEM Joystick Control 28563AA... -
Page 18: Rear Panel
LINE RJ-11 RS-232 Used to connect to an OpenEye DVR. Used to terminate the connected RS-485 communication line - should be set in the OFF Termination Switch position normally if at the end of the communication chain. The default position is OFF. - Page 19 NOTES: 28563AA...
- Page 20 NOTES: 28563AA...
-
Page 21: Getting Started
GETTING STARTED SYSTEM SETUP The control keyboard can be connected with a speed dome camera or DVR. The following sections describe basic connections in a surveillance system. CONNECTING RS-485 CABLES To operate dome cameras, a control keyboard (or other control device, e.g. DVR) is needed to communicate all devices via RS-485 interface. -
Page 22: Standby Mode Actions
Standby Mode Actions You can perform the following actions while in Standby Mode. • Press the SYS key to enter System Setup mode. • Press the CAMERA key to enter Camera/Dome Control mode and access the camera OSD setup and PTZ operations. •... -
Page 23: System Date Setting
1.5 SYSTEM DATE SETTING Users can set the control keyboard system date. Press ESC to exit this mode. Press the key to select Year, Month, and Day. Press the number keys on the keyboard to input the new system date. 1.6 SYSTEM TIME SETTING Users can set the control keyboard system time. -
Page 24: Set The System Baud Rate
Set the System Baud Rate Press the 2 key to set the system baud rate. Press to change the setting (Default, 9600bps, 4800bps, 2400bps). SYSTEM BAUD RATE DEFAULT 9600 4800 2400 DOME CAMERA 9600 9600 4800 2400 (OPTIX 3) DOME CAMERA 2400 9600 4800... -
Page 25: Dome Camera Control
DOME CAMERA CONTROL To enter Camera Control mode press the CAMERA key. SYSTEM CAMERA Select Camera Control mode. Exit current function. AUTO SCAN Set the camera to scan between two custom points. PATTERN Build and execute the pattern path MENU Press for 3 seconds to open the camera OSD menu of compatible cameras. -
Page 26: Select A Camera
SELECT A CAMERA Select a camera to control with the keyboard control joystick: Press the camera ID number of the dome camera. Press ENTER to confirm. You can now control the camera with the joystick. ACCESSING THE CAMERA OSD MENU To open the OSD menu of the selected camera: Press and hold the MENU key for three seconds. -
Page 27: Tour Function
TOUR FUNCTION In Camera Control mode, you can operate the tour function. Before setting this function, you must pre-define at least two preset positions. Up to eight tour lines can be set using the keyboard controller. Set Tour Line TIP: Each Tour Line can be composed of up to 32 preset positions. Press a number key to assign a tour number. -
Page 28: Exiting Tour Mode
Exiting Tour Mode Press the ESC key to exit the Tour mode after configuring a tour line. AUTO SCAN You can control the Auto Scan function of a dome camera under the Camera Control mode; one auto scan line can be set using the keyboard. -
Page 29: Camera Lens Control
CAMERA LENS CONTROL You can control the functions of a camera lens while in Camera Control mode. Brightness Function • Press the BRIGHTNESS + key to increase the video brightness. • Press the BRIGHTNESS - key to decrease the video brightness. Focus Function •... -
Page 30: Dvr Control
DVR CONTROL You can control your OpenEye DVR remotely through the control keyboard. Press the DVR key to enter the DVR control mode. SYSTEM Select DVR mode. SELECT W X Select DVR ID (1-255) by scrolling up or down. INSTANT RECORD Start/Stop recording on an individual camera. -
Page 31: Connect The Control Keyboard To The Dvr
To connect the control keyboard to an OpenEye DVR: Connect the RS-232 jack to the COM 1 port on the OpenEye DVR using the provided serial cable. Connect the TX +/- camera connections on the RS-485 output on the back of the DVR. Please refer to the DVR manual for further assistance on connecting a PTZ camera to the DVR. -
Page 32: Notes:appendix A: Specifications
NOTES: 28563AA... -
Page 33: Appendix A: Specifications
APPENDIX A: SPECIFICATIONS GENERAL Manual Pan/Tilt/Zoom Preset Tour Dome Control Pattern Auto-scan Zoom: Tele/Wide Focus Near/Far/Auto Camera Lens Control Brightness Mode Selection Split screen mode: full, 2x2, 3x3, 4x4 DVR/Multiplexer Menu Control Supported Protocols PELCO D&P, OPTIX 1, OPTIX 3 (Baud rate selectable) GENERAL Environment Indoor... - Page 34 NOTES: 28563AA...
-
Page 35: Appendix B: Function Tree
APPENDIX B: FUNCTION TREE SYSTEM FUNCTION TREE Function Operation Description System Setting Press <SYS> key Keyboard System Setting Mode Lock the keypad Press <LOCK/UNLOCK> key Lock/Unlock keyboard 1. System Linking Scan the existed device 2. Set Keyboard ID Keyboard ID Setting 3. -
Page 36: Dome Camera Control Mode
DOME CAMERA CONTROL MODE Function Operation Description Dome Selection CAMERA + <1> ~ <223> Press number keys to select a dome camera to control. Pan/Tilt Joystick Right/Left for PAN, Up/Down for Tilt Lens Control <Zoom -> Zoom Out <Zoom +> Zoom In <Focus +>... - Page 37 NOTES: 28563AA...
- Page 38 © 2008 Openeye Inc. All rights reserved. No part of this publication may be reproduced by any means without written permission from Openeye Inc. The information in this publication is believed to be accurate in all respects. However, Openeye cannot assume responsibility for any consequences resulting from the use thereof.
Need help?
Do you have a question about the CA-501J and is the answer not in the manual?
Questions and answers