Table of Contents
Advertisement
A q u i c k G u i d e
t o y o u r S u p e r H u b 2 A c
H E L L O .
W E L c O m E t O t H i s H a n d y g u i d E t O y O u r
n E W v i r g i n m E d i a b u s i n E s s b r O a d b a n d .
WHat's insidE
• Getting to know your
Super Hub 2ac
• Top tips
• Wireless network settings
• Configuring your wireless
• Adding a new device
• Setting up a wired
connection
• Dual concurrent WiFi
• Need more help?
Advertisement
Table of Contents

Summary of Contents for Virgin Media Super Hub 2ac
- Page 1 A q u i c k G u i d e t o y o u r S u p e r H u b 2 A c H E L L O . W E L c O m E t O t H i s H a n d y g u i d E t O y O u r n E W v i r g i n m E d i a b u s i n E s s b r O a d b a n d .
- Page 2 Super Hub 2ac Guide G e t t i n G t o k n o w y o u r S u p e r H u b 2 A c b E f O r E y O u b E g i n , c H E c k...
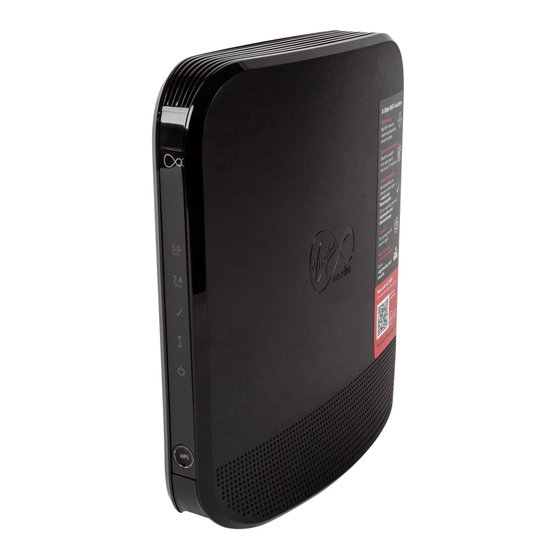
- Page 3 With the Super Hub 2ac on your side you can do it all. abOut yOur supEr Hub 2ac IT EqUIpmEnT Cable modem to connect your PCs etc. to the Internet WLAN WIRElESS WLAN supporting dual concurrent band wireless ‘n’ at 2.4GHz and 5GHz and wireless “ac” at 5GHz WIREd dEVIcES Gigabit LAN switch SEcURITy Configurable software firewall for setting filters and controls connEcTIon 4 port Gigabit Ethernet If you’re new to Virgin Media Business and one of our engineers installed your Super Hub 2ac, then your connection should be up and running. sEtting up yOur supEr Hub 2ac tO bE in nOrmaL OpEratiOn mOdE First, plug in and switch on your Super Hub 2ac. The WAN light should blink blue, indicating that data traffic is passing through the Super Hub 2ac. The ready light (tick) should be solid blue. Take a look on the next page for more information about your Super Hub 2ac.
- Page 4 Super Hub 2ac Guide y o u r S u p e r H u b 2 A c e x p l A i n e d Front 5GHz – Solid blue. The 5GHz wireless radio frequency is operating 2.4GHz – Solid blue. The 2.4GHz wireless radio frequency is operating Ready – Solid blue. Indicates that the Super Hub 2ac has completed its registration with the Virgin media network WAn – Blinks blue. Indicates that data traffic is passing through the Super Hub 2ac power – Solid blue. The Super Hub 2ac is ready to use WpS button – pressing this button allows you to use...
- Page 5 Super Hub 2ac Guide The sticker on the base of your Super Hub 2ac contains the information you need to make a wireless connection. Here are the key bits explained: 1. Wifi nEtWOrk namE (ssid) This is the network name broadcasted by your Super Hub 2ac. You need to select either 2.4GHz or 5GHz network name (if shown) from your computer or device’s wireless manager to connect wirelessly. The Super Hub 2ac has a dual concurrent WiFi feature. See page 19 for more detail. 2. Wifi passWOrd This is the WiFi Password (or security key) you will be prompted to enter after selecting your WiFi network name (SSID). 3. sEttings pagE Enter this web address into your browser to change settings, such as your WiFi network name or WiFi Password.
- Page 6 Here’s how to make sure your kit works at its best. 1. stand your super Hub 2ac upright Stand your Super Hub 2ac on its base with the lights on the front facing into the room. 2. don’t hide your super Hub 2ac away Putting it inside a filing cabinet or closed shelving can block your wireless signal. 3. get a clearer signal Keep your Super Hub 2ac away from other electrical devices and remember the more space around it the better the signal.
- Page 7 6. you can add a huge amount of devices to your wireless network If you use them all at the same time, your speed is shared across those devices and your broadband speed might suffer. Try to stagger downloading large files or run updates outside office hours to ease congestion. 7. access your super Hub 2ac network manager to personalise your super Hub 2ac settings to suit your business’ needs Connect your device to the Super Hub 2ac wirelessly or using an Ethernet cable. In your web- browser address bar, enter http://192.168.0.1. On the Super Hub 2ac Network Manager enter the password ‘changeme’ and click the sign in button.
- Page 8 S e t t i n G S to check the device’s connection status you’ll need to log into the super Hub 2ac network manager then click the wireless network settings button on the left hand side.
- Page 9 Super Hub 2ac Guide yOu’LL sEE tHE fOLLOWing: WIRElESS Select the relevant tick box to Enable / Disable 2.4GHz or 5GHz wireless functionality on your Super Hub 2ac. Please see pages 19 and 20 for more information. SEcURITy modE We recommend you select the ‘WPA Auto’ option. This gives you good security and the connection will be supported on most computers and devices. SSId This is the Service Set Identified (the name for your wireless network). Simply leave it as the default, or change the name to something else. pASSpHRASE You’ll find this on the base of your Super Hub 2ac. You can change it so it’s more secure if you like. cHAnnEl Your Super Hub 2ac will automatically scan and set itself to the best available channel – but if you want to you can choose any channel you like. This is handy if there are signal interruptions caused by microwaves, DECT phones or something similar. please note: The user experience quality may deteriorate if the number of concurrent WiFi users increases above 20 users.
- Page 10 Super Hub 2ac Guide c o n F i G u r i n G y o u r w i r e l e S S...
-
Page 11: Guest Networks
Super Hub 2ac Guide guEst nEtWOrks On top of standard WLAN SSID you can set up two guest networks per wireless channel (2.4GHz and 5GHz). Just go to advanced settings on the Super Hub 2ac Network Manager and click on the network you wish to amend: • 2.4GHz first guest wireless network • 2.4GHz second guest wireless network • 5GHz first guest wireless network • 5.GHz second guest wireless network Now visitors have access to your network, and the internet, for as long as you need them to. Don’t forget, guest networks use locally administered MAC addresses. This means anyone using a device designed to disable these networks could make your guest network unstable. You can usually set devices so your guest network works properly. cOnnEcting a WirELEss dEvicE There are two ways to connect a wireless device to your Super Hub 2ac. Either follow the simple WPS push-button method here, or follow the manual method on page 11 depending on your operating system e.g. for Windows Vista please go to page 14. simpLE Wps pusH-buttOn mEtHOd step 1 Press and hold the round WPS button until it flashes. step 2 Open your device’s Network Manager, or find the WPS button on your... -
Page 12: Manual Method
Super Hub 2ac Guide manuaL mEtHOd Here are instructions for your computer’s own operating system. Windows 8 set up step 1 From the Start menu move your mouse cursor to the top right or bottom right corner of the Start screen. A sidebar with five icons will open. step 2 Click the icon at the bottom of the side-bar and the settings panel will open. Settings step 3 Click the available icon to show a list of WiFi connections available. - Page 13 Super Hub 2ac Guide step 4 Depending on the type of device, one or two Virgin Broadband WiFi networks (also known as SSID) will appear and will be something like vm123456-2g and/or vm123456-5g. We recommend you connect to the 5GHz wireless network connection if your device is compatible (if your device isn’t compatible it won’t show you this option). See page 19 for more information. Click the network name and then click connect. If you don’t see these in the list, click flight mode to On and then Off to scan again for available wireless networks. step 5 Tick connect automatically and click connect if you want this to be your default wireless connection. Otherwise just click connect. step 6 Finally, you’ll be asked to enter the Network Security Key (WiFi Password) for your Super Hub 2ac. This is printed on the base of the unit. Once entered, click next (or click next and just press the WPS button on the front of the Super Hub 2ac). That’s it! You should now be connected.
- Page 14 Super Hub 2ac Guide Windows 7 set up step 1 First locate the wireless network icon in the system tray on the bottom right hand corner of your screen. step 2 Right click on the icon to show a list of wireless network connections available. Depending on the type of device, one or two Virgin Broadband wireless network connections (also known as SSID) will appear and will be something like vm123456-2g and/or vm123456-5g. We recommend you connect to the 5GHz wireless network connection if your device is compatible (if your device isn’t compatible it won’t show you this option). See page 19 for more information. Click the network name and then click connect. Note: If you don’t see your connection, try clicking the double arrow in the top right corner of the menu to scan again for available wireless networks. step 3 Next, you should be prompted for the security key or passphrase. This is printed on the base of your Super Hub 2ac. Enter the security key and then click connect. To hide the security key on the screen as you type it, tick the box Hide characters.
- Page 15 Super Hub 2ac Guide Windows vista set up step 1 Locate the wireless network icon in the system tray on the bottom right hand corner of your screen. Right click and select connect to a network. step 2 You should now see all the available wireless networks. Depending on the type of device, one or two Virgin Broadband wireless network connections (also known as SSID) will appear and will be something like vm123456-2g and/or vm123456-5g. We recommend you connect to the 5GHz wireless network connection if your device is compatible (if your device isn’t compatible it won’t show you this option). See page 19 for more information. Click the network name and then click connect. Note: If you don’t see your connection, try clicking the double arrow in the top right corner to scan again for available wireless networks. step 3 Next, you should be prompted for the security key or passphrase. This is printed on the base of your Super Hub 2ac. Enter the security key and then click connect. To show the security key on the screen as you type it, tick the box display characters.
- Page 16 Super Hub 2ac Guide Windows Xp set up step 1 Locate the wireless network icon in the system tray on the bottom right hand corner of your screen. Right click on the icon and select view available Wireless networks. step 2 You should now see all the available wireless networks. If you don’t see any wireless networks listed, click on refresh network list on the left hand side. Depending on the type of device, one or two Virgin Broadband wireless network connections (also known as SSID) will appear and will be something like vm123456-2g and/or vm123456-5g. We recommend you connect to the 5GHz wireless network connection if your device is compatible (if your device isn’t compatible it won’t show you this option). See page 19 for more information. Click the network name and then click connect. step 3 Next, you should be prompted for the network key. The default network key is printed on the base of your Super Hub 2ac.
- Page 17 Super Hub 2ac Guide mac Os set up step 1 First click the AirPort wireless icon in the top right of the screen, near the clock. If you don’t see this icon, you’ll need to connect to your wireless router via apple > system preferences > network > airport or, on older Macs, via applications > internet connect. Your router should appear in the list as vm123456-2g and/or vm123456-5g. The actual network name (known as the SSID) can be found on the base of the Super Hub 2ac. step 2 Click the network name. If you have the option of ‘2G’ which is 2.4GHz, or ‘5G’ which is 5GHz, we recommend that you select ‘5G’ - see page 19 for more information. You should then be prompted for the password. The default password (passphrase) can be found printed on the base of your Super Hub 2ac. Then click Ok. That’s it! You should now be connected.
- Page 18 S S n e t w o r k from computers and laptops, to printers and smart phones – you’ll be surprised at how many devices you can connect to your super Hub 2ac. 1. bring your device into the same room as the super Hub 2ac This will give you the strongest wireless connection. (Don’t worry, once it’s connected...
- Page 19 Super Hub 2ac Guide H o w t o S e t u p A w i r e d c o n n e c t i o n • Step 1 Check that your computer has an Ethernet socket (it’s usually marked LAN) and plug it in. • Step 2 Plug the other end of the Ethernet cable into one of the four Ethernet ports at the back of the Super Hub 2ac. You can add 3 more wired devices by using the remaining ports. Reset...
- Page 20 Super Hub 2ac Guide w H A t i S d u A l c o n c u r r e n t w i F i ? 1. What is dual concurrent Wifi? When you’re online, your WiFi connection uses radio waves to pass information to and from your computer and wireless devices like tablets and smartphones. Right now, just about all broadband providers use the same radio band, which is 2.4GHz (that’s Gigahertz!). 2.4GHz is a bit like a busy motorway. With so many people using the same band at the same time, there’s lots of congestion so information travels...
- Page 21 Super Hub 2ac Guide 2. What’s the difference between a 2.4ghz and 5gHz signal? As a general rule, the 5GHz band has a shorter range but is great for demanding activities like downloading large files. The 2.4GHz band is better for long range but is more likely to suffer from interference. Your wireless devices should switch between the two signals to maintain a wireless connection, but an easy way to make sure you’re getting the best connection is to check your wireless manager and check the connection Weak signal Strong signal strength by the number of bars showing. 3. How do i connect to dual concurrent Wifi? If your device is 5GHz compatible it will automatically pick up both the 2.4GHz and 5GHz WiFi network names (SSID). All you need to do is select the 5GHz SSID for compatible devices and you’re away! If your device is not 5GHz compatible you’ll only have the option to connect to the 2.4GHz SSID. What’s also great is that you can connect multiple devices on both 2.4GHz and 5GHz at the same time, so all your devices can access the best possible WiFi available.
- Page 22 Super Hub 2ac Guide n e e d M o r e H e l p ? from time to time, you may discover a little glitch with your wireless connection. Here’s our handy troubleshooting guide to have you back up and running in no time.
- Page 23 Super Hub 2ac Guide 60/60 Turn everything off and wait for a full minute. Then turn on your Super Hub 2ac, wait another minute, then turn on your computer or device. check the connections to your super Hub 2ac Check all your Super Hub 2ac cables and connections are properly in and the power is on. check the Wifi network name Check you’ve chosen the correct SSID (WiFi network name) from the list of available wireless networks on your computer. check you’ve entered your network security key (Wifi password) correctly It’s on the sticker on the base of your Super Hub 2ac. If it’s been changed or forgotten, retrieve it by accessing the Super Hub 2ac Network Manager and view the wireless network settings page. check your wireless is switched For a laptop, check for a small side button. Some tablets also have a...
- Page 24 There’s plenty of helpful information online if you don’t see what you need here. Just go to www.virginmediabusiness.co.uk/broadbandhelp, give us a shout on 0800 052 0800 or send an email to businesscustomercare@virginmedia.co.uk f O r E n g i n E E r i n s t a L L O n L y G E T T I n G y o U c o n n E c T E d . . . So, your services are all hooked up and ready to go. In order for you to manage your services we’ve put together this checklist.
Need help?
Do you have a question about the Super Hub 2ac and is the answer not in the manual?
Questions and answers